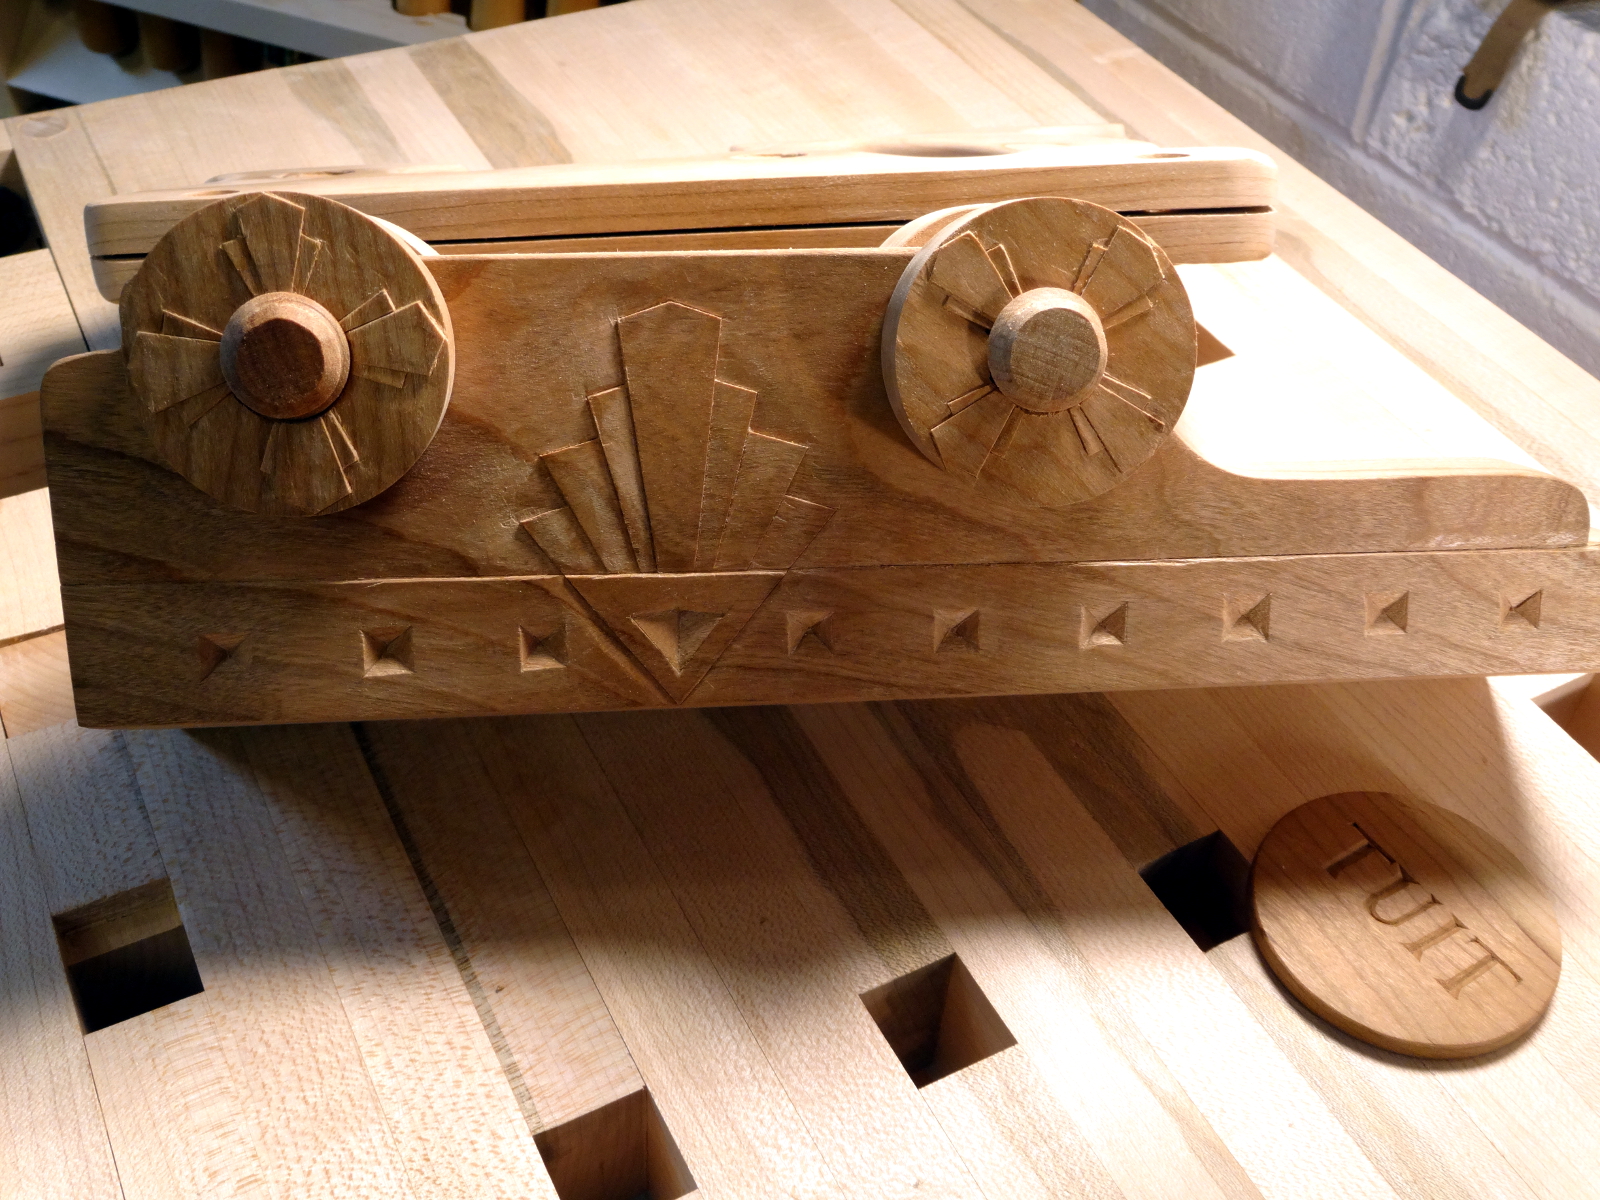
…and here’s the curvy side.
Chocolate powered woodworking
…and here’s the curvy side.
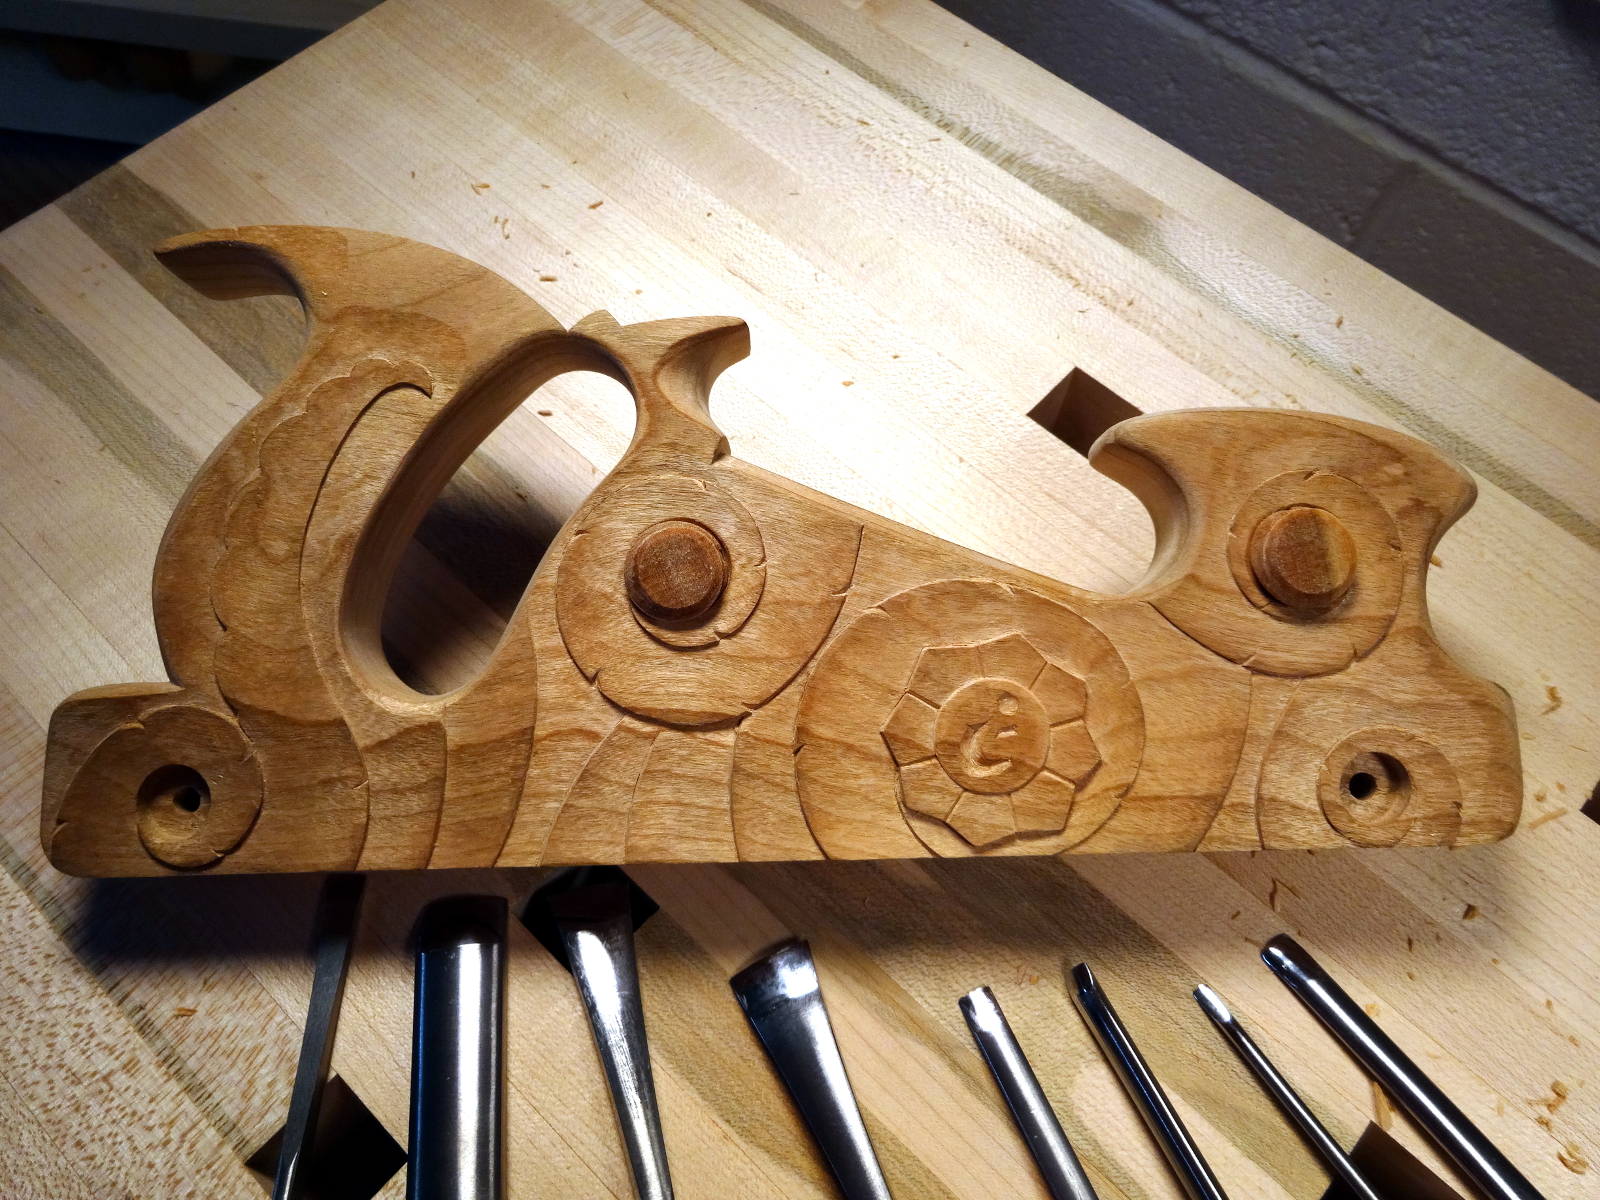
“Hey, aren’t you done with that thing yet?” You know I can’t make something without a carving decoration. So…
Here’s the harder one first. Carving straight lines along the grain line is harder than carving curves. While I’m never satisfied with a carving, this one is done enough to set aside and wait for its partner.
It’s all Shannon’s fault. During his review of a Bontz saw, he mentioned an Art Deco feature in how the saw’s back was shaped. That sparked an old interest and I was off to re-explore the genre and come up with a couple of designs.
The curvy one is next. And yes, I’ll cut a saw plate some day.
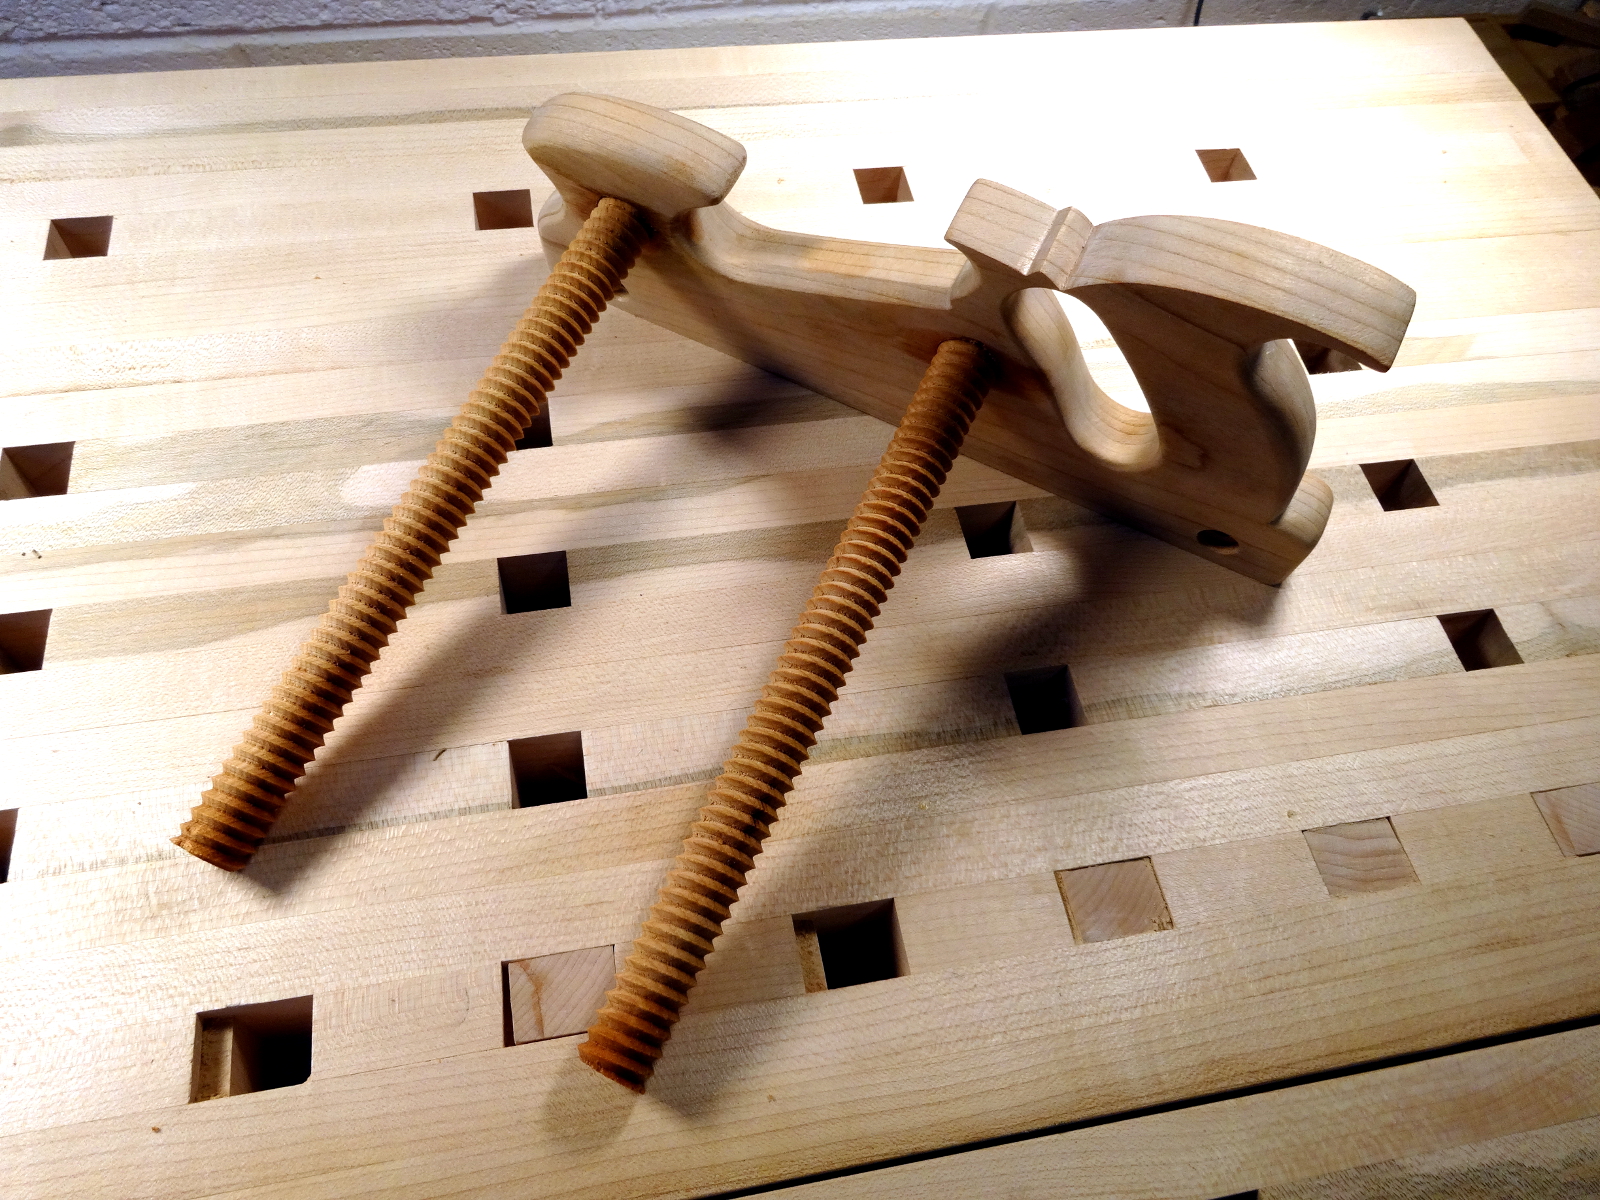
So, what are those threaded holes for? Threaded rods, of course. And the adjustable fence.
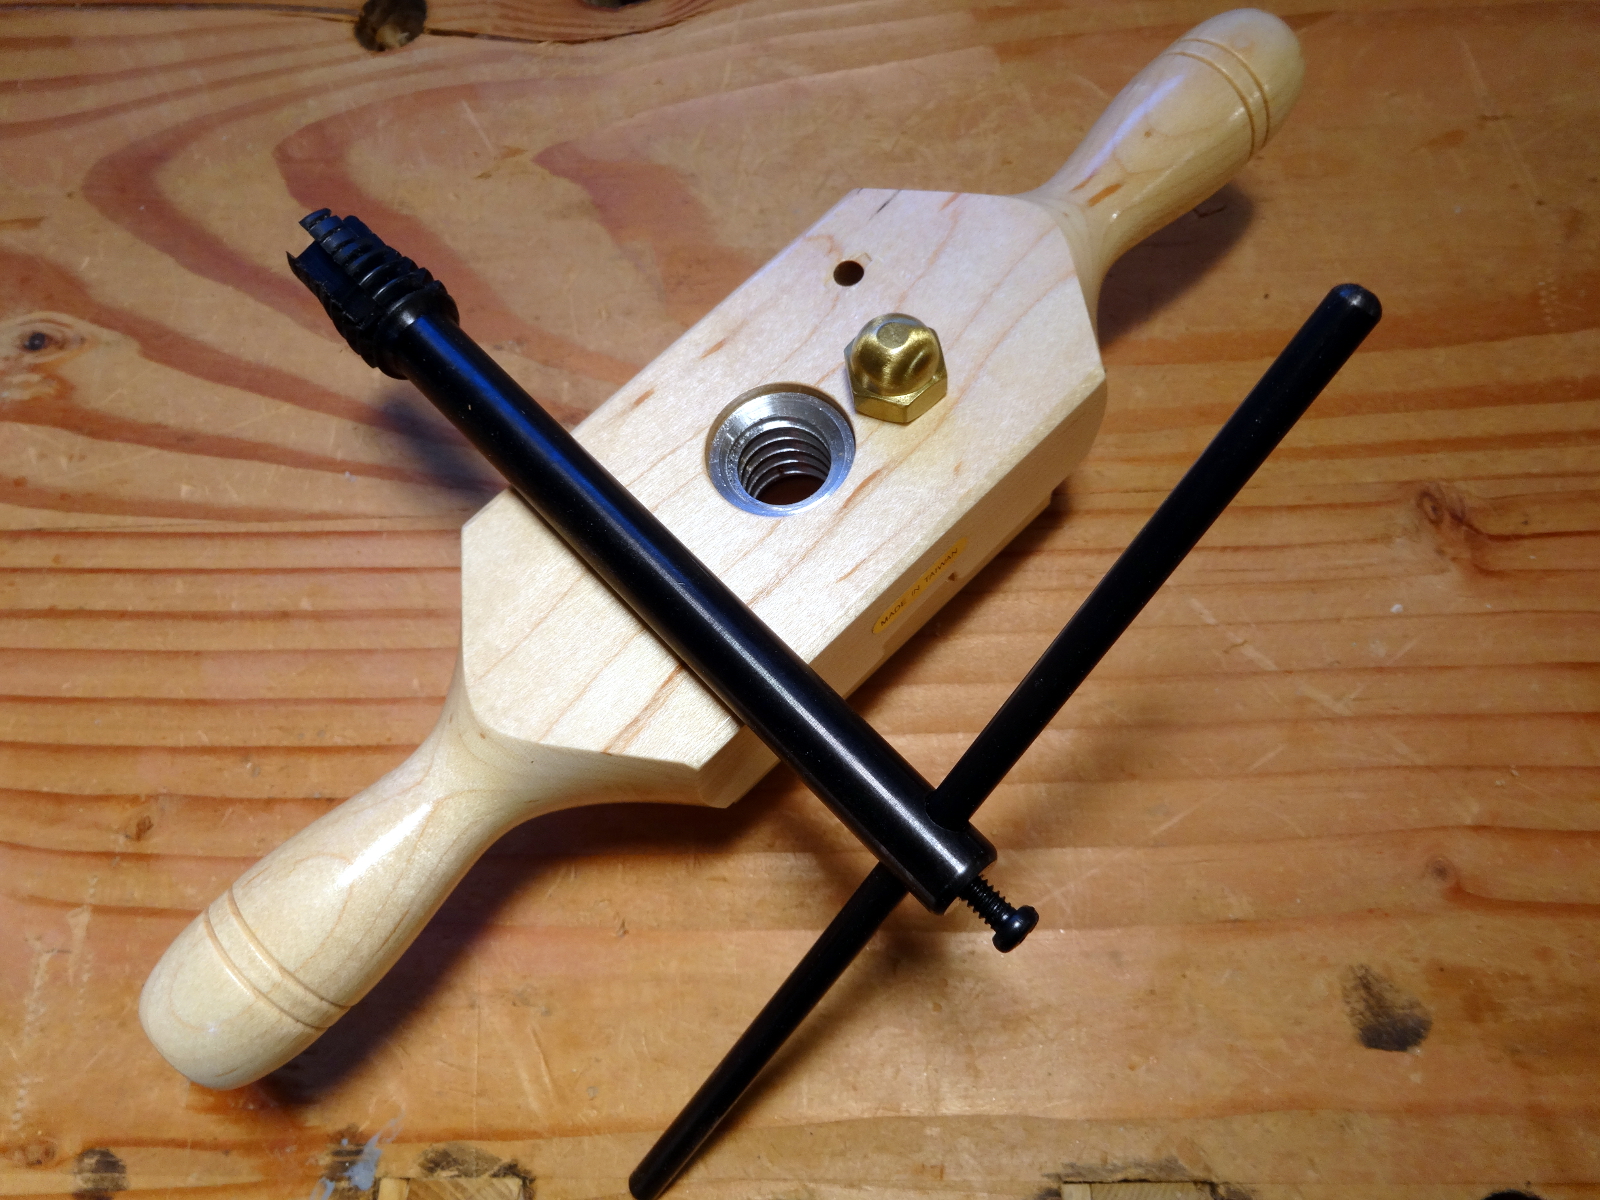
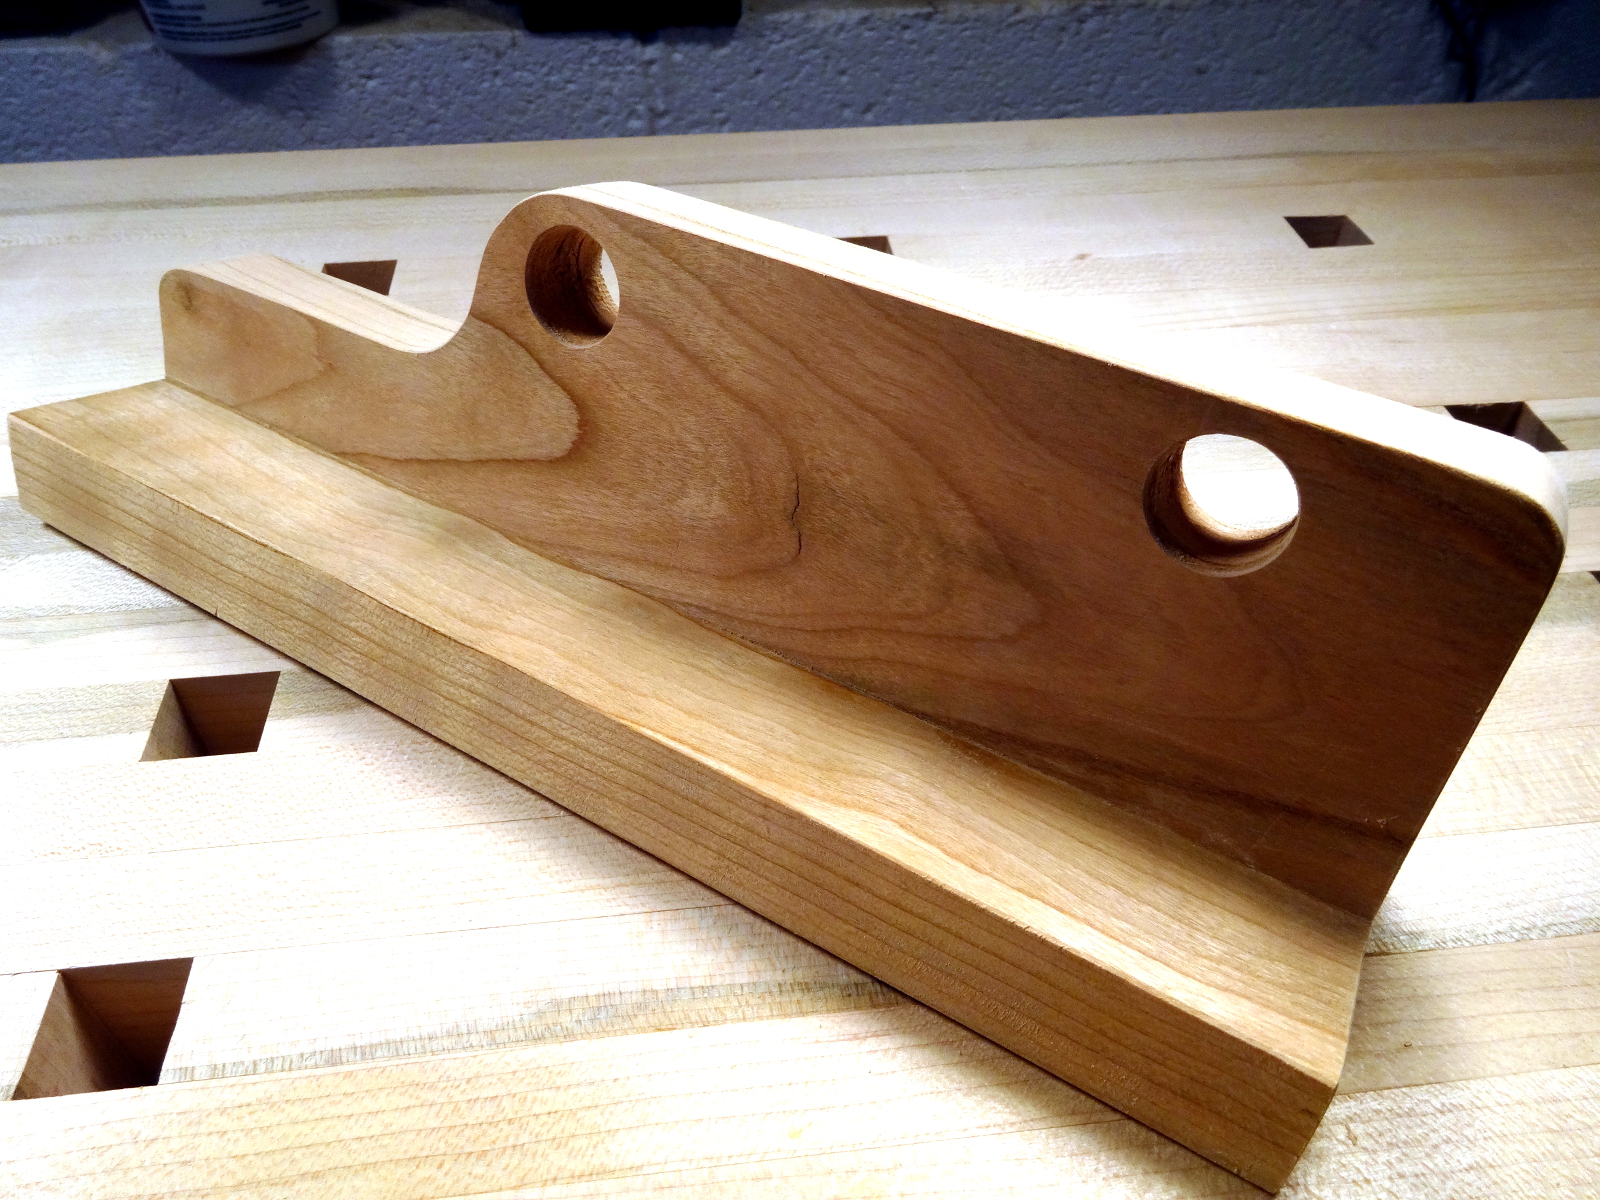
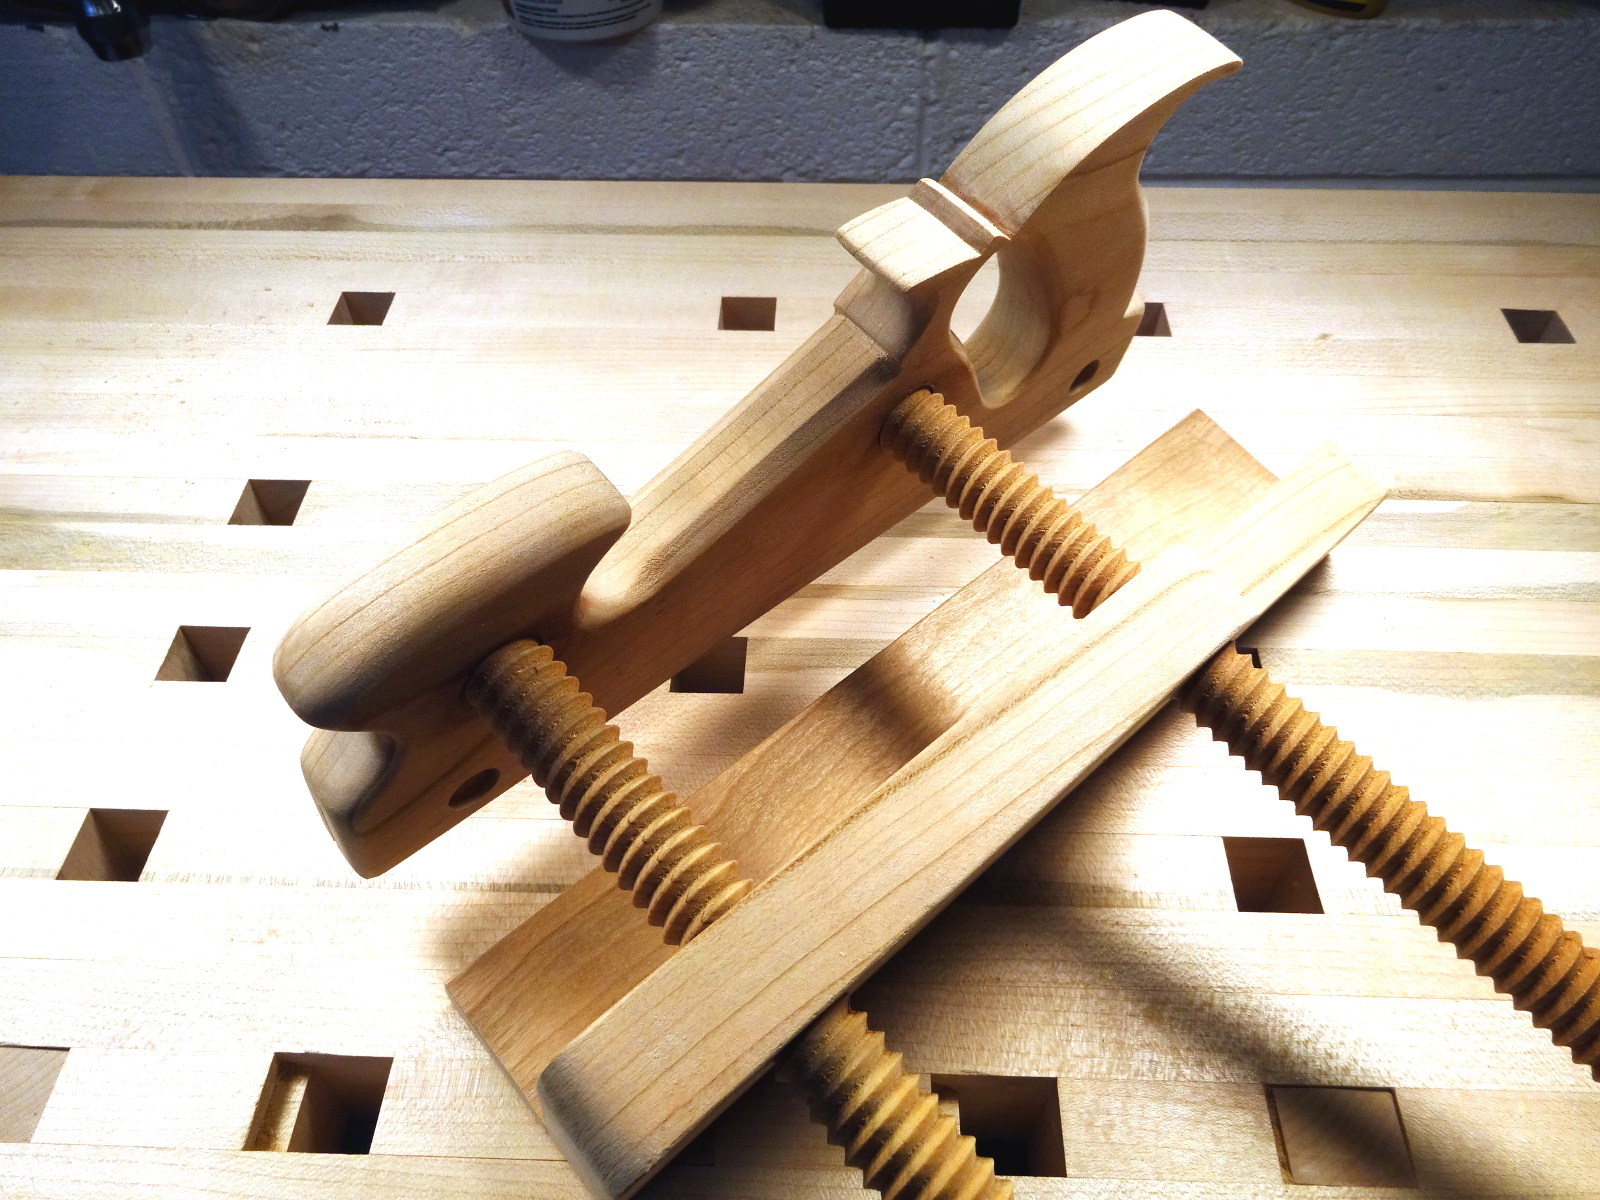
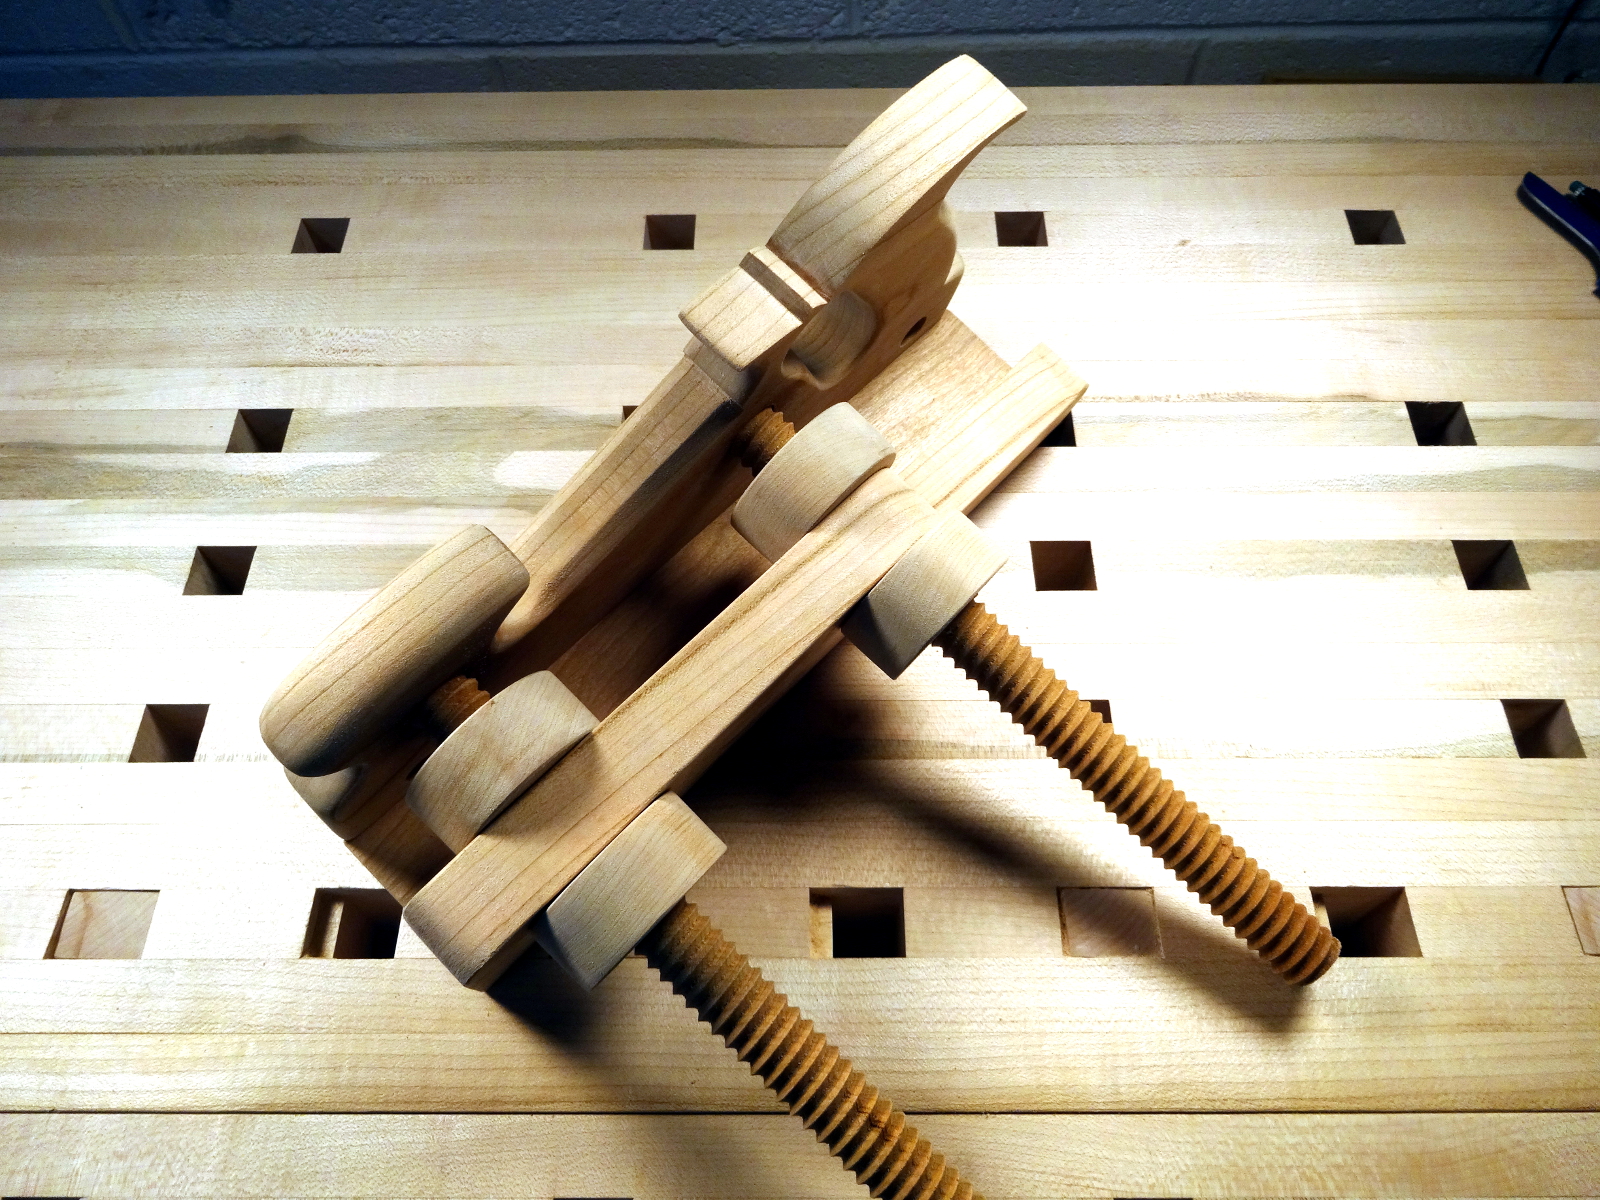
The fence itself is pretty simple, two pieces glued together with holes drilled to allow sliding along the threaded rods. Tom Fidgen planed off the bottom piece at an angle, providing a way of resting the plane at an angle which keeps the blade off the bench. I liked the idea and did the same.
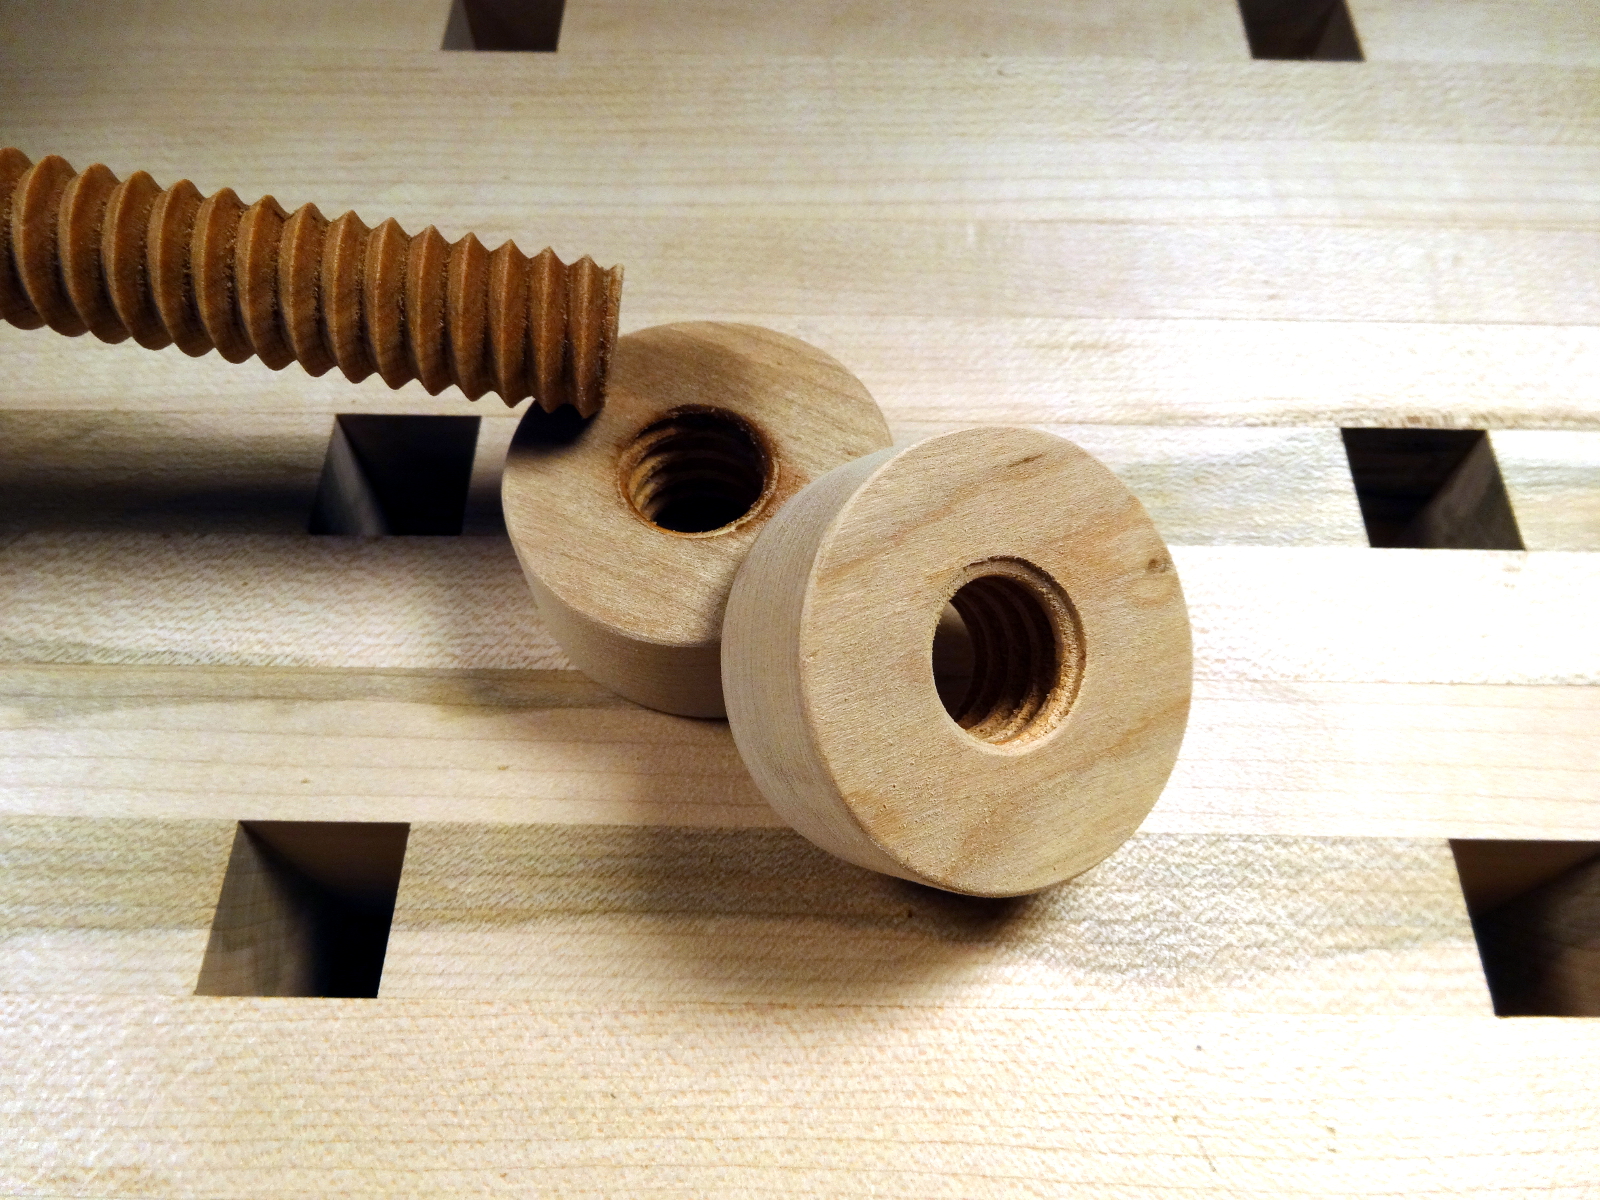
Now, the threading… I’ve read good and bad (too often more bad than good) about the quality wood threading kits. I was almost tempted to use metal parts (Hello McMaster-Carr), but decide to give the Woodcraft 3/4″ threading kit a try. It’s worked out very well! No problems, no horror stories. The cutters are plenty sharp enough for producing good results on cherry. I was careful to chamfer entry points, to lube the tap with BLO, and to soak the dowels overnight in BLO before threading.
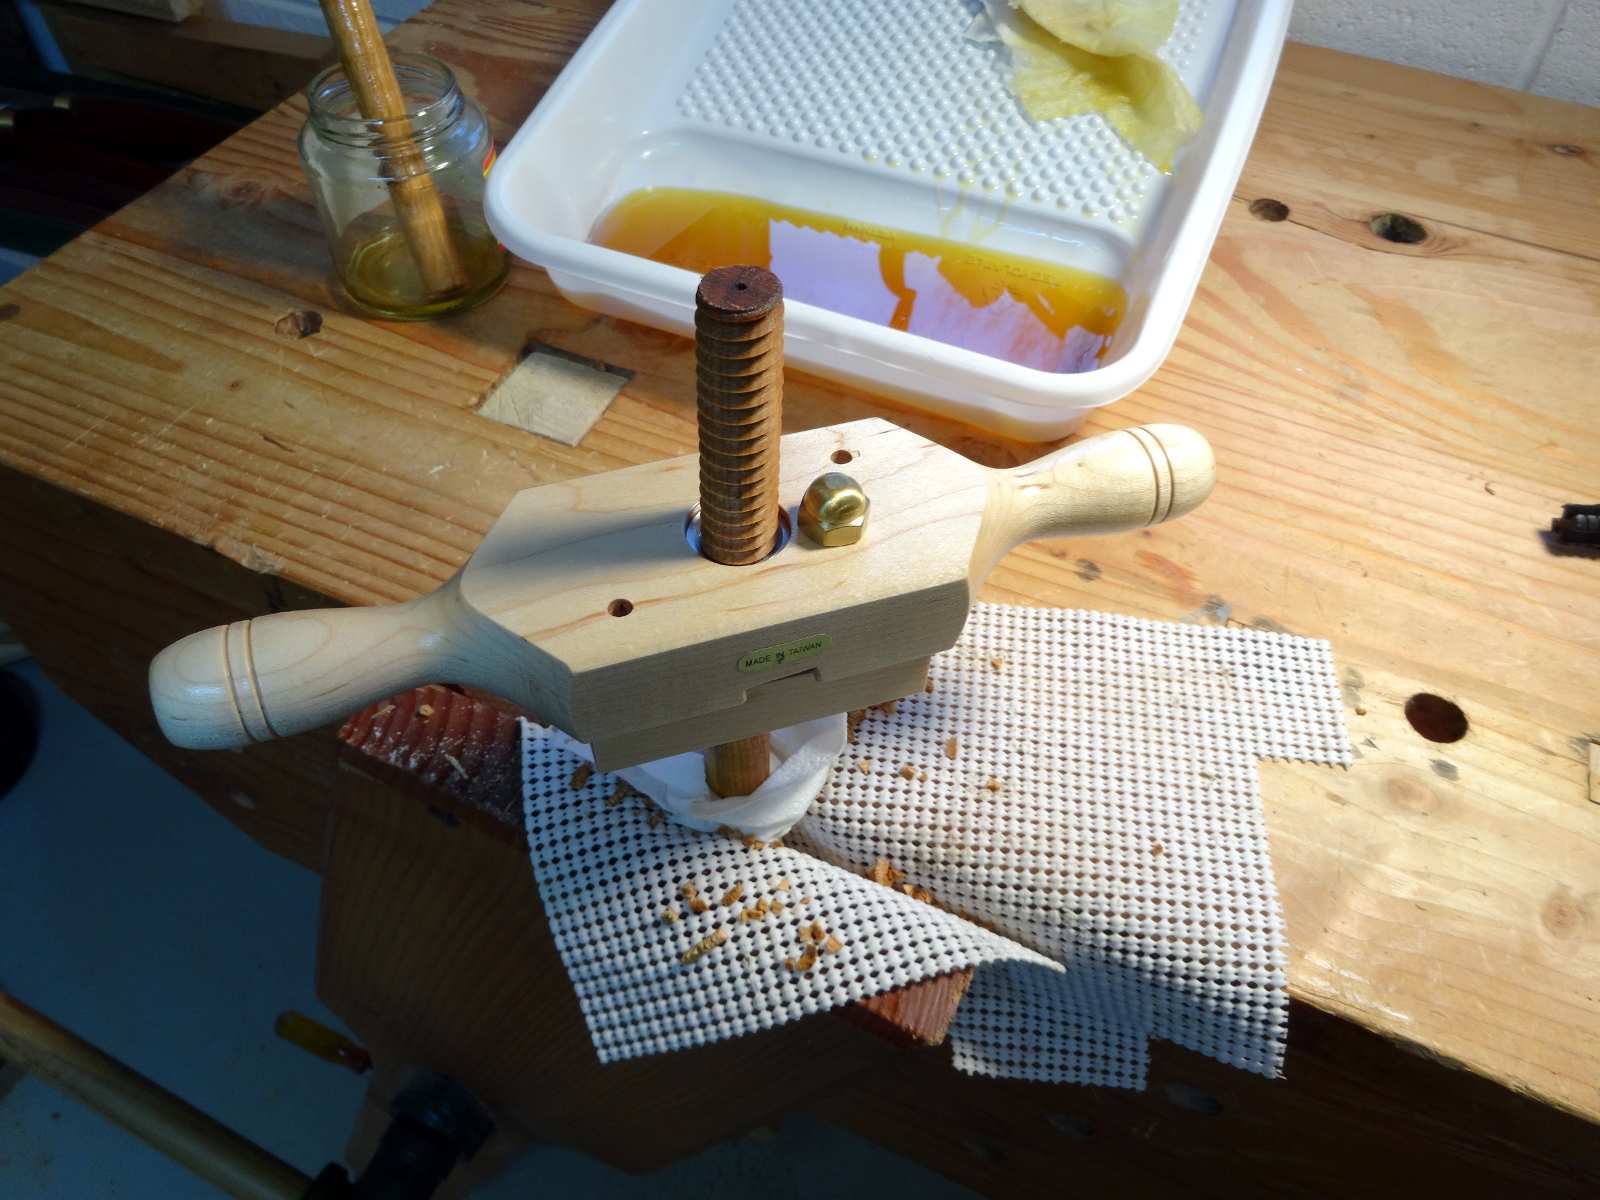
The dowels are right on 3/4″ diameter, ripped from 4/4 stock and then turned on the treadle lathe.
The nuts too are turned. I stacked four 4/4 blocks together with double sided tape, sawed off the corners and turned on the lathe. Each was then drilled with a 5/8″ auger and tapped. Easy-peasy. I left them round, rather than putting flats on the sides, because they are easy enough to grip and don’t need much torque to do their job.
It comes together very nicely, allowing the fence to be adjusted right up against the blade. I’ll cut the threaded rods down some after I decide how far I might really want to extend the fence.