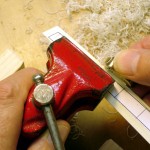
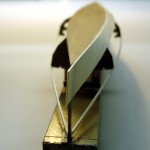
 The garboard plank is the lowest plank on a boat or ship, and the first to be placed on this boat. Like most other parts, I temporarily glue a part of the drawing to the lumber and shape it, loosely, to the drawing. Leave lots of extra when doing the first cut for planks, especially on the upper edge. Here, I trimmed very close to the bottom.
That’s a simple little modeler’s vice, set sideways on a fixture, making it easy to see the lines.
The upper edge of the plank is found by trial fitting. The markers for this edge are the apex points on the bulkheads and frame. Trim until it fits. We also need to cut “gains” before hanging the plank.
The planks on this boat are “lapstrake,” literally meaning the strakes (old term for planks) overLAP each other. At the ends of the boat, the overlap diminishes with the planks coming to a smooth join with the stems. This transition is accomplished by fitting “gains,” the area where the overlap transforms into an edge-to-edge join. There are two methods for cutting gains. One method, called “shiplap,” cuts an angled half lap in each plank. The other, called “dory lap,” bevels the edge of each plank. Because of the thinness of these planks, I used dory laps.
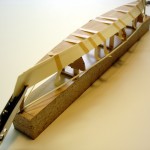
 Through a good bit of experimentation, I found that the best way to hold the planks in position while glue sets is with thin strips of masking tape and a couple of de-toothed alligator clips. Fastening on the 1:1 boat uses very small screws and clinched tacks. We use only glue on the model.
The garboards are not only the widest planks, but the ones that take the most twists and turns. They are plumb vertical on the ends, and nearly at 30 degrees in the middle. Fitting this plank is usually the toughest part of planking any boat.
By the way, you can see two simulated screws in the bottom of the stem in this photo. They are actually bamboo trennels that add strength, and this will be the last time they are visible. Paint covers them later.
The keen observer will see that the “clamps” are in place. These are the very thin strips set into the top of the bulkheads and the frame. The fit into notches in those parts and form the line and structural support for the top, or sheer, of the uppermost plank.
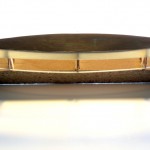
 These planks are of aspen and are a mere 5/16 inch thick, or only 20 thousands of an inch thick at 1:16 scale. I have a stunning window just beyond my modeling workbench, and the afternoon light shown through, showing the translucent thinness of the planks.
Click on any image to show a larger version.

Leave a Reply