 Gratitude: Having so many choices of things to do.
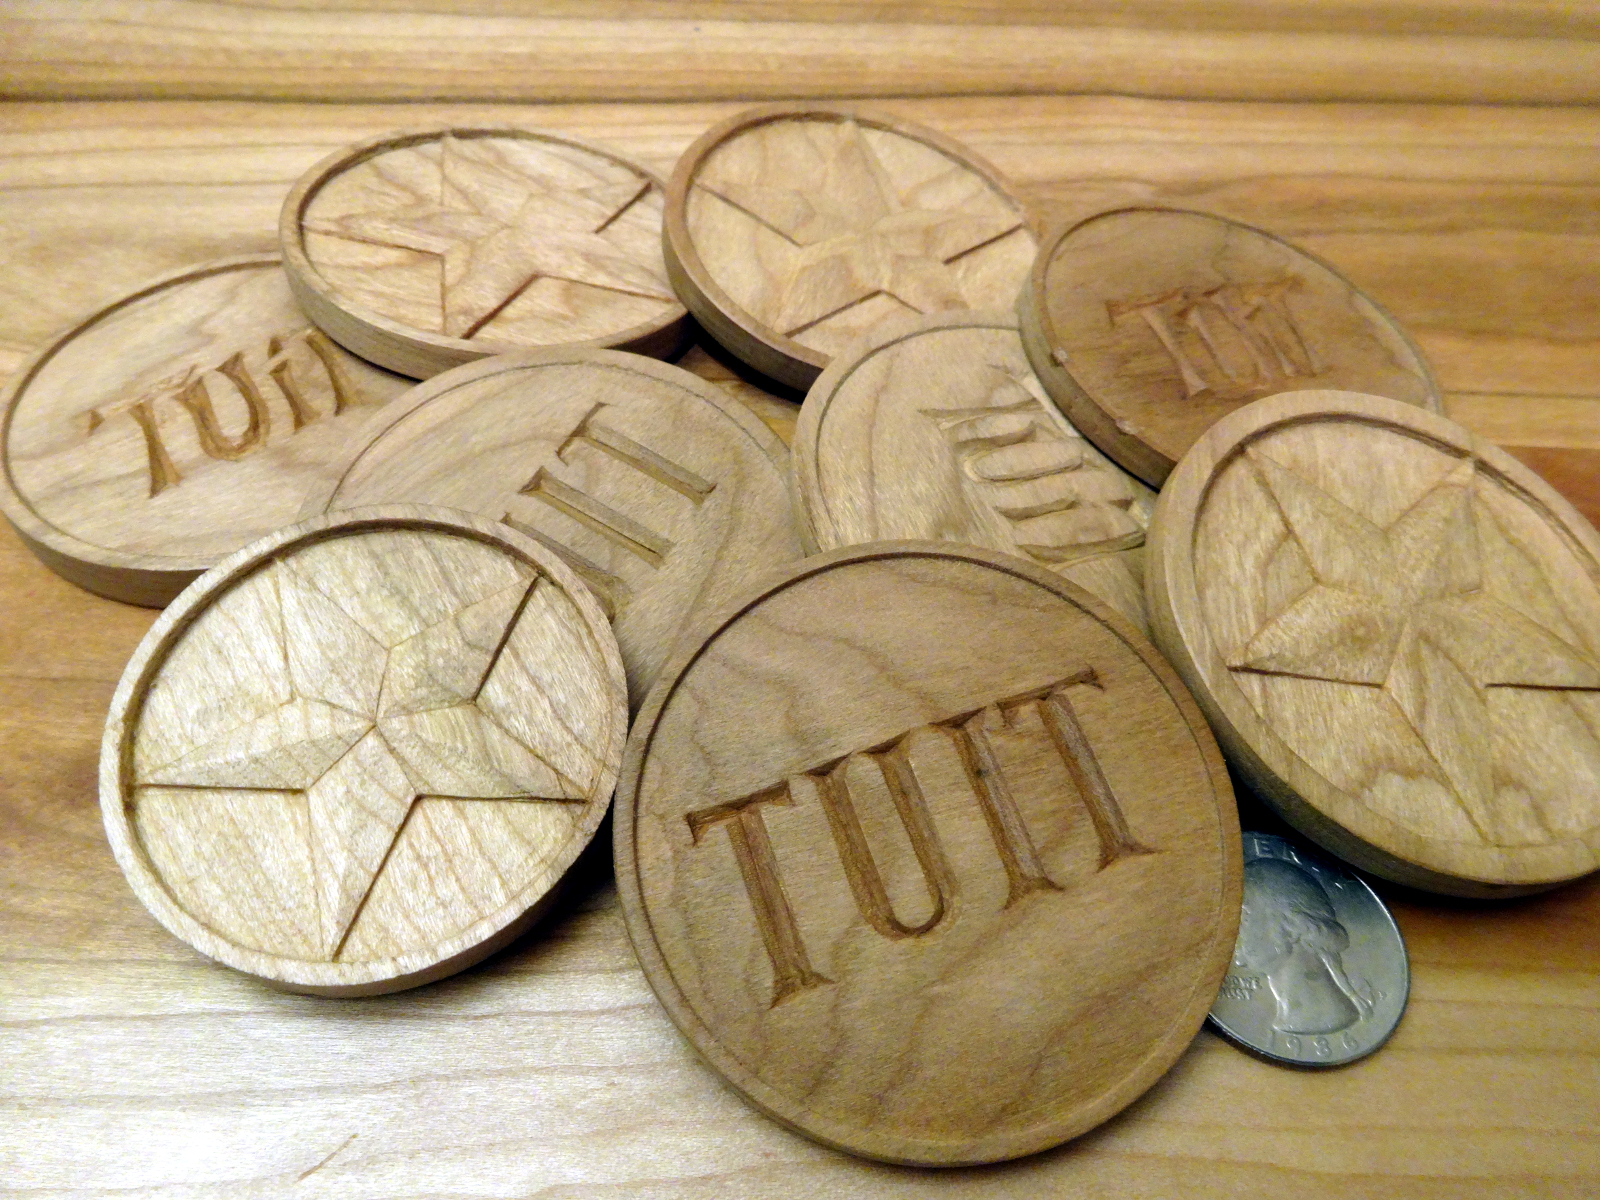
When you get a round tuit, …
cherry, hand-turned, hand carved, finished with common paste wax
Chocolate powered woodworking
Gratitude: Having so many choices of things to do.
When you get a round tuit, …
cherry, hand-turned, hand carved, finished with common paste wax
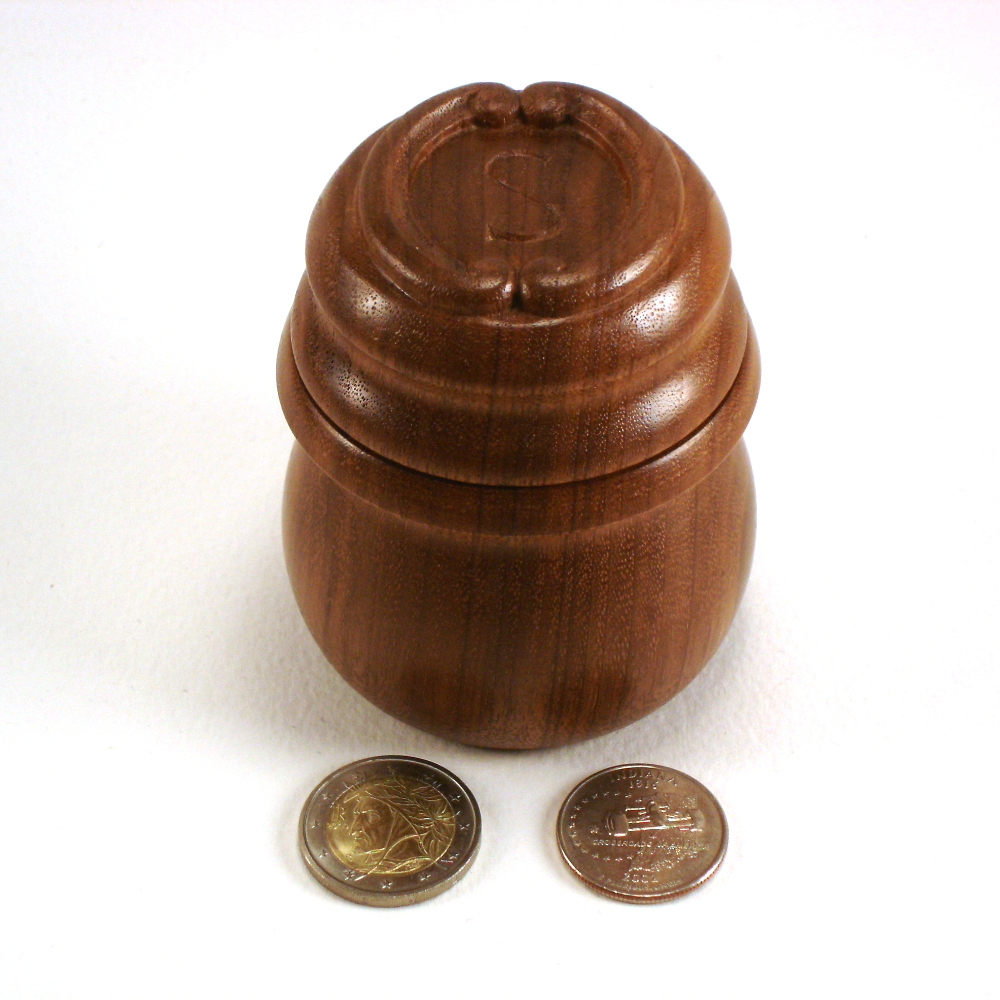
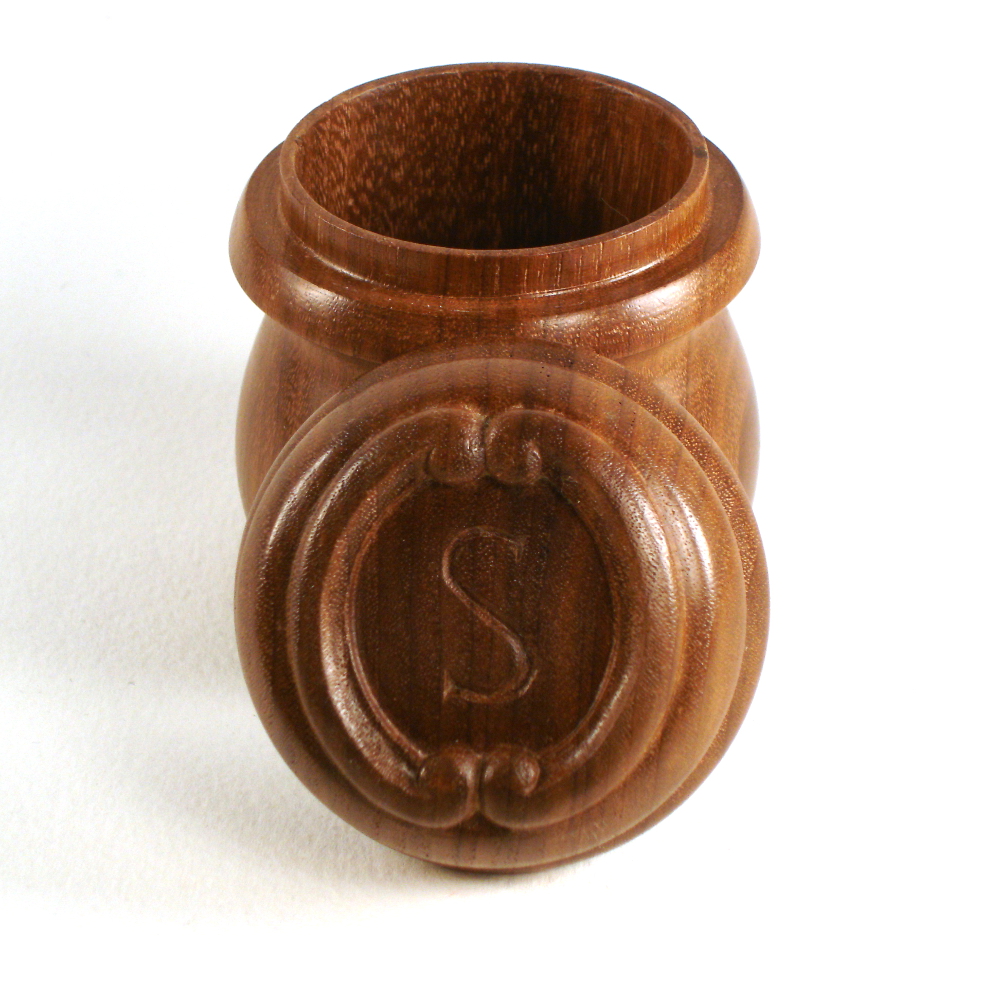
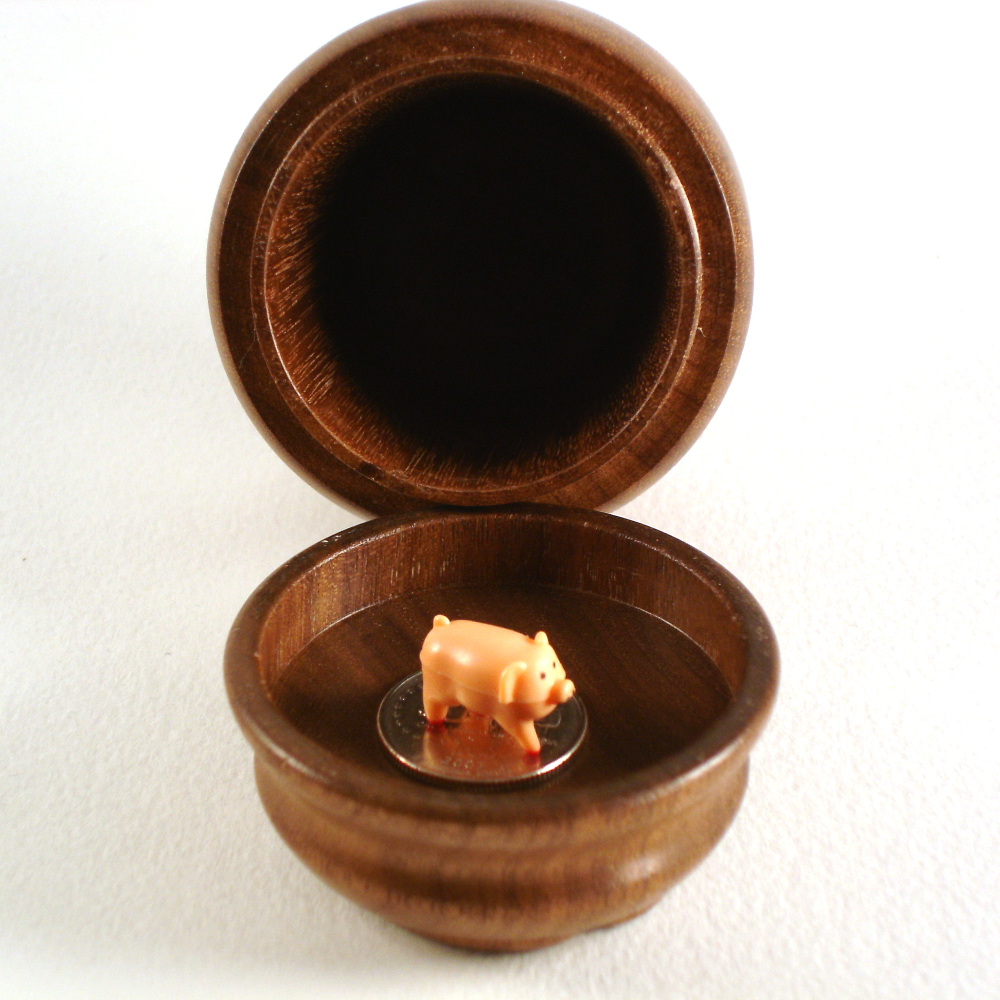
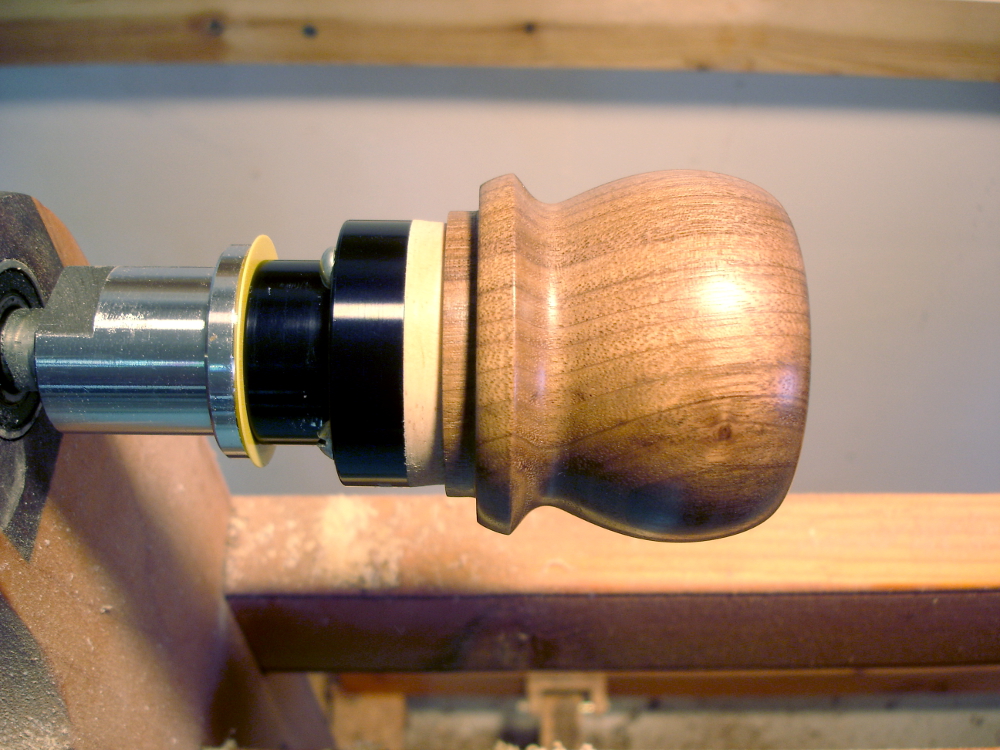
Walnut. 2 and 3/4 inches in diameter. 3 and 3/8 inches tall. The grain matches from container to lid. This is the first container turned on the treadle lathe, and my first turned container in about 30 years. Coins in the photo are for size reference, a 2 Euro (Italian/Dante) and a US Quarter (Indiana/Indy 500 – we used to live 1/2 mile from there.) The pig is an Austrian good luck charm. Turning and carving details follow these photos.
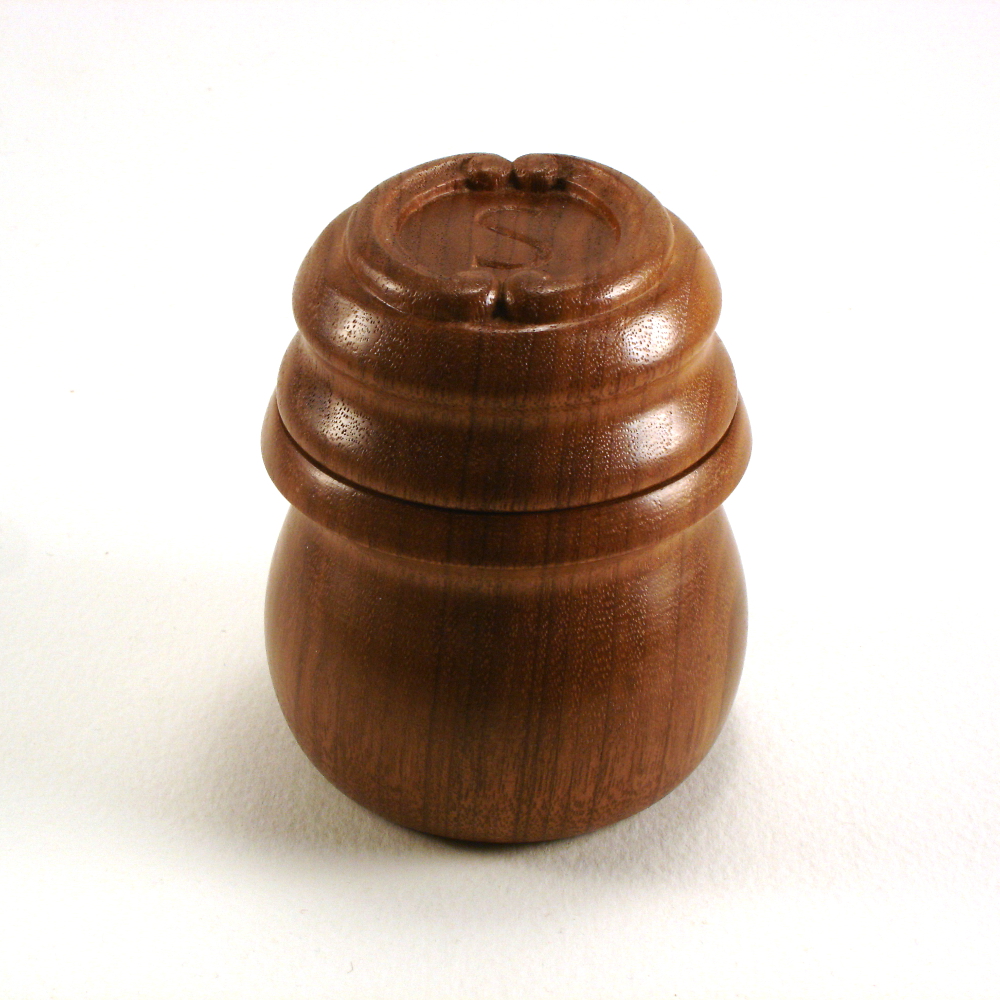
Having watched half a gazillion YouTube videos about container turning techniques, I did this one a bit differently than what I saw in any of the videos. Being of Scottish heritage and a bit “thrifty,” I haven’t yet bought one of the 4-jaw chucks we so often see used for this type of work.
Instead, I sandwiched the walnut blank between two pine waste blocks (saves wasting 50 cents worth of walnut) and mounted the sandwich on a simple $10 faceplate. I trued the blank with a live center taking up the tail. After truing the blank into a cylinder, I trued a perpendicular face on the tail end of the blank, i.e on the end of the waste block there. That prepared a surface for mounting yet another simple $10 faceplate for working the lid.
The rest of the turning followed fairly standard procedure.
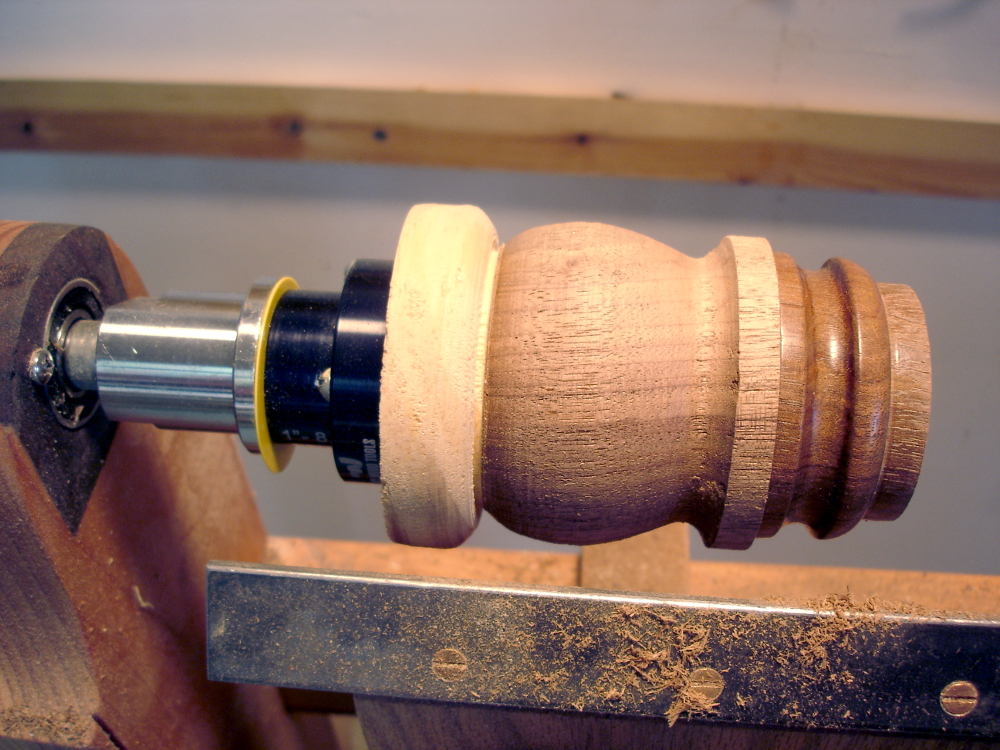
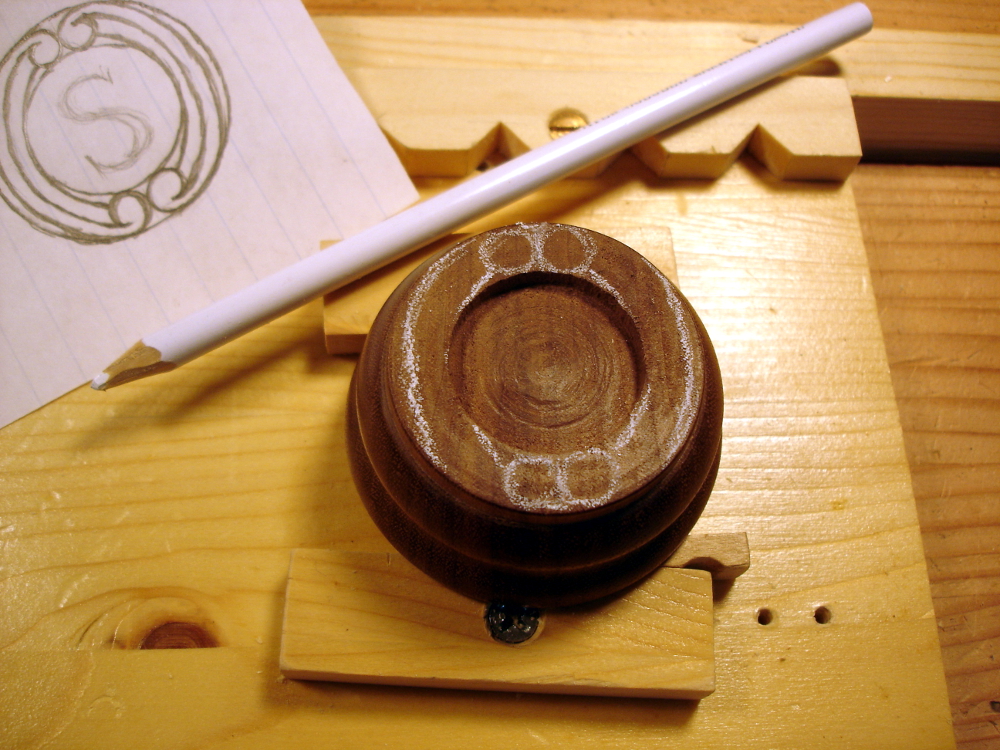
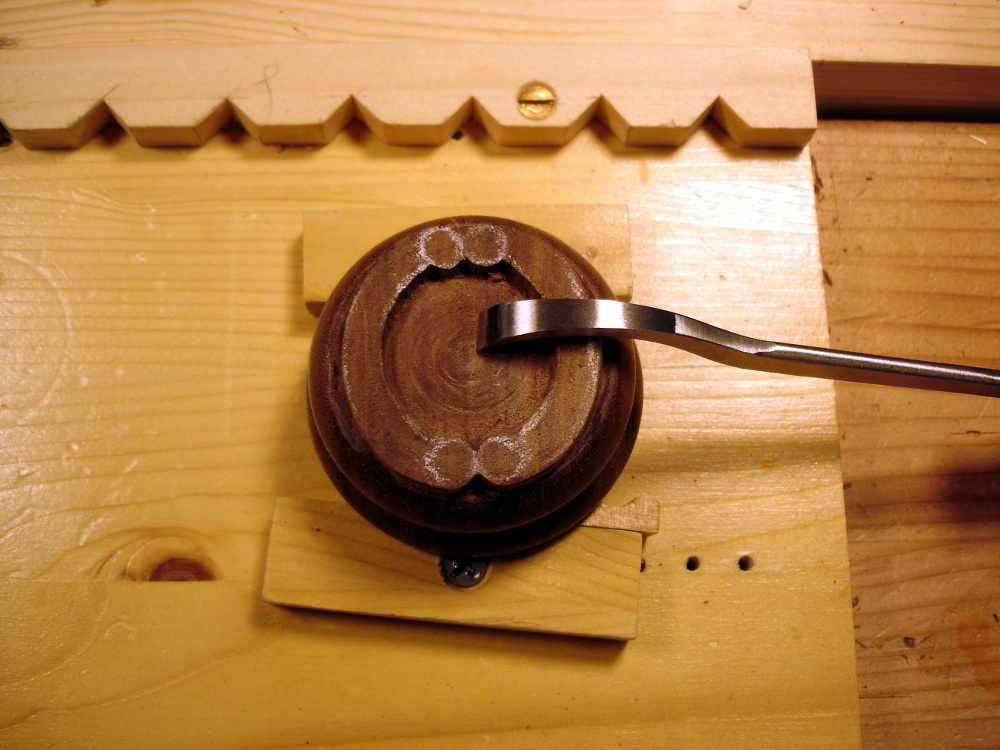
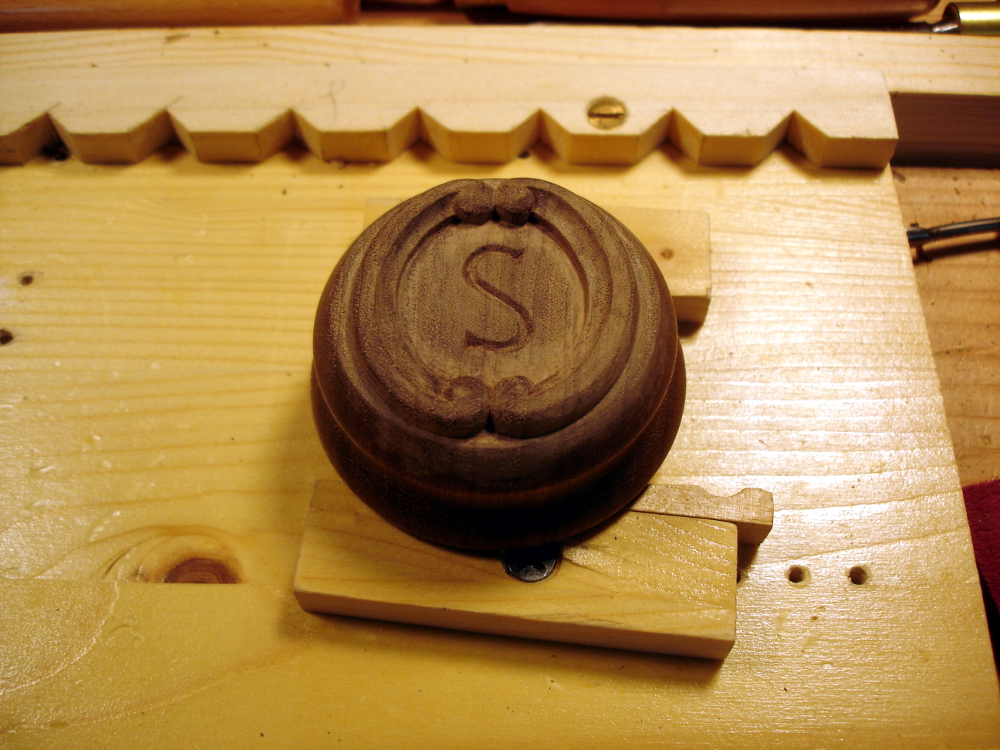
All that remains is a simple matter of carving. The design is a single letter monogram set between two classic “C-bars.” The carving is different from most in that it is carved in end grain. While that eliminates the usual grain sensitivity of carving, it presents another difficulty. Carving in end grain is like pressing a knife into the end of a bundle of soda straws. Extra sharp tools are the order of the day, along with a healthy helping of patience. Also helpful are a white wax marker and a fine spoon shaped chisel.
I’m not sure what the recipient will keep in such a container. It has enough room for about 211 calories worth of Gummy Bears, or maybe a few spare gold coins. We’ll see.

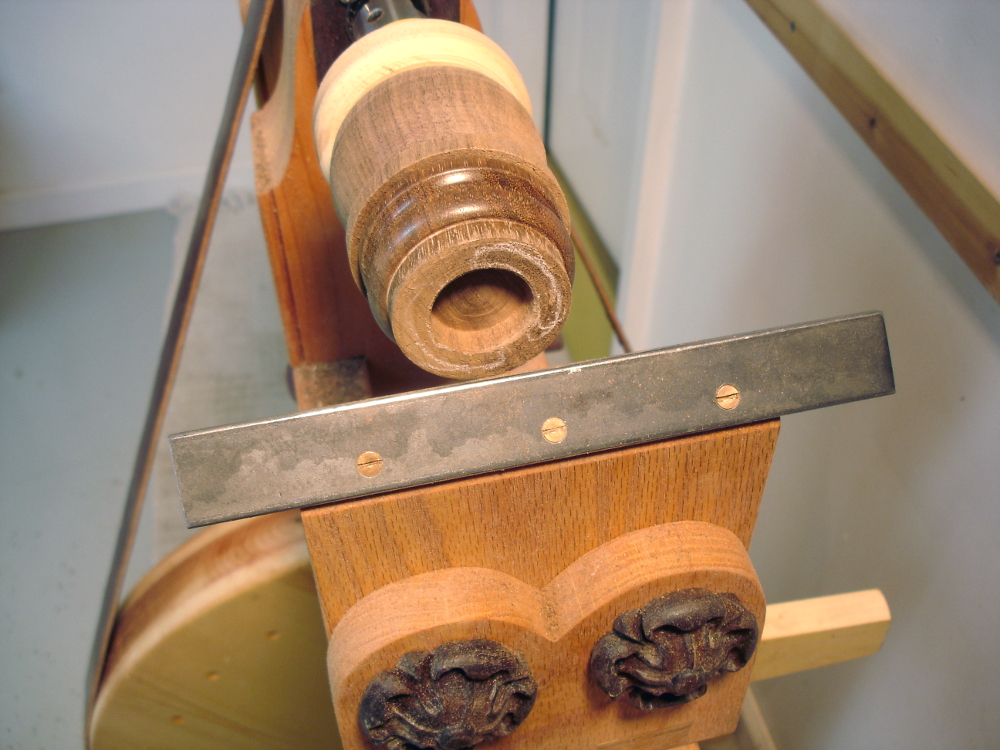
Sometimes, there’s madness in my method. Back when I made the adjustable tool rest, I used a certain shape in anticipation of these carvings.
 Inspiration for this pair of turnings comes from yet another Frederick Wilbur book, “Carving Architectural Details in Wood: The Classical Tradition.” A little rosette appears in the lower corners of a very ornate picture frame. It’s a classic rosette that’s frequently seen on period furnishings. Besides its appeal to me, it is sometimes carved from a turned base, one of the reasons I built a lathe.
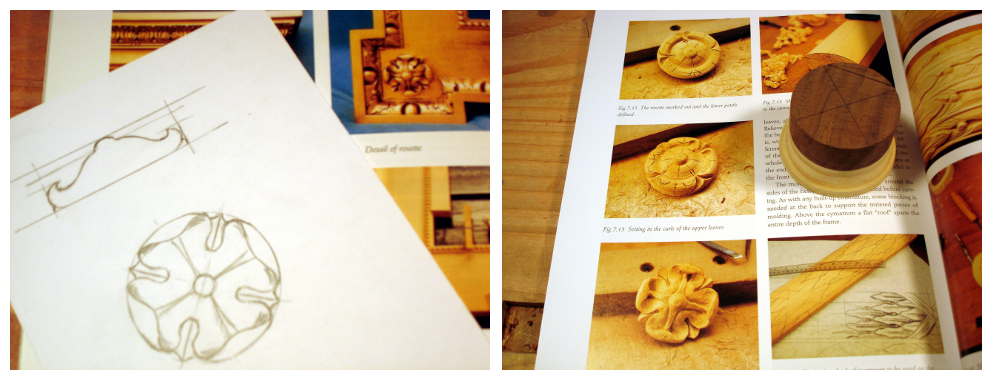
As with many carvings, I like to draw the item a couple of times myself. It helps be get a better feel for the object, for knowing the turning profile, and for having a fair idea of how to create the result.

The turnings are of walnut. Because the dominant features are on the face, these need to be mounted for faceplate turning. I used a small “Easy Wood Tools” faceplate, to which I screwed some sacrificial pine. To that, the walnut is attached by the technique of gluing a layer of paper between the pine and walnut.
The turning is straightforward. Walnut works very easily. The only unusual aspect is that I have not yet made a tool rest specifically for faceplate turning. So, I improvised by F-clamping the existing tool rest across the lathe’s ways in the only way it would fit … backwards.

At my level of ability, carving is about two factors, grain and sequence. Feeling grain interaction with tools is almost second nature now. The real consideration for grain on these pieces was orientation with respect to features. I decided to place the leaves between the pedals on diagonals to the grain direction. My hope was in minimizing the likelihood of breakage. That worked out great. Sequence is the other aspect that I find challenging. What to cut first? My instinct was to set in the spaces between pedals first, and to do that with cuts that minimize the pressure on what will be the sharp ridge of the leaves. That worked out OK. The rest of the carving was to remove everything else that’s neither leaf nor pedal. 🙂
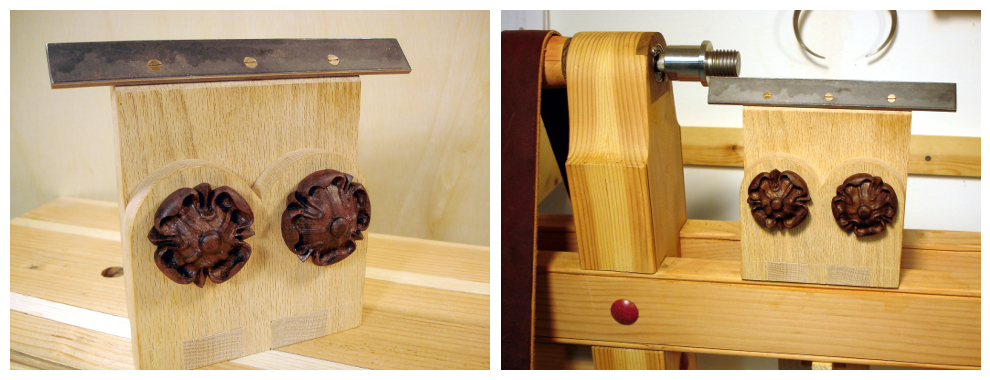
Lastly, I drilled the back of each rosette with a 3/4″ hole the depth of a metal nut, and additional 1/4″ hole to accommodate a screw. The nut is set in a pool of epoxy. The whiteness of the epoxy is due to a filler.
Finish: simple boiled linseed oil. NO sanding harmed either this carving or me!
The result is… some classy knobs to replace the ugly wing nuts on the adjustable tool rest!