• Skip to primary navigation
  • Skip to main content
  • Skip to primary sidebar
  • Skip to footer

Bob Easton

Chocolate powered woodworking

  • Home
  • Grinling Gibbons Tour

Archives for 2008

Bulkheads

November 8, 2008 by Bob Easton Leave a Comment

Now that the workbench is done, it’s back to the Fiddlhead. We left off with a stack of resawn cedar.

Harry wants the bulkheads made up by laminating 1/4 inch thick pieces, making each bulkhead a 1/2 inch thick two ply board. Back when I did this for the model, my first result was a pair of bulkheads that curled up like potato chips. Learning from that, I took a more cautious approach. I resawed only to 1/2 inch thickness, not all the way to 1/4. I then did the lamination in two stages, edge to edge first, and then face to face.
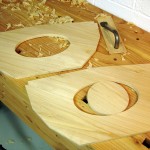
The shop is not normally heated, and this week was very cooperative with overnight lows that did not reduce the shop below the 60 degrees needed for West System epoxy. After laminating, I planed both rough boards to near-final thickness; quick work for the big #7 plane. The elipses for hatch openings were cut with a fiddly old coping saw that’s now headed for the trash. Finished with a cabinet maker’s rasp. Handling these, I now appreciate Harry’s intent. They are unbelievably light, much lighter than they would be if made from regular 1/2 inch plywood. The cross grain lamination adds strength over using raw cedar.

The round piece shown in one of the openings is part of a hatch cover, another clever device that Harry designed. Clever, but devilish to construct.

Update – Nov 11, 2008: In only a couple of days these bulkheads have acquired a warp. They didn’t turn into potato chips, but have about 3/32 inch of curl. I don’t like it, but will leave them as they are. It’s probably not enough to make the boat tend to the left.
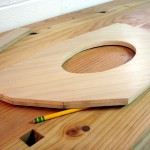
warped bulkheadUpdate – Nov 20, 2008: More curl. They’ll be potato chips soon! A pencil can be rolled under either of two raised corners. I really don’t want to rebuild these, and I want even less to substitute plywood. I wonder what would happen if they got a good overnight soaking and then dried out under weights. Then again, it probably doesn’t matter that they are warped. The critical edge, the bottom, is still straight.
Filed Under: Boatbuilding, Eva Won, Fiddlehead

Workbench: Done

November 4, 2008 by Bob Easton 15 Comments

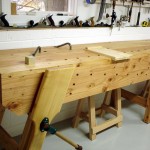
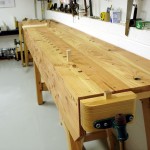
My extra long “English” workbench is done. The plan came form Christopher Schwarz’s excellent “Workbenches from Design & Theory to Construction & Use.” I lengthened it to accommodate the longer workpieces commonly found in boat building. It is 12 feet long and 2 feet wide.

Although made of common construction lumber (aka rather ugly Douglas fir), and with a thin top compared to some cabinet builders benches, it ends up being rock solid. While contemplating extending the length, I asked Chris if he thought a third set of legs would be needed. He suggested they wouldn’t hurt and pointed out a photo in his book of a bench with three sets of legs. I took a cautious approach and made the center legs a fraction of an inch short. The last thing I wanted was a teeter-tottering bench. Well, there’s no teeter-totter, and not much we can do to make those legs touch the floor. Maybe if I plop my truck engine on the bench? This is what they invented wedges for, isn’t it!

The Gramercy holdfasts from “Tools for Wood Working” work very well. They do need a top thicker than what I used. So, like I did for the dogs, I added doubling blocks under the holdfast locations. They’re great tools at an attractive price.

All of the lumber dimensioning and most all of the fitting and construction was done with hand tools. The only things I used electrons for were:

  • My old $10 hand drill helped with the large holes for the lead screws for the vises. As an aside, this is an amazing drill. It was a “no name” metal bodied $9.95 special in the early 1960s. I’ve used it almost continuously since them for the usual DIY stuff.  It has outlasted two cordless drills and shows no signs of giving up.
  • I used the band saw to nibble away the waste near the curved areas of both vise faces.
  • A semi-retired miniature lathe and some idle mahogany were used for the ends of the vise handles.

Building the bench offered a few really interesting techniques: the use of Miller dowels for fastening the top (no metal to catch a plane while flattening), the use of drawboring to really tighten up a mortise and tenon joint, and the use of a wedged tenon for the parallel guide at the bottom of the face vice. Each technique was easy to learn, thanks to well written instructions, and each produces very strong joints.

Two coats of boiled linseed oil provide enough finish to keep blood from soaking into the top. Don’t ask how I know that.

Once upon a time (dead link now): “approved by the Schwartz.”

Now, back to boat building.

Filed Under: Woodworking, workbench

Workbench: Flattening the Top

October 30, 2008 by Bob Easton 1 Comment

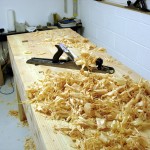
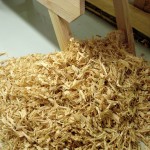
rough flatteningbig pile of shavingsThe last two boards are on, bringing the width to 24 inches. Flattening is simple; just takes time and 2.3 Snicker bars worth of energy. The big ole No. 7 jointer was set up rank and swept diagonally until all boards were brought to the same thickness. I then set it for fine work and used along the length of the boards to remove the diagonal marks. The heft of the jointer, along with a razor sharp iron and a constantly waxed sole (candle wax), makes it a very effective and enjoyable tool.

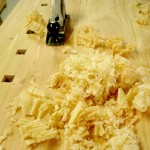
whispy shavingsThe No. 3 smoother feels petite in comparison, and was set up for petite, lace like, finish work.

The keen observer might find some strange holes in those last two boards. No, they’re not for holdfasts. Those boards each had a few dead knots in them, the kinds surrounded with a black ring of bark where the tree grew up around dead branches. Those kinds of knots tend to be loose, and in boatbuilding they must be removed and plugged lest they become unplanned drain holes. Here, I just knocked them out and left them unplugged. Made planing easier.

It turns out to be exactly what I expected. Al Navas would want better, but this is perfect for its intended use and a good bit better than what I’ve seen in many boat shops.

Filed Under: Woodworking, workbench

  • « Go to Previous Page
  • Page 1
  • Page 2
  • Page 3
  • Page 4
  • Page 5
  • Page 6
  • Interim pages omitted …
  • Page 19
  • Go to Next Page »

Primary Sidebar

Footer

Recent Posts

  • New Frame Saw / Scroll Saw
  • Lamppost Sign
  • Goodbye PayPal – Goodbye Bob’s eBooks
  • Anarchist’s Workbench is Done
  • Why we keep offcuts…

Categories

  • About
  • Artwork
  • Boatbuilding
  • Boating
  • bowl carving
  • Boxmaking
  • Clocks
  • Drawings
  • eBook
  • etude
  • Eva Too
  • Eva Won
  • Fiddlehead
  • Fiddlehead model
  • Flying
  • frame saw
  • gilding
  • green woodworking
  • Grinling Gibbons
  • Guns
  • Hand tools
  • Humor
  • kerfing plane
  • Lettercarving
  • Mill Creek 13
  • Model building
  • Power tools
  • Rant
  • resawing
  • scroll saw
  • Shopmade
  • sign painting
  • Stonework
  • Swimming
  • Technology
  • The Wall
  • treadle lathe
  • Uncategorized
  • VSD
  • Woodcarving
  • Woodturning
  • Woodworking
  • workbench

Other stuff

  • About
  • Contact
  • Privacy Policy

Copyright ©2024 · Bob Easton · All Rights Reserved