• Skip to primary navigation
  • Skip to main content
  • Skip to primary sidebar
  • Skip to footer

Bob Easton

Chocolate powered woodworking

  • Home
  • Grinling Gibbons Tour

Bob Easton

New Frame Saw

December 13, 2008 by Bob Easton

A few new cedar flitches are acclimating themselves to the shop. In the meantime, I’ve been busy preparing a saw that will be used to get planking out of that cedar. This saw’s main work will be resawing, slicing thickness from roughly 4 quarters to pairs of roughly 2 quarters boards. Getting two boards from each flitch is the goal. Most people would use the bandsaw for this job, but mine is good for only 6 inches of resaw capacity, and some of these boards will be from 8 to 10 and 1/2 inches wide. I would rather have a good hand tool method than invest yet more in the band saw.
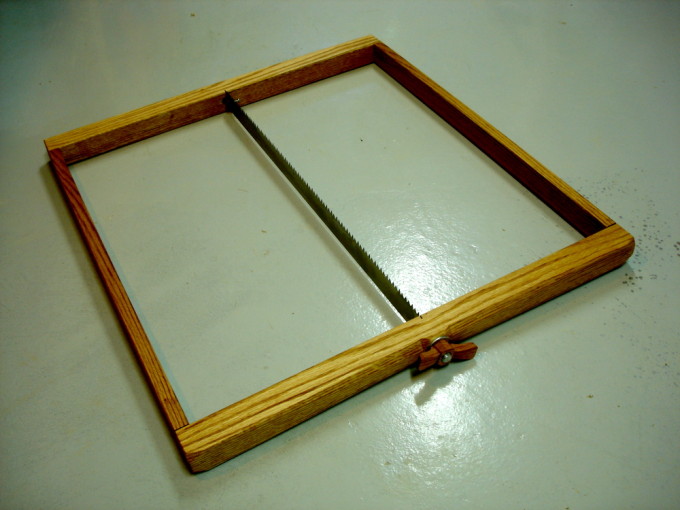
frame saw

This frame saw derives from Josh Clark’s “Making a Frame Saw” article. I used red oak, 1 and 1/2 inch square, for the stretchers. The arms were gotten from a piece of the same oak, resawn to half thickness. The blade is also 1 and 1/2 inches wide. I found it at Frog Tool Company in Dixon Illinois. See the update at the end of the article.

frame saw

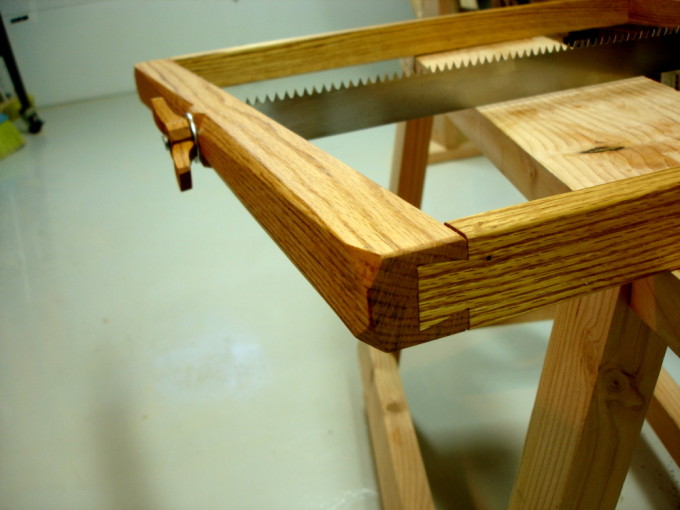
As Josh suggested, I used half-blind dovetail joints. While I’m skeptical that the forces on the saw actually need this kind of joint, I saw it as opportunity to learn to do them. First time doing dovetails. I cut the tails on the arms first and did a couple of practice pockets on scrap wood. Then, did the real ones. Each one gets better, and yes, that’s the last one that’s shown in the picture. All are snug enough to require gentle tapping to assemble. No glue used so far. (Note from several years later: These joints are still not glued or screwed. The tension from the saw keeps them firm enough for constant use.)

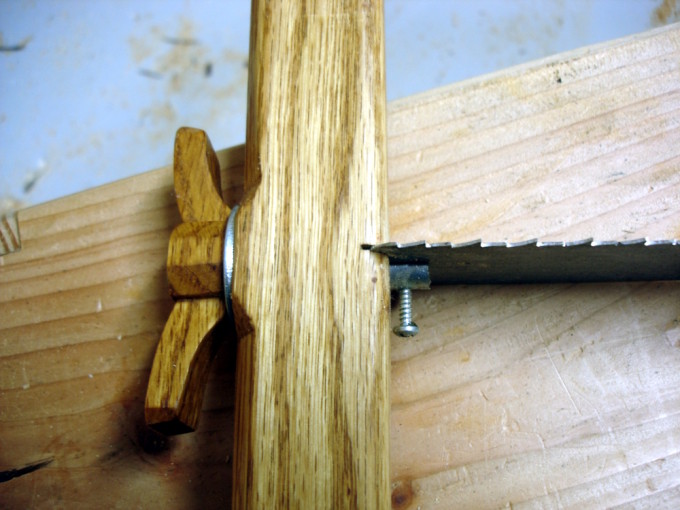
saw fastening

All edges are chamfered, because I imagine I’ll spend quite a few hours using this saw. I’m an Art Deco fan, so the upper arm has a series of stop chamfers in an Art Deco motif, and a wing nut to match. The wing nut is simply a wooden shell covering a 3/4 inch metal nut.

The first cut, on a 7 inch wide board, shows the saw will indeed do the job well. Planing will be needed to smooth the cut surfaces, but that was expected. Now, all I need to do is figure out how to hold a workpiece that’s 16 feet long.

IMPORTANT NOTE: After using this saw for a couple of months, I came to dislike the blade. I acquired a good old Disston 26 inch saw, changed it from 7 TPI to 4 TPI, sharpened, and hacksawed to a 2 inch width. That replaced the original blade an made a huge improvement in how well the saw works.
Filed Under: Boatbuilding, frame saw, Hand tools, resawing, Shopmade

New Bow Saw

December 6, 2008 by Bob Easton 5 Comments

A few weeks ago, I cursed a wretched coping saw as I cut the oval hatches in the Fiddlehead’s bulkheads. A week or so later, I needed a turning saw to cut the long gradual curves on the Fiddlehead’s bottom, and actually hacked together a temporary saw from a hacksaw frame and part of a used bandsaw blade. It worked, but it’s a good thing the curved line wasn’t too far from the edge of the board.

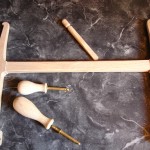
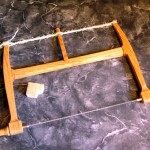
Those incidents led me to make a bow saw. Of the available designs, I found the Gramercy Tools design most appealing. The design is classic, yet uses a moderm pair of brass pins to hold the blade. The pins can accommodate blades that already have pins pressed in, or blades that have open eyelets. The Gramercy bow saw is available from Tools for Working Wood as a completed saw for $139.95, or as individual parts. Gramercy offers a very complete set of drawings for people who want to make their own. I chose to buy only the pins and blades and make all the wooden parts myself. While they use Hickory, I used Oak because that’s what I had on hand.

Features that appealed to me are: the classic style, the curved faces of the mortise joints on the stretcher (fun cutting them, allows for slightly varying blade lengths), and the subtle sculpting of the various curves and edges, including a finger rest near the base of the cheeks.

The pins are glued into the handles with epoxy. I used a couple of coats of boiled linseed oil for finish. It still needs a good cord for tensioning. The fuzzy hemp is temporary, enough to try it out. The blade is 12 inches long. This blade is the coarsest of a set of three, 10 tpi.

That little squiggly block of wood represents the first cut, an S shape about an inch long, through 4/4 cedar. The saw ends up being very light and pleasing to use. While I thought the handle a bit small when I was turning it, I find that it falls very naturally into the hand. Gramercy did a fine job on the design. This one is a keeper!

For Luke and Dan: Yes, I used electrons while building this saw. I used a bandsaw to resaw the oak to useful dimensions, and I used an ancient miniature lathe to turn the handle, toe, and toggle. The lathe was only moderately easier than hacking them out with a pocket knife. Oh yes, there are also electric lights in the shop. The remainder of the making used hand tools, rasps and the eggbeater drill.

So now, we’ll have many fewer colorful words while sawing.

Update (12/13): Those brass pins from Gramercy are so smooth that the saw frame wants to rotate around them a little too easily. More tension? The blade already sings a high C when plinked. A small sliver of 320 grit sandpaper inserted along with the pin provides exactly the right friction. For long time coping saw users, this saw is a great upgrade. Break the habit of taking short stokes, Use the entire length of the blade and be amazed at how easily the saw works.

Filed Under: Hand tools, Shopmade

Setup Complete

December 1, 2008 by Bob Easton 4 Comments

The outside temps are up for a couple of days, making it easier to get the shop to 60 degrees. The bottom is now glued and screwed in place.

Filed Under: Boatbuilding, Eva Won, Fiddlehead

  • « Go to Previous Page
  • Page 1
  • Interim pages omitted …
  • Page 99
  • Page 100
  • Page 101
  • Page 102
  • Page 103
  • Interim pages omitted …
  • Page 128
  • Go to Next Page »

Primary Sidebar

Footer

Recent Posts

  • New Frame Saw / Scroll Saw
  • Lamppost Sign
  • Goodbye PayPal – Goodbye Bob’s eBooks
  • Anarchist’s Workbench is Done
  • Why we keep offcuts…

Categories

  • About
  • Artwork
  • Boatbuilding
  • Boating
  • bowl carving
  • Boxmaking
  • Clocks
  • Drawings
  • eBook
  • etude
  • Eva Too
  • Eva Won
  • Fiddlehead
  • Fiddlehead model
  • Flying
  • frame saw
  • gilding
  • green woodworking
  • Grinling Gibbons
  • Guns
  • Hand tools
  • Humor
  • kerfing plane
  • Lettercarving
  • Mill Creek 13
  • Model building
  • Power tools
  • Rant
  • resawing
  • scroll saw
  • Shopmade
  • sign painting
  • Stonework
  • Swimming
  • Technology
  • The Wall
  • treadle lathe
  • Uncategorized
  • VSD
  • Woodcarving
  • Woodturning
  • Woodworking
  • workbench

Other stuff

  • About
  • Contact
  • Privacy Policy

Copyright ©2024 · Bob Easton · All Rights Reserved