• Skip to primary navigation
  • Skip to main content
  • Skip to primary sidebar
  • Skip to footer

Bob Easton

Chocolate powered woodworking

  • Home
  • Grinling Gibbons Tour

Bob Easton

Lathe Tool Chest – Fitted Drawer

June 8, 2018 by Bob Easton Leave a Comment

What sort of carving does this tool chest need? Not decorative this time; functional.

The 4-jaw chuck, with several sets of jaws, arrived in a molded plastic case with a cracked interior and dodgy latches. It served the job of protecting the contents during shipping, but not much more. Replacing it was part of the motivation for making this chest.

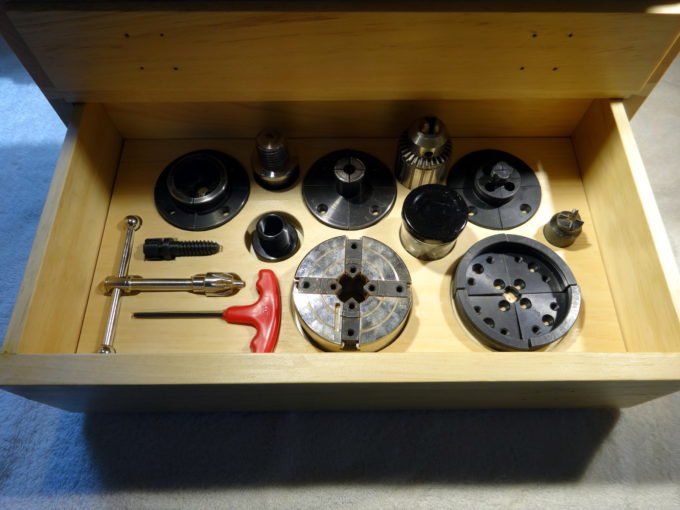
After making the lower drawer, I cut a “liner” that fits snugly inside and got out drills and gouges to create holes and depressions in the liner for all of the original 4-jaw chuck parts plus some other chucks and drive pieces. It brings together most of the things that go on the head end of the lathe. Now, shall I do the same for the next drawer; the tail stock things? Haven’t decided yet.
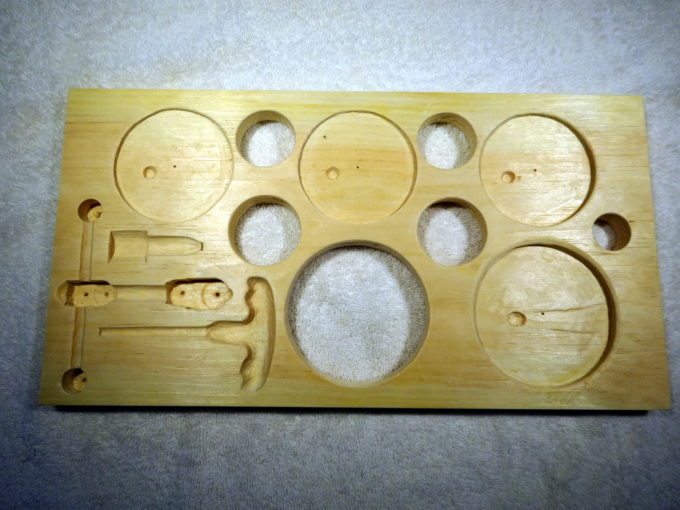
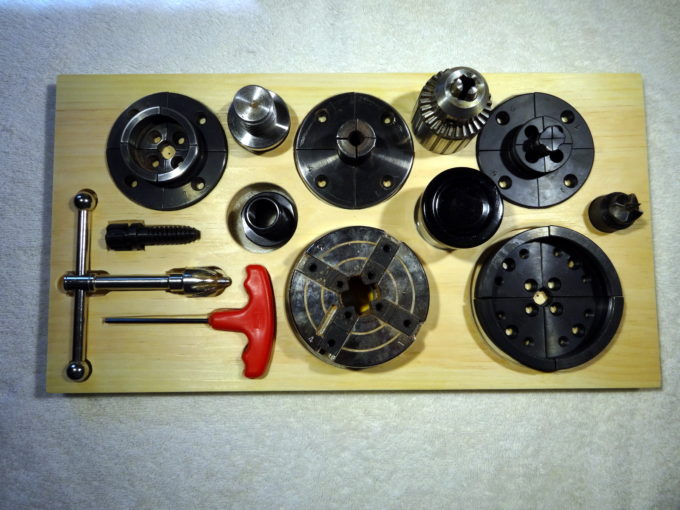
photo - drawer insert for drive chucks

Filed Under: treadle lathe, Woodcarving, Woodworking

Lathe Tool Chest – Drawers, etc.

June 6, 2018 by Bob Easton 3 Comments

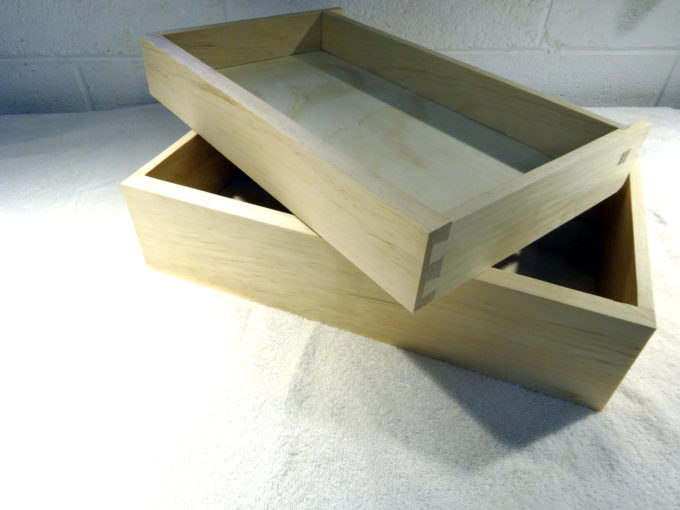
photo of two dawersThe drawers are straightforward and use common techniques. Such as, the sides joined to the fronts with half-lapped dovetails, and the floor being 1/4 inch plywood fitted into grooves. Less common is the extended length to the sides, which allows the drawer to be pulled out enough to give full access to the interior, yet have the tails keep it within the chest. Also a bit different is the back piece fitted into a housing joint and secured with wedged through tenons.

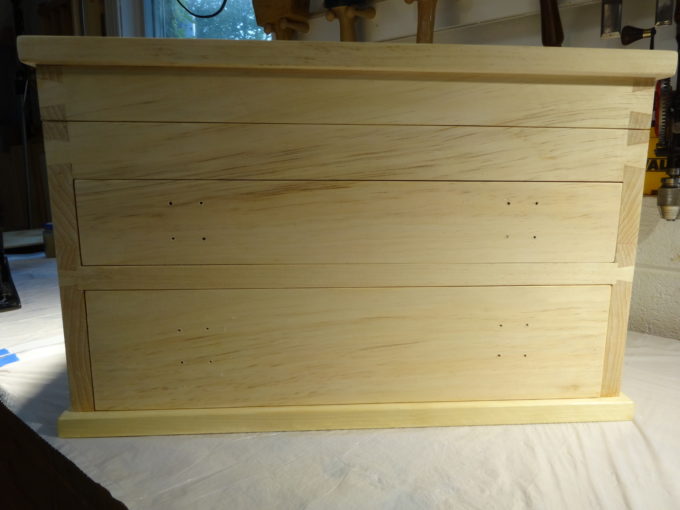
photo of front of the tool chestTo my eyes, “grain matching” worked out well. I cut the top front of the chest and the upper drawer front, side by side, from a section of lumber Then, I found the lower drawer front from grain running at the same angle immediately adjacent in that board. It was as much careful planning as it was happy accident to have this distinctive angular grain pattern running through that board. By the way, all lumber in this chest is some sort of mystery pine from the big orange store.

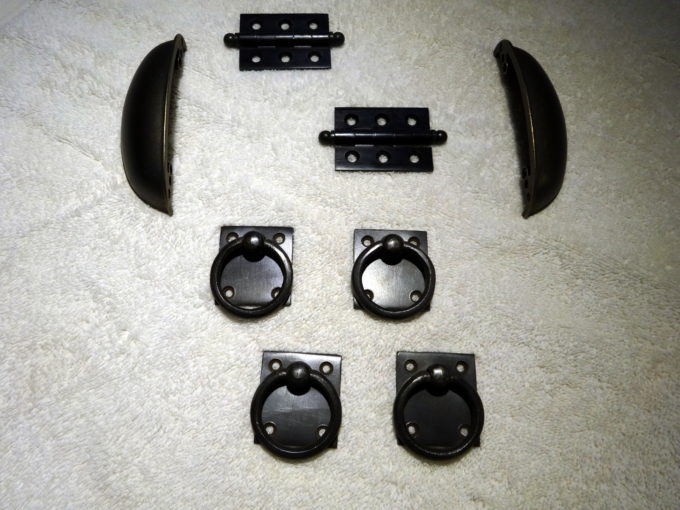
photo of hardware bitsYou can already see hardware mounting holes in the fronts of the drawers. The chest will end up in a place that doesn’t have room for drawer pulls that protrude very much. I chose drop ring pulls for the drawers and quickly settled on the “antique bronze” finish. That was probably a mistake, because now I was on the hunt for matching finish for the other parts. After tedious wandering through the hinterlands of the internet I gave up on finding larger, rectangular, “antique bronze” drop handles for the sides. I actually found some, but they looked like wilting lilies and their $3 per pair cost signaled they were probably junk. I compromised with some “antique bronze” bin pulls from the big orange store. The hinges come from yet another source and are yet another shade of “antique bronze.” Yet, they are very sturdy and happily the pair is actually the same size.

Next, a bizillion coats of shellac.

Filed Under: treadle lathe, Woodworking

Lathe Tool Chest – Panels

June 4, 2018 by Bob Easton 2 Comments

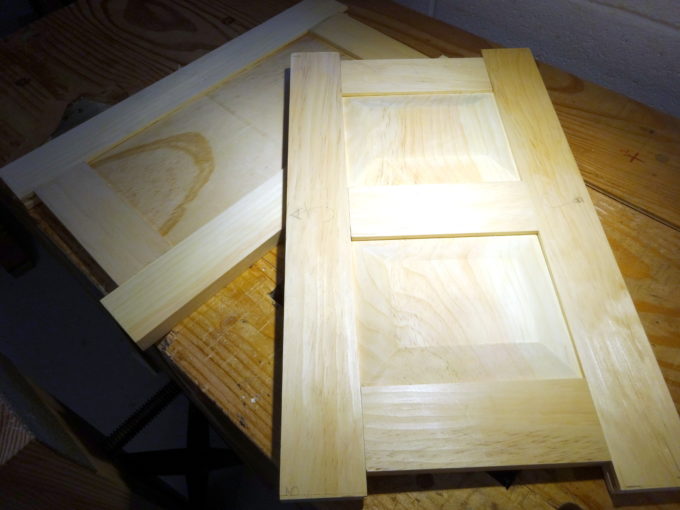
photo of rough panelsThe top and bottom use frame and panel construction. The dimensions, 19 inches by 12 inches, are at the small end of needing this type of construction for managing wood movement. Yet it was fun to do them this way.

The long rails were intentionally left over-long. Those tails sticking out were very practical for knocking the frame apart while fitting the pieces. And thanks to the previously mentioned mortise and tenon helpers, there was very minimal fitting needed.

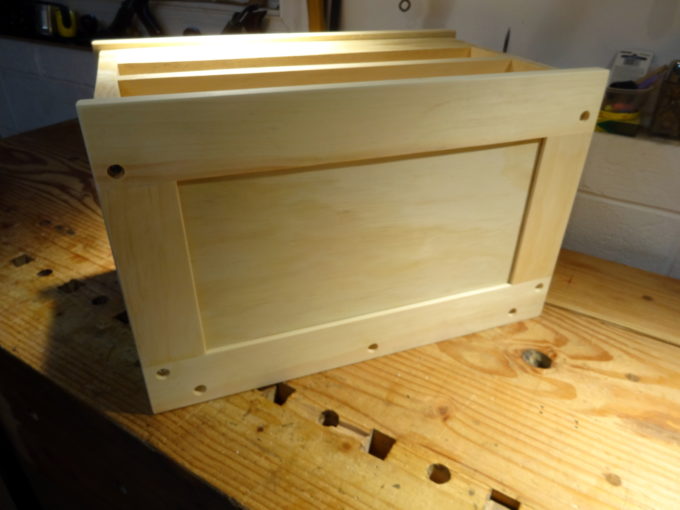
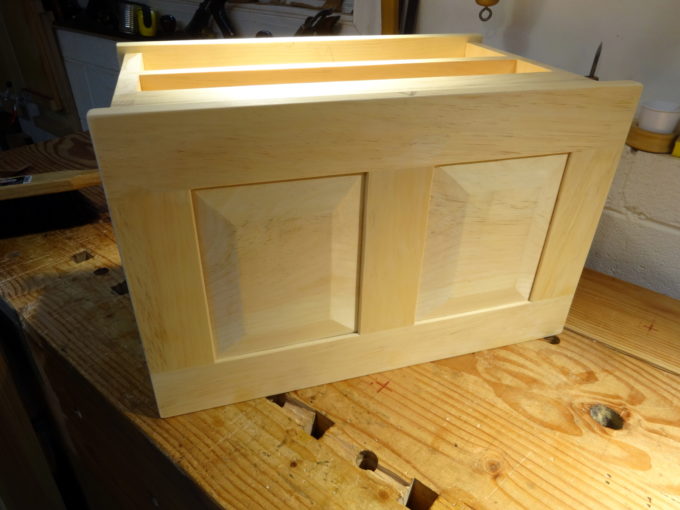
The bottom panel is simple 1/4 inch plywood, and the assembly is glued and screwed to the carcass. The screw holes get plugged. The top uses raised panels, shaped from 5/8 inch thick material. The assembly is only glued to the top of the carcass. Instead of the full bull-nose that Paul Sellers prefers on his chests, I used a less severe round over.

photo of bottom panel
photo of top panel

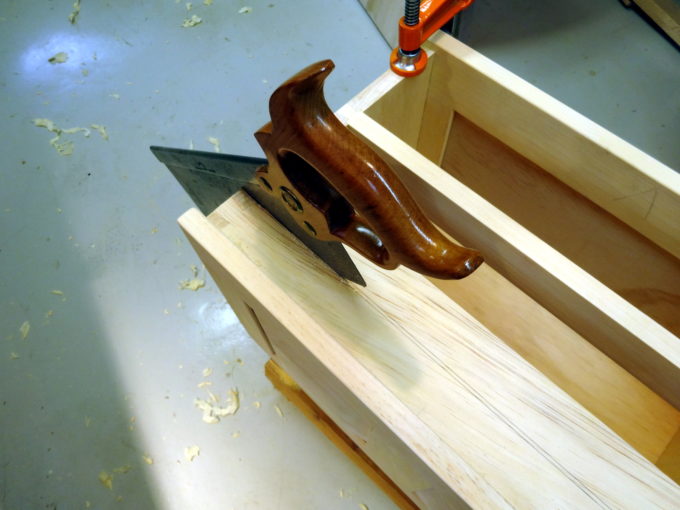
After the glue set, the lid is freed from the rest of the chest by sawing all around. The task looks scary, but was frighteningly easy. ( I had just sharpened that 150 year old Richardson saw. ) A few swipes with the plane cleaned up the kerf marks with minimal loss of material.

photo of cutting the lid

Filed Under: treadle lathe, Woodworking

  • « Go to Previous Page
  • Page 1
  • Interim pages omitted …
  • Page 10
  • Page 11
  • Page 12
  • Page 13
  • Page 14
  • Interim pages omitted …
  • Page 128
  • Go to Next Page »

Primary Sidebar

Footer

Recent Posts

  • New Frame Saw / Scroll Saw
  • Lamppost Sign
  • Goodbye PayPal – Goodbye Bob’s eBooks
  • Anarchist’s Workbench is Done
  • Why we keep offcuts…

Categories

  • About
  • Artwork
  • Boatbuilding
  • Boating
  • bowl carving
  • Boxmaking
  • Clocks
  • Drawings
  • eBook
  • etude
  • Eva Too
  • Eva Won
  • Fiddlehead
  • Fiddlehead model
  • Flying
  • frame saw
  • gilding
  • green woodworking
  • Grinling Gibbons
  • Guns
  • Hand tools
  • Humor
  • kerfing plane
  • Lettercarving
  • Mill Creek 13
  • Model building
  • Power tools
  • Rant
  • resawing
  • scroll saw
  • Shopmade
  • sign painting
  • Stonework
  • Swimming
  • Technology
  • The Wall
  • treadle lathe
  • Uncategorized
  • VSD
  • Woodcarving
  • Woodturning
  • Woodworking
  • workbench

Other stuff

  • About
  • Contact
  • Privacy Policy

Copyright ©2024 · Bob Easton · All Rights Reserved