• Skip to primary navigation
  • Skip to main content
  • Skip to primary sidebar
  • Skip to footer

Bob Easton

Chocolate powered woodworking

  • Home
  • Grinling Gibbons Tour

Bob Easton

Resawn lumber – Work in progress

July 16, 2015 by Bob Easton 4 Comments

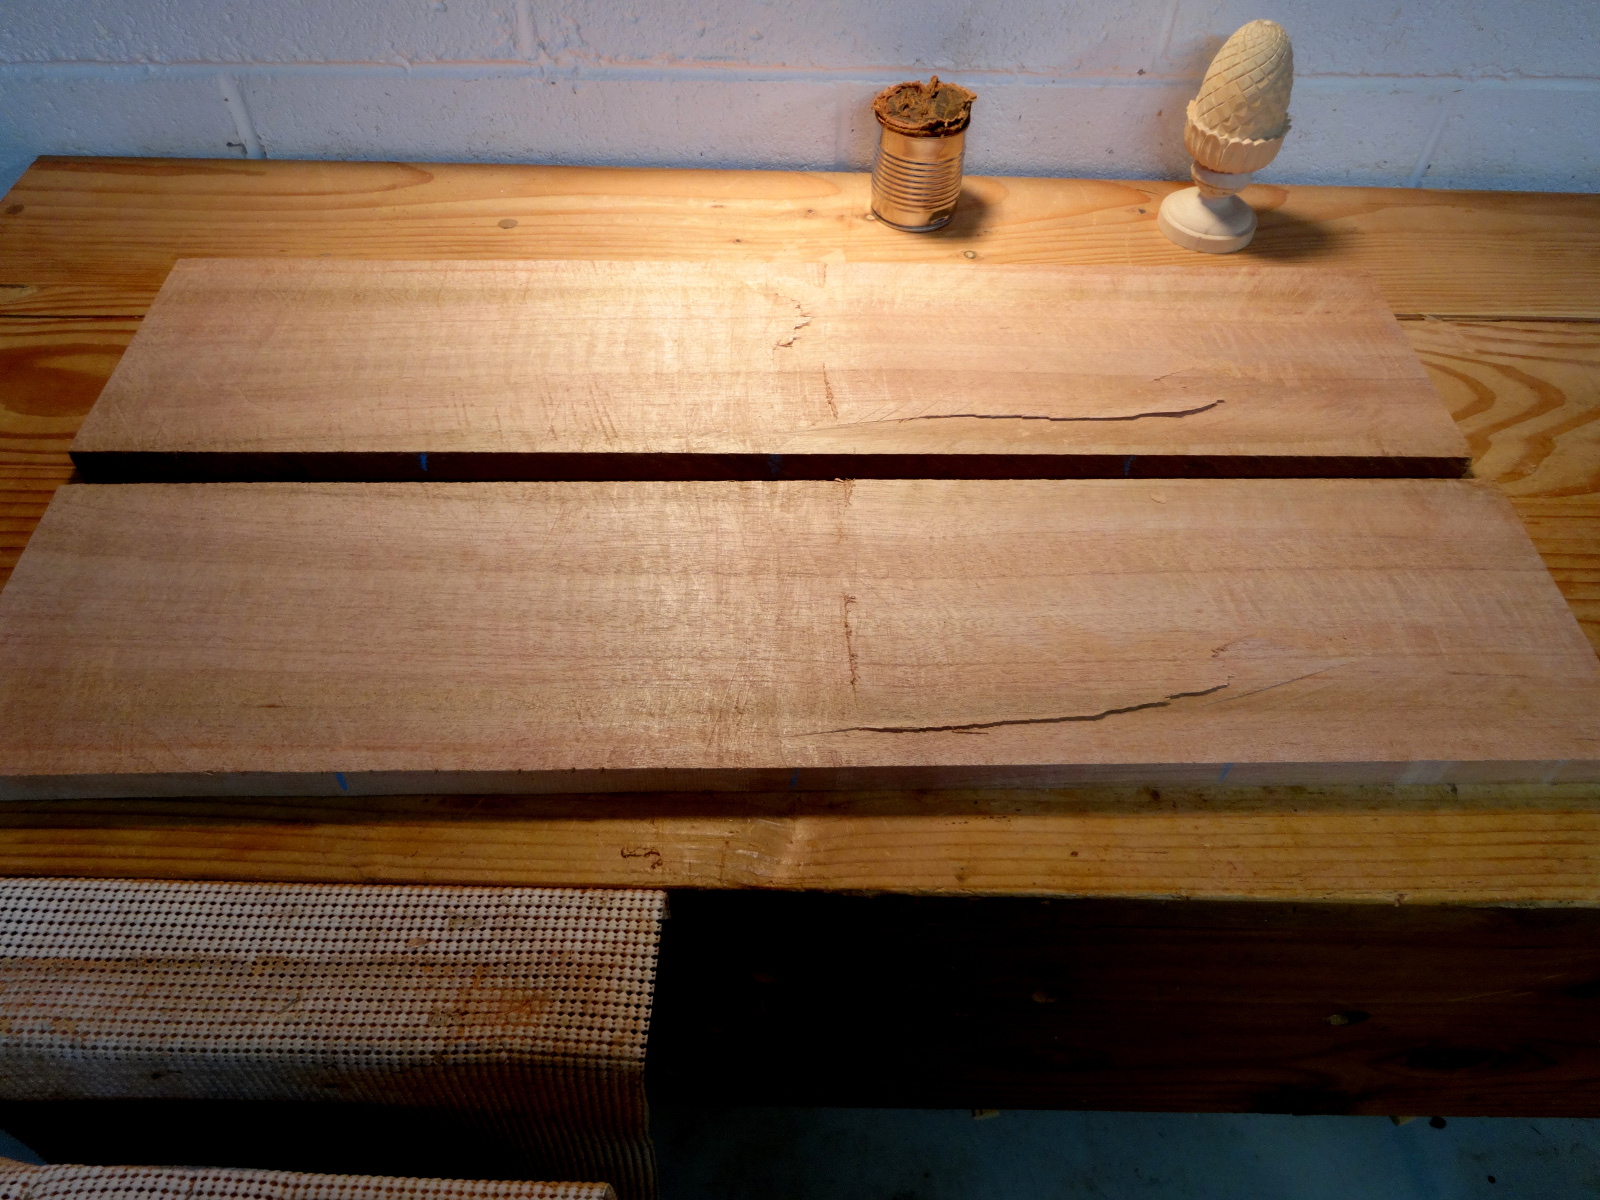
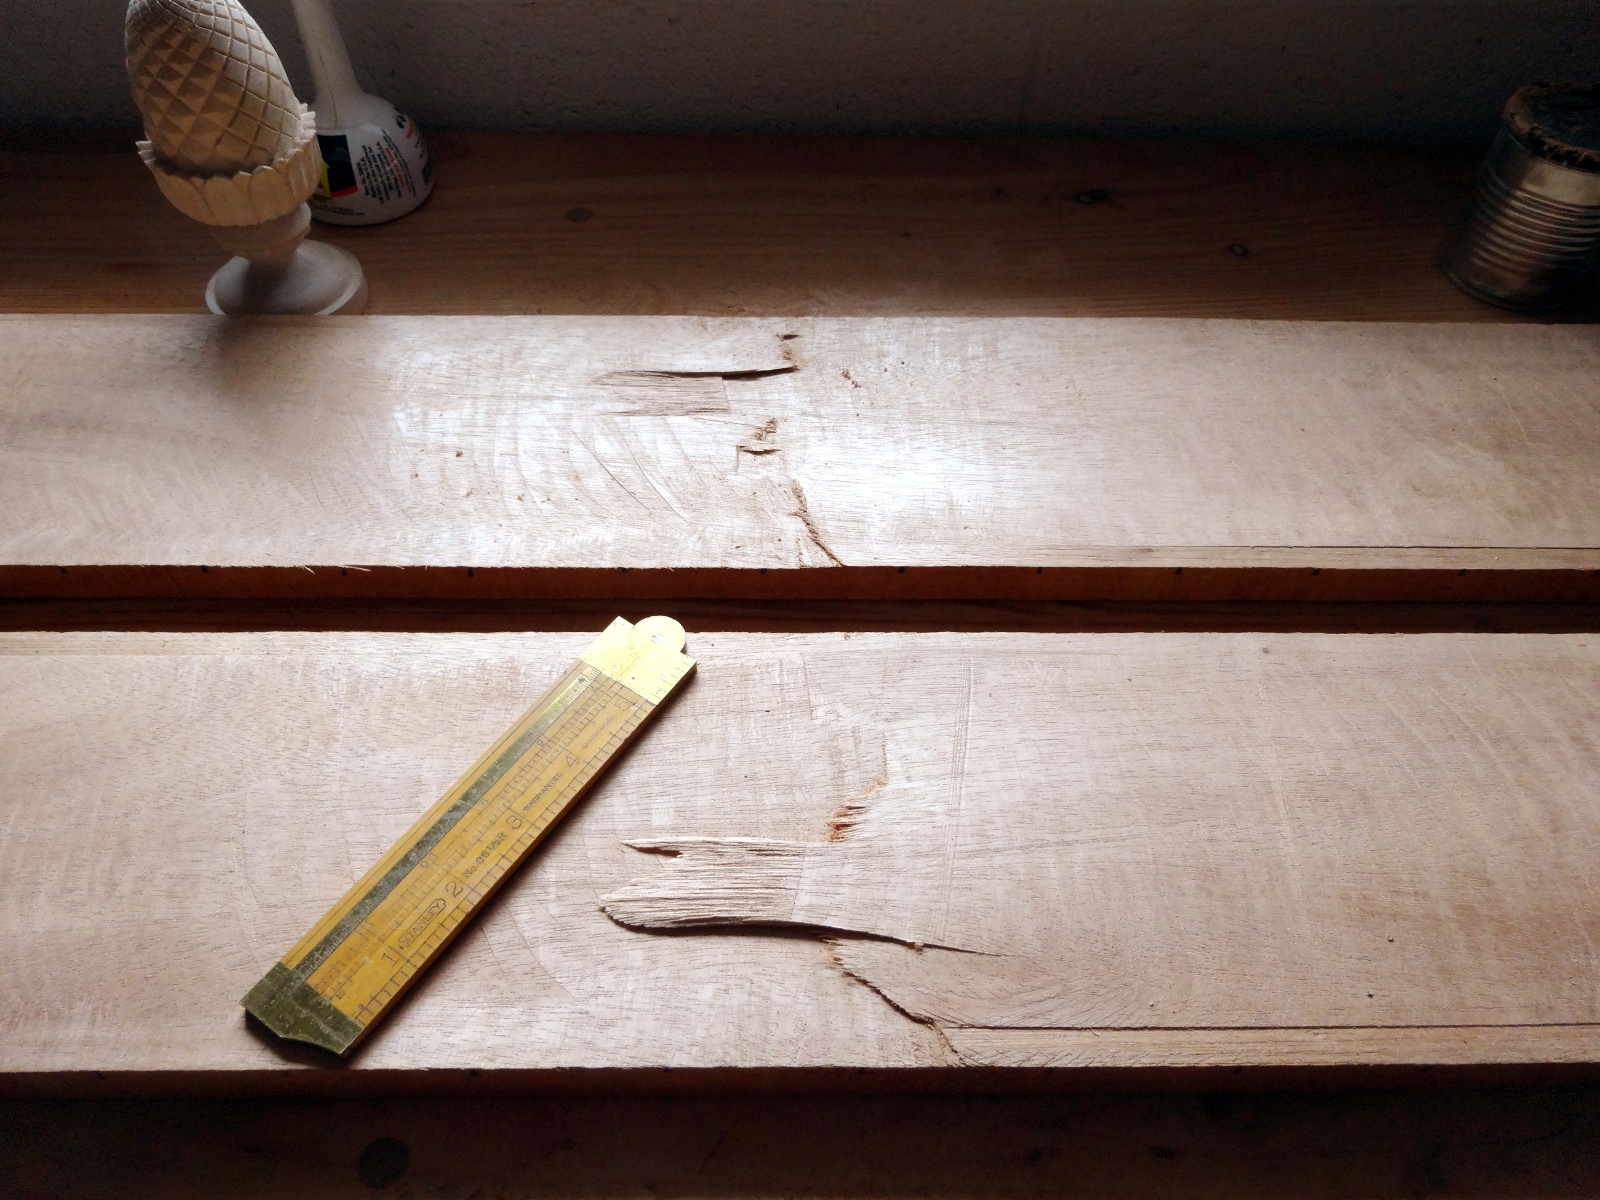
Did you know that mahogany, like Cherry and I’m sure other wood types, darkens when exposed to light? That if you stack up a bunch of pieces and come back to them 2 months later, you’ll find lighter silhouettes of the smaller pieces that were placed atop others?

Yeah, that’s what I get for doing other things… More sunlight will fix them.

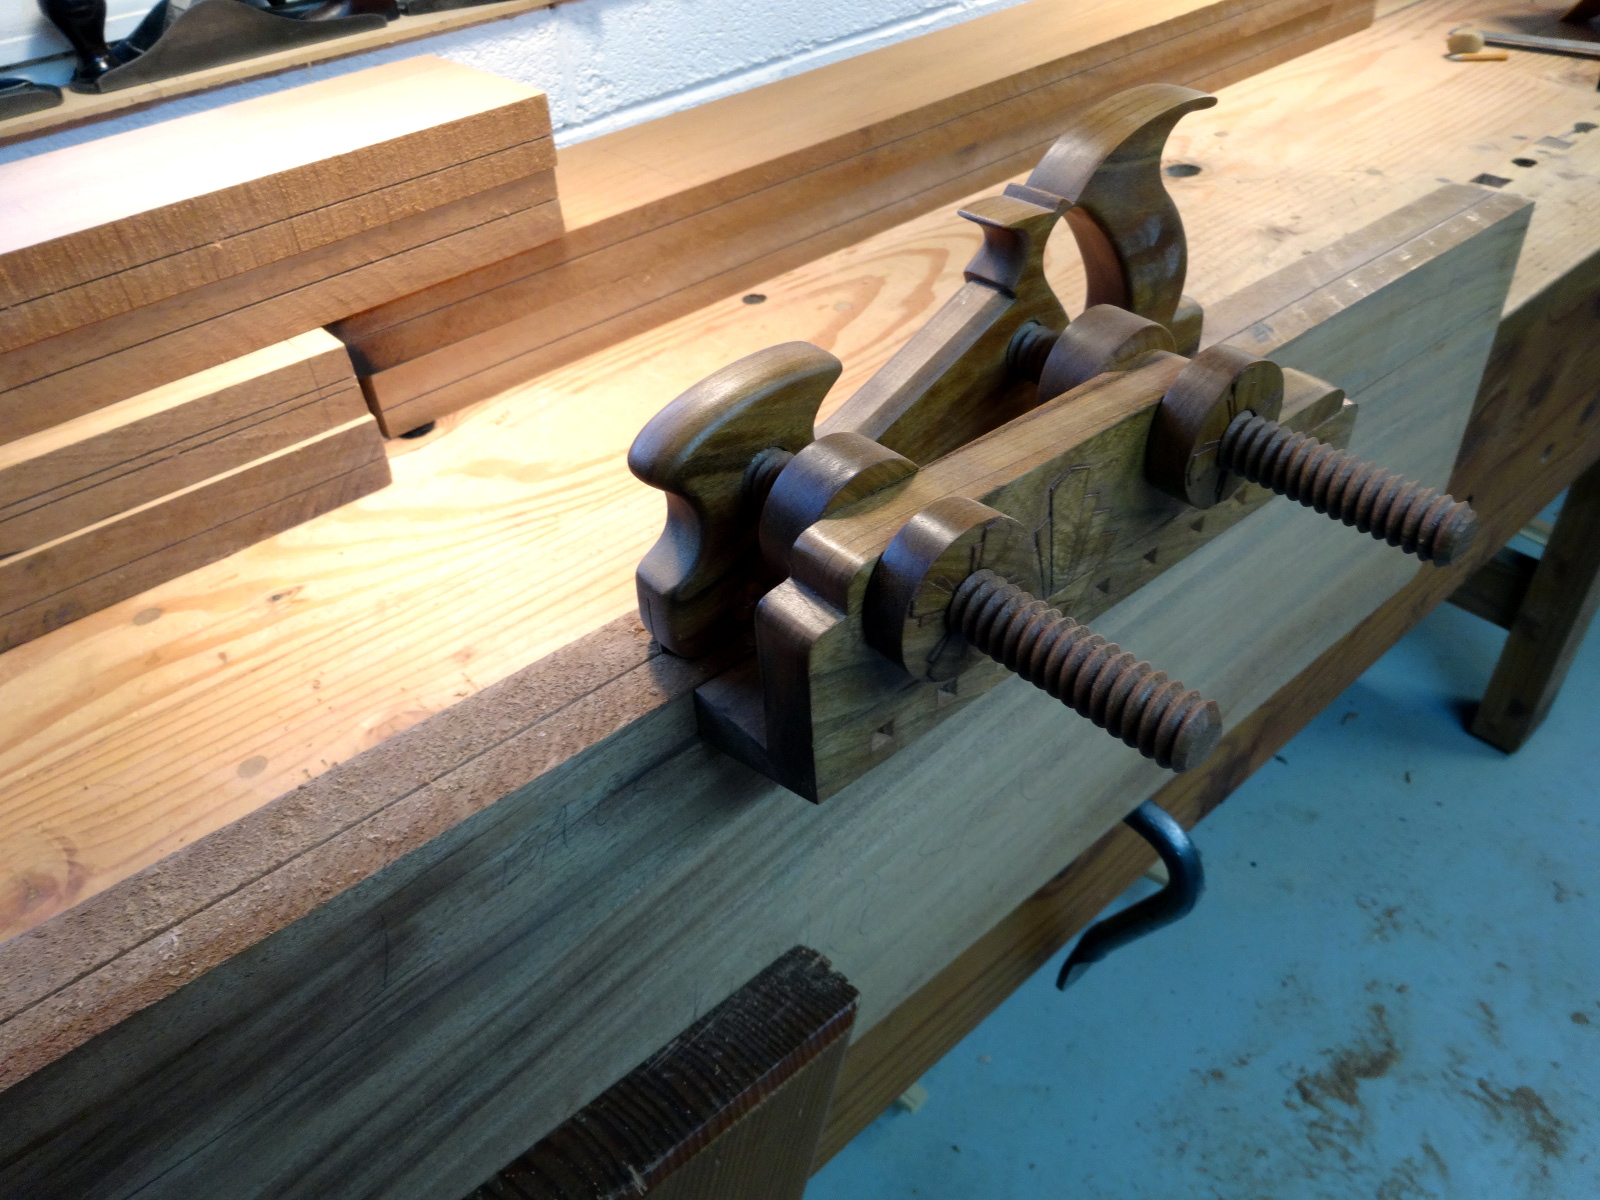
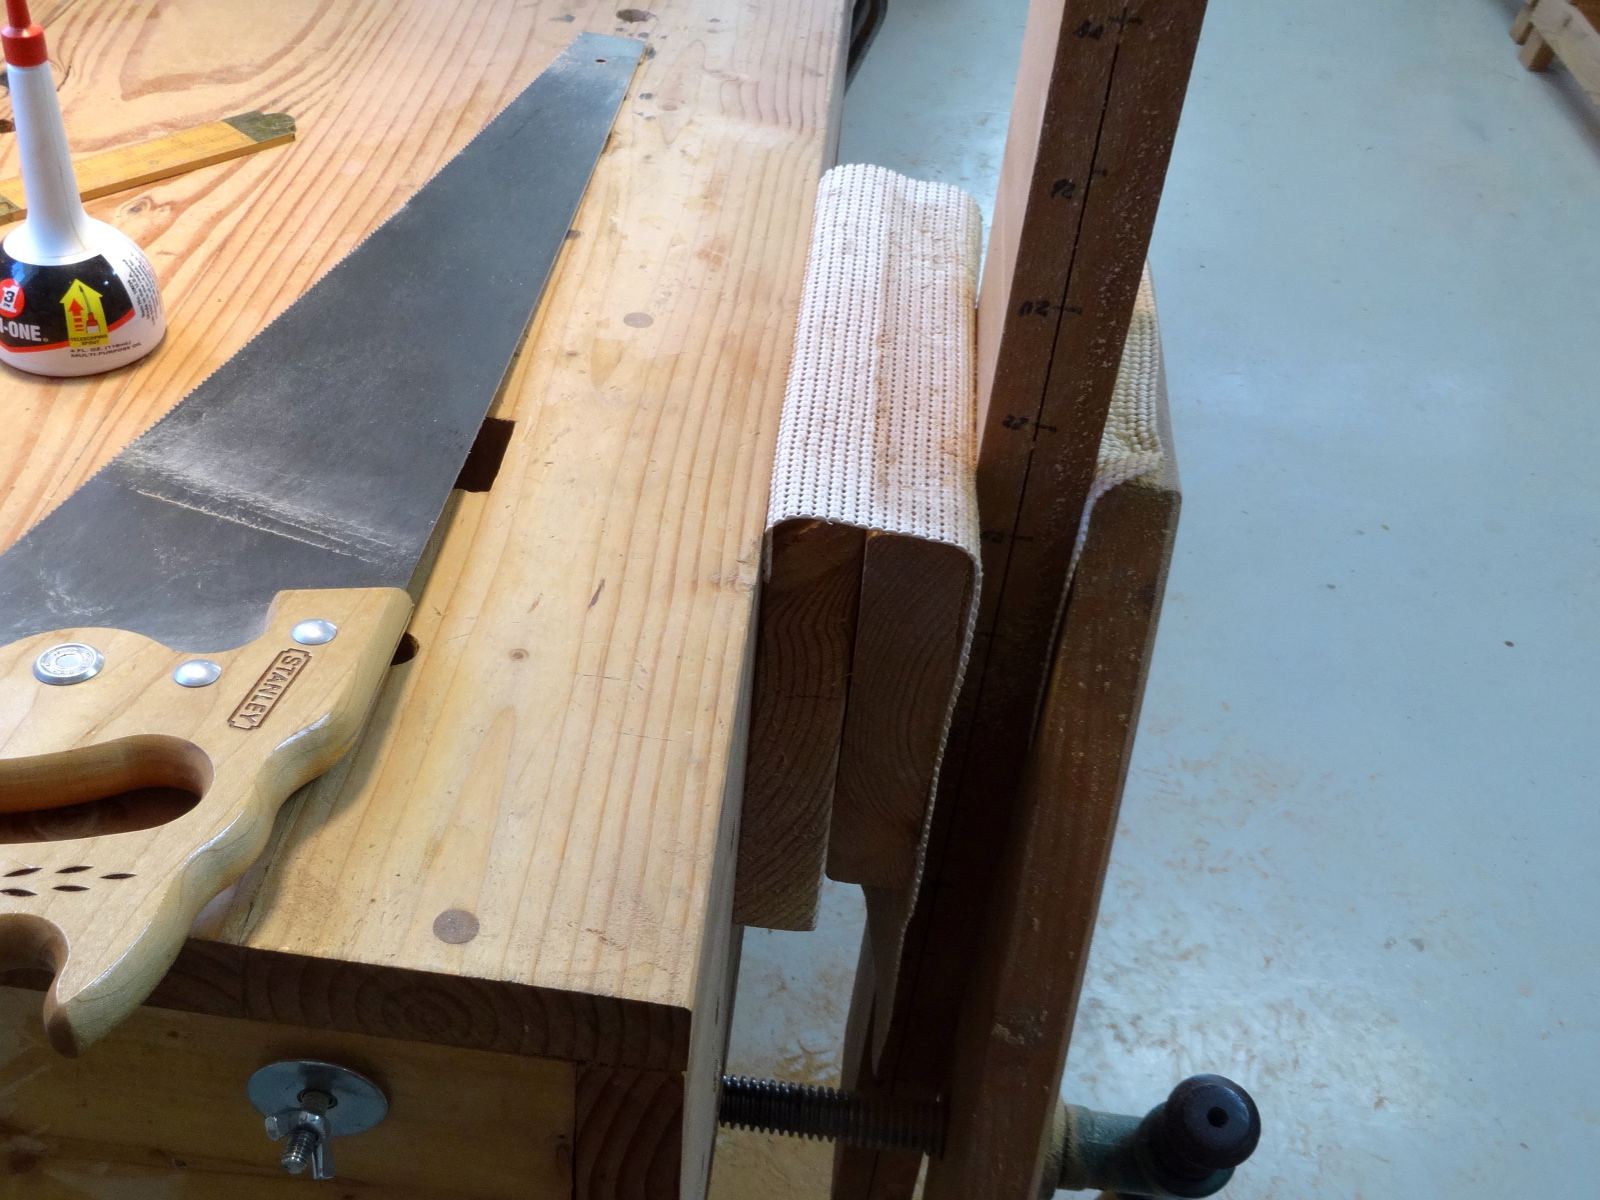
All the parts for the project were cut, shaped, and had their surfaces smoothed long ago. I deferred assembly of this “you can do it in a weekend” project until the carvings were done. Now, what’s my excuse?

photo of project parts - carved with tudor roses

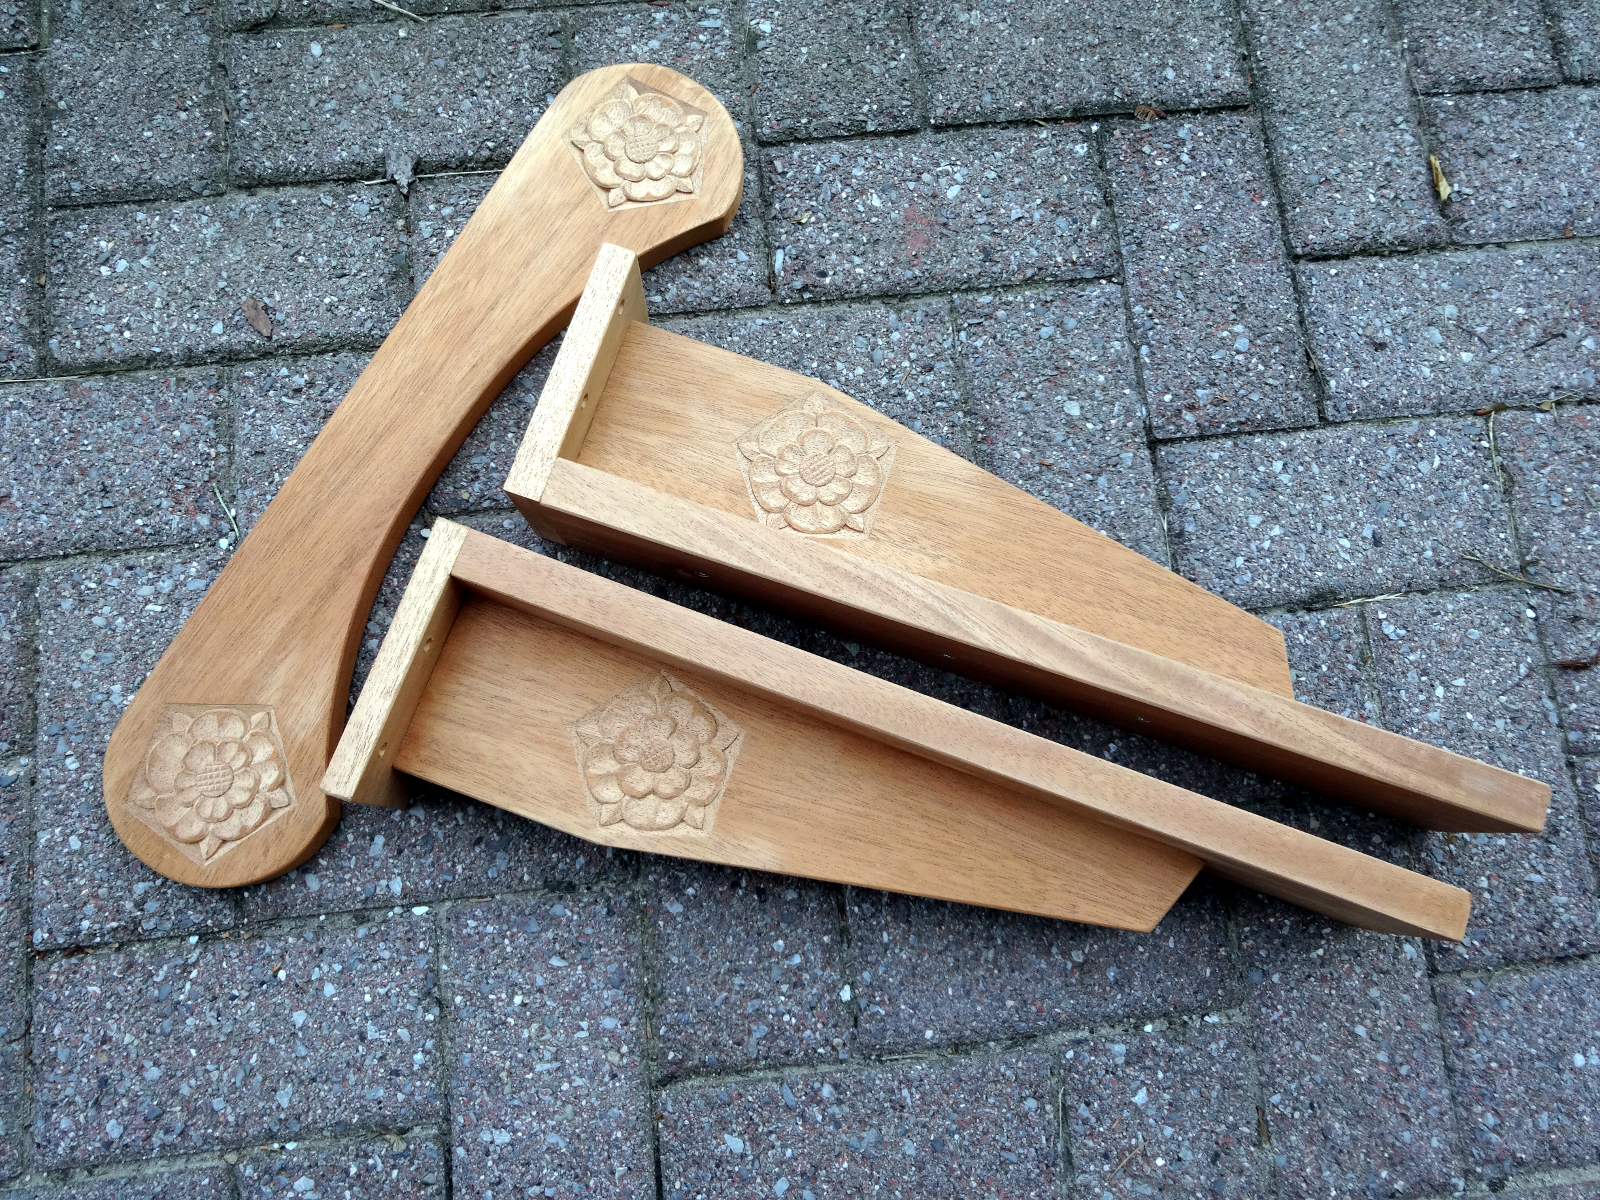
The carvings are Tudor Roses. Mary May has a lesson that shows how to carve them.

Filed Under: frame saw, resawing, Woodcarving, Woodworking

Resawing – Dueling Saws

April 8, 2015 by Bob Easton Leave a Comment

This was a purposeful test: Two choices to learn from.

a comparison of 2 cuts

When starting this batch of resawing (mahogany for an Adirondack chair), I reasoned that using the plain ole rip saw would be OK because it was lighter and easier to handle than the 24″ frame saw. At one point I did show the frame saw to a cut in process but quit because the frame saw had decidedly stronger set and I didn’t want to resaw a resawing cut. Then, along came comments from others about frame saws. So, out it came for the second half of a board.

The saws:

The plain saw is a Stanley rip saw of 1970’s vintage, 26″ long, filed at 5 ppi, sharpened just before starting this recent work. Plate thickness is 0.034 inch. Weight: 1 and 1/2 pounds.

The frame saw is one I built from a Disston 1897 saw cut down to 24″ It is filed 4 ppi and I’m not sure when last sharpened. It has an identical plate thickness of 0.034 inch, and something like 50% more set than the plain saw. (I remembered it as 5 ppi, but it really measures 4 ppi.) Weight: 5 pounds.

The lumber for this comparison is an 8/4 piece of mahogany, 7 and 1/4 inches wide and 32 inches long. The resawing line is right down the middle of its thickness.

shallow angle cut - bad idea

I sawed the first half with the plain saw (marked with blue chalk in one of the pictures). I added something different to the routine … cutting in from the end at a shallow angle. It was not easy cutting from that direction and I broke the “manhandling” rule. Bad idea! I knew from the feel of the saw that the cut had gone a little wrong, but couldn’t see inside to know how it had gone wrong.

When it came time to cut from the other end, I switched to the frame saw. I kept to the routine prescribed in the previous post, without the shallow cut from the end: the saw didn’t fit well in that position.

The difference is remarkable! While heavier, the weight of the saw makes a bigger difference than I imagined it would. The combination of its weight and slightly stronger set made for both smoother sawing and faster sawing. It was almost twice as fast as the plain saw! Better yet, it has far less tendency to wander. The blade, being held taut from both ends has much less opportunity to go its own way.

my 24 inch frame saw

More points to add to the learning:

  1. ALWAYS resaw with the frame saw, no matter what the size of the workpiece. Don’t be tempted to say, “Aw, it’s small, the hand saw will do.” Use the frame saw EVERY time. Even though heavier, the weight of the frame saw is an advantage and the blade under tension significantly adds to accuracy.
  2. Avoid the shallow, oblique, cut that has too little guidance and too easily goes astray.
  3. Oh yeah, don’t manhandle it!

Filed Under: frame saw, resawing, Woodworking

Resawing again – Problems and Solutions

April 6, 2015 by Bob Easton 22 Comments

Learning to resaw well has been a long journey. With all the resawing I’ve done, I’ve found it’s very easy to end up with something like this: a dished out area in one board and an matching hump on the other board. That kind of result is rather minor on small boards, or with stock where there’s ample room for error. But as board sizes increase, so do the probabilities and the scale of the mishaps. How do these things happen and how can they be avoided? I picked up some useful suggestions at the School of Hard Knocks.

photo of dished cut

Long ago, I built  a couple of wonderful small boats. For one of those boats, I made a frame saw and resawed a LOT of cedar into very long planks. (4/4 live edge white cedar, up to 10.5 inches wide and 16 feet long). Minor mishaps there were no problem because the raw boards had more than enough material to produce two 5/16 inch thick boards.  More recently, I’ve resawn cherry and walnut, but on a much smaller scale for desk boxes. Smaller pieces mean less opportunity to go astray.

Now, I’m working on something larger than desk boxes and smaller than boats. My lumber for this project is 8/4 African mahogany that varies from 6 inches wide to 10 inches wide. I bought this lumber from Steve Wall Lumber in Mayodan, NC. They have 20 board foot bundles that are packaged for delivery by FedEx. I bought two bundles and am delighted with what Wall Lumber delivers. Both bundles contained clear lumber, S2S, in generous widths, and easily 20 bd. ft. No end checks, splits, knots or other defects. None! The only one complaining is the FedEx delivery guy who carries the 62 pound packages up our steep driveway. (Takes too much time to get out the hand cart.)

setting a kerf

The project calls for boards 1 inch thick and 3/4 inch thick. With careful resawing, I can get one of each out of an 8/4 board. OK, scant 1 inch and scant 3/4 inch That’s plenty sturdy enough for a project that is not super critical about board thickness. Scant thicknesses will work. But, there’s not much margin for error. Which also means, no room for going astray. However, the boards are long, up to 4 feet, giving yet more opportunity to go astray.

OK. What goes wrong? What causes the problems? In a single word: inaccuracy. BTW, I used my kerfing plane to establish a 1/2 inch deep kerf around all edges of these boards. That kerf is a lot better at guiding the saw than is a pencil line.

Problems

Inaccuracy in resawing can come from a lot of things:

  1. Sawing too long from one position.
  2. Guiding the saw instead of letting the kerf guide the saw.
  3. Being too aggressive with the saw — “manhandling.”
  4. Impatience.

No matter what the cause, here’s what happens. Resawing is always done a little from one side, then a little from the other. Switching back and forth frequently eliminates irregularities before they become bothersome. Imagine the cut becoming off by a mere fraction in one direction or the other. Sawing too long from one side lets the problem grow. Then, when you move to the other side, the saw will take the path of least resistance, through that inaccurate kerf. This results in the saw bowing within the cut, creating a dish on one side of the cut. The longer the sawing goes with a bowed path, the deeper the dish gets. Since you can’t see inside the board, the only external awareness you have about this happening is increased friction. It sneaks up slowly, and if you’re manhandling the saw, or holding it with a death grip, you won’t notice the increased friction until it’s too late.

Once a bowed path gets established inside the board it is almost impossible to correct. So, don’t let it get started.

Frequent direction changes are the most important factor for success. Aligning yourself to the work is equally important. As an aside, unlike the boat lumber that I did with a frame saw, I’m cutting this lumber with a common rip saw. Nicely sharpened, but nothing special. It is lighter than the frame saw and has a broader blade that (one hopes) helps keep it moving straight. No matter which saw, the body and saw both have to line up precisely with the cut line.

Stance: I face the work with my shoulders square to the work piece, so that both arms can move as one. I spread my feet about a shoulder’s width distance apart, but position them in a line with the cut. I’m right handed, and place the left foot forward, with the toe exactly in line with the cut. The right foot is back. Why? So I can use the bigger leg muscles to power the work. Using the legs to rock back and forth is far less tiring than just the arms alone, and leads to better accuracy. In fact, when properly lined up, one could pin their elbows to their side and let the legs do all the work.

BIG problem source: Maintaining this stance from both sides of the cut is essential. Not keeping this stance on both sides of the cut was the biggest cause of my problems for a long time. There’s plenty of room to take this stance from the end of the bench. But walk around to the other side of the board and the bench is in the way. Modifying the stance to accommodate simply didn’t work.  So, that meant turning the work piece so I could always work from the end of the bench. Open the vise, turn, close the vise, saw, open the vise, turn, close the vise, saw. Yeah, it was too much trouble to turn the board as often as I should have. Instead of turning, I was spending too much time sawing from one side.

added blocks

Often, way too much from one side. Very slight wanderings were not being quickly corrected from the other side. They added up… until…

Fix: I solved that problem by adding blocks to offset the work piece from the bench. I started with one 2-by and added a second one later. (They have pegs fitted into holes in the face of the bench so they can easily be added to the vise space.) Bingo!!! That provided enough space to maintain the correct stance from either side of the board. No more need for turning the work piece. It stays in the vise and gets approached equally well from both sides. Now, it’s much easier to change directions frequently, as frequently as 25-30 saw strokes at a time. The only need to open the vise now is to raise the work piece as the cut progresses.

holding the saw

Holding the saw: How to hold the saw is almost as important as stance. The operative word is “loose!” I hold the saw loosely enough that only the webs of my thumbs push forward and the inner parts of my fingers pull back. The saw handle is free to move within my grip. Why? That method provides the least “guidance” to the saw. It let’s those kerfs do their work. Holding the saw too tightly leads one to “manhandling” the saw and diverting it’s path. Holding the saw loosely also makes it easier to feel friction increasing, to know about an oncoming bowed path before it’s too late. Over time, I’ve found a comfortable grip with only 2 fingers of each hand in the handle’s hole. Index fingers and pinkie fingers point toward the blade: same on each side. It is a grip that is very balanced, one that prevents favoring one side over the other and keeps the blade nicely centered in the kerf.

Changing directions: Cutting in “sets” of about 30 strokes from one side and then a set of about 30 from the other side has given me the most accuracy.

Cutting angles: I’ve tried many different approaches. The “cut toward the center from all corners” approach works well for pieces that are almost square. For long pieces, I cut with the saw’s tooth line running at 90° across the board … mostly. The majority of the strokes are straight across the board. But for 10 strokes of each “set,” I drop the handle stroke by stroke until the tooth line is at 45°, then another 10 to 12 at 30°. This deepens the kerf line gradually and accurately.

Keep the cut line high: By keeping the cut line about chest high, the arms are less inclined to do the hard work, and thereby less likely to push the cut astray. Keeping the cut high almost forces using the legs, and when done this way the arms can be kept even and the saw centered on the kerf more easily.

oil-can

Oil the saw: That’s a small tomato sauce can with a cloth rolled up inside it. It’s soaked with light synthetic oil (3-in-one). A couple of quick swipes on each side of the saw after every few direction changes keeps the saw smoothly gliding along.

Take a break: Sawing too long makes one tired. Tiredness leads to impatience. Impatience leads to manhandling. … and so on. Sawing for the length of an Oscar Peterson album, a Travis Tritt album, or a Beethoven piano concerto is about right. Then, take a break and come back refreshed.

…and what to do when it goes wrong? The easiest answer is to stop as soon as you detect the bowing and go saw from the other end of the board. ~carefully~ You’ll have to saw from the other end at some point anyway. Make it good.

Solutions

  1. Make sure your heart is healthy enough for resawing.
  2. Work all the way around the board with a kerfing saw.
  3. Mount the board in a vise in the manner that enables the same stance from both sides of the cut.
  4. Develop and maintain the same stance from both sides of the cut.
  5. Hold the saw loosely enough to allow the kerf to guide the saw, not your arms guiding the saw.
  6. Switch directions frequently. Work in small “sets:” 10 straight across strokes. followed by 10 strokes of increasing angle (about 45°), then 10 strokes at a more acute angle (about 30°).
  7. Let the kerfs guide the saw, not your arms.
  8. Switch directions frequently. (90°, 45°, 30°)
  9. Let the kerfs guide the saw, not your arms.
  10. Switch directions frequently.
  11. Raise the work piece in the vise often enough to keep the cut line about chest high.
  12. Oil the saw every few changes of direction.
  13. Take a break BEFORE you get tired, grumpy, or impatient.
  14. Switch directions frequently.
  15. For resawing that lasts longer than 4 hours, seek immediate medical advice.

Most of all, relax and enjoy!

Filed Under: frame saw, kerfing plane, resawing, Woodworking, workbench

  • « Go to Previous Page
  • Page 1
  • Interim pages omitted …
  • Page 26
  • Page 27
  • Page 28
  • Page 29
  • Page 30
  • Interim pages omitted …
  • Page 128
  • Go to Next Page »

Primary Sidebar

Footer

Recent Posts

  • New Frame Saw / Scroll Saw
  • Lamppost Sign
  • Goodbye PayPal – Goodbye Bob’s eBooks
  • Anarchist’s Workbench is Done
  • Why we keep offcuts…

Categories

  • About
  • Artwork
  • Boatbuilding
  • Boating
  • bowl carving
  • Boxmaking
  • Clocks
  • Drawings
  • eBook
  • etude
  • Eva Too
  • Eva Won
  • Fiddlehead
  • Fiddlehead model
  • Flying
  • frame saw
  • gilding
  • green woodworking
  • Grinling Gibbons
  • Guns
  • Hand tools
  • Humor
  • kerfing plane
  • Lettercarving
  • Mill Creek 13
  • Model building
  • Power tools
  • Rant
  • resawing
  • scroll saw
  • Shopmade
  • sign painting
  • Stonework
  • Swimming
  • Technology
  • The Wall
  • treadle lathe
  • Uncategorized
  • VSD
  • Woodcarving
  • Woodturning
  • Woodworking
  • workbench

Other stuff

  • About
  • Contact
  • Privacy Policy

Copyright ©2024 · Bob Easton · All Rights Reserved