• Skip to primary navigation
  • Skip to main content
  • Skip to primary sidebar
  • Skip to footer

Bob Easton

Chocolate powered woodworking

  • Home
  • Grinling Gibbons Tour

Bob Easton

Give Me an “E” Please

June 19, 2011 by Bob Easton Leave a Comment

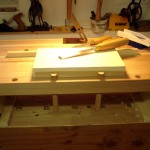
photo of the bench top bench holding a practice blockThat Bench on Bench was built with good reason. Here’s the start of a new journey: lettercarving.

Hand carved lettercarving. Not machine carved. Not routed.

Signs are such a pervasive part of our everyday existence that we rarely think of how they are made. Most, these days, are computer generated in some way and produced through a variety of automation. Early in Dad’s art career he painted signs: shop window signs, store front signs, signs on trucks, gold leaf signs on bank windows (there’s a lock picking story with one of those banks), signs in every imaginable form. All were hand lettered, with letters of all styles flowing magically off long bristled brushes. There was a certain period when the Interstate Commerce Commission required great long strings of registration numbers be painted on the door of every commercial vehicle. While we detest government regulation, that one found Dad frequently lettering trucks and put a lot of food on our table.  About the time that adhesive, die-cut, plastic lettering came along those regulations eased and reduced the need for hundreds of numbers on every truck door. Long stories short, I have an affinity for hand lettering.

Once in a rare while we come upon a sign with three dimensional characters, and on close inspection usually find that it was power routed. Then, far more rarely we find hand carved work from Kari or maybe Chris Pye.
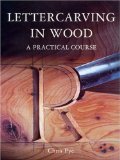
photo ob book coverChris “wrote the book” about hand lettercarving a dozen years ago. It’s out of stock every place I looked in the U.S., and the world’s largest bookseller needed only 3 months to fetch me a copy from the British publisher.

The book is excellent and I’m slowly working my way through it. One thing is certain. There’s not much forgiveness in lettering, especially incised lettering … where the letters are carved into the wood. I’ve been doing lots of incised practice.

Taking a break from practicing incised letter trenches, hundreds and hundreds of them, I did my first raised / relief carving.

About 40 years ago, my wfe swished a paint brush around for 2 seconds to produce this character, a stylized “E” that we have used since. It made a good subject for my first raised letter.
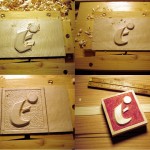
photo collage showing 4 stepsThe first cuts were with a 60 degree v-tool, an Ashley Isles tool at it’s original grind. It works very well but has a higher cutting angle than I prefer. I just haven’t screwed up the courage to change it. … and forgot to take a picture just after the outlining.

Next, everything that is not part of the letter is the ground, and the ground is lowered, using #9 and #6 gouges, about 3/32 of an inch. Then it is leveled with a wide #3 gouge.

“Setting in” started up there around the ball. Setting in is the tedious part, the work of carefully setting the edge bevel exactly where it belongs. It needed quite a range of gouges and some very careful trimming with a fishtail chisel that also doubles as a surgery scalpel.

Then, the ground was fine tuned. Grounding in the small space was a challenge. Some of my smaller palm tools helped there.

After that, I stopped and made a simple “froster” by filing spurs into the end of a carriage bolt. You can see the end of it in the lower left photo.

The froster is to texture the background. The first stage is a quick outline with the v-tool. Next, tap the froster all around the edges of the letter, right at the base of the bevels. Then, the rest of the ground is done by keeping the froster suspended about 1/8 inch off the ground and moving it all around while tapping with a hammer. (and trying not to let it get onto the edge framing)

Then, a single coat of clear satin was applied to seal the bevel edges. That was followed by a 320 grit sanding of the letter face and a red acrylic wash on the ground, and trimming to final size.
Filed Under: Lettercarving

Bob Builds a BOB

May 30, 2011 by Bob Easton 4 Comments

“Bob” is an easy to remember name that’s spelled the same way coming and going. (Mama knew I’d need that.)

BOB can also mean Bench On Bench. There have been a lot of those featured on various blogs lately. We build great workbenches at low heights that are comfortable for planing, but not a lot of other work, then build Bench On Bench accessories to raise the work surface.

Some forms of relief carving have caught my interest and fueled some new ideas. For that work, I certainly need a BOB and the Steve Branam’s version recently caught my attention. While I’m not a furniture builder, don’t need to hold large panels vertically, and will never seek dovetail proficiency, his BOB does promise a good raised work surface and some great work holding possibilities. Steve did a wonderful job with his step-by step description. Follow his lead if you want lots of detail. THANKS Steve!

Here, I note a few differences in both materials and technique, and yet another kind of work holding.

  • Steve used nice clear poplar. I used semi-beautiful construction lumber, with the most attractive knots oriented to the bottom side of the bench top. The “butcher-block” laminated top lets one make a thicker top while giving a good bit of choice in hiding small knots. Saw around the big knots and let them drop to the floor.
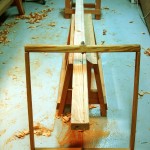
  • photo of frame saw, saw benches, and a long boardMy shopmade frame saw made ripping a job that didn’t require knee pads.
  • No mid-rip jointing for me. Those ripped edges become the top and bottom surfaces, and I deferred planing them until the top was completely together. Saved wear and tear on the bandanna.
  • Instead of veneer press screws, I substituted Joel Moskowitz’s excellent bench screws. The very nice thing about these screws is that the handles can be repositioned once tightened. This avoids the problem of having the handle sticking up in the way of putting chisels to the workpiece. Pull the spring loaded handle out from the screw and rotate it to a more convenient position. Very slick. THANKS Joel. They were easier to fit too; a square nut falls into a simple square mortise.
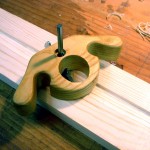
  • photo of a router plane in a grooveMy I-beams are solid wood, some sort of splintery pine from the on-hand lumber pile, instead of plywood. The dadoes in these offers a tooling problem. What kind of boat building shop is it that doesn’t have a nice narrow rabbet plane? Oh well, I cleared the bottoms of the dadoes with my shopmade router plane.
  • The top was laminated in three sections, for reasons we’ll see in a moment. I attached it to the beams before planing the top surface … once again deferring the work that requires a bandanna. Long ago, an oral surgeon charged with removing my 4 wisdom teeth (see why I needed the simple name) asked, “One at a time (4 different sessions and 4 different times for a sore mouth) or all at once?” I chose all at once.
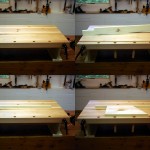
  • A series of 4 photos showing how to use the floating stop.A BIG THANKS to Bob Bob Rozaieski at The Logan Cabinet Shoppe for his recent post: The Workbench – 1 Year Later. One part of that post shows a “floating planing stop” that was a game changer for me. My intended use for this bench is for holding flat work on top of the bench. Pinching that work between one of these “floating stops” and a couple of dogs will be very very handy. Anticipating work of two general sizes, I incorporated two of these stops in the bench top. Normally, they rest loosely upon the i-beams. Flip one over, and an edge sticks up. Very neat and very easy. See the picture collage as a demo. [We’ll see how well the construction wood vice jaw holds up. It may need a hardwood replacement.]
  • Lastly, no scrapers were harmed. This is construction lumber and there’s NO way we’ll get it to look like Donald Trump’s boardroom conference table. Nor, did I use any Avocado (ooops, “Aged Olive”) paint.

The completed bench measures 29″ wide, by 19″ deep and a little over 8″ high. It is tall enough to use the excellent Gramercy holdfasts, and the space between vice screws is just over 24″ (wide enough for holding cabinetry panels – just in case).

Filed Under: Shopmade, Woodcarving, workbench

Whittle Gnome

May 7, 2011 by Bob Easton 1 Comment

“Out of the mouths of babes…”

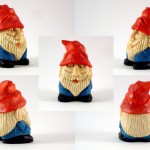
photo of whittle gnome carving

Leave it to the youngest of our grandchildren (let’ call him little “Georgie”), to explain to everyone else about last year’s Christmas ornaments: “Grandpa hasn’t learned to carve eyes yet.”

Yep! Got me!

So, when I decided to mimic the “Whittle Dwarfs” carved by Don Stephenson and featured on Don Mertz’s “WoodBeeCarver” site, I added eyes. It’s a cute little gnome, just under 2 inches tall. … and it has eyes!

Filed Under: Woodcarving

  • « Go to Previous Page
  • Page 1
  • Interim pages omitted …
  • Page 62
  • Page 63
  • Page 64
  • Page 65
  • Page 66
  • Interim pages omitted …
  • Page 128
  • Go to Next Page »

Primary Sidebar

Footer

Recent Posts

  • New Frame Saw / Scroll Saw
  • Lamppost Sign
  • Goodbye PayPal – Goodbye Bob’s eBooks
  • Anarchist’s Workbench is Done
  • Why we keep offcuts…

Categories

  • About
  • Artwork
  • Boatbuilding
  • Boating
  • bowl carving
  • Boxmaking
  • Clocks
  • Drawings
  • eBook
  • etude
  • Eva Too
  • Eva Won
  • Fiddlehead
  • Fiddlehead model
  • Flying
  • frame saw
  • gilding
  • green woodworking
  • Grinling Gibbons
  • Guns
  • Hand tools
  • Humor
  • kerfing plane
  • Lettercarving
  • Mill Creek 13
  • Model building
  • Power tools
  • Rant
  • resawing
  • scroll saw
  • Shopmade
  • sign painting
  • Stonework
  • Swimming
  • Technology
  • The Wall
  • treadle lathe
  • Uncategorized
  • VSD
  • Woodcarving
  • Woodturning
  • Woodworking
  • workbench

Other stuff

  • About
  • Contact
  • Privacy Policy

Copyright ©2024 · Bob Easton · All Rights Reserved