• Skip to primary navigation
  • Skip to main content
  • Skip to primary sidebar
  • Skip to footer

Bob Easton

Chocolate powered woodworking

  • Home
  • Grinling Gibbons Tour

Boatbuilding

Resawing Boat Lumber

December 15, 2008 by Bob Easton Leave a Comment

harry-strasil-avatar
Harry’s self portrait

My question about resawing very long lumber was answered some time ago on the Sawmill Creek Forums with a very fine suggestion by Harry Strasil. He offered good suggestions about using a saw table and stool for holding the work, and described very precisely how to build a frame saw tuned for the job . One of his other entries has a couple of pictures of using such saws and benches.

As shown in my previous entry, I built a frame saw somewhat similar to what Harry described. I varied from his suggestion by using a purchased blade instead of cutting down an old rip saw.  As an aside, I recently acquired an old Disston D-8 rip saw from fleabay. The blade had undergone enough pitting that the engraving has almost completely disappeared, so I can’t date it from the engraving. At some point there was a chemical restoration that stopped the rusting and left the blade in pretty good shape. The saw nut with the Disston medallion dates between 1896 and 1917. That saw cuts so well that I decided to keep it for ripping rather than cut it down as Harry suggested.

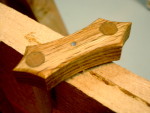
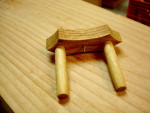
center marking tool center marking gauge

Along the way, I took a short diversion to make a marking gauge. The usual marking gauge is used to mark a prescribed distance from an edge. For this work, the task is to mark the center line along the board’s edges. The tool doesn’t need to be very refined. Rough sawn cedar flitches are far from smooth, so anything that will rumble along those rough surfaces is fine. It’s a simple self-centering gauge made of two pieces of birch dowel, a scrap of oak, and a bit of six penny nail. It would work okay as a simple rectangular slug, but I like a little more shape, and this shape actually makes it easy to cant the gauge to hug the lumber. The shape is inspired by DaVinci.

Hint for anyone making one of these: If you use an aggressive auger (in a brace) to bore the holes for the pins, it is a very good thing to bore those holes in the oak stock before cutting it to length or making any decorative shapes. Don’t ask how I know.

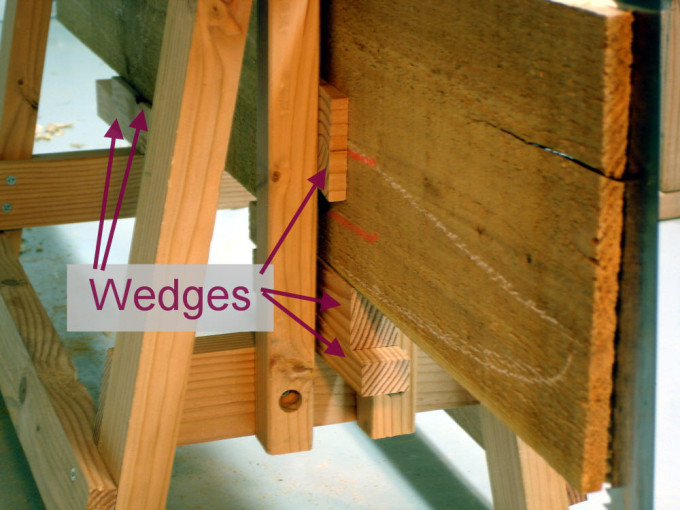
resaw bench

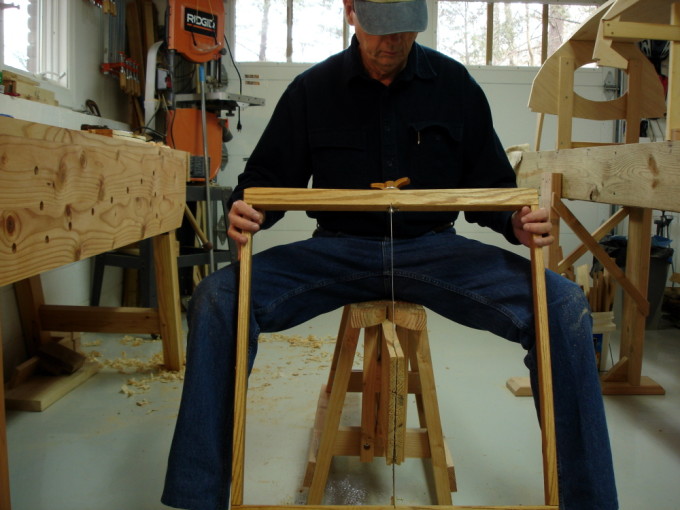
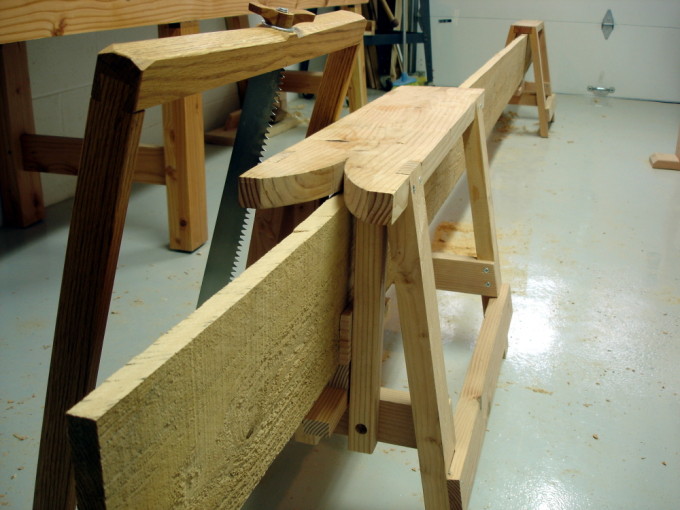
The bigger puzzle was how to hold the workpiece. I have a pair of great saw benches that are exactly the right height. One of them now has a simple modification, two vertical rails added between an end stretcher and the top of the bench. They are mortised into the bottom of the bench top and screw attached to the stretcher. The space between them is about 1 and 1/2 inches. The space from stretcher to bench top is 10 and 1/2 inches. Most any board I want to resaw can be stood on edge within that space. Then, wedges are used to center the board vertically and to push it up against the bench top. The fit snugs up nicely enough to not need any other clamps.  This ended up being a very simple solution which seems to work well. I haven’t yet discovered the saw blade’s optimum attack angle, but will soon. The ergonomics feel right with the saw just wide enough to be evenly guided by knobby knee bones.

resaw with bob

The test piece shown in the first pictures is about four feet long. When I get to resawing a sixteen foot piece, I was expecting that I would need another pair of vertical rails installed on the second saw bench. Not needed. A quick set up finds that a simple pair of wedges on that other bench will be enough. Time to find some good music and get to sawing.
resaw 16 footer

Filed Under: Boatbuilding, Hand tools, Woodworking

New Frame Saw

December 13, 2008 by Bob Easton

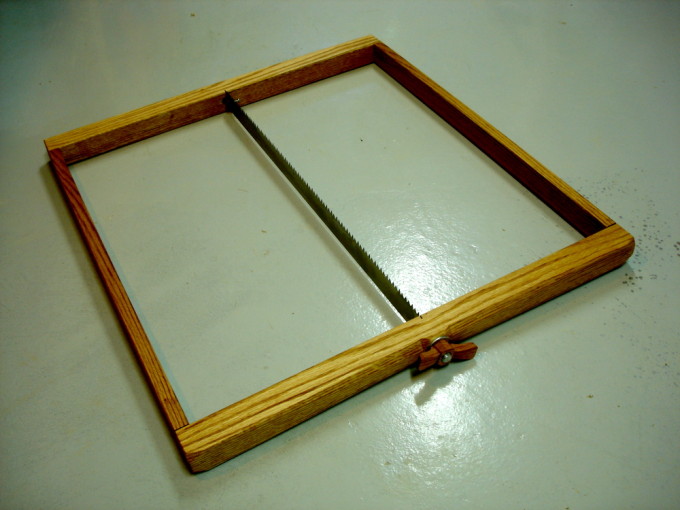
A few new cedar flitches are acclimating themselves to the shop. In the meantime, I’ve been busy preparing a saw that will be used to get planking out of that cedar. This saw’s main work will be resawing, slicing thickness from roughly 4 quarters to pairs of roughly 2 quarters boards. Getting two boards from each flitch is the goal. Most people would use the bandsaw for this job, but mine is good for only 6 inches of resaw capacity, and some of these boards will be from 8 to 10 and 1/2 inches wide. I would rather have a good hand tool method than invest yet more in the band saw.
frame saw

This frame saw derives from Josh Clark’s “Making a Frame Saw” article. I used red oak, 1 and 1/2 inch square, for the stretchers. The arms were gotten from a piece of the same oak, resawn to half thickness. The blade is also 1 and 1/2 inches wide. I found it at Frog Tool Company in Dixon Illinois. See the update at the end of the article.

frame saw

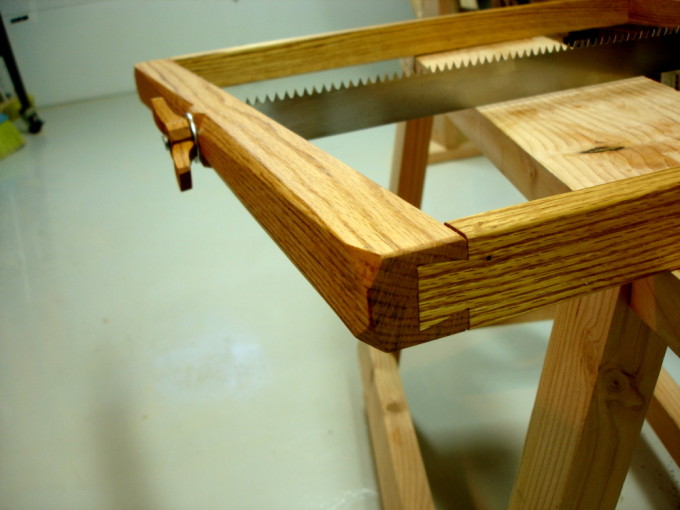
As Josh suggested, I used half-blind dovetail joints. While I’m skeptical that the forces on the saw actually need this kind of joint, I saw it as opportunity to learn to do them. First time doing dovetails. I cut the tails on the arms first and did a couple of practice pockets on scrap wood. Then, did the real ones. Each one gets better, and yes, that’s the last one that’s shown in the picture. All are snug enough to require gentle tapping to assemble. No glue used so far. (Note from several years later: These joints are still not glued or screwed. The tension from the saw keeps them firm enough for constant use.)

saw fastening

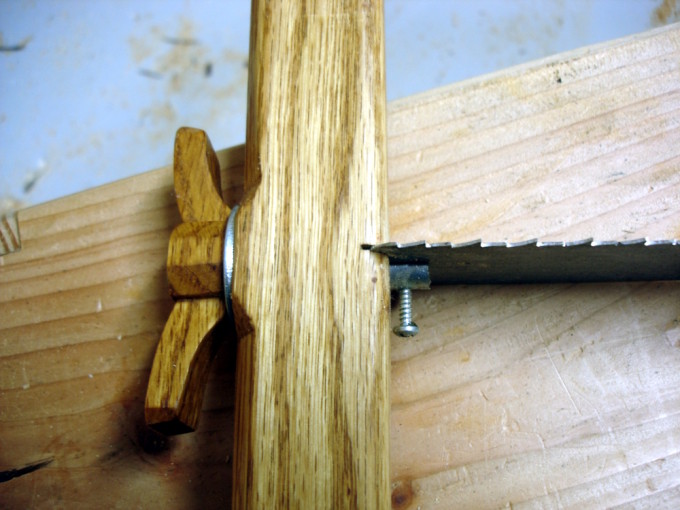
All edges are chamfered, because I imagine I’ll spend quite a few hours using this saw. I’m an Art Deco fan, so the upper arm has a series of stop chamfers in an Art Deco motif, and a wing nut to match. The wing nut is simply a wooden shell covering a 3/4 inch metal nut.

The first cut, on a 7 inch wide board, shows the saw will indeed do the job well. Planing will be needed to smooth the cut surfaces, but that was expected. Now, all I need to do is figure out how to hold a workpiece that’s 16 feet long.

IMPORTANT NOTE: After using this saw for a couple of months, I came to dislike the blade. I acquired a good old Disston 26 inch saw, changed it from 7 TPI to 4 TPI, sharpened, and hacksawed to a 2 inch width. That replaced the original blade an made a huge improvement in how well the saw works.

Filed Under: Boatbuilding, frame saw, Hand tools, resawing, Shopmade

Setup Complete

December 1, 2008 by Bob Easton 4 Comments

The outside temps are up for a couple of days, making it easier to get the shop to 60 degrees. The bottom is now glued and screwed in place.

Filed Under: Boatbuilding, Eva Won, Fiddlehead

  • « Go to Previous Page
  • Page 1
  • Interim pages omitted …
  • Page 20
  • Page 21
  • Page 22
  • Page 23
  • Page 24
  • Interim pages omitted …
  • Page 27
  • Go to Next Page »

Primary Sidebar

Footer

Recent Posts

  • New Frame Saw / Scroll Saw
  • Lamppost Sign
  • Goodbye PayPal – Goodbye Bob’s eBooks
  • Anarchist’s Workbench is Done
  • Why we keep offcuts…

Categories

  • About
  • Artwork
  • Boatbuilding
  • Boating
  • bowl carving
  • Boxmaking
  • Clocks
  • Drawings
  • eBook
  • etude
  • Eva Too
  • Eva Won
  • Fiddlehead
  • Fiddlehead model
  • Flying
  • frame saw
  • gilding
  • green woodworking
  • Grinling Gibbons
  • Guns
  • Hand tools
  • Humor
  • kerfing plane
  • Lettercarving
  • Mill Creek 13
  • Model building
  • Power tools
  • Rant
  • resawing
  • scroll saw
  • Shopmade
  • sign painting
  • Stonework
  • Swimming
  • Technology
  • The Wall
  • treadle lathe
  • Uncategorized
  • VSD
  • Woodcarving
  • Woodturning
  • Woodworking
  • workbench

Other stuff

  • About
  • Contact
  • Privacy Policy

Copyright ©2024 · Bob Easton · All Rights Reserved