• Skip to primary navigation
  • Skip to main content
  • Skip to primary sidebar
  • Skip to footer

Bob Easton

Chocolate powered woodworking

  • Home
  • Grinling Gibbons Tour

Boatbuilding

Eva Too – Hull Fiberglass

April 13, 2010 by Bob Easton 8 Comments

(3rd of 3 postings today) When our children were young, my wife volunteered to help with food preparation for some school event which included an evening meal. She called a food distributor to explain her task and ask how many servings are in a gallon can of baked beans. The woman on the other end of the line answered, “Oh honey, that won’t be nearly enough.”
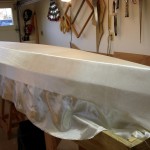
photo of hull with fabric draped over itThe instructions for the Mill Creek 13 are a little bit like that. … But, I’m getting ahead of things.

This boat is covered with fiberglass fabric that is adhered with epoxy. After making the hull suitably smooth, the fabric is draped on the hull, smoothed, and trimmed. The weave of the fabric is loose enough that it complies very easily to the shape of the hull. I was expecting ripples and pleats, but was very pleasantly surprised to see the fabric fit neatly. After draping, the instructions call for trimming the fabric to within 1/4 inch of the edges of the hull. Right! The experienced stitch-n-glue builders probably work to that tolerance, but I’m apprehensive about making a trimming error. I got to within 1/2 inch on average.
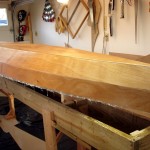
photo of hull with glassing doneOK, back to baked bean servings and epoxy mixing instructions. The intent of this stage of work is to “wet out” the cloth. That is, apply enough epoxy to wet the cloth, make it turn from white to transparent, enough to make it adhere, but not so much as to flood it, create runs and puddles. So  … the instructions say to mix up 8 ounces of epoxy (that’s a cup for you folks who cook), and I’m thinking “Oh honey, that won’t be nearly enough.”

There is actually a very good reason for that mixing suggestion. A cup is about the right amount for the working time needed to spread, smooth, re-spread, squeegee off, the epoxy. Any more than a cup and it will start thickening before it’s all spread. In the end, it took me about 2 1/2 cups. Whether that’s the right amount, I don’t know. Yet, there’s fiberglass stuck to the boat, no runs, and it looks like it was done by someone who knew what they were doing.

Oh yeah … spread drop cloths (trash bags in my case) on the floor under the edges of the boat before your (gloved) epoxy soaked hands get too sticky to handle the drop cloths. (Don’t ask how I came up with this tip.)

Oh yeah … (once more) the reason for trimming to 1/4 inch is to minimize wagging interference from the cloth hanging at the bottom, but more importantly to minimize the amount of epoxy it can absorb.
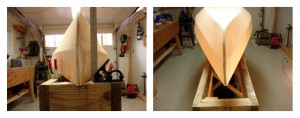
Filed Under: Boatbuilding, Eva Too, Mill Creek 13

Eva Too – Prep Hull for Fiberglass

April 13, 2010 by Bob Easton 2 Comments

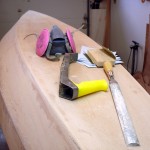
photo of hull and sanding and shaping tools(2nd of 3 postings today) How smooth should it be? This is my first stitch-n-glue, fiberglass encased, boat. I don’t know exactly how smooth the underlying wood needs to be to produce a good finish, but assume it should be as good as it would be if the wood were not covered. CLC, who sells sandpaper only in disk form, suggests going to 150 for painted hulls and more for bright surfaces. This hull will be painted and the decks will be bright.

I imagine that people using tailed sanders can do this work in about 6 minutes. Mine took longer because I vehemently dislike powered sanders, their raucous noise, and the clouds of dust they produce. (Don’t even try to tell me how great the premium/$$$ sanders are.) Actually, what took time was filling all of the now empty wire holes. Yes, they will probably get filled when the fiberglass gets applied … but I have this thing about holes in boat hulls.

photos of crooked stern, before and afterThere was also a little “hitch in your get-along,” “wag in the tail,” or “kink in the stern” where I didn’t get pieces together precisely enough in the original glue-up. A couple of layers of epoxy putty made up to creamy peanut butter consistency was used to build up one side. Then, a lot of shaping and sanding, more than all the rest of the hull itself, brought the stern to an acceptable level of symmetry.

Just think what Michelangelo could have done if he’d had some of this epoxy putty!

Filed Under: Boatbuilding, Eva Too, Mill Creek 13

Eva Too – Paintin’ While the Paintin’s Good

April 13, 2010 by Bob Easton 2 Comments

(1st of 3 postings today) Do you follow directions step by step, exactly as written, no deviations? No, I didn’t think so. Does anyone? Sometimes it works out easier to break stride and do work a different way. This is one of those cases.

Progress on the boat slowed as I did another project (to be detailed sometime), but it’s boat building time again. The last you saw, I was fitting carlins and a seat. I decided to hold off on the carlins and complete the fitting out of the cockpit. One reason: paint. While all the wood gets at least two coats of clear epoxy as a sealant, that’s not enough. Epoxy needs some extra UV protection, hence paint, varnish, or some other coating is also needed. The cockpit and the decks will be “bright,” in the case of my boats “workboat bright” not “yachty bright.” I use Cetol Marine for those surfaces. It is clear with an amber tint. Three very thin coats do the job well.

The Fiddlehead, another decked canoe, taught me that painting the cockpit after the deck is installed requires numerous maneuvers easily handled by someone with triple elbow and wrist joints. I don’t need to learn that lesson twice.  As I started to install the carlins, I thought, “Whoa. Hold on. Fit out the rest of the interior stuff and paint it before letting the carlins and deck get in the way.”

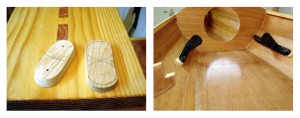
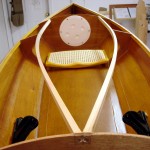
photo of foot braces and their attachment padsThe photo of cockpit shows footbraces, seat, hatches, and carlinsother interior fittings were footrests and the deckplates that comprise the hatches into the watertight / flotation / storage  compartments. The only element requiring any real work was the footrests. As shipped, they are designed to be screwed in place with big ugly screws that pass through the hull. I’ve always shunned having any more holes than absolutely necessary in a boat’s hull. So, I made some mounting pads that glue to the inside of the hull, to which the footrests can then be fastened with screws.

With few obstructions, the painting was quick. I’ve found the little 4 inch foam rollers to be very convenient for this work.

Filed Under: Boatbuilding, Eva Too, Mill Creek 13

  • « Go to Previous Page
  • Page 1
  • Interim pages omitted …
  • Page 4
  • Page 5
  • Page 6
  • Page 7
  • Page 8
  • Interim pages omitted …
  • Page 27
  • Go to Next Page »

Primary Sidebar

Footer

Recent Posts

  • New Frame Saw / Scroll Saw
  • Lamppost Sign
  • Goodbye PayPal – Goodbye Bob’s eBooks
  • Anarchist’s Workbench is Done
  • Why we keep offcuts…

Categories

  • About
  • Artwork
  • Boatbuilding
  • Boating
  • bowl carving
  • Boxmaking
  • Clocks
  • Drawings
  • eBook
  • etude
  • Eva Too
  • Eva Won
  • Fiddlehead
  • Fiddlehead model
  • Flying
  • frame saw
  • gilding
  • green woodworking
  • Grinling Gibbons
  • Guns
  • Hand tools
  • Humor
  • kerfing plane
  • Lettercarving
  • Mill Creek 13
  • Model building
  • Power tools
  • Rant
  • resawing
  • scroll saw
  • Shopmade
  • sign painting
  • Stonework
  • Swimming
  • Technology
  • The Wall
  • treadle lathe
  • Uncategorized
  • VSD
  • Woodcarving
  • Woodturning
  • Woodworking
  • workbench

Other stuff

  • About
  • Contact
  • Privacy Policy

Copyright ©2024 · Bob Easton · All Rights Reserved