• Skip to primary navigation
  • Skip to main content
  • Skip to primary sidebar
  • Skip to footer

Bob Easton

Chocolate powered woodworking

  • Home
  • Grinling Gibbons Tour

Boatbuilding

Eva Too – Hull Structure & Seat Parts

March 26, 2010 by Bob Easton 1 Comment

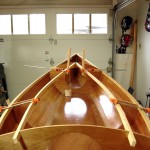
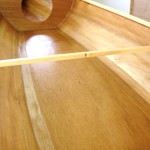
photo of hull interior showing bulkheads, carlin knees and carlinsThe MAS epoxy I am using is a bit thinner than the West System epoxy I used on the previous boat. It’s low viscosity and absence of amine blush (have to dig deep into epoxy chemistry for that one) make it the preferred choice for sealing and coating, and there’s a lot of that with this type of boat construction.

Progress on the hull interior is moving along nicely. The bulkheads are now completely fitted, and glued with fillets that make them watertight. The carlin knees are installed. All of the interior surfaces have received two rolled on coats of epoxy as a surface sealant. Short, 4 inch, foam rollers make this coating activity almost enjoyable, and rolling lets me make the coating really thin. Many areas will get two more coats of clear or paint finish and it all adds up to weight that must be carried. The photo shows the carlins being fitted. These are the structural members which support the inner edges of the deck. The “interesting” pair of clamps, sticks, and strings near the far end were used to twist the carlins into “verticality” at that point, a temporary measure while fitting them.
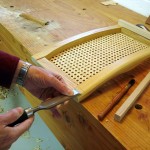
photo of a chiseling operationWhile epoxy cures, there are plenty of small things needing attention. The drawings for this boat include plans for a slatted seat which is made largely from plywood. There are enough plywood cutoffs for this, so it makes good sense. Yet, the design is not one I find appealing. I like traditional cane seats and have purchased yet another from Ed’s Canoe. It’s both a comfortable and beautiful seat. Fitting it is a matter of cutting off the arms which might normally be used for a hanging type mount, and fitting rails to the bottom. The rails get glued to the boat’s bottom and the seat screwed to the rails.
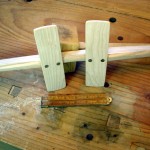
photo of the seat backA lightweight traditional style of seat back consists of two curved slats fixed to a yoke shaped cross piece. Again, this is similar to the previous boat. The thin pieces are 1/4 inch thick, resawed left overs. They are shaped by boiling and then clamping to the curved back of some chairs. The yoke is made eight sided and will be cut to the correct length after the deck and coaming parts are done. We’ll see more of it later.

Did you know that epoxy has nearly infinite open time at 40 degrees? Spring squeaked open for a few days and is now squeaking closed again. The forecast for the next few days predicts very slow epoxy curing.

Filed Under: Boatbuilding, Eva Too, Mill Creek 13

Eva Too – Taped

March 20, 2010 by Bob Easton 2 Comments

photo of two people mud wrestlingThese folks look experienced with the glue part of stitch-n-glue boatbuilding.

It’s time to fully fill the seams with thickened epoxy and add fiberglass tape for strength. As an aside, the “tape” is simply fiberglass fabric that is 4 inches wide, finished on each edge to avoid fraying. Filling the seams is the same as I did with “tabbing” in the previous post, spreading thickened epoxy with a rounded stick about 1 inch wide. Affixing the tape is with unthickened epoxy, regular stuff that’s slightly less viscous than molasses. CLC’s instructions suggest painting on a coat of epoxy, pressing the cloth in place, and then painting on more epoxy to saturate the cloth. Another fellow I read suggests soaking the cloth strip in epoxy to saturate it, then placing it in the boat and spreading out the excess with a gloved hand.

photo of inside of hull showing taped seamsI tried both ways, always with gloves. Both methods work, but one feels like you’re retrieving your waffle from a vat of syrup chocolate.

The interior of this boat will get no more fiberglass. A few people glass both the exterior and interior of their boats. I think those are the people who don’t mind the extra weight and want the extra strength for extreme canoeing adventures. This boat will get two very thin coats of epoxy as a sealer. Another finish will be added later for UV protection (epoxy has very little). The first coat is on, applied with a short nap foam roller which really spreads the epoxy thin, helping minimize weight.

Filed Under: Boatbuilding, Eva Too, Mill Creek 13

Eva Too – Glue Tabs and Salad Dressing

March 17, 2010 by Bob Easton 2 Comments

Would you like to see a picture of the stitches in my arm? No, I didn’t think so. Actually, they are almost gone, the self-dissolving kind left from a very minor surgery some time ago.

Some stitch-n-glue builders leave the stitches in the boat. They cover the seams with a thick fillet of epoxy, then epoxy soaked fiberglass cloth, all in one pass. One might follow this approach for either of two reasons, to get a good solid seam by applying everything at once, or to build the boat quickly (Build a boat in a week!). Once the epoxy sets around the wires, they’re there to stay. All that can be done is to snip the tails off on the outside, and deal with the detritus in all the rest of the finishing steps.

photo of intermittent seam gluingThe more persnickety builders do the seams in two steps. The first is “tabbing,” securing the spaces between the wires with thin epoxy fillets. Then the wires can be removed and the full length of the seams reinforced. Guess which camp I’m in. Right! Persickety. You win today’s prize.

Even this, I did in two stages. I mixed epoxy straight out of the pumps with no fillers. I brushed this onto the seams to allow the raw edges to soak up some glue. Then, I mixed in “wood flour” to thicken the epoxy to a consistency midway between mustard (Dijon, not yellow) and peanut butter.  I pressed that into the seams fairing them with a rounded stick (think tongue depressor). I was persnickety about making these extra clean so they won’t need sanding before the cloth layer.

Denatured alcohol (not the drinkable kind) is a good clean up agent for removing epoxy from places it does not belong, such as the handles of my pliers and clamps. Recent reading suggested trying simple white vinegar. Dang! It works better than alcohol. It’s pretty amazing that the stuff we splash on our veggies can remove rust from tools and cut this industrial adhesive. Or, maybe it’s amazing that our digestive pipes handle the solvent?

Well, I won’t be completing this boat in a week, but it will end up prettier than my arm.

Filed Under: Boatbuilding, Eva Too, Mill Creek 13

  • « Go to Previous Page
  • Page 1
  • Interim pages omitted …
  • Page 5
  • Page 6
  • Page 7
  • Page 8
  • Page 9
  • Interim pages omitted …
  • Page 27
  • Go to Next Page »

Primary Sidebar

Footer

Recent Posts

  • New Frame Saw / Scroll Saw
  • Lamppost Sign
  • Goodbye PayPal – Goodbye Bob’s eBooks
  • Anarchist’s Workbench is Done
  • Why we keep offcuts…

Categories

  • About
  • Artwork
  • Boatbuilding
  • Boating
  • bowl carving
  • Boxmaking
  • Clocks
  • Drawings
  • eBook
  • etude
  • Eva Too
  • Eva Won
  • Fiddlehead
  • Fiddlehead model
  • Flying
  • frame saw
  • gilding
  • green woodworking
  • Grinling Gibbons
  • Guns
  • Hand tools
  • Humor
  • kerfing plane
  • Lettercarving
  • Mill Creek 13
  • Model building
  • Power tools
  • Rant
  • resawing
  • scroll saw
  • Shopmade
  • sign painting
  • Stonework
  • Swimming
  • Technology
  • The Wall
  • treadle lathe
  • Uncategorized
  • VSD
  • Woodcarving
  • Woodturning
  • Woodworking
  • workbench

Other stuff

  • About
  • Contact
  • Privacy Policy

Copyright ©2024 · Bob Easton · All Rights Reserved