• Skip to primary navigation
  • Skip to main content
  • Skip to primary sidebar
  • Skip to footer

Bob Easton

Chocolate powered woodworking

  • Home
  • Grinling Gibbons Tour

Boatbuilding

Eva Too – Chalking for Snug Joins

March 9, 2010 by Bob Easton 3 Comments

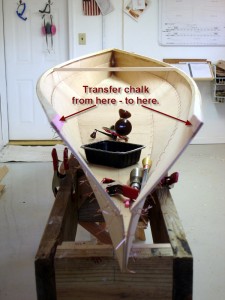
Just as there are few straight lines in a boat, there are few 90 degree joins.  Consider the join of the top planks at either end of the boat, an acute angle. These kinds of joins, sometimes with compound angles, are hard to cut exactly with the first cut. I sneak up on the join by cutting a generous approximation and then trimming to exactness with a rasp. This works OK for small structural members such as the sheer clamp which is only 1/2 inch by 3/4 inch.

I made the cut mark on the top of the sheer clamp by holding the plank in what I hope will be its final position and then sighting along a center line that is drawn on the boat’s bottom board. The plank was so near vertical that the cut needed no compound adjustment. Sorry for no pictures of that cut, it was chaotic enough cutting a free floating floppy thing in mid air without also having to manage a camera. Then, as it says on the shampoo bottle, “rinse and repeat” for the matching cuts.

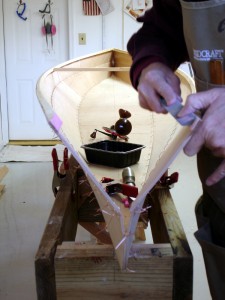
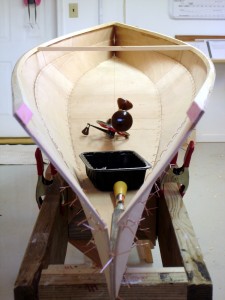
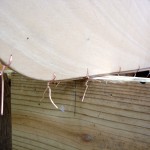
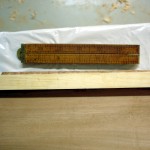
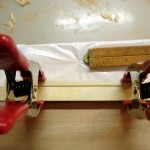
Now, the fun part, trimming to fit. A good rasp makes quick work of this, but only if you know where to use it. I learned this chalk trick technique from Greg Rössell at the Wooden Boat School. It’s very simple and works incredibly well. In words: Mark one part of the join with bright chalk. Rub that part against the other part of the join where it will leave a trace on the high point(s) of contact. Remove the high point. “Rinse and repeat” until the rubbing produces an even transfer. Done!  Click on any of the images for a larger version.

photo of one surface with chalk, the other withou photo of rasping one surface

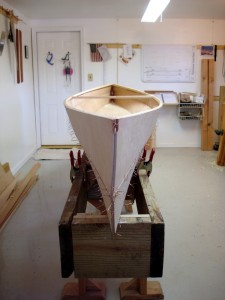
photo of both surfaces evenly coated with chalk photo of bow end with planks joined

Stitch-n-Glue vs. Traditional

Responding to Al Navas’ comment wondering how the epoxy is used in stitch-n-glue construction, here’a very short and woefully incomplete comparison of two boat building techniques.

Traditional boat building, such as my previous boat Eva-Won, uses solid wood components, frames, bulkheads, and planks that are generally nailed to each other. The joins between planks are made watertight with caulking, usually a flexible compound. All of the wood parts expand and contract independently with changes in moisture, staying more or less watertight. Some joins, such as the sheer clamp, use epoxy as a simple glue.

Stitch-n-Glue construction uses marine grade plywood, much thinner and lighter than traditional boat lumber. As seen in the previous post, the parts are stitched together. Then, thickened epoxy combines with strips of fiberglass cloth to glue and strengthen the joins. The exterior is then covered with fiberglass cloth that is adhered (and filled) with epoxy. Surfaces that are not fiberglassed are clear coated with epoxy. The result has almost no structural components, depending on monocoque construction for strength. Since all the wood is encased, there is less moisture related movement than with traditional construction.

Pros and cons of each technique have been omitted for your reading pleasure.
Filed Under: Boatbuilding, Eva Too, Mill Creek 13

Eva Too – Stitching

March 7, 2010 by Bob Easton 2 Comments

While Madame Defarge sticks to her knitting, I’m stitching a boat together.

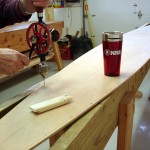
photo of Bob drilling holesIt all starts with cutting up about a quarter mile of copper wire into 4 inch lengths. Then, drill 1/16 inch holes in the bottom every 4 inches, 3/8 inch in from the edge. Next, levitate what the Chesapeake Light Craft folks call the “bilge panel” and other boat builders call the “garboard plank” next to the bottom. Start at the bow. Mark off and drill the first 4 or 5 holes into the garboard plank, matching those in the bottom, and 3/8 inch in from the edge. Insert cooper wires in matching holes and twist. Do 4 or 5 on the other side. Proceed along, a few at a time on the port side, a few at a time on the starboard side, until …

… until discovering that the bottom is longer than the planks. Or, the edges that join are not equal lengths. Drat!!! (Actually, I think there were other words.) By some lofting error as yet undiscovered either the bottom was 3 inches too long (nope, measures exactly to the drawings) or the planks were 3 inches too short (nope, they measure exactly to the drawings). Whatever the cause, the remedy is not making the planks longer, but making the bottom shorter. Yes, unwired both panels, and shortened the bottom at both ends, keeping the lines fair. About 20 minutes work with a block plane.

photo of first half dozen stitchesThen, started stitching again. As with all boat planking, there’s lots of contortion going on, and it is best handled by leaving the stitches loose. When the sheer plank is added, the stitches are left even more loose. Stitching up the sheer planks is even more fun than the garboard. It wants to fly off into space on its own. I constrained it by putting a spreader bar at the widest point and by tying the stern ends together with a couple of loops of string. Judicious use of clamps, as props, here and there helped control the chaos, but only slightly.

The instruction manual doesn’t advise one to wear armor, elbow length leather gloves, face masks, and anything else needed to protect oneself from all the wire points. By the time the stitching is done, we have a porcupine. My hands look like I’ve been ripping up bramble bushes. Some people call this construction technique “stitch-n-glue.” Others call it “tortured plywood.” I’m thinkin’ “tortured boatbuilder.”

I thought it might be interesting to have a time lapse video (mostly lapse) of the stitching work so you can see how it comes together.

The next post will show a trick, erm technique, for cutting and fitting the ends of the sheer clamps together.

Filed Under: Boatbuilding, Eva Too, Mill Creek 13

Eva Too – Slip Happens

March 4, 2010 by Bob Easton 1 Comment

Glue is slippery stuff. After a glue-up and double checking that the parts haven’t moved, you walk away and something decides to get moving. That’s when you turn around, go back, and check one more time. hmmm. Did that. Twice! This time the parts waited until I was completely out of sight.

photo shows edge of plank showing where it shouldn'tThe slippage of the sheer clamp photo shows new shim addedfrom the previous glue-up is just less than 1/4 inch at the stern end of one of the planks. If it had slipped the other way, I would just plane off the overhanging material, but since it slipped downward on the plank, I must decide what to do. Well, the extending area of the plank could be planed off. That would leave the deck sitting askew in that area, the sheer line spoiled, the boat imbalanced and turning in circles and who knows what else.

Part of boat building, or most any other activity, is learning how to recover from problems. This one is simple. Rive off a shim of wood. Glue it in place. Plane it to shape after the glue sets.

Filed Under: Boatbuilding, Eva Too, Mill Creek 13

  • « Go to Previous Page
  • Page 1
  • Interim pages omitted …
  • Page 7
  • Page 8
  • Page 9
  • Page 10
  • Page 11
  • Interim pages omitted …
  • Page 27
  • Go to Next Page »

Primary Sidebar

Footer

Recent Posts

  • New Frame Saw / Scroll Saw
  • Lamppost Sign
  • Goodbye PayPal – Goodbye Bob’s eBooks
  • Anarchist’s Workbench is Done
  • Why we keep offcuts…

Categories

  • About
  • Artwork
  • Boatbuilding
  • Boating
  • bowl carving
  • Boxmaking
  • Clocks
  • Drawings
  • eBook
  • etude
  • Eva Too
  • Eva Won
  • Fiddlehead
  • Fiddlehead model
  • Flying
  • frame saw
  • gilding
  • green woodworking
  • Grinling Gibbons
  • Guns
  • Hand tools
  • Humor
  • kerfing plane
  • Lettercarving
  • Mill Creek 13
  • Model building
  • Power tools
  • Rant
  • resawing
  • scroll saw
  • Shopmade
  • sign painting
  • Stonework
  • Swimming
  • Technology
  • The Wall
  • treadle lathe
  • Uncategorized
  • VSD
  • Woodcarving
  • Woodturning
  • Woodworking
  • workbench

Other stuff

  • About
  • Contact
  • Privacy Policy

Copyright ©2024 · Bob Easton · All Rights Reserved