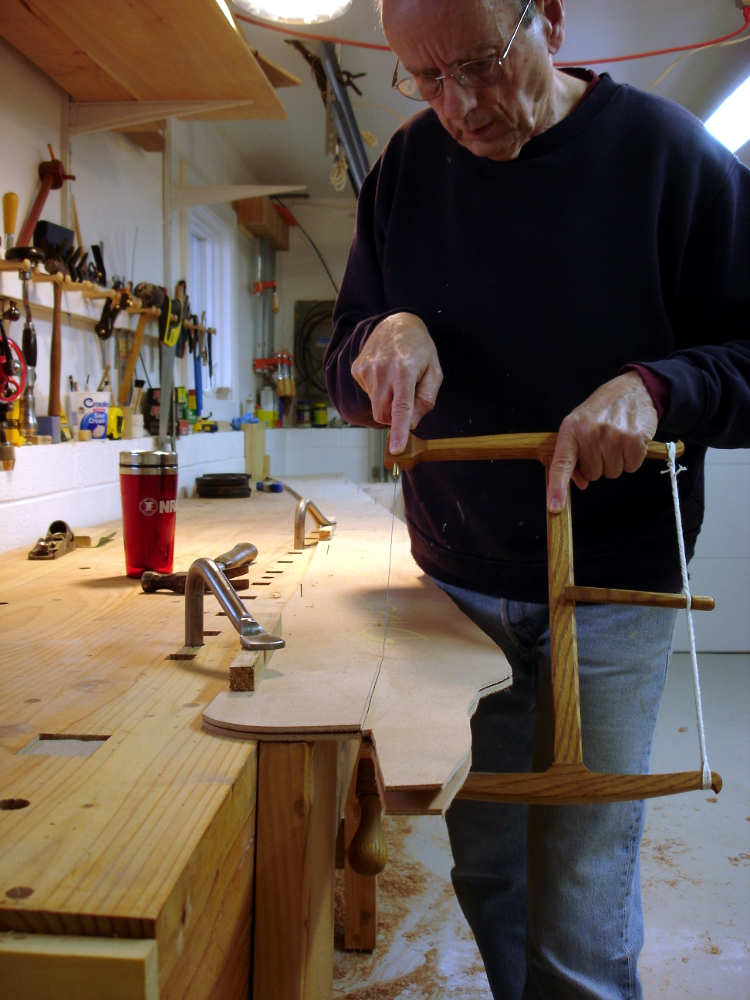
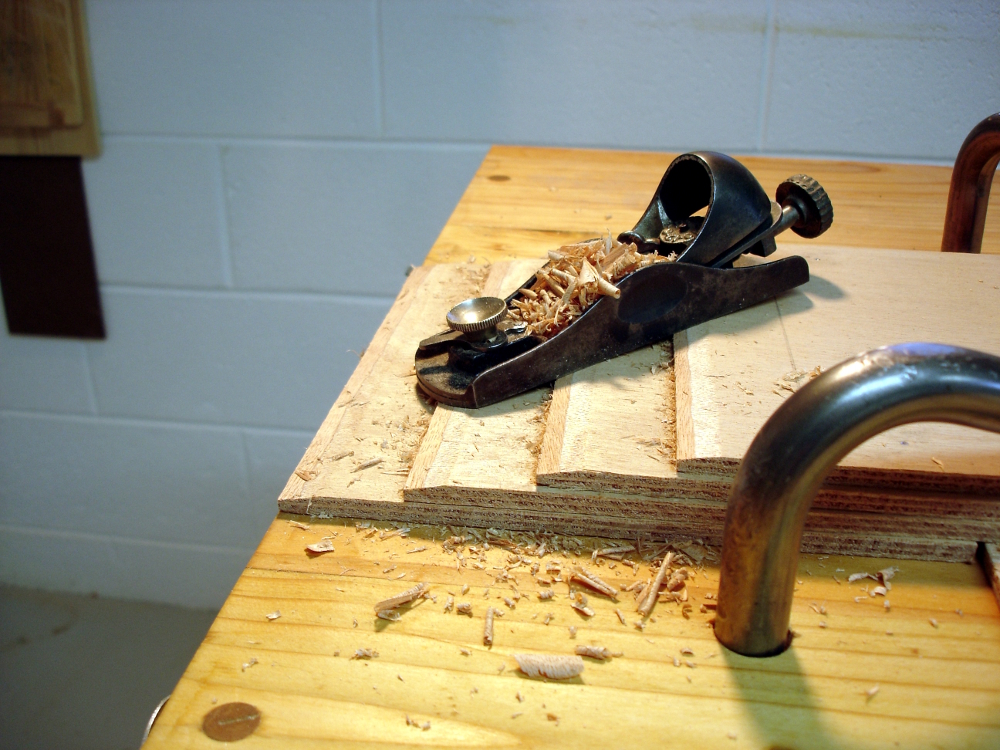
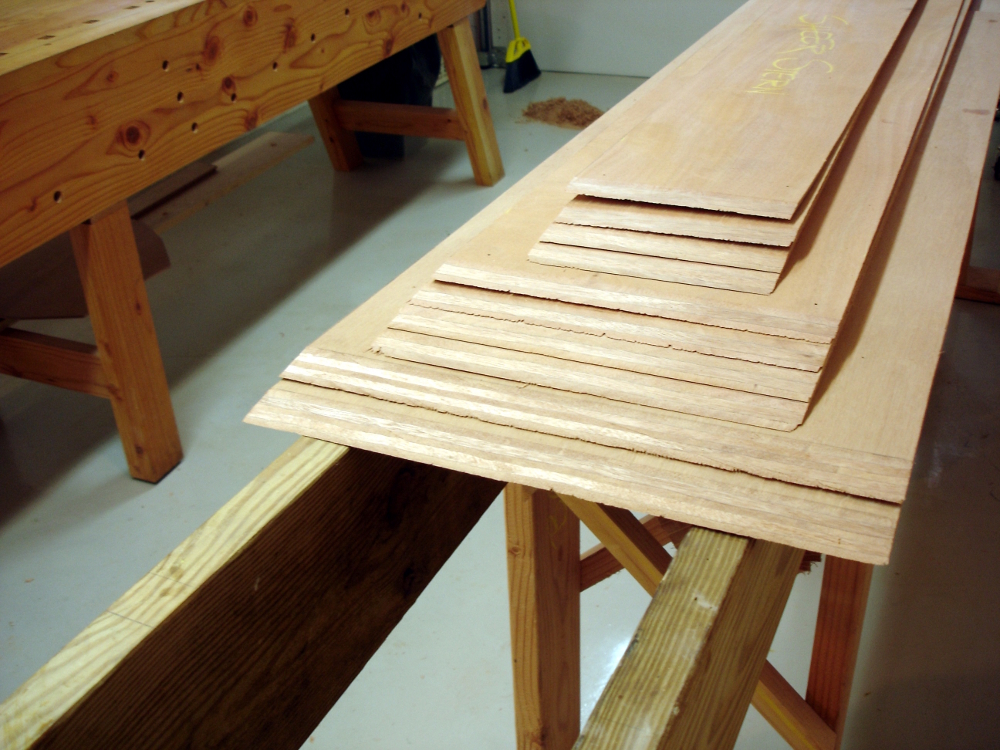
• Skip to primary navigation
  • Skip to main content
  • Skip to primary sidebar
  • Skip to footer

Bob Easton

Chocolate powered woodworking

  • Home
  • Grinling Gibbons Tour

Eva Too

Eva Too – Bottom – and a Shop Desk

December 9, 2009 by Bob Easton 2 Comments

The boat’s bottombottom board and small shop desk is 1/4″ plywood. It’s lofted, cut and shaped, an easy bit of work. My turning saw, set up with a fine blade, did the job with ease and left an edge with no tearout or splintering. As always, I’m not confident to cut exactly on the line. I stay a bit proud and then get to the line with a block plane.

Sitting on the middle of the bottom is a shop desk that I made recently. By design, I have very few horizontal surfaces in the shop and they are either covered with work in progress or too small to use for much more than holding small tools, cans, etc. The instruction booklets, or small paper plans (the big ones are pinned to the wall) have always been at the mercy of temporary space, leaving me to constantly ask myself, “Where’s the book? … Where’s the book?”

shop desk hanging on a french cleat
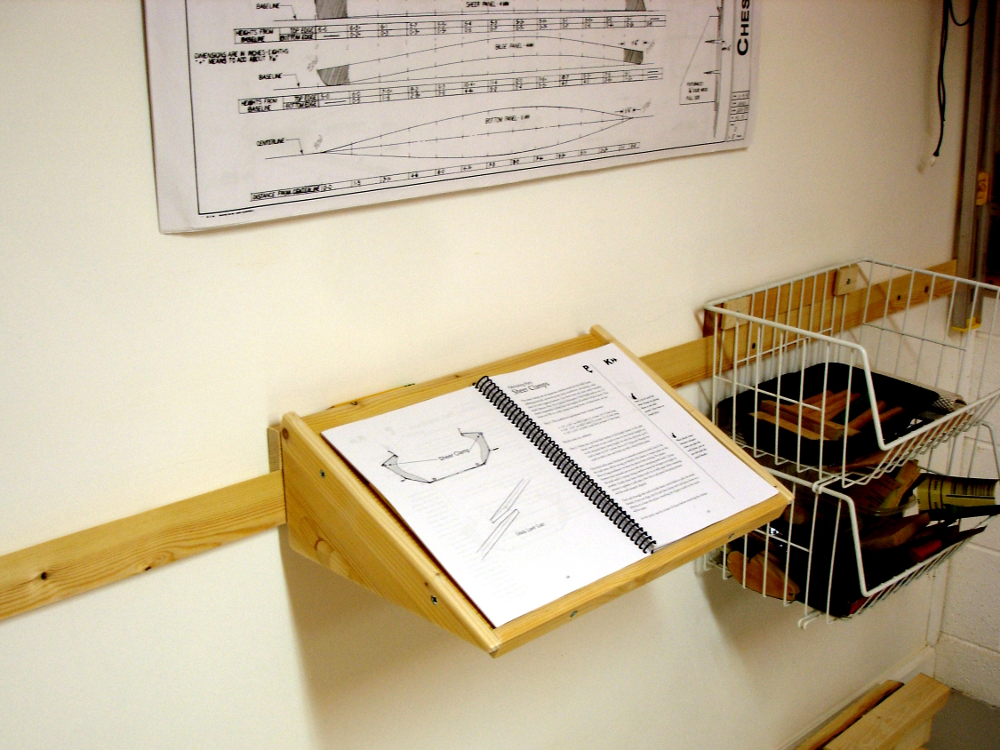
So, I finally did something about it and made a very simple little desk. I used no plans. I just hacked up a bit of old shelf material to make something of suitable size. A few simple dado joints are as fancy as it gets. This isn’t boardroom furniture; I kept it simple and functional. The versatile part of this little desk is the french cleat on the back. I ripped a mating cleat that’s the full width of the shop’s end wall. The desk can now be hung anywhere along that cleat.

While at it, I added a cleat to a pair of wire bins. These were good for de-cluttering another part of the shop.

For the sharp-eyed among you, the large sheet of plans hanging above show plank and bottom shapes along with their tables of offsets. … and the stuff on the floor in the corner is the black locust being saved for mallets.

As always, click on any image to see a larger version.

Filed Under: Boatbuilding, Eva Too, Mill Creek 13

Eva Too – Lofting Along

December 8, 2009 by Bob Easton Leave a Comment

picture shows a smooth scarph
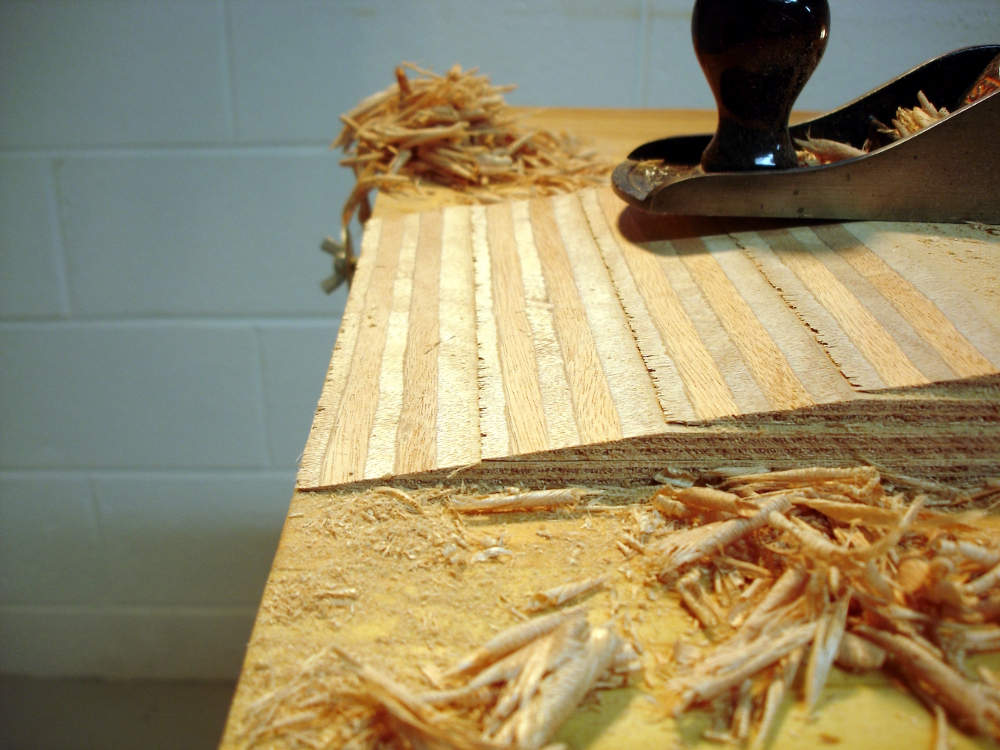
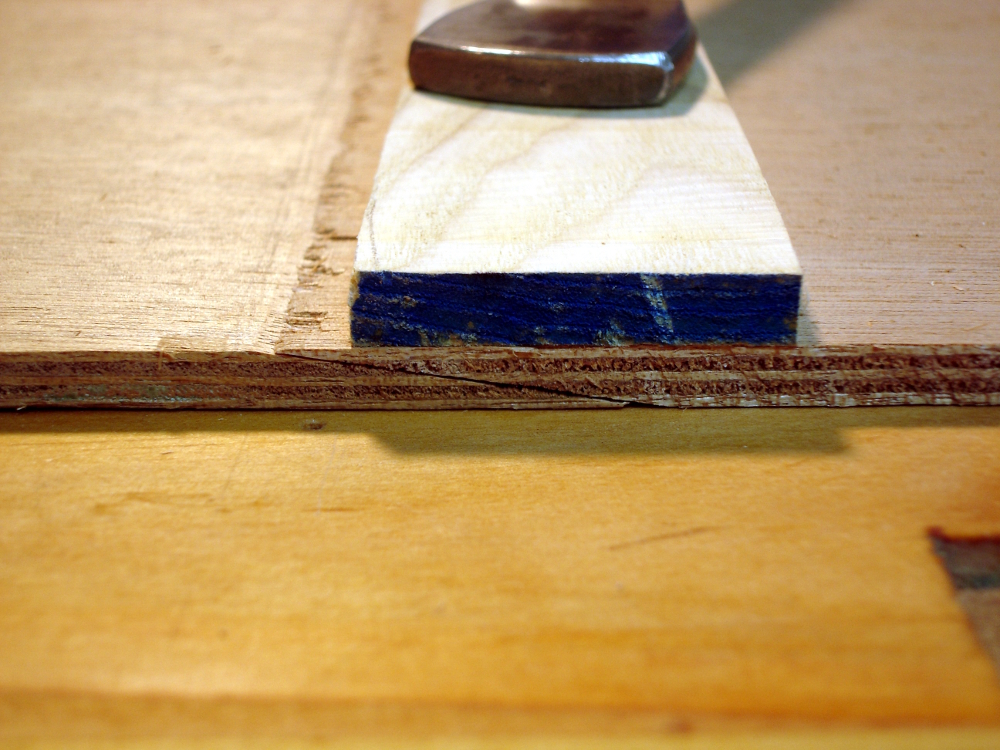
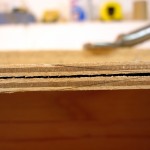
Oh, before we get too far away form scarphing, here’s a picture of how a pair of the scarphs worked out. Even continuation of the plies is exactly what we wanted.

This boat’s plans specifies the shape of the planks with a table of offsets. The planks and the bottom are lofted, not spiled like in the previous boat. The process is simple. Establish a straight reference edge along one edge of the material (good use of the long jointing plane). Measure off and draw station lines, one per foot for this boat. Take the offsets from the table on the plans and mark on the station lines. Connect the dots using a smooth batten to fair the lines.

sawing planksThen, saw as close as you dare to the lines and finish up with a block plane. The boat only has 4 planks, 2 sheer and 2 bilge. Cutting and shaping them in pairs is easy and keeps them identical. Once again, a lumberyard bench is nice to have because the easiest way to keep a pair of planks in alignment is to nail them to the bench.

Recent boat building isn’t getting a lot of time. This boat could be moving along a lot faster were there not a lot of other things I find interesting.

  • Flatbread “Bings” are the latest cooking discovery for this house husband. They are easy to make and disappear quickly.
  • Marveling at hand engraving and learning to draw some of the scrolls and leaves patterns is a new diversion.
  • Exploring wooden clocks, and considering making them…
  • Reading woodworking books such as “The Joiner and the Cabinet Maker” in which young Thomas learns a woodworking trade, and Tom Fidgen’s “Made by Hand” in which stunningly beautiful furniture is made using only hand tools.
  • Following “ClimateGate” and contrasting it with my many years spent in serious, principled scientific discipline.
  • Studying the Federalist Papers, in which the country’s founders discuss the merits of the U.S. Constitution. Today’s reading was #41 in which James Madison clearly delineates how the “general Welfare” phrase of Article 1, Section 8, is followed immediately by, and constrained by, a list of 21 enumerated powers which limit what the government can force upon us.

Tomorrow: cut and shape the bottom of the boat.

As always, click on any image to see a larger version.

Filed Under: Boatbuilding, Eva Too, Mill Creek 13

Having a Scarphing Good Time

November 24, 2009 by Bob Easton 5 Comments

Scarf or Scarph – The joining of two timbers by beveling the edges so the same thickness is maintained throughout the length of the joint.

All of the plywood has been reduced to strips and chunks of sizes appropriate for fabricating the various parts.

picture of scarph stack just startingUsing 8 foot long lumber to make a 13 foot long boat needs some method of lengthening lumber. Scarphing is the answer. It has been a while since I beveled lumber for scarph joints, so I did a trial run with a few small plywood offcuts. The recommended bevel ratio is 8:1. For the 6mm (1/4 inch) plywood this works out to 1 and 1/2 inch of length. So, I stacked 4 boards with 1 and 1/2 inch offsets and used a few brads to immobilize them. (Hey you guys with the maple / mahogany / purpleheart bench tops that look like boardroom furniture, see why a lumberyard bench is really versatile? Neither my bench nor I cry when I drive nails into it.)

picture after planingBy using 4 boards, the correct planing angle is automatic. The stepped stack sets the right angle and one has to work hard to make it wrong. I started with a block plane, but quickly switched to the jack plane. The jack’s longer nose makes the work more accurate. Extra sharpness is really helpful for this work. Planing at an angle is also helpful. The multiple grain directions of the ply layers are handled much easier with an angled approach. Keep going until there’s a smooth ramp. The plies themselves act as indicators of even planing. They get all wavy when the work is uneven. Keen observers will see some tear out on the fine edge. That’s not a problem, as we’ll see during glue up.

The test of a good job comes from joining the bevels and seeing if the plies of both pieces line up well. Here we see a couple of pieces dry fitted. Looking great. So, let’s move on and plane all the pieces needing scarphing. The bottom is 6mm (1/4 inch) and needs one scarph. There are four 4mm (5/32 inch) hull planks needing scarphs. There are five in all.

Preparing all the bevels wasn’t much work. Actually, it was a lot less work than getting to a similar point with the previous boat where I invested a lot of time in resawing the lumber.

stack of beveled boardsNext comes “glue up.” This is the time when woodworkers usually feel the pressure of glue that’s starting to cure faster than they can get parts aligned. I still have some West System epoxy left from the previous build and am using their slow version. Still, pot life is rather short, and it is good to get all parts stacked up in the right sequence for use, and to have all auxiliary stuff (plastic sheets, clamps, cauls, etc.) close at hand. Rehersal sometimes helps. Yep, I rehearsed this one since I intended to do all joints in one sesson.

I used two batches of epoxy. The first was the standard mix. I brushed this onto all faying surfaces but did not join them. picture of completed glue upThis was to feed those hungry surfaces, essentially priming them so they wouldn’t dry out without providing adhesion. The second batch included enough wood flour to thicken the epoxy to the consistency of mustard. This makes a robust mixture that won’t easily run out of the joint while it cures. It also helps fill in at the very fine edge where there is some tear out. I applied this liberally to one surface for each join and then joined pieces together. A plastic trash bag protects the bench from having planks glued to it. Two hull planks, side by side, made the first pair of joins. Add another trash bag. Do the next two planks side by side. Add another trash bag and do the join for the wide bottom board. Lastly add another trash bag, stack a caul on top and apply some clamp pressure. Epoxy doesn’t need a lot of clamping pressure. Doing so squeezes too much out an leaves a weak joint.

The little bit of glue left after these joins was just enough to glue up two pairs of “hanging knee” parts. We’ll see pictures of them later.

So now, we sit back and watch glue cure … every bit as exciting as watching paint dry.

Filed Under: Boatbuilding, Eva Too, Mill Creek 13

  • « Go to Previous Page
  • Page 1
  • Interim pages omitted …
  • Page 8
  • Page 9
  • Page 10
  • Page 11
  • Go to Next Page »

Primary Sidebar

Footer

Recent Posts

  • New Frame Saw / Scroll Saw
  • Lamppost Sign
  • Goodbye PayPal – Goodbye Bob’s eBooks
  • Anarchist’s Workbench is Done
  • Why we keep offcuts…

Categories

  • About
  • Artwork
  • Boatbuilding
  • Boating
  • bowl carving
  • Boxmaking
  • Clocks
  • Drawings
  • eBook
  • etude
  • Eva Too
  • Eva Won
  • Fiddlehead
  • Fiddlehead model
  • Flying
  • frame saw
  • gilding
  • green woodworking
  • Grinling Gibbons
  • Guns
  • Hand tools
  • Humor
  • kerfing plane
  • Lettercarving
  • Mill Creek 13
  • Model building
  • Power tools
  • Rant
  • resawing
  • scroll saw
  • Shopmade
  • sign painting
  • Stonework
  • Swimming
  • Technology
  • The Wall
  • treadle lathe
  • Uncategorized
  • VSD
  • Woodcarving
  • Woodturning
  • Woodworking
  • workbench

Other stuff

  • About
  • Contact
  • Privacy Policy

Copyright ©2024 · Bob Easton · All Rights Reserved