• Skip to primary navigation
  • Skip to main content
  • Skip to primary sidebar
  • Skip to footer

Bob Easton

Chocolate powered woodworking

  • Home
  • Grinling Gibbons Tour

Hand tools

Safety Week 2009 – for Handtool Woodworkers

May 7, 2009 by Bob Easton 3 Comments

safetyweek 2009Warning: Unlike most others, there’s no blood involved in this safety tip.

Executive Summary: When the going gets tough, STOP. There’s something wrong with:

  • The tool you are using
  • The way you are using it
  • Your frame of mind.

Many of the safety tips we are seeing this week relate real life experiences. Here’s my confession. Back when I was learning how to effectively resaw long lumber with handtools, I did one trial cut using a simple, but sharp, Disston rip saw. I knew that the workholding setup was less than optimal and that I would need something better. I knew that this wasn’t the tool I ultimately wanted to use but had not yet built the much better frame saw. When the sawing got tougher than it should have been, I knew that I should stop and give up the test. Instead, I just ploughed on through, eager to see what that piece of wood looked like when sliced in that manner.

One of the oddities of rotator cuff injuries is that they don’t manifest immediately. They become apparent only when the injury, in this case a torn tendon under the anterior deltoid, is asked to do something that irritates the injury, such as reaching up to get something from a high shelf. It’s the coming down that goes “Zowie!” These sorts of injuries take months to heal, and this one is no exception. One can’t simply stop using a shoulder and wait. So, I’ve included some extra therapy to build muscle strength in the deltoids, and have continued on with life as usual, despite the rather frequent “Zowies!” After all, there’s a boat to be built!

Bottom line: When your sawing, or planing, or other handtool activity becomes difficult, STOP. Check your tools for sharpness. Optimize workholding. Diagnose why unusual force may be needed. Maybe all you need is a mental break and a fresh approach. Don’t just muscle your way through it. You could bear the consequences for months.

By the way, a comment about aging. I’ll become 65 this year. I’ve already noticed that nature starts taking things away from you as you age. Regular weight training is part of the way I fight that off, as is plenty of handtool work in my boatbuilding shop. Stretching and staying flexible is also part of that regimen. A few days ago I saw an entry on one of the woodworking forums where a guy said he wasn’t going to put a leg vise on his workbench because he doesn’t like bending down to adjust the vice. Making an assumption that he’s in his mid-life years, I’ve got news for him and others who think this way: Get use to bending and staying flexible, or by the time you retire and have more time for your hobby your body won’t be able to do it.
Filed Under: Hand tools, Woodworking

Tools…

April 23, 2009 by Bob Easton 6 Comments

My slow and deliberate boatbuilding adventure is slow not only from forgetting to order the right fasteners, but also stopping to make tools as I need them.

clamps-and-gauge1Lapstrake planking is the sort where one plank overLAPS the next. Two tools useful for this kind of construction. First, one needs to mark the width of the lap on a plank edge so that yet another rolling bevel can be planed as a joint area. Some boatbuilder make simple little gauges from a notched piece of wood. That’s basically a one-time use gauge. I decided to make a good marking gauge that will last the rest of my woodworking days. It’s in the foreground of the photo. (Click any picture to see a larger version.) It is made of cherry with a couple of coats of wiping varnish as finish.

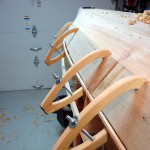
clamps in useNext comes the clamps. Deep throats are needed to reach around the width of the planks, deeper than most c-clamps. These are traditional lapstrake clamps, cut from pine and poplar stock that was already on hand. The hinges are nylon belt webbing and the tip pads are rubber drawer lining material. Finish is 2 coats of boiled linseed oil thinned with mineral spirits. Yes, they are very lightweight, yet are strong enough for this lightweight planking.

The wood that’s clamped to the boat is not a new plank. It is a spiling batten, 1/8 inch thick plywood. Spiling is the measurement process used to discover the shape of the next plank. Measures are taken from the lap line on the garboard plank above and from a thin temporary batten that marks the edge of the next plank.

Filed Under: Boatbuilding, Eva Won, Fiddlehead, Hand tools, Shopmade

Resawing Long Lumber – a Tutorial

March 3, 2009 by Bob Easton 33 Comments

Some who follow my blog know of several articles about resawing boat lumber. I’ve found various hand tool resawing techniques around the Internet, but they are usually for relatively short boards. My interest is in boat lumber, often as long as 16 feet and sometimes longer.

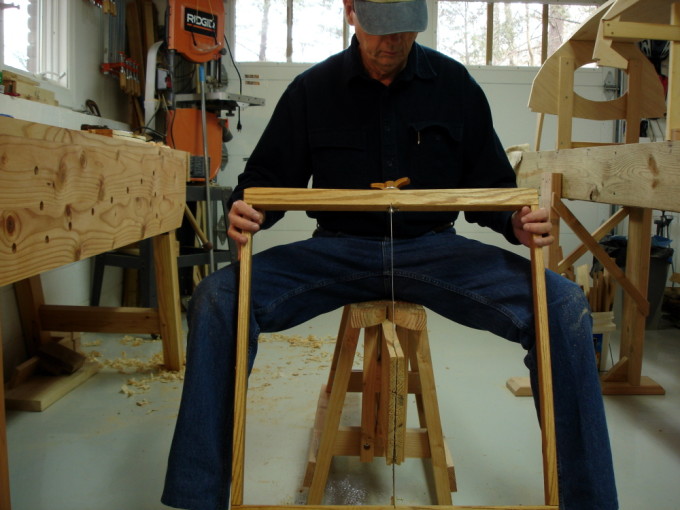
resaw with bob

Many hours sitting on the sawbench and a good stack of resawn lumber has brought me to the point where I can now pull my experience together as a tutorial. That’s not to say I think myself expert, but only that I’ve learned enough to feel basically competent. There’s more to learn before claiming real proficiency.  This information will help those who want to resaw lengthy pieces of softwood lumber using hand tools. It may or my not help others. For example, I don’t know how well these methods will work for tight grained hardwoods.

cedar flitchSo, why resaw by hand? First, the Atlantic white cedar I use for boat lumber is more than twice as thick as I need for planking and deck material. Slicing it doubles the value of each board. I’m a skinflint who likes to avoid buying more than I need. Second, my band saw is an entry level machine that would need significant investment to get the capacity and horsepower needed for lumber up to 12 inches wide. Third, I’m a skinflint Neanderthal galoot and would rather do it myself than pay the lumber mill. Fourth, this is a hobby, not a business where time might be more important. Fifth,my hand tools are powered by Snickers Bars, and the more I use them, the more Snickers Bars I can work off.

I’ll tell you what I’ve learned about making and tuning a saw, about holding the work pieces, about prepping a work piece, and techniques for getting good results.

Before going on, I have to recognize and thank several people. THANKS to Bob Smalser for his saw straightening and rehab tutorials on the Sawmill Creek forums and elsewhere, to Junior Strasil, also on Sawmill Creek, for his work holding and saw filing suggestions, to Peter Taran for his saw sharpening primer on the Vintage Saws site, to Josh Clark for his article on making a frame saw, and to many others who have added to discussions on the forums and in my blog comments. My success results largely from learning from these folks who graciously share their knowledge.

The Saw

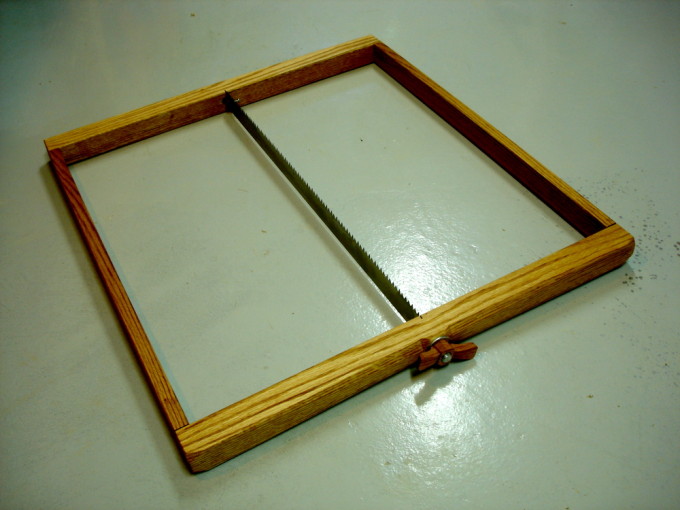
frame saw

My frame saw is made of oak almost exactly as Josh Clark described in his article. His design has given me a frame that is very strong and easy to handle.

Since the post about building the saw, I am on the third blade. The first was a very nice blade about 1 3/4 inches wide and quite thin. I now know that it is a “peg tooth” design (Thanks to “Saint Roy for that” definition) and is not really optimal for rip cutting. It worked OK, but slowly. Next, I tried a 3/4 inch wide 3 TPI band saw blade. It cut much faster, but also went wildly astray just as fast. The current blade is 2 inches wide, cut from a 1915 era Disston D-8 rip saw.

One of Junior Strasil’s suggestions was to file the saw teeth at 90 degrees instead of the usual 82 degrees (0 degrees of rake instead if 8 degrees of rake). This produces a more aggressive angle of attack and has worked very well. However, I had never ever sharpened a saw, and that meant learning how. I found Peter Taran’s “Saw Filing – A Beginner’s Primer,” an excellent guide. It suited my learning style. That old D-8, a few inexpensive tools, and some patience turned a reasonably decent saw into something I call “wicked sharp.” For example, when using this blade for normal ripping of 4 quarters cedar, a gentle nudge and the weight of the saw cuts about an inch per stroke.

While refiling this blade, I removed most of the set. The first couple of feet of resawing proved to “sticky,” so I added some set. Then (of course), it wanted to drift to one side, so I stoned that side. That first board has a good bit of “wandering” as I learned to tune the saw. That’s OK. I need some really thin boards for decking.

The end lesson in all this rambling about the saw is that saw sharpening is not that difficult. I see it as a gateway skill that any hand tool woodworker should be able to easily learn. The next time your saw needs sharpening, don’t send it out. Do some reading at Vintage Saws, order some files and learn a new skill.

One last suggestion. When you make your own saw, be sure to give extra attention to making edges comfortable to hold. For this kind of work, your hands will spend lots of time at the upper reaches of the uprights, and at the outer ends of the top piece.

Workpiece Prep

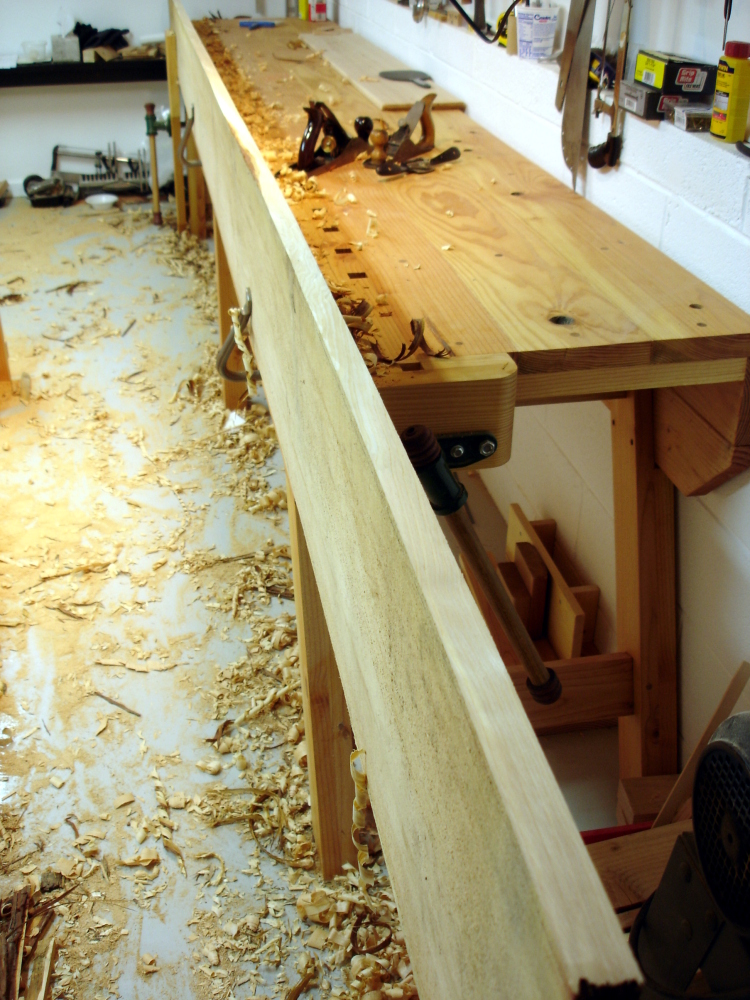
12 foot long bench with overhanging board

The cedar I use is purchased as live edge flitches. Each board is rough sawn, about 4 quarters thick, and still has bark on the edges. For each flitch, I find the widest width of heartwood I can get from it and strike chalk lines for the waste that’s to be removed. If the board is narrow enough to fit within the frame saw, I use it to rip to the lines, about 3 or 4 minutes work for each 16 foot edge. If the board is too wide for the frame saw, I put the board vertically on the front apron of my long workbench and rip with a bow saw. Depending on how careless I was sawing, a few minutes with a jack plane might be needed.

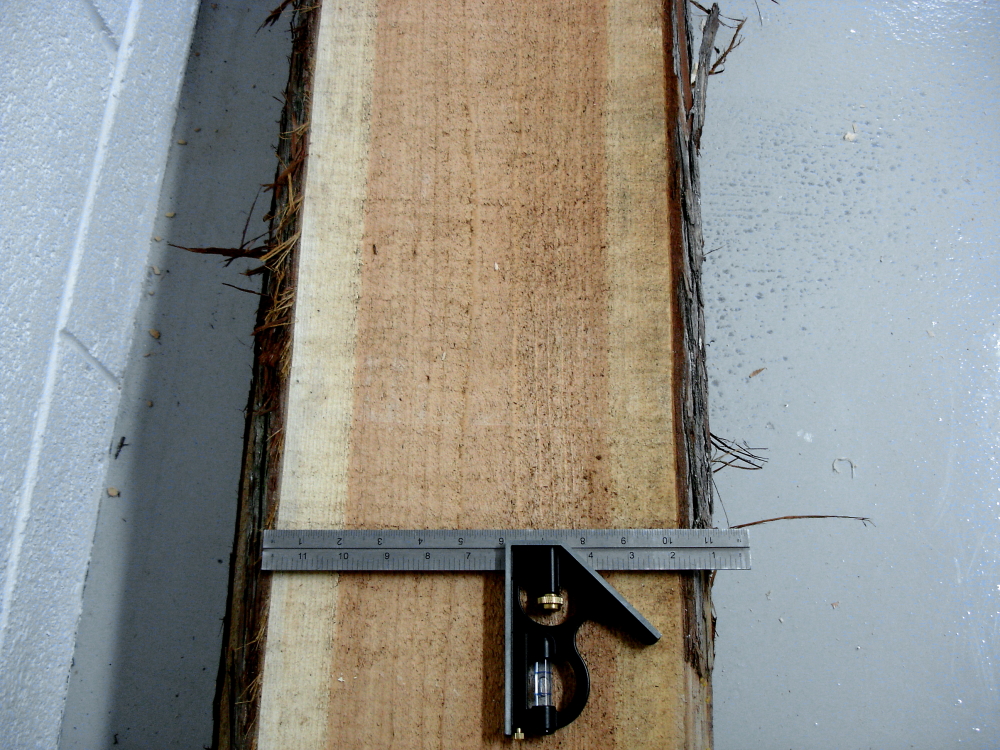
edge prep

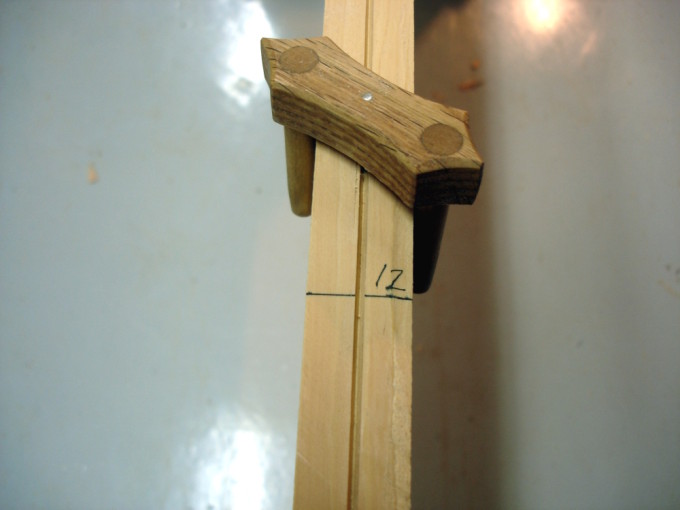
The most important part of the prep is marking center lines on the edges. I use a center marking tool and scribe these lines about 3/16 inch deep and on all 4 edges. Yes, it is worth the effort to mark the ends (well, at least one end) as well as the long edges. These deep and easily visible scribe lines are critical to getting good results.

Lastly, I mark distances in one foot intervals on the long edges. It helps quiet the idle child’s question, “Are we there yet?”

Work Holding

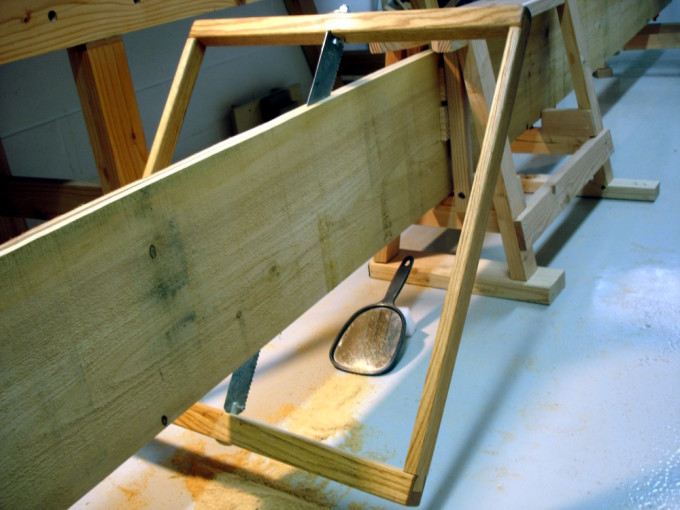
This had me a bit puzzled until I asked a question on one of the Sawmill Creek forums. Junior Strasil replied with a lengthy answer that led to the solution I’m using now. I already had two very nice saw benches that I built from plans by Chris Schwarz. They were a matched pair, both the same height, an important part of the answer. resaw bench

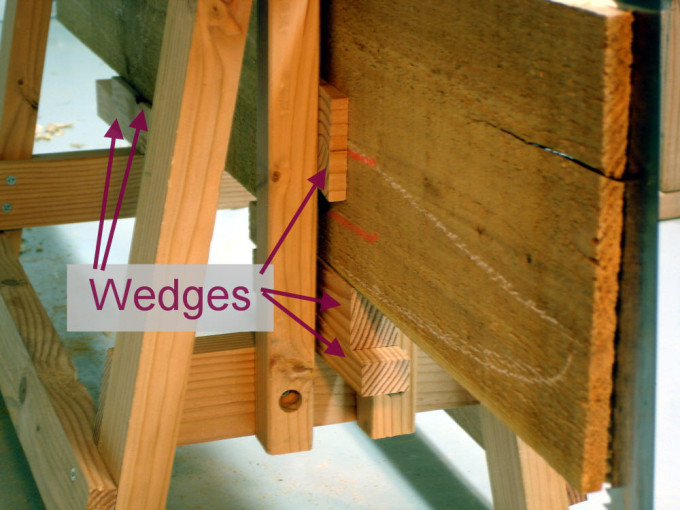
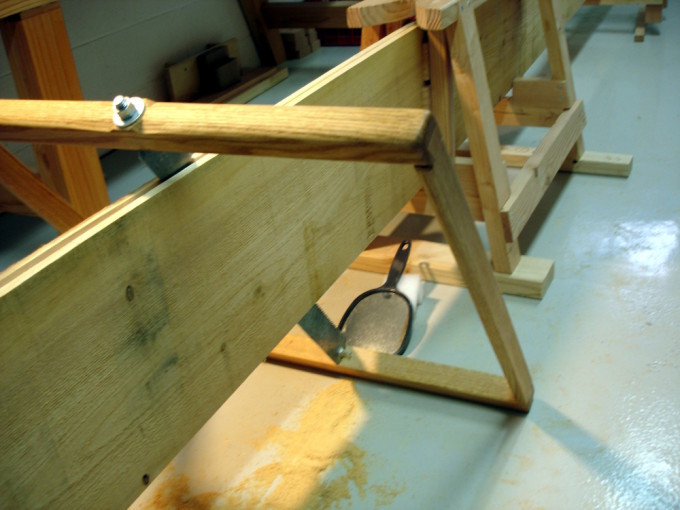
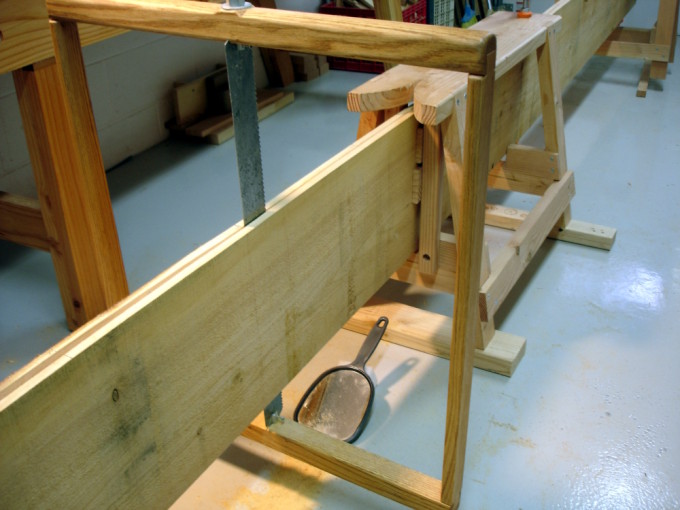
I added two vertical guides to one of the benches. Those guides form a gate that holds a board vertical underneath the bench top. Wedges in the gate keep the board absolutely vertical. I originally used wedges under the boards to clamp the up against the bench top but have since changed to using a simple f-clamp instead. It’s faster and easier to set. Recently, a wider board wouldn’t fit, so I modified the cross braces of the larger saw bench to accommodate a notch for the wider board.

Wider boards also present another problem. There’s reduced room for the length of the throw. In some pictures, you’ll see the saw benched sitting atop 2 by 4s, offering a bit more throw.

The basic setup is using the bench with the gate at the end of the board being cut, and the other bench clamped to the other end of the board to keep the board relatively level. The two benches and me sitting on one of them is enough to keep the workpiece stable.

Sawing

Cutting top ramp
Cutting top ramp

Start with the board extending 12-18 inches from the gate. Start the cut very carefully, using the scribe line on the top edge and the end to ensure as precise a start as possible. I have found several techniques useful in keeping the cut precise.

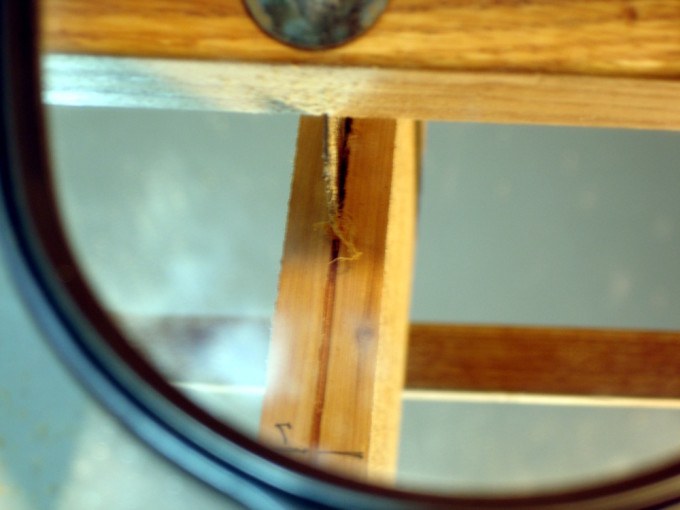
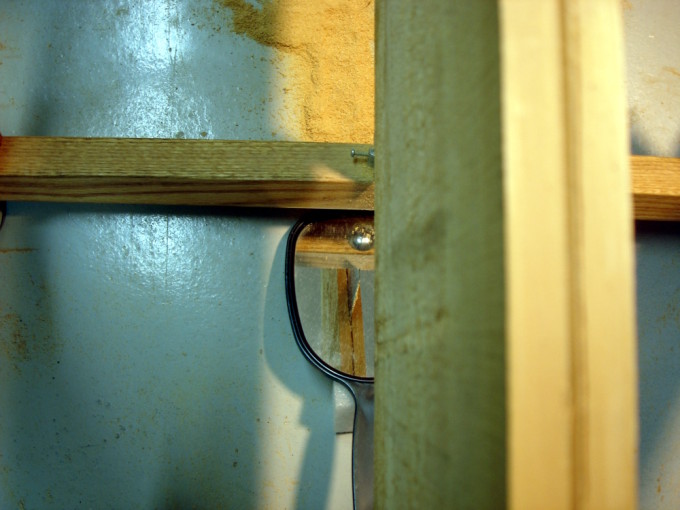
Watch the bottom of the cut with a hand mirror. Propping the mirror up at an angle helps keep it back from being directly under the cut and reduces the frequency you’ll need to clear off the sawdust.

Vary the angle of attack frequently. Sawing with the bottom edge moving away produces a long leading ramp inside the kerf on the top edge of the board. Raking the saw over in the opposite direction produces a long leading ramp inside the kerf from the bottom edge of the plank.

Cutting bottom ramp
Cutting bottom ramp

Use the mirror for this one. When you’re making a nice little curl directly from the center of the scribe line, the ramp is perfect. These ramps provide very effective guidance for the blade. Bring the blade vertical to saw away the apex of these two ramps.

Changing the sawing angles is also helpful for removing dust. There is not enough throw in the saw strokes to efficiently remove dust. That is, the tooth that starts a stroke does not continue all the way through the board to release its dust. The most dust clogging happens when sawing the upper ramp. One method that helps remove this dust is to rock the saw in an arc, kicking up the bottom with each stroke. The other sawing angles are much better for releasing dust. It really falls out easily when the saw is cutting the bottom ramp and at angles approaching that one.

Cutting normally
Cutting normally

Changing these angles frequently does two things: the ramps provide guidance and the different angles of attack keep the sawing surface small and dust release effective. One might think that resawing a 10 inch wide board requires constantly sawing a 10 inch wide surface, just as a band saw does. I’ve tried it that way, and progress is much faster with the multiple angle approach.

Binding is a potential problem. The first few feet of every board produces the most pinch in the kerf. The boards want to pinch back together quite strongly until the cut moves in 3 to 4 feet. After the kerf becomes 3 or 4 feet long, tension eases and the kerf opens. Until then, thin wedges in the kerf can provide relief. It also helps to wax the saw occasionally. I use a simple candle for waxing.

Perfect cutting
Perfect cutting

Sawing effort is moderate, and should be kept moderate. Anytime a saw is forced, it’s liable to bend away from the desired path. I have a few feet of lumber that proves that point well. When the saw is running smoothly in an open kerf and with good guidance ramps, it is easy to maintain a cadence of 60-70 strokes per minute without breathing heavily. Cutting rates depend on the width of the board. My cutting rate for an 8 inch board is almost 4 feet per hour. A 12 inch board drops to about half that. OK, OK, I hear you asking (again) if this guy’s crazy. Probably! But he’s working off those Snickers Bars.

As the Cut Progresses

We started the cut with a saw bench clamped to each end of the board. The gated bench starts, with the gate facing the end of the board, about 12-18 inches from the end of the board. As I sit on the end of the bench, I find 18 inches a comfortable reach. When the cut nears the bench, unclamp the gated bench and pull it back along the board another 12-18 inches. Recenter the board in the gate, Set the f-clamp at the tail of the bench and continue sawing. When the mid point of the board is reached, the cut ends of the boards are probably flapping around and maybe affecting the cut. That’s when it’s time to move the supporting bench from the tail end of the board to the other end.

Continue the process of periodically moving the gated bench until there’s no room to use a clamp. At this point, unclamp everything and rearrange the benches and saw so that the gated bench now has the gate facing the short end of the board, and the saw is trapped between the gate and the end of the board. It is very uncomfortable to attempt cutting by sitting on the bench and pushing the saw backwards. Get a chair of similar height and sit at the end of the board to complete the cut. Since there’s no body full of Snickers Bars sitting on either bench, some temporary weight or other constraint might be needed to keep the rig from moving. I sometimes toss a rope through the legs of the supporting bench and tie it to something immovable in the shop.

When the Cut Goes Astray

watch the mirror

Oh, it will. This was a frequent occurrence on my first few boards. Saw tuning, and developing the multi-angle techniques have mostly eliminated the problems, but you need to know how to recover. Of course, constant use of the mirror helps spot the wandering before it gets serious. I used to keep the mirror on the bench beside me, and reach for it once in a while. After a few wanderings, I learned to keep the mirror on the floor and to watch it constantly. OK, back to recovery. Imagine that you’ve wandered off into day dreaming as you saw and the saw has wandered off too. You’ll see this at the bottom of the cut, not the top. (probability = 1.0)  The best recovery I’ve found is to unclamp the workpiece and turn it over. Work at correcting the wandering from the top. Be forewarned that simply trying to use brute force to press the end of the saw back to the line will result in a nice long cupped section. Don’t ask how I know.

Next?

Some of the blog commenters have wondered whether a saw with fewer teeth per inch would cut faster. That’s very likely. A 3 tpi saw with deeper gullets might be faster. I don’t yet know. I’m at 5 tpi because that was the original filing of that old D-8 blade and it was an experiment, one that turned out quite well. I might get another old rip saw and try a 3 tpi, deep gullet version. For the time being, there’s a lot of thin spruce pieces needing ripping and I want to keep this 5 tpi blade for that work.

If there’s anyone reading this who also thinks resawing with hand tools is a good idea, leave a comment. I’d love to know there are other skinflint Neanderthal galoots around. What fuels your hand tools?

Filed Under: Boatbuilding, frame saw, Hand tools, resawing, Woodworking

  • « Go to Previous Page
  • Page 1
  • Interim pages omitted …
  • Page 10
  • Page 11
  • Page 12
  • Page 13
  • Page 14
  • Page 15
  • Go to Next Page »

Primary Sidebar

Footer

Recent Posts

  • New Frame Saw / Scroll Saw
  • Lamppost Sign
  • Goodbye PayPal – Goodbye Bob’s eBooks
  • Anarchist’s Workbench is Done
  • Why we keep offcuts…

Categories

  • About
  • Artwork
  • Boatbuilding
  • Boating
  • bowl carving
  • Boxmaking
  • Clocks
  • Drawings
  • eBook
  • etude
  • Eva Too
  • Eva Won
  • Fiddlehead
  • Fiddlehead model
  • Flying
  • frame saw
  • gilding
  • green woodworking
  • Grinling Gibbons
  • Guns
  • Hand tools
  • Humor
  • kerfing plane
  • Lettercarving
  • Mill Creek 13
  • Model building
  • Power tools
  • Rant
  • resawing
  • scroll saw
  • Shopmade
  • sign painting
  • Stonework
  • Swimming
  • Technology
  • The Wall
  • treadle lathe
  • Uncategorized
  • VSD
  • Woodcarving
  • Woodturning
  • Woodworking
  • workbench

Other stuff

  • About
  • Contact
  • Privacy Policy

Copyright ©2024 · Bob Easton · All Rights Reserved