• Skip to primary navigation
  • Skip to main content
  • Skip to primary sidebar
  • Skip to footer

Bob Easton

Chocolate powered woodworking

  • Home
  • Grinling Gibbons Tour

Hand tools

It’s All About Sawing

August 18, 2008 by Bob Easton 4 Comments

Some of the furniture I wanted for my new shop was a decent pair of sawhorses. I skipped the Workmate era a few decades back, and haven’t changed my mind since. I don’t want sawhorses that pretend (poorly) to be workbenches, and don’t actually work very well for sawing. Nor did I want the usual utility horses that are almost completely useless for sawing.

The answer that caught my eye was a sawbench designed by Christopher Schwarz, editor of Woodworking and Popular Woodworking magazines. A sawbench and sawhorseIt differs from the utility horse by having a broader top, a surface that can be used to hold lumber more firmly than on the edge of a two by four. A good sawbench supports a wide variety of hand sawing tasks. Christopher offers free construction drawings for a sawbench and a companion horse, both the same height

Christopher also conducts classes about constructing them.  Now, one would think that they’re pretty straightforward and may not need a class. That was my first thought, and not being near one of his class locations, I decided to set off on my own. That’s when I discovered a few of the things not covered on the drawings are:

  • how everything is fastened together
  • the best assembly sequence
  • how to be really good at the joinery.

The first puzzle, fastening, was fairly simple, especially after seeing screws mentioned in a blog entry. I don’t know what Christopher uses, but I opted for #10 by 1 1/2″ countersunk screws. Assembly sequence sorted itself out, although I’m not sure I found the most efficient sequence. Got them together! The real enlightenment was about joinery. There are a dozen joins in each bench, each needing somewhat accurate sawing. Part way through the project, it dawned on me that those classes are really all about developing good hand sawing techniques, not about building sawbenches! The sawbenches were just fodder for sawing practice.

While I’m fortunate to be able to learn a lot of things on my own, classes can be invaluable in two regards. They can convey advice on how to master skills competently, and by necessity they’re full of the advice you never find in books: how to recover from mistakes. The absolute best thing about the class at Wooden Boat School was learning from mistakes, those I made and those I watched others make. In that sense, a class is a “mistakes concentrator” that packs plenty of learning into a short time.

Slogging on without that advice, my joins gradually improved. By trial and error I learned the correct stance, (as in the Using a Sawbench article), what workpiece positions worked best for specific types of cuts, and how to be more accurate. Since I had to discover those things on my own, the learning might stick, but I’m sure there are lots of things I didn’t learn.

eggbeater drill
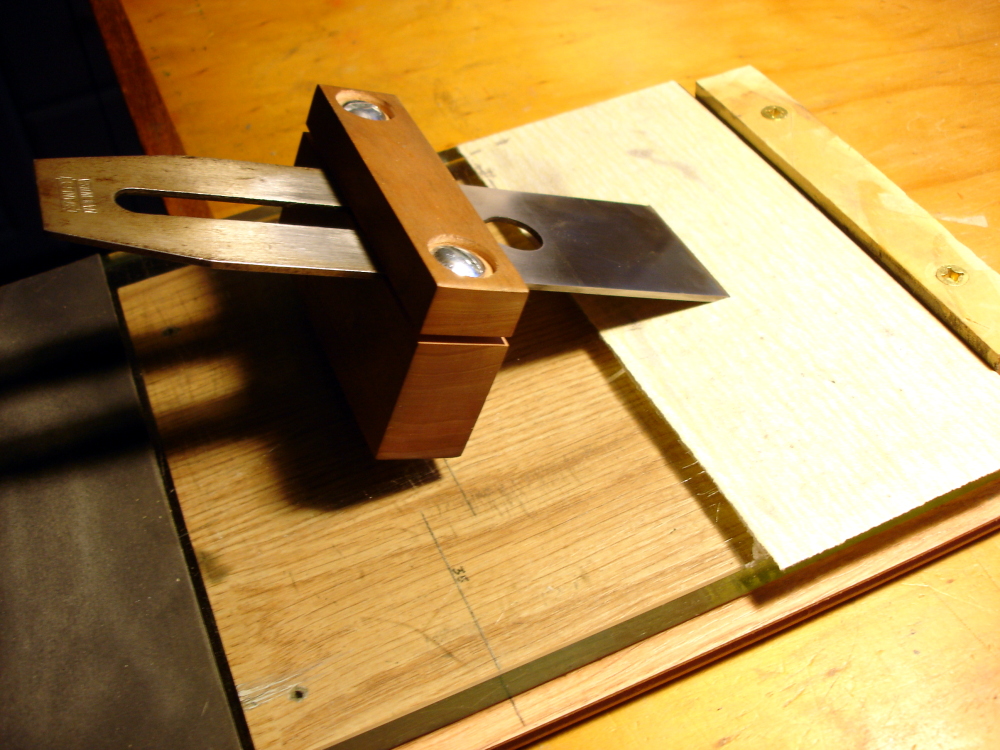
As an aside, these horses were built using hand tools exclusively except for the curved rip notch which I cut with a band saw. The wood is Douglas fir, direct from the home center, hand planed down to the specified dimensions. All joins were hand sawn. Drilling and fastening was done with my 1896 Goodell-Pratt cordless drill.

The results are a pair of horses that work very well. Don’t look too closely at the joins. They’re good enough for this kind of project and the gaps will soon fill with sawdust.

Filed Under: Hand tools, Woodworking

A 10¢ Sharpening System

May 10, 2008 by Bob Easton

My first plane and chisel sharpening work was freehand. I taught myself how to achieve a very sharp edge with a minimal amount of equipment. The techniques take a bit of concentration and practice, but are basic skills learned by many generations of craftsmen.

Yet, there was this lingering curiosity about the sharpening jigs found in the tool catalogs like this one or this one. Could they help me produce a better edge? They certainly look great but they’re way out of the price range I’m willing to pay to satisfy a curiosity.

plane jig holding an ironThen, I stumbled across Derek Cohen’s “10¢ sharpening system.” Well, not quite 10¢. I had a nice piece of cherry, but not suitable fasteners. I spent $1.40 and a couple of hours labor, a very acceptable price for an old galoot of Scottish heritage.

Curiosity satisfied. I’m not sure I get a “better” edge using a sharpening jig, but I can certainly produce an edge that is more repeatable. That is, each freehand sharpening result will be sharp, but might not be exactly xx degrees, whereas the jig always produces the same angular result. Using the jig removes the need to concentrate on maintaining a precise angle from stroke to stroke. The job is easier using the jig, but I enjoy knowing that I can be successful without it.

So, this entry is the place where I’ll keep the extension settings for the plane irons I currently have. Brent Beach’s extension calculator gave me these values.

Extension settings

These are for my particular jig which is 1 and 1/2 inches tall on the long side and just over 1/2 inch tall on the short side.

For Stanley and Sargent irons that are typically 0.08 inches thick, use the tall side and these extensions.

  • 25° primary bevel – 3 and 12/32nds
  • 28° micro bevel – 2 and 32/32nds
  • 30° primary bevel – 2 and 24/32nds
  • 33° micro bevel – 2 and 14/32nds
  • 35° primary bevel – 2 and 8/32nds
  • 38° micro bevel – 2 and 1/32nd

For spoke shaves with short blades about 0.06 inches thick, use the short side of the jig.

  • 25° primary bevel – 1 and 11/32nds
  • 28° micro bevel – 1 and 6/32nds

The rest of the system

reflections on the back of an ironMany sharpening systems exist. The latest fashion uses diamond stones. Just before that was the Japanese water stones fad. Before that, and good enough for many generations, were oil stones, usually Arkansas stones. Somewhere along the way, some folks stumbled upon using sandpaper, the “Scary Sharp(tm)” method. There are proponents, and good sensible arguments for each approach. I shuddered at the cost of the water stones, and fell back upon a couple of two sided India stones I’ve had for decades. They’ll do in a pinch, but aren’t the optimal grits. So, I stopped by a glass store and bought an outcut of 1/2 inch plate glass. That and several grades of sandpaper from “the borg” rounds out the kit. I don’t go to the 1200 and 2000 grit levels suggested by some, but hone to 600 grit and then strop on a piece of card that’s prepped with white rouge. That’s plenty good enough to polish the back of an iron to a mirror finish and produce edges to hair shaving sharpness.

By the way, the first picture shows the jig in use sharpening the iron from a jack plane. It is working on 220 grit sandpaper that’s mounted on one end of my 1/2 inch piece of plate glass. That, in turn, sits atop a bench hook to keep it from sliding around.

Filed Under: Hand tools, Shopmade

Just Plane Practice

May 6, 2008 by Bob Easton Leave a Comment

a bucket full of shavingsIt was a simple job, the kind assigned to a newbie woodworking apprentice. Make this piece of lumber thinner. Use those hand planes over there. Don’t even think of power tools. We don’t have any that are suitable for this job.

The lumber was a two yard long stick of common softwood, 1 x 3. I intend to use it as a mounting strip for hanging the decorative oriental rug (a gorgeous red Chinese dragon) that our son gave his mother. I wanted to use something close to 1/4 inch to minimize how much the mount stands off from the wall. This was the perfect job for learning how to use two of my “new” woodworking planes.

Stanley #40 scrub planeThe plane to use for quick stock removal is a Stanley #40 “scrub” plane. My #40 has an iron with the very old “Stanley Rule and Level Co.” trademark, which dates the plane to about 1910. A scrub plane has an iron with a curved cutting edge which is helpful for scrubbing off thick shavings. Scrubbing diagonally across the lumber makes quick work of reducing thickness while affording a reasonable degree of control.

I scrubbed about 1/4 inch off one side and then smoothed up the rough furrows with a Stanley #5 “jack” plane. Old stories say it is called a “jack” because it is the workhorse, “jack of all trades” plane. My #5 dates to sometime between 1933 and 1941. Stanley #5 jack planeThis smoothing work went faster than I expected. The first dozen or so passes knocked the high ponts off the scrub furrows. It didn’t take long to work those peaks down and start producing long wide shavings. A few minutes work and the surface was plenty smooth enough for this purpose, actually a good bit smoother than when it came home from the lumber store. I also have a good smoothing plane, but this application doesn’t need to be smoother and I was more than happy using only these two planes.

Flip the board over and do the other side. Yes, I could have done it all from one side, but this was an intentional learning exercise. Think about the “Karate Kid” waxing those cars. Practice is good.

The work went quickly and easily (ok, an hour or so of learning and practice). The most important thing I learned was how well these tools work when they are well honed and tuned. The weight and momentum of the tool does the work. It was aerobic work, not strenuous work. The time I spent learning to tune up and sharpen the tools has paid off very well, but that’s a story for another post.

BTW, anyone interested in rehabilitating old planes can get excellent advice from a seasoned sawyer in the Northwest, Bob Smalser. See his “Rehabilitating Old Planes” article, and many other useful articles here and here.

Filed Under: Hand tools, Woodworking

  • « Go to Previous Page
  • Page 1
  • Interim pages omitted …
  • Page 13
  • Page 14
  • Page 15

Primary Sidebar

Footer

Recent Posts

  • New Frame Saw / Scroll Saw
  • Lamppost Sign
  • Goodbye PayPal – Goodbye Bob’s eBooks
  • Anarchist’s Workbench is Done
  • Why we keep offcuts…

Categories

  • About
  • Artwork
  • Boatbuilding
  • Boating
  • bowl carving
  • Boxmaking
  • Clocks
  • Drawings
  • eBook
  • etude
  • Eva Too
  • Eva Won
  • Fiddlehead
  • Fiddlehead model
  • Flying
  • frame saw
  • gilding
  • green woodworking
  • Grinling Gibbons
  • Guns
  • Hand tools
  • Humor
  • kerfing plane
  • Lettercarving
  • Mill Creek 13
  • Model building
  • Power tools
  • Rant
  • resawing
  • scroll saw
  • Shopmade
  • sign painting
  • Stonework
  • Swimming
  • Technology
  • The Wall
  • treadle lathe
  • Uncategorized
  • VSD
  • Woodcarving
  • Woodturning
  • Woodworking
  • workbench

Other stuff

  • About
  • Contact
  • Privacy Policy

Copyright ©2024 · Bob Easton · All Rights Reserved