• Skip to primary navigation
  • Skip to main content
  • Skip to primary sidebar
  • Skip to footer

Bob Easton

Chocolate powered woodworking

  • Home
  • Grinling Gibbons Tour

Shopmade

New Frame Saw / Scroll Saw

November 26, 2022 by Bob Easton 8 Comments

It’s smoother, more accurate, quieter, and doesn’t scare the children.

photo of the scroll saw from the front

My previous scroll saw was an attachment for my treadle powered lathe. It was built from a postage stamp sized drawing by Roy Underhill. While it served well for years, it is a clanky, rickety, wobbly, insanely noisy collection of loose parts pretending to almost work as a saw. Accuracy is subjective. Yet, I cut many wood carving projects with it and was satisfied until arriving at a new project that wants several parts thicker than the saw could handle; basswood parts that are 3 inches thick.

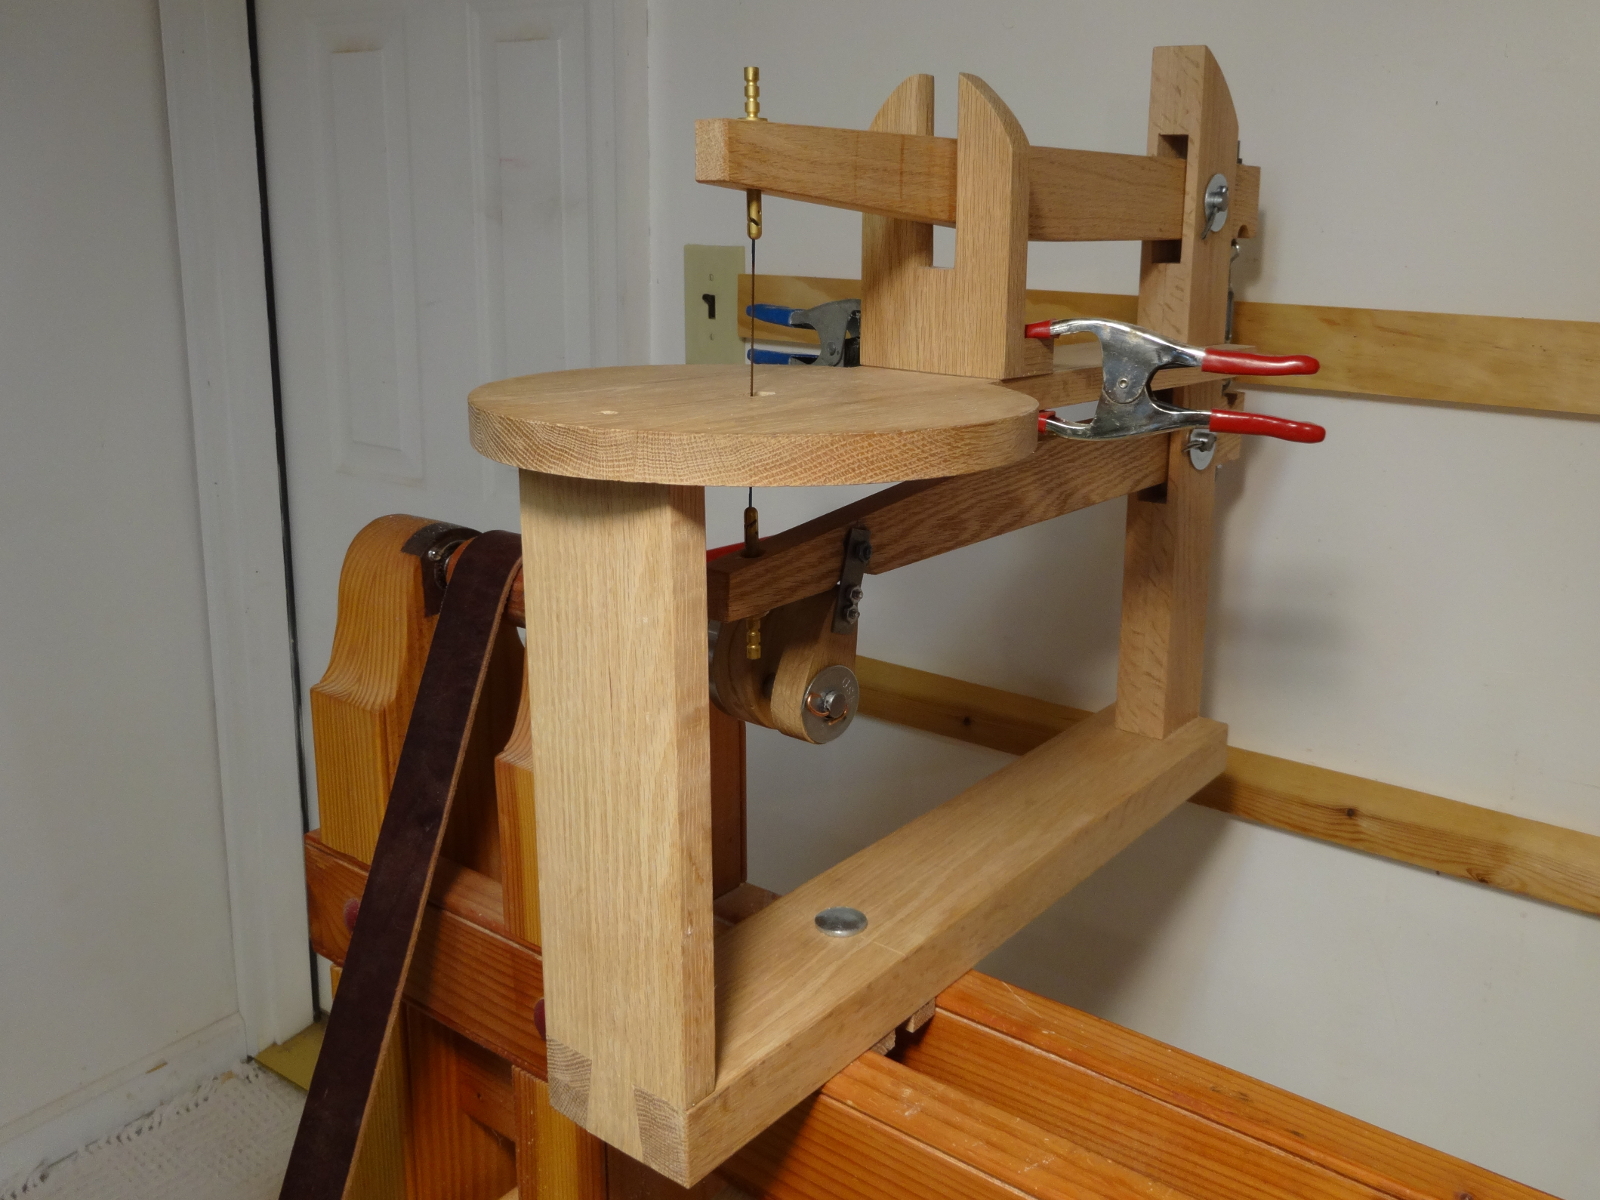
This new saw, also treadle operated, is a simple frame saw that has the frame moving in a vertical plane, riding very smoothly on drawer slides.

photo of treadle operated frame saw

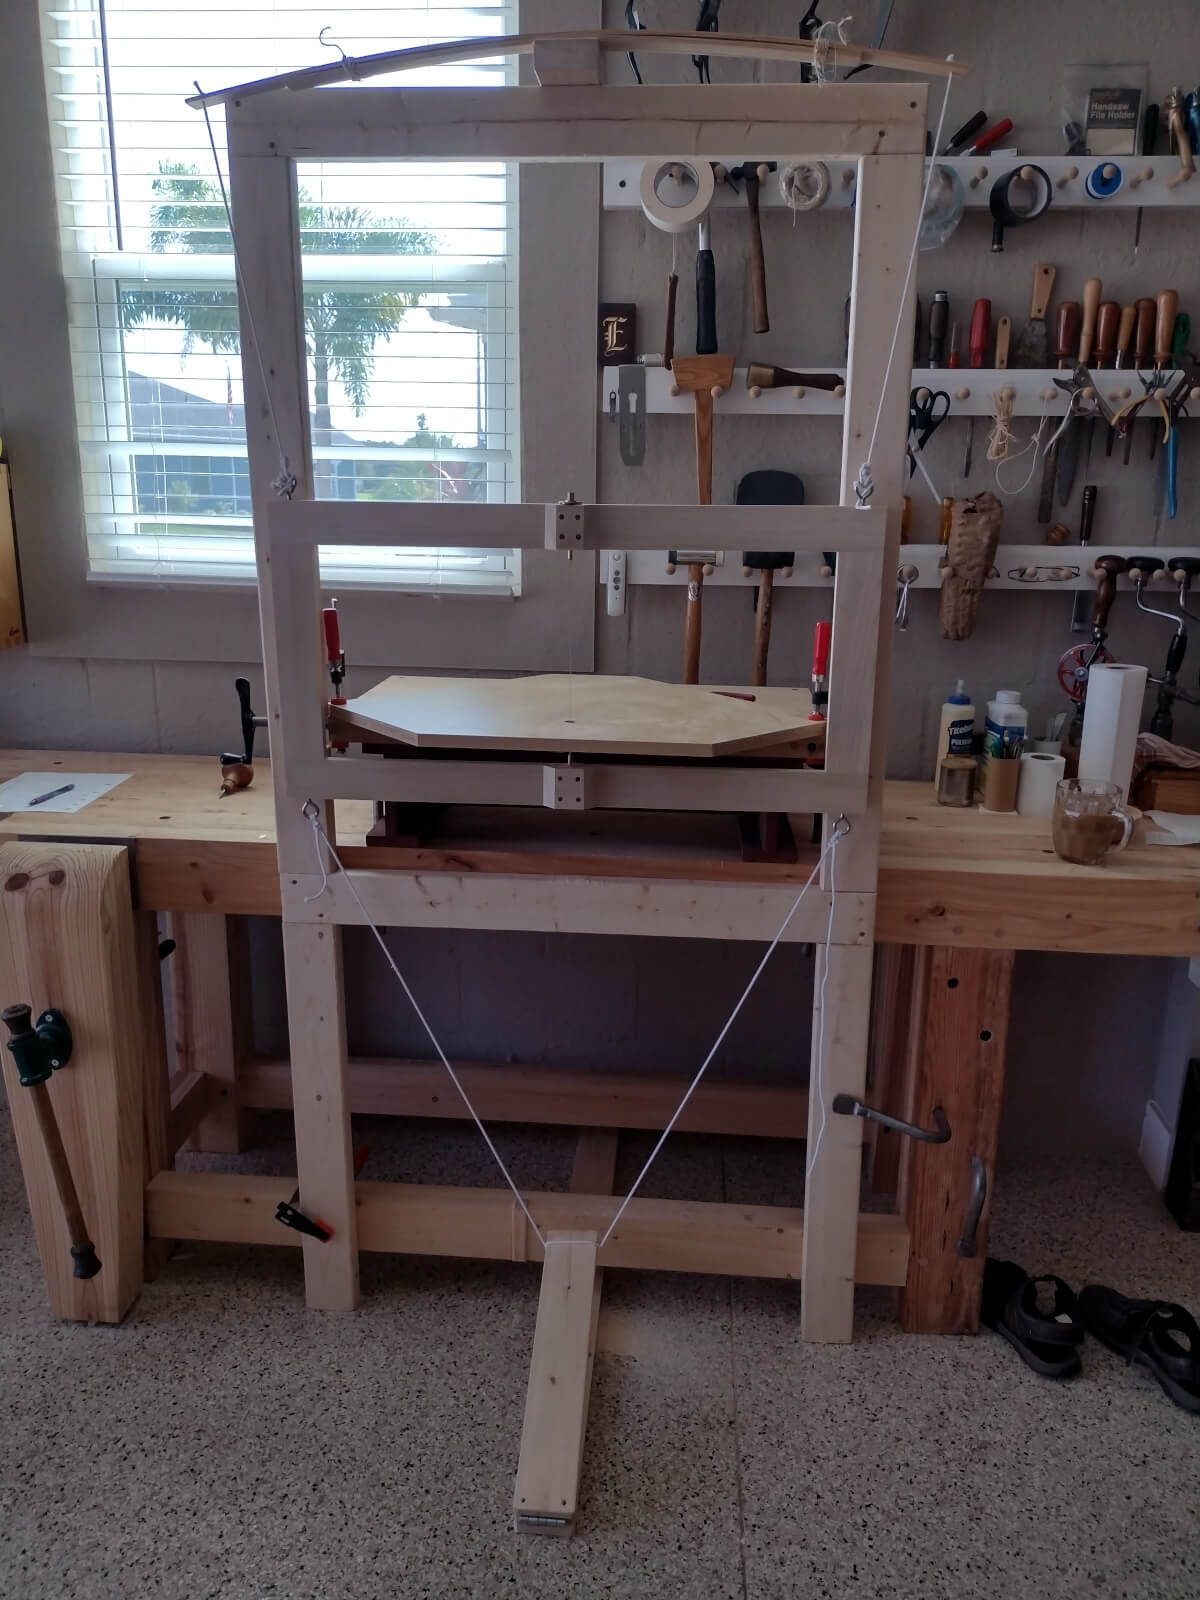
The support frame is simply an unfinished flat assembly of construction grade 2 x 4 lumber, joined by half-laps. It clamps to the front face of my workbench. Drop a rope from the bottom of the moving frame, loop it around a hinged treadle, and we have the motive power that pulls against the spring at the top of the support frame. That spring is only a couple of strips of quarter inch thick lattice, and more rope. Functional, not pretty.  It has the added benefit of storing away in minimal space.

For the table that supports the workpiece, I use my woodcarving bench-on-bench sitting behind the frame. Clamped to the bench is a piece of cabinet shelving with a hole drilled for the blade. Simple, and as with the other parts, easily stored in minimal space.

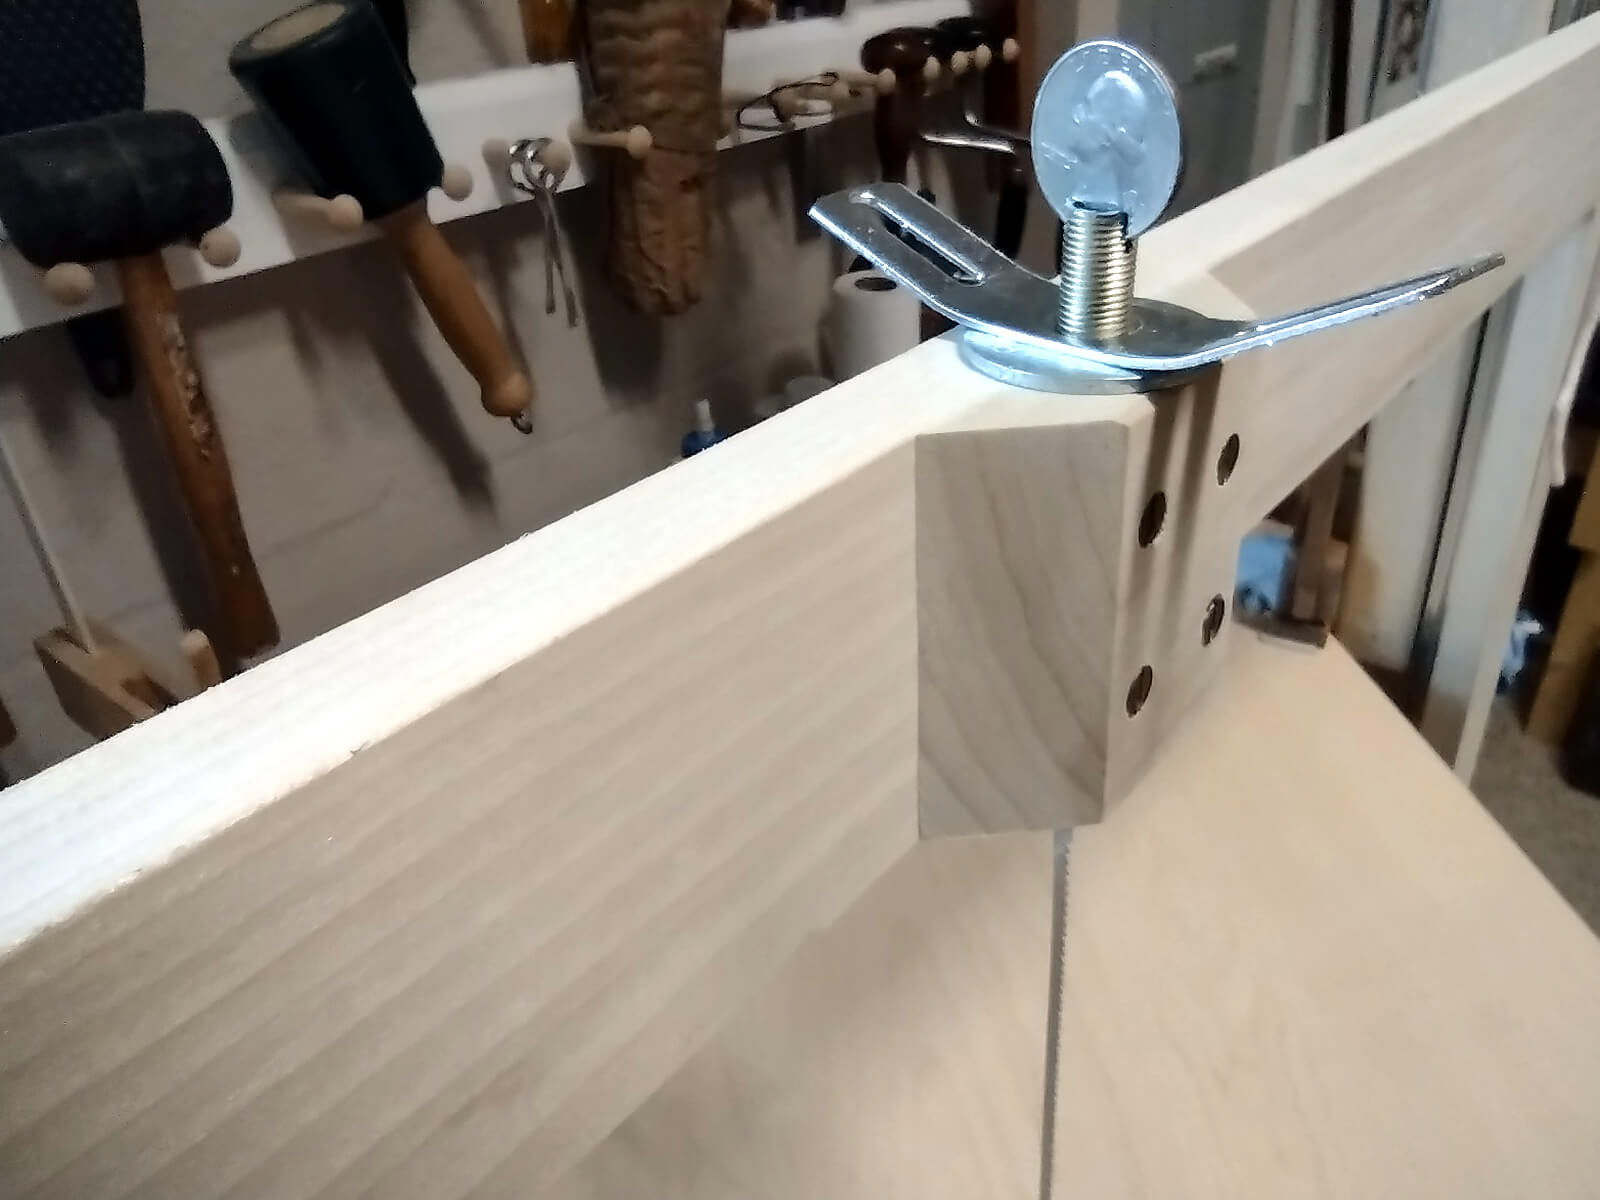
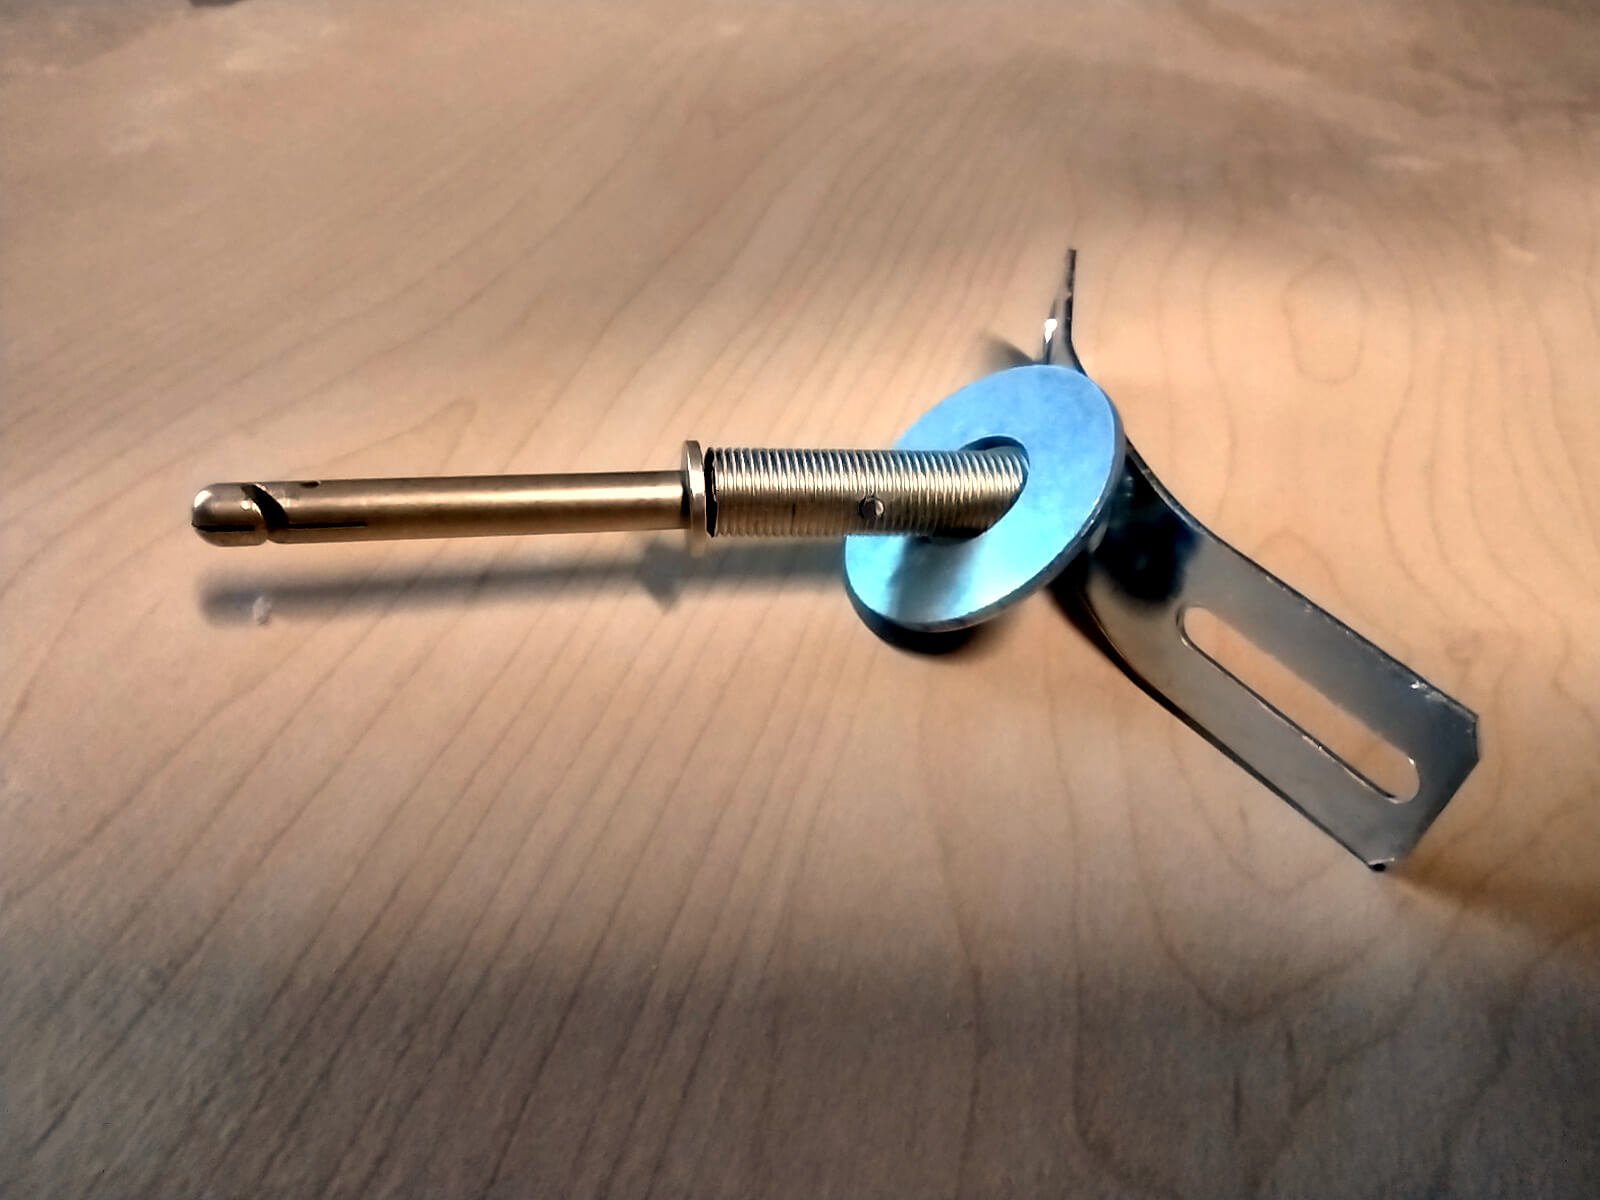
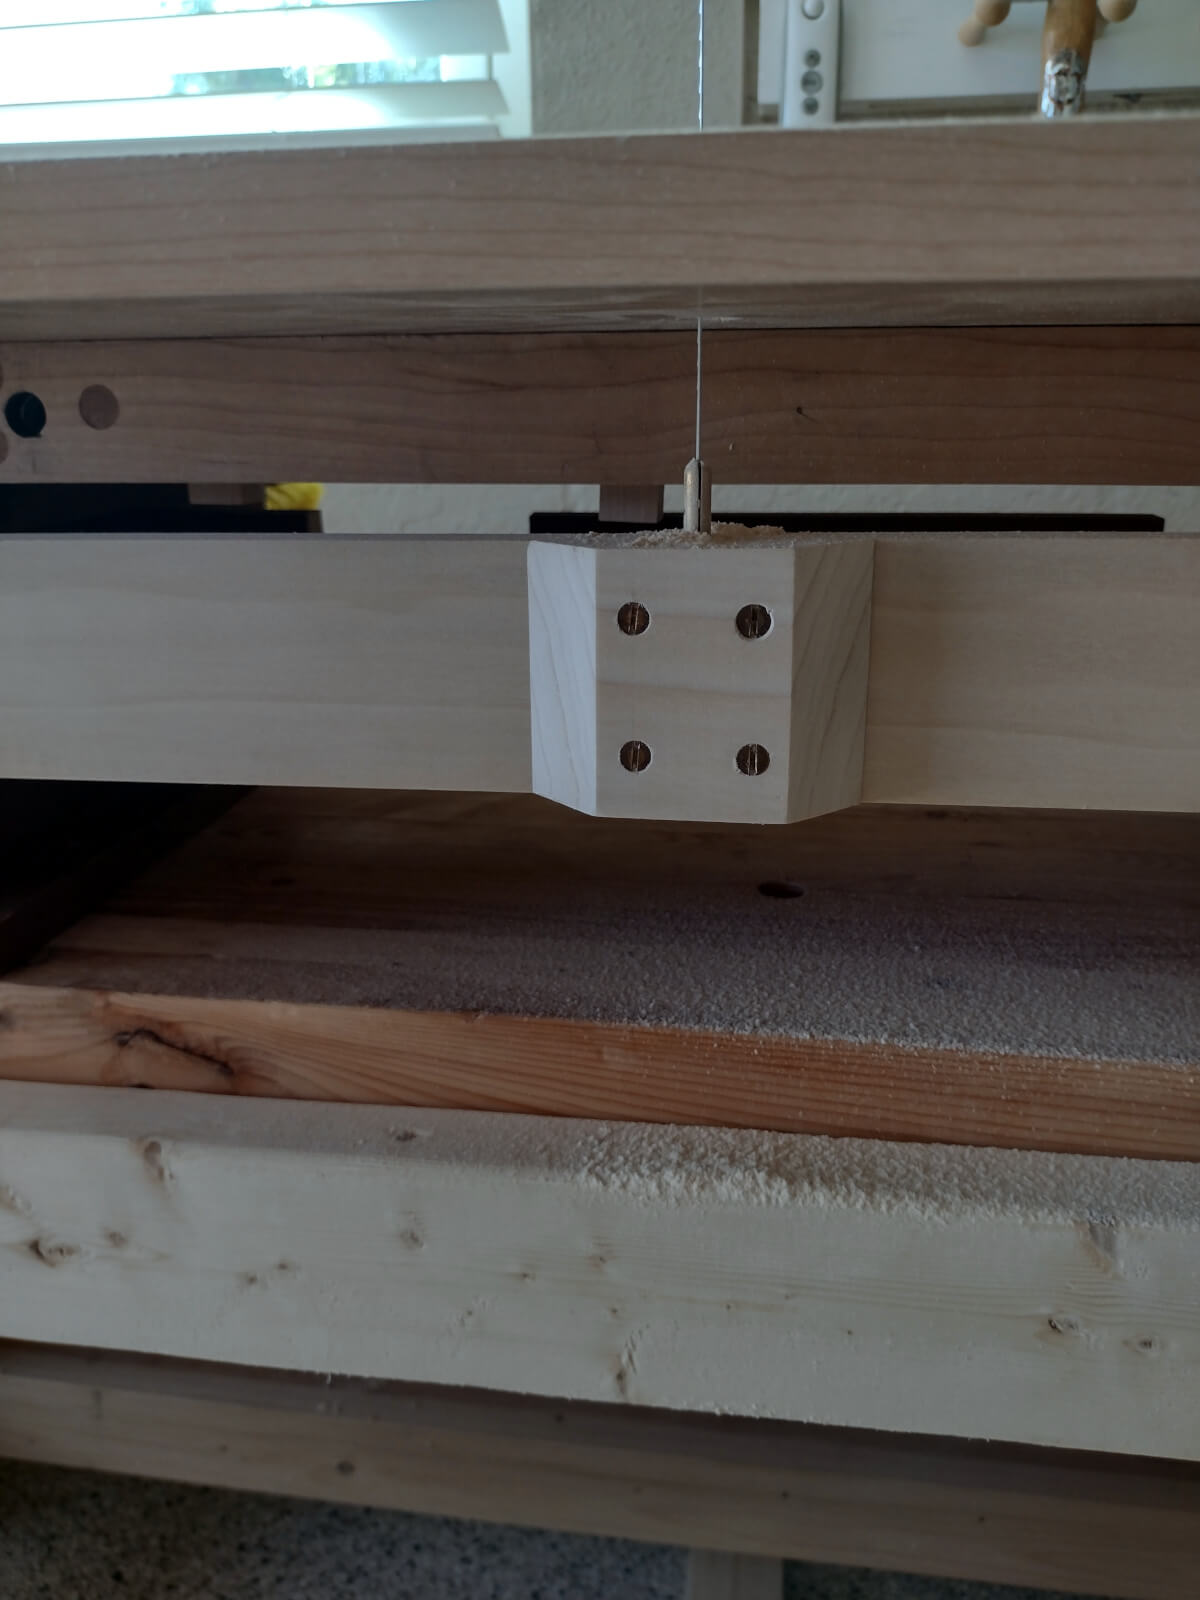
The saw frame itself is poplar, using bridle joinery. Most important are the blade holding pins and blade. These are parts from the Tools For Working Wood 12″ bow saw. I’ve used them before for a wonderful turning saw and for that earlier scroll saw. I cannot say enough good about them. The bottom pin has its flange trapped by a wood block screwed to the bottom of the frame. The top pin is adjustable thanks to being pinned inside a lamp pipe which can move inside that upper block. Tensioning is via a slightly bent cross bar. A variety of blades from TFWW offer a good range of cutting options.

photo of top blade holder
top blade holder
photo of top blade holder parts
top holder details
photo of bottom blade holder
bottom blade holder
photo of cut pieces for a Gibbons-like woodcarving

So, how well does it work? Two answers. The next photo shows the parts of a new carving project, all but one cut with this saw. They are 2 and 3 inches thick, with the longest being 21 inches long. The video shows a comparison between the old saw and the new.

What I haven’t shown you are the smiles that come along with using the new one.

Inspiration

The first inspiration appeared in the middle of a video made by Esteban Jiménez at his woodcarving shop in Barcelona. His treadle operated frame saw is gigantic in comparison to what I wanted. Impressive! Watch Esteban describe it and then demonstrate its operation:

Another inspiration is one of many examples I found of treadle operated fret saws used by marquetry artists. Here we see Christina Moreno using her frame saw:

Filed Under: frame saw, Shopmade, Woodcarving

Anarchist’s Workbench is Done

March 10, 2022 by Bob Easton 8 Comments

It’s been done for a couple of weeks and is already suffering HSS, Horizontal Surface Syndrome, the collecting of stuff on almost any horizontal surface.

  • Design – Anarchist’s Workbench by Christopher Schwarz from Lost Art Press
  • Dimensions – 100 inches long, 23 inches deep, 34 inches high
  • Lumber – grade #2 Southern Yellow Pine from central Florida Lowes stores
  • Vise – Crisscross from Benchcrafted
  • Vise screw – 21 inch screw from Lee Valley Tools
  • Vise accessory – Crubber non-slip cork/rubber from Benchcrafted
  • Planing stop – Crucible Planing Stop from Lost Art Press
  • Holdfasts – Gramercy Holdfasts from Tools For Working Wood

Note: I have no affiliation, nor collect any royalties, from any of these products. I simply enjoy their quality.

Filed Under: Shopmade, workbench

Why we keep offcuts…

February 7, 2022 by Bob Easton 4 Comments

photo of bench assembled, but still upside down

The Anarchist’s Workbench is ~mostly~ assembled, but it is upside down. How can I, myself, and me get it turned right side up? Yeah, I’m a hermit that won’t ask a team of strangers to throw their backs out. I’m also an enginerd with a simple understanding of physics. Here we see the bench resting on a couple of offcuts at each end, placed there to facilitate removing the clamps I used as levers for flipping the benchtop over. (See previous post.) Its time to engineer a way to flip the entire bench.

photo of bench turnover - 1 of 4

My F150 pickup truck has a great scissors jack that, fortunately, never gets used. Now is the time. First step, use it to tip the bench 90 degrees. Actually, I just moved it off center enough that tipping could be done with about 60 pounds of effort / control.

photo of bench turnover - 2 of 4

Start jacking up the back side. This is where the offcuts come in. I built two stacks of them while raising the bench. They serve two purposes, as a safety in case of sliding off the jack, and you’ll see the other purpose in the next paragraph. BTW, little patches of rubber shelf liner under the legs keeps the bench from sliding on the super smooth coated floor.

photo of bench turnover - 3 of 4

Keep on jacking. As the reach of the jack extends, let the bench rest on those stacks of offcuts and put a few offcuts under the jack to give it more reach.

photo of bench turnover - 4 of 4

It didn’t need much more to reach another tipping point, where with only about 40 pounds of effort I tipped the bench over by hand and let it softly land upright.

photo of top of the bench being scrub planed

Call the donkey back for more planing. Here, flattening the top is partially done with a #5 scrub plane. Needs more….

Yet to be done:

  • Finish flattening the top. (done)
  • Saw off the ends. (done)
  • Drill 16 holes for holdfasts. Schwarz has a pattern in the book. (done)
  • Build a chop for the vise.
  • Install the Benchcrafted Crisscross vise that I brought with me when we moved.

Filed Under: Shopmade, Woodworking, workbench

  • Page 1
  • Page 2
  • Page 3
  • Interim pages omitted …
  • Page 22
  • Go to Next Page »

Primary Sidebar

Footer

Recent Posts

  • New Frame Saw / Scroll Saw
  • Lamppost Sign
  • Goodbye PayPal – Goodbye Bob’s eBooks
  • Anarchist’s Workbench is Done
  • Why we keep offcuts…

Categories

  • About
  • Artwork
  • Boatbuilding
  • Boating
  • bowl carving
  • Boxmaking
  • Clocks
  • Drawings
  • eBook
  • etude
  • Eva Too
  • Eva Won
  • Fiddlehead
  • Fiddlehead model
  • Flying
  • frame saw
  • gilding
  • green woodworking
  • Grinling Gibbons
  • Guns
  • Hand tools
  • Humor
  • kerfing plane
  • Lettercarving
  • Mill Creek 13
  • Model building
  • Power tools
  • Rant
  • resawing
  • scroll saw
  • Shopmade
  • sign painting
  • Stonework
  • Swimming
  • Technology
  • The Wall
  • treadle lathe
  • Uncategorized
  • VSD
  • Woodcarving
  • Woodturning
  • Woodworking
  • workbench

Other stuff

  • About
  • Contact
  • Privacy Policy

Copyright ©2024 · Bob Easton · All Rights Reserved