• Skip to primary navigation
  • Skip to main content
  • Skip to primary sidebar
  • Skip to footer

Bob Easton

Chocolate powered woodworking

  • Home
  • Grinling Gibbons Tour

Shopmade

Shopmade Router Plane

November 17, 2009 by Bob Easton 5 Comments

Someday…  Someday, I’m going to need a router plane. Router planes are used to clear the waste from a dado groove. I really don’t need the plane today, but have some projects in mind for the future that will need dado joints.
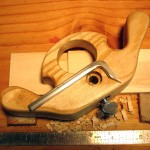
picture of router planepicture of blade and blade holderI based this plane (also called an “old woman’s tooth”) on an example made by Derek Cohen. A bit of 5/4 ash left over from the Fiddlehead boat was the starting point. Shaping was much as Derek described; drill a few holes, cut the outline with the shopmade turning saw, refine with rasps. Now that I can shape metal, the tooth / blade was shaped from a hex key. Hand cranking the grinder to shape the blade burned off a hand full of mini Tootsie Rolls. A screw insert and a thumb screw were the last of the parts. A couple of coats of boiled linseed oil, followed by a coat of danish oil finished the job.
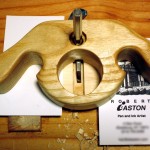
picture shows depth settingYes, it cuts as intended. This hex key yielded a 1/4 inch wide blade, which will be handy for the intended projects. The method used to set the depth of cut is to elevate the tool on a couple of old business cards and then drop the blade to the wood surface and tighten the thumb screw. Now, remove the cards and cut. Repeat til done. By the way, it is a real good thing to cut from the outsides of a groove toward the center. That avoids tearout at the edges.

For those who have no old business cards for depth setting, use two aces out of a deck of playing cards. Leave them in the shop, so the next time you have friends over for poker, you know where at least two of the aces are.
Filed Under: Hand tools, Shopmade

Tools…

April 23, 2009 by Bob Easton 6 Comments

My slow and deliberate boatbuilding adventure is slow not only from forgetting to order the right fasteners, but also stopping to make tools as I need them.

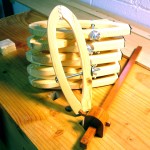
clamps-and-gauge1Lapstrake planking is the sort where one plank overLAPS the next. Two tools useful for this kind of construction. First, one needs to mark the width of the lap on a plank edge so that yet another rolling bevel can be planed as a joint area. Some boatbuilder make simple little gauges from a notched piece of wood. That’s basically a one-time use gauge. I decided to make a good marking gauge that will last the rest of my woodworking days. It’s in the foreground of the photo. (Click any picture to see a larger version.) It is made of cherry with a couple of coats of wiping varnish as finish.

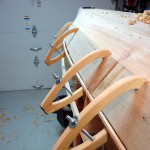
clamps in useNext comes the clamps. Deep throats are needed to reach around the width of the planks, deeper than most c-clamps. These are traditional lapstrake clamps, cut from pine and poplar stock that was already on hand. The hinges are nylon belt webbing and the tip pads are rubber drawer lining material. Finish is 2 coats of boiled linseed oil thinned with mineral spirits. Yes, they are very lightweight, yet are strong enough for this lightweight planking.

The wood that’s clamped to the boat is not a new plank. It is a spiling batten, 1/8 inch thick plywood. Spiling is the measurement process used to discover the shape of the next plank. Measures are taken from the lap line on the garboard plank above and from a thin temporary batten that marks the edge of the next plank.

Filed Under: Boatbuilding, Eva Won, Fiddlehead, Hand tools, Shopmade

New Frame Saw

December 13, 2008 by Bob Easton

A few new cedar flitches are acclimating themselves to the shop. In the meantime, I’ve been busy preparing a saw that will be used to get planking out of that cedar. This saw’s main work will be resawing, slicing thickness from roughly 4 quarters to pairs of roughly 2 quarters boards. Getting two boards from each flitch is the goal. Most people would use the bandsaw for this job, but mine is good for only 6 inches of resaw capacity, and some of these boards will be from 8 to 10 and 1/2 inches wide. I would rather have a good hand tool method than invest yet more in the band saw.
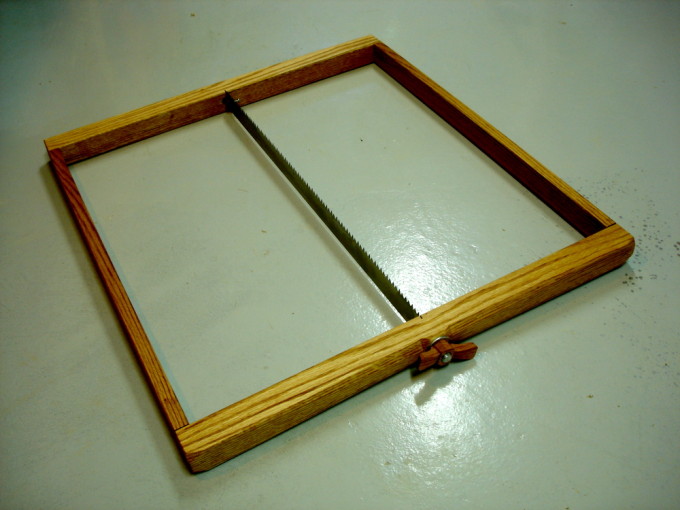
frame saw

This frame saw derives from Josh Clark’s “Making a Frame Saw” article. I used red oak, 1 and 1/2 inch square, for the stretchers. The arms were gotten from a piece of the same oak, resawn to half thickness. The blade is also 1 and 1/2 inches wide. I found it at Frog Tool Company in Dixon Illinois. See the update at the end of the article.

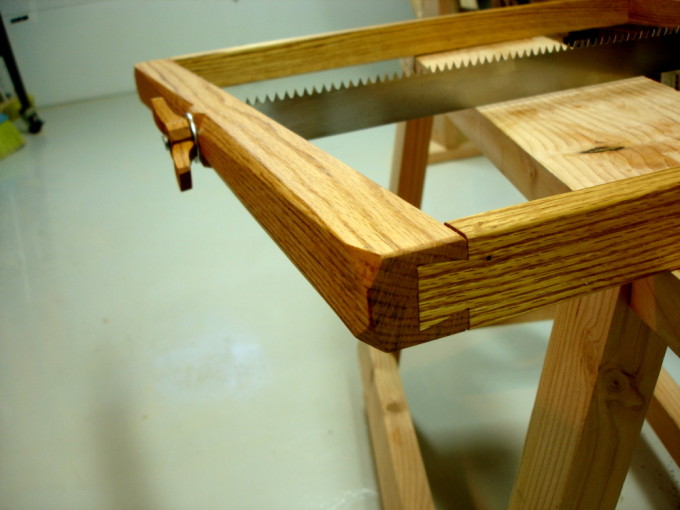
frame saw

As Josh suggested, I used half-blind dovetail joints. While I’m skeptical that the forces on the saw actually need this kind of joint, I saw it as opportunity to learn to do them. First time doing dovetails. I cut the tails on the arms first and did a couple of practice pockets on scrap wood. Then, did the real ones. Each one gets better, and yes, that’s the last one that’s shown in the picture. All are snug enough to require gentle tapping to assemble. No glue used so far. (Note from several years later: These joints are still not glued or screwed. The tension from the saw keeps them firm enough for constant use.)

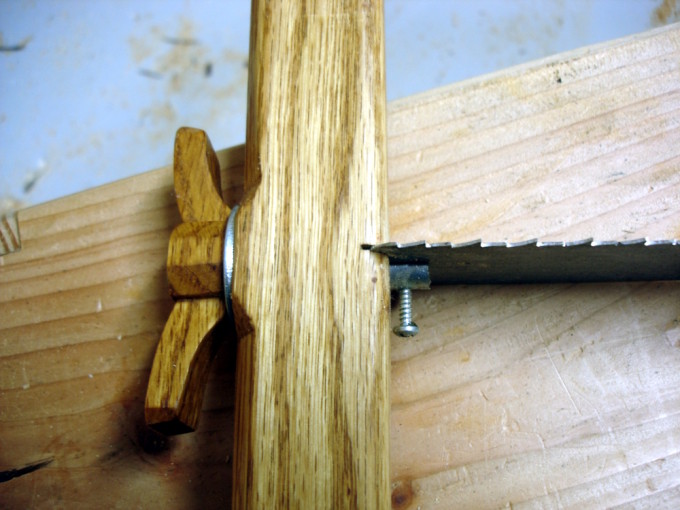
saw fastening

All edges are chamfered, because I imagine I’ll spend quite a few hours using this saw. I’m an Art Deco fan, so the upper arm has a series of stop chamfers in an Art Deco motif, and a wing nut to match. The wing nut is simply a wooden shell covering a 3/4 inch metal nut.

The first cut, on a 7 inch wide board, shows the saw will indeed do the job well. Planing will be needed to smooth the cut surfaces, but that was expected. Now, all I need to do is figure out how to hold a workpiece that’s 16 feet long.

IMPORTANT NOTE: After using this saw for a couple of months, I came to dislike the blade. I acquired a good old Disston 26 inch saw, changed it from 7 TPI to 4 TPI, sharpened, and hacksawed to a 2 inch width. That replaced the original blade an made a huge improvement in how well the saw works.

Filed Under: Boatbuilding, frame saw, Hand tools, resawing, Shopmade

  • « Go to Previous Page
  • Page 1
  • Interim pages omitted …
  • Page 19
  • Page 20
  • Page 21
  • Page 22
  • Go to Next Page »

Primary Sidebar

Footer

Recent Posts

  • New Frame Saw / Scroll Saw
  • Lamppost Sign
  • Goodbye PayPal – Goodbye Bob’s eBooks
  • Anarchist’s Workbench is Done
  • Why we keep offcuts…

Categories

  • About
  • Artwork
  • Boatbuilding
  • Boating
  • bowl carving
  • Boxmaking
  • Clocks
  • Drawings
  • eBook
  • etude
  • Eva Too
  • Eva Won
  • Fiddlehead
  • Fiddlehead model
  • Flying
  • frame saw
  • gilding
  • green woodworking
  • Grinling Gibbons
  • Guns
  • Hand tools
  • Humor
  • kerfing plane
  • Lettercarving
  • Mill Creek 13
  • Model building
  • Power tools
  • Rant
  • resawing
  • scroll saw
  • Shopmade
  • sign painting
  • Stonework
  • Swimming
  • Technology
  • The Wall
  • treadle lathe
  • Uncategorized
  • VSD
  • Woodcarving
  • Woodturning
  • Woodworking
  • workbench

Other stuff

  • About
  • Contact
  • Privacy Policy

Copyright ©2024 · Bob Easton · All Rights Reserved