• Skip to primary navigation
  • Skip to main content
  • Skip to primary sidebar
  • Skip to footer

Bob Easton

Chocolate powered woodworking

  • Home
  • Grinling Gibbons Tour

Shopmade

Treadle Lathe – New Banjo & Tool rest

March 12, 2016 by Bob Easton 2 Comments

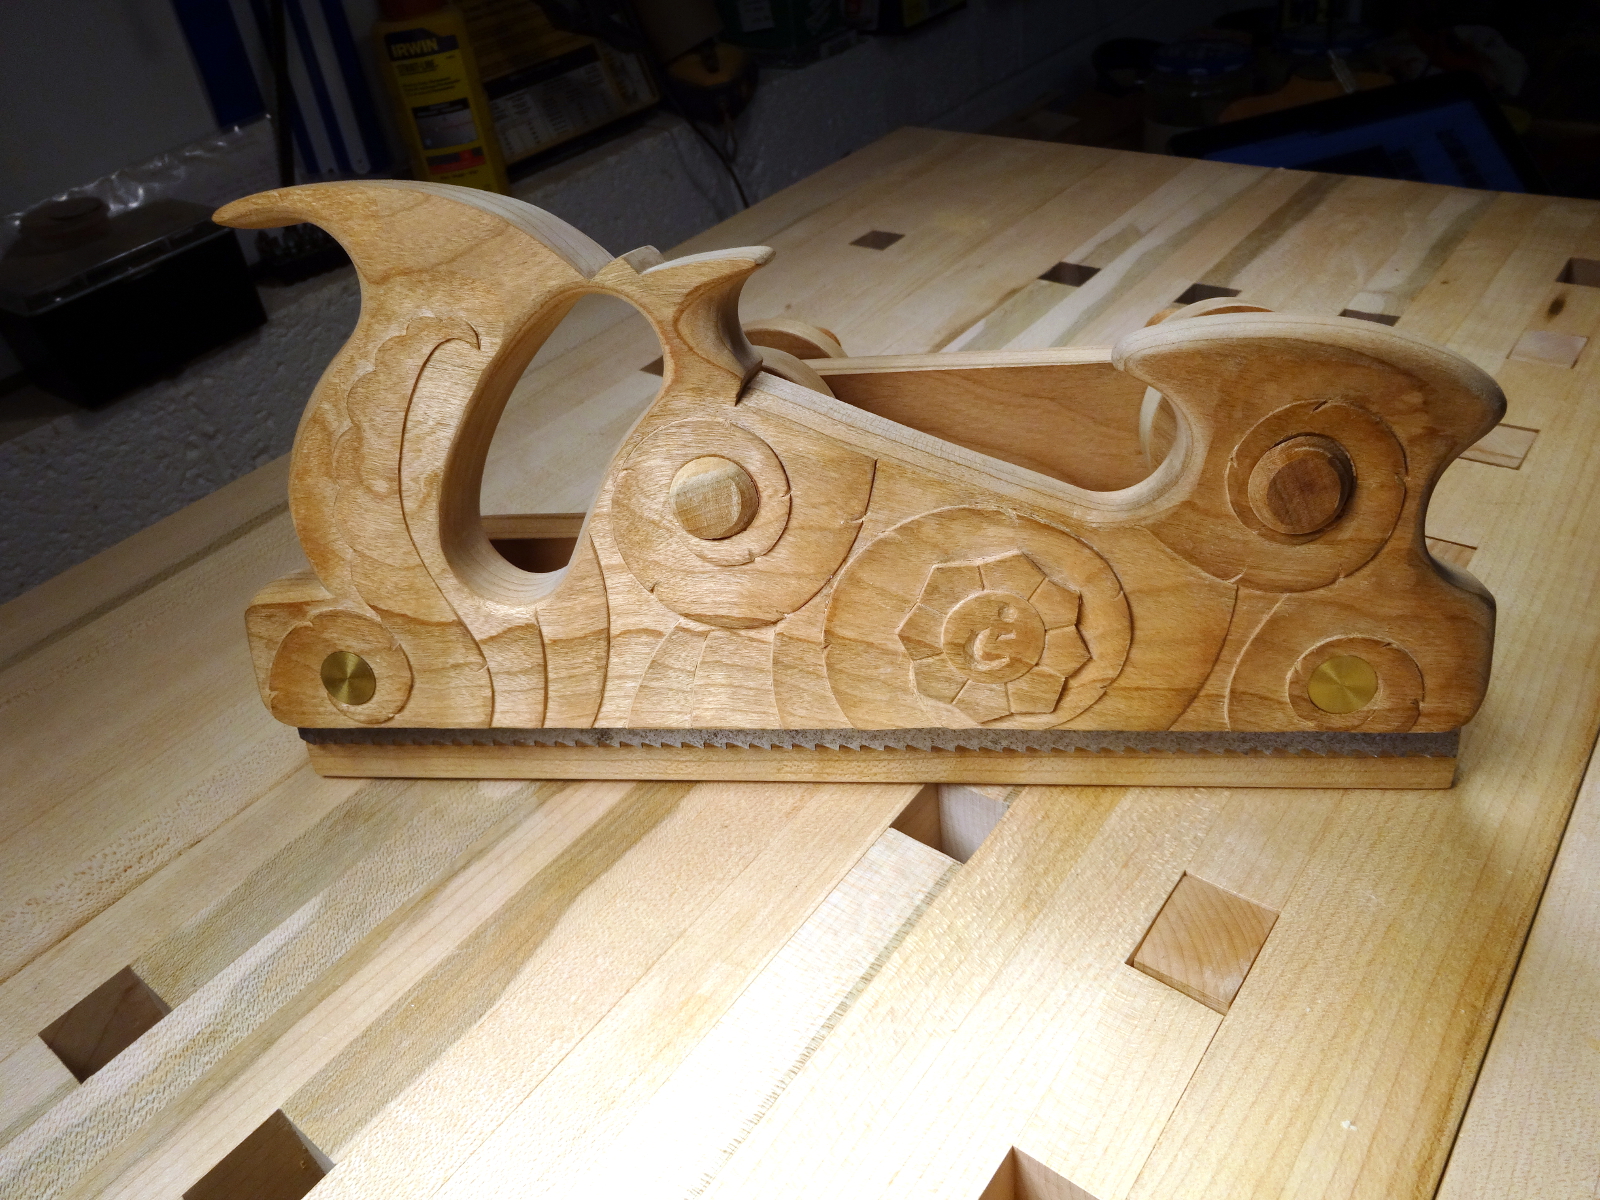
My old “improved” adjustable tool rest works fine, but is fussy to move around and adjust for some situations. How about a “banjo” to offer more flexibility. This one wasn’t hard to make and has offered outstanding convenience. It can slide easily back and forth along the ways, be locked down at virtually any angle to the lathe axis, and has a tool rest that can be raised, lowered and turned as desired.

photo of banjo in typical use

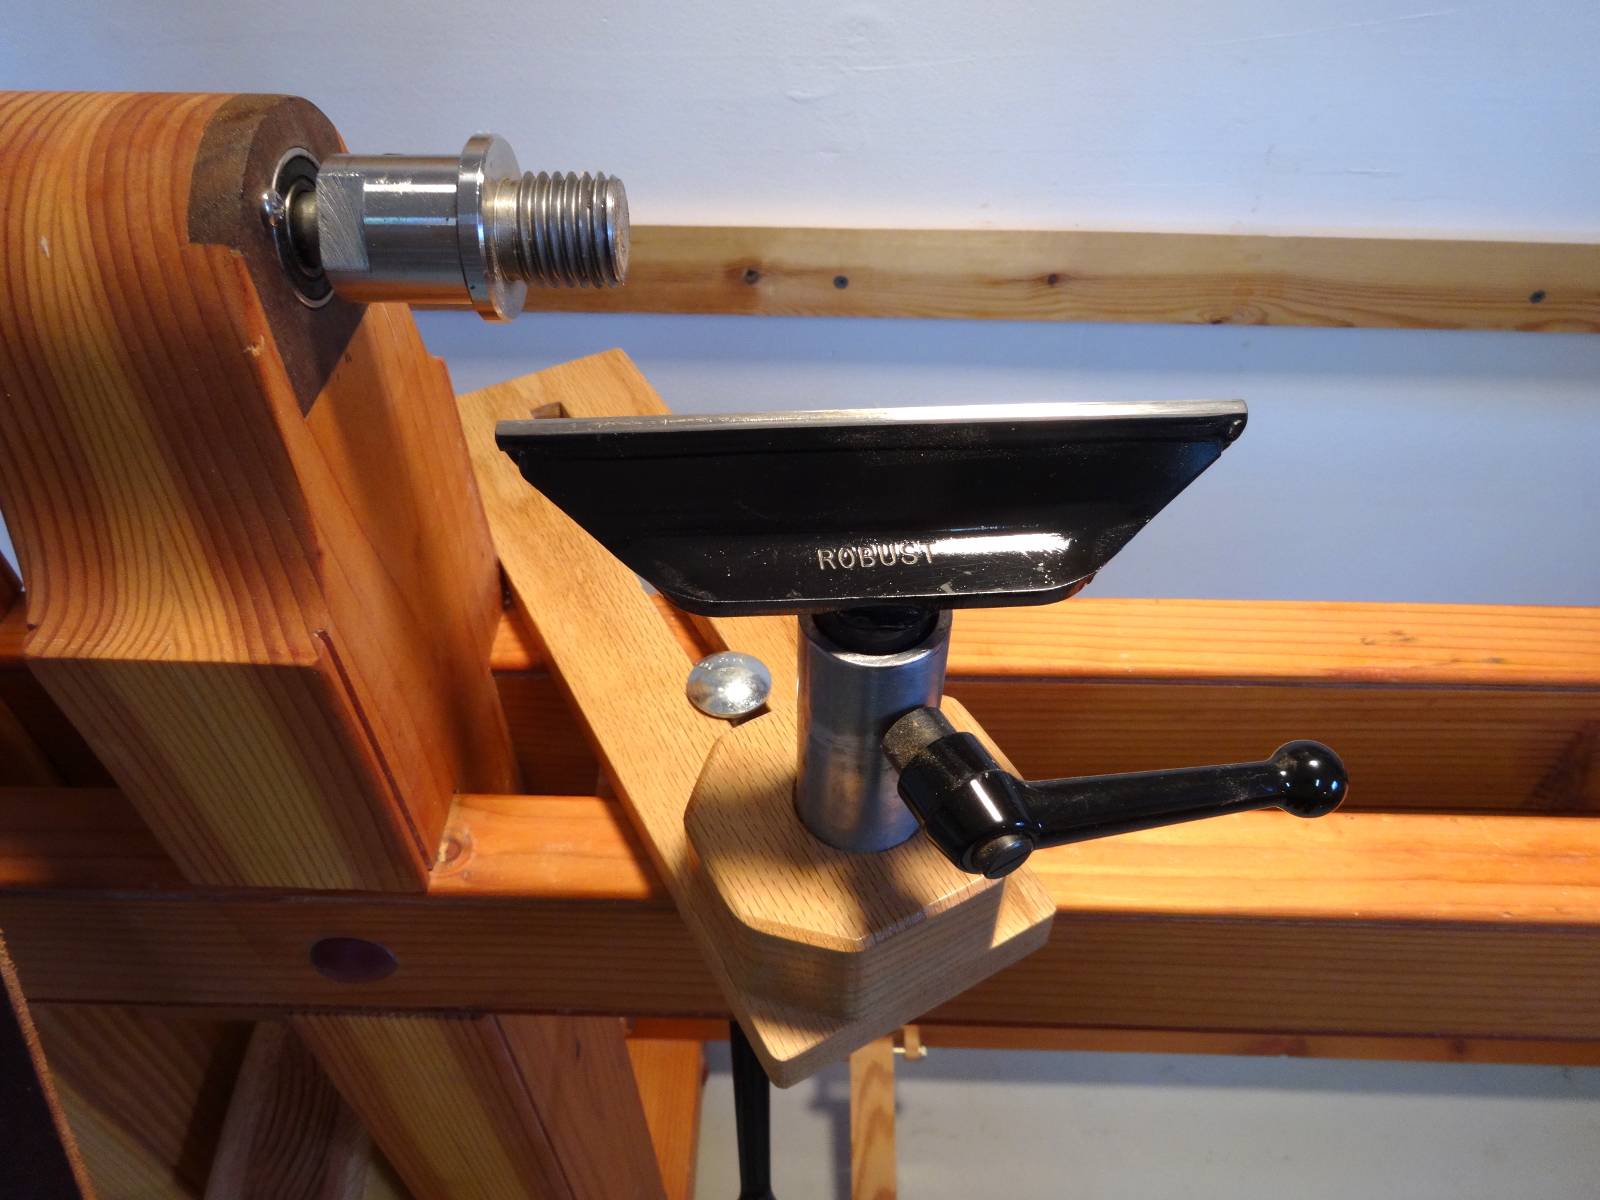
From the top, we see two wood elements, the slotted base and the tool rest block. The base is oak 3/4″ x 3 1/2″ x 12″, with a 9/16″ slot down the middle. The octagon shaped block is laminated from oak, measuring 1 1/2″ x 3″ x 3″. It is screwed to the base.

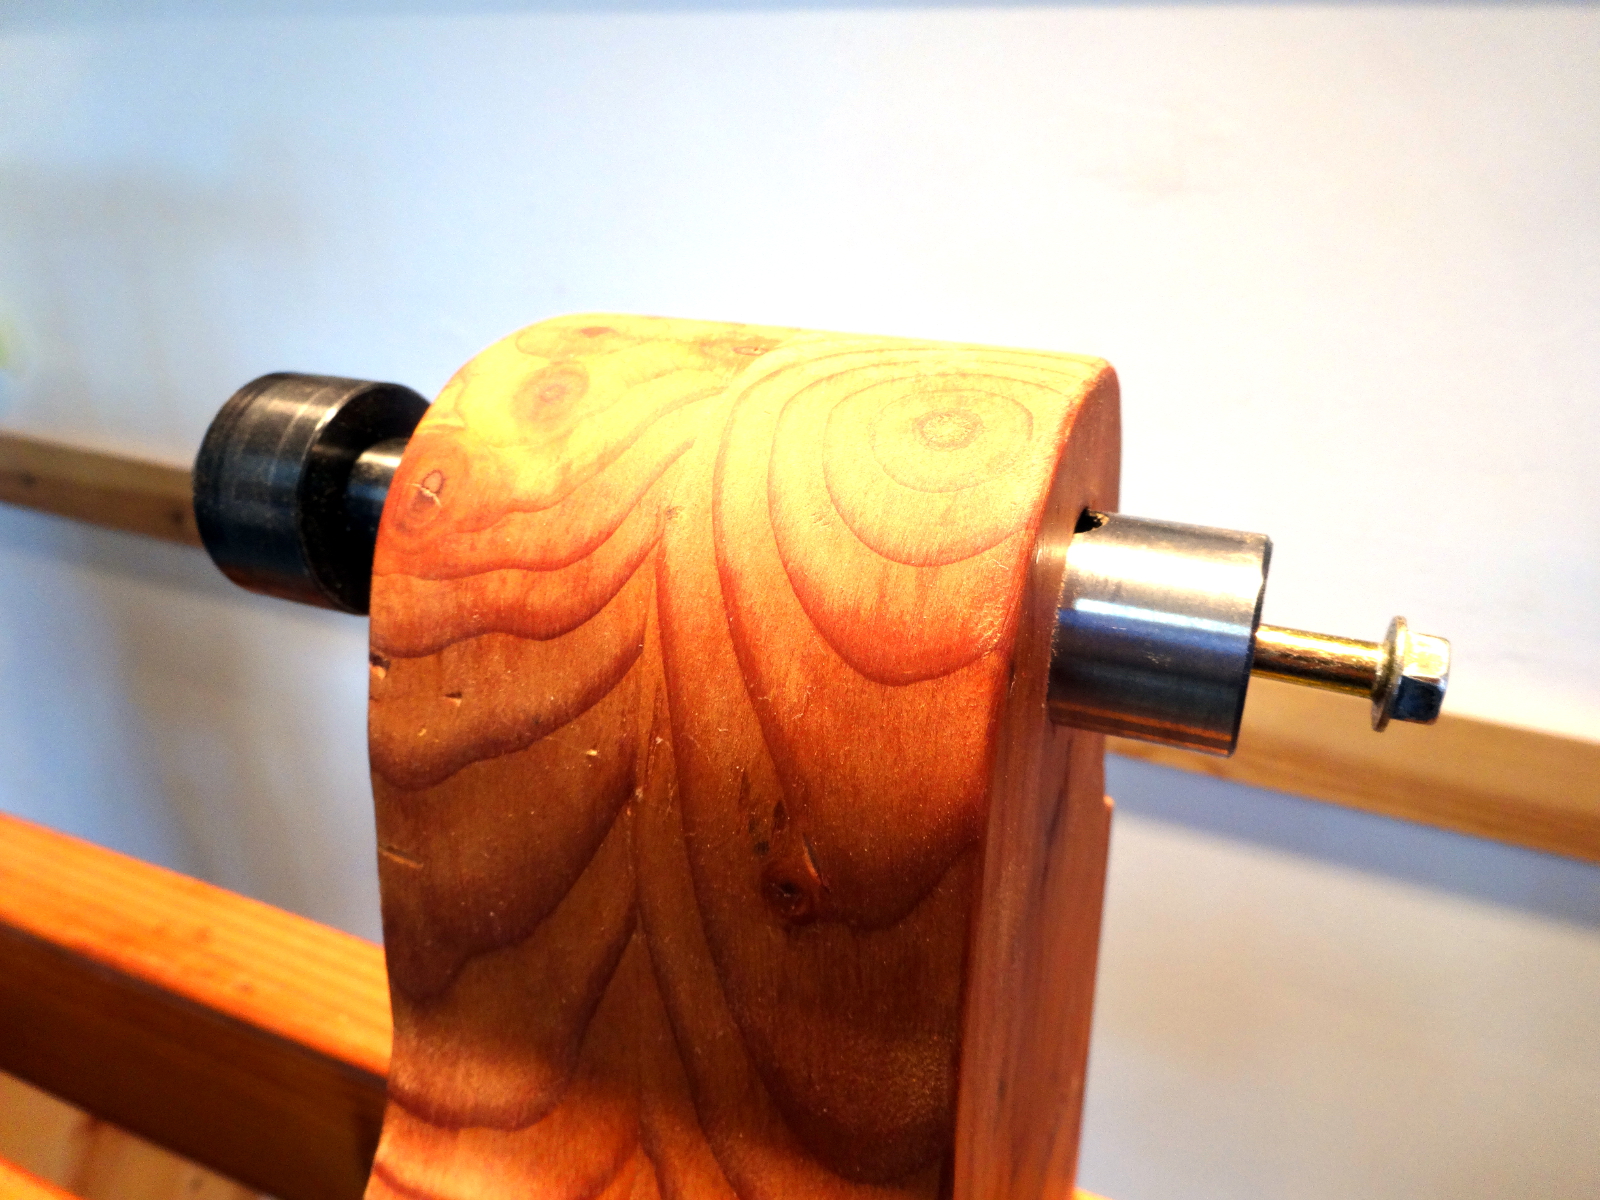
The tool rest holder is nothing more than a simple piece of  steel plumbing pipe 1″ inside diameter. The pipe is epoxied to a hole in the octagon shaped block. The steel rest is a Robust 6″ wide “comfort” tool rest on a 1″ diameter post.

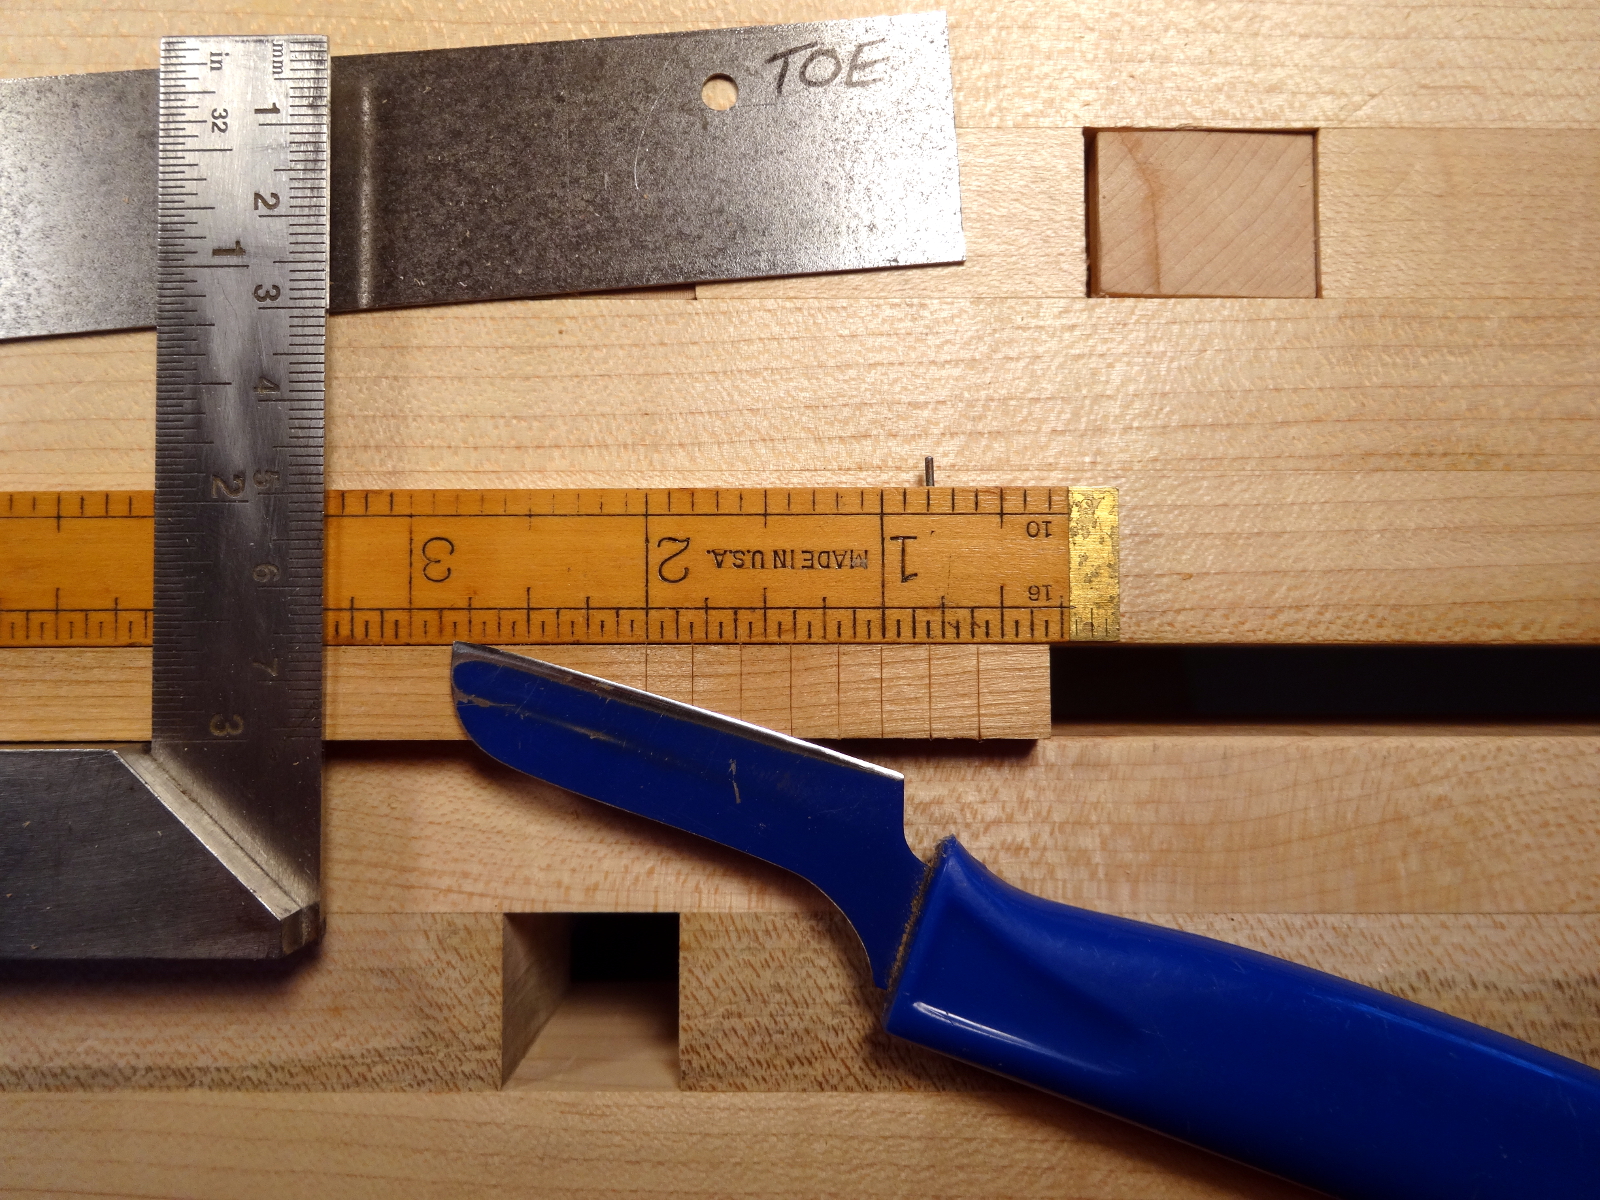
In the middle of the slot, we see the top of a 1/2″ carriage bolt, about 5″ long. It’s cut to size to fit the height of the ways plus the seating block (another bit of oak) that clamps it in place from the bottom (next two pics).

photo of banjo - side view

photo of banjo clamped from the bottom

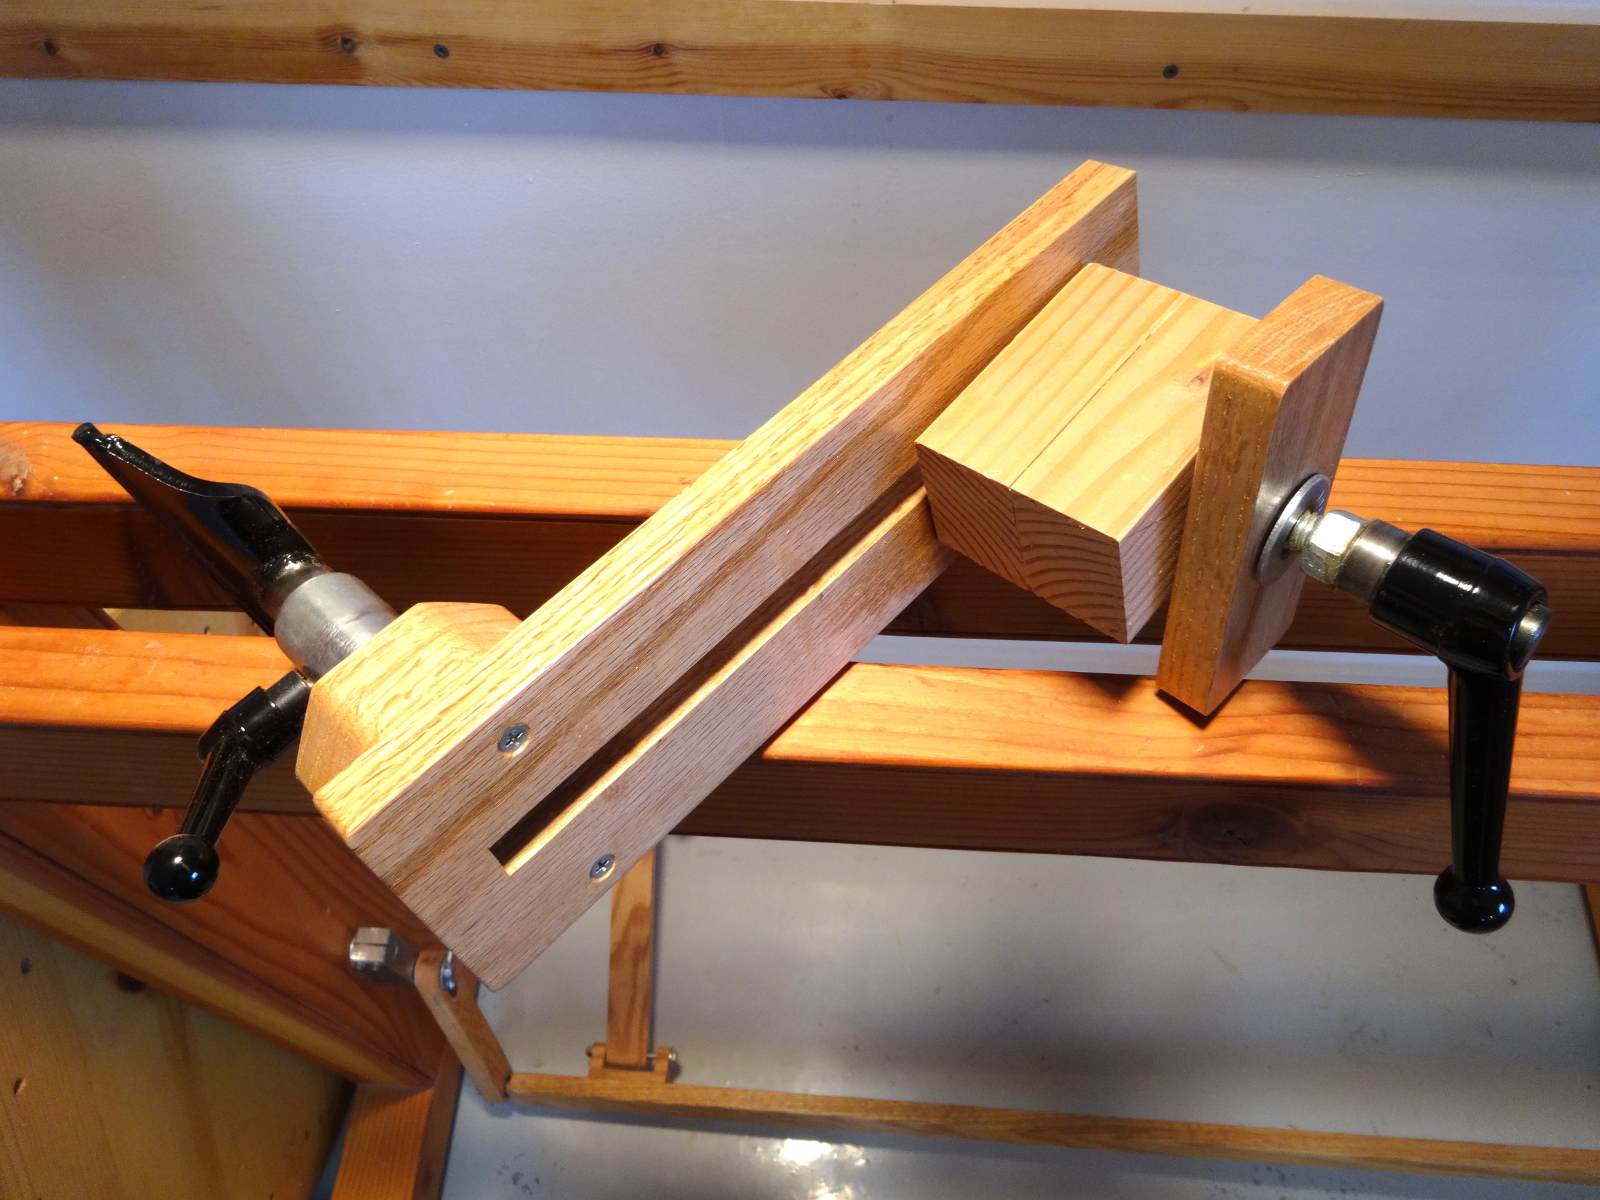
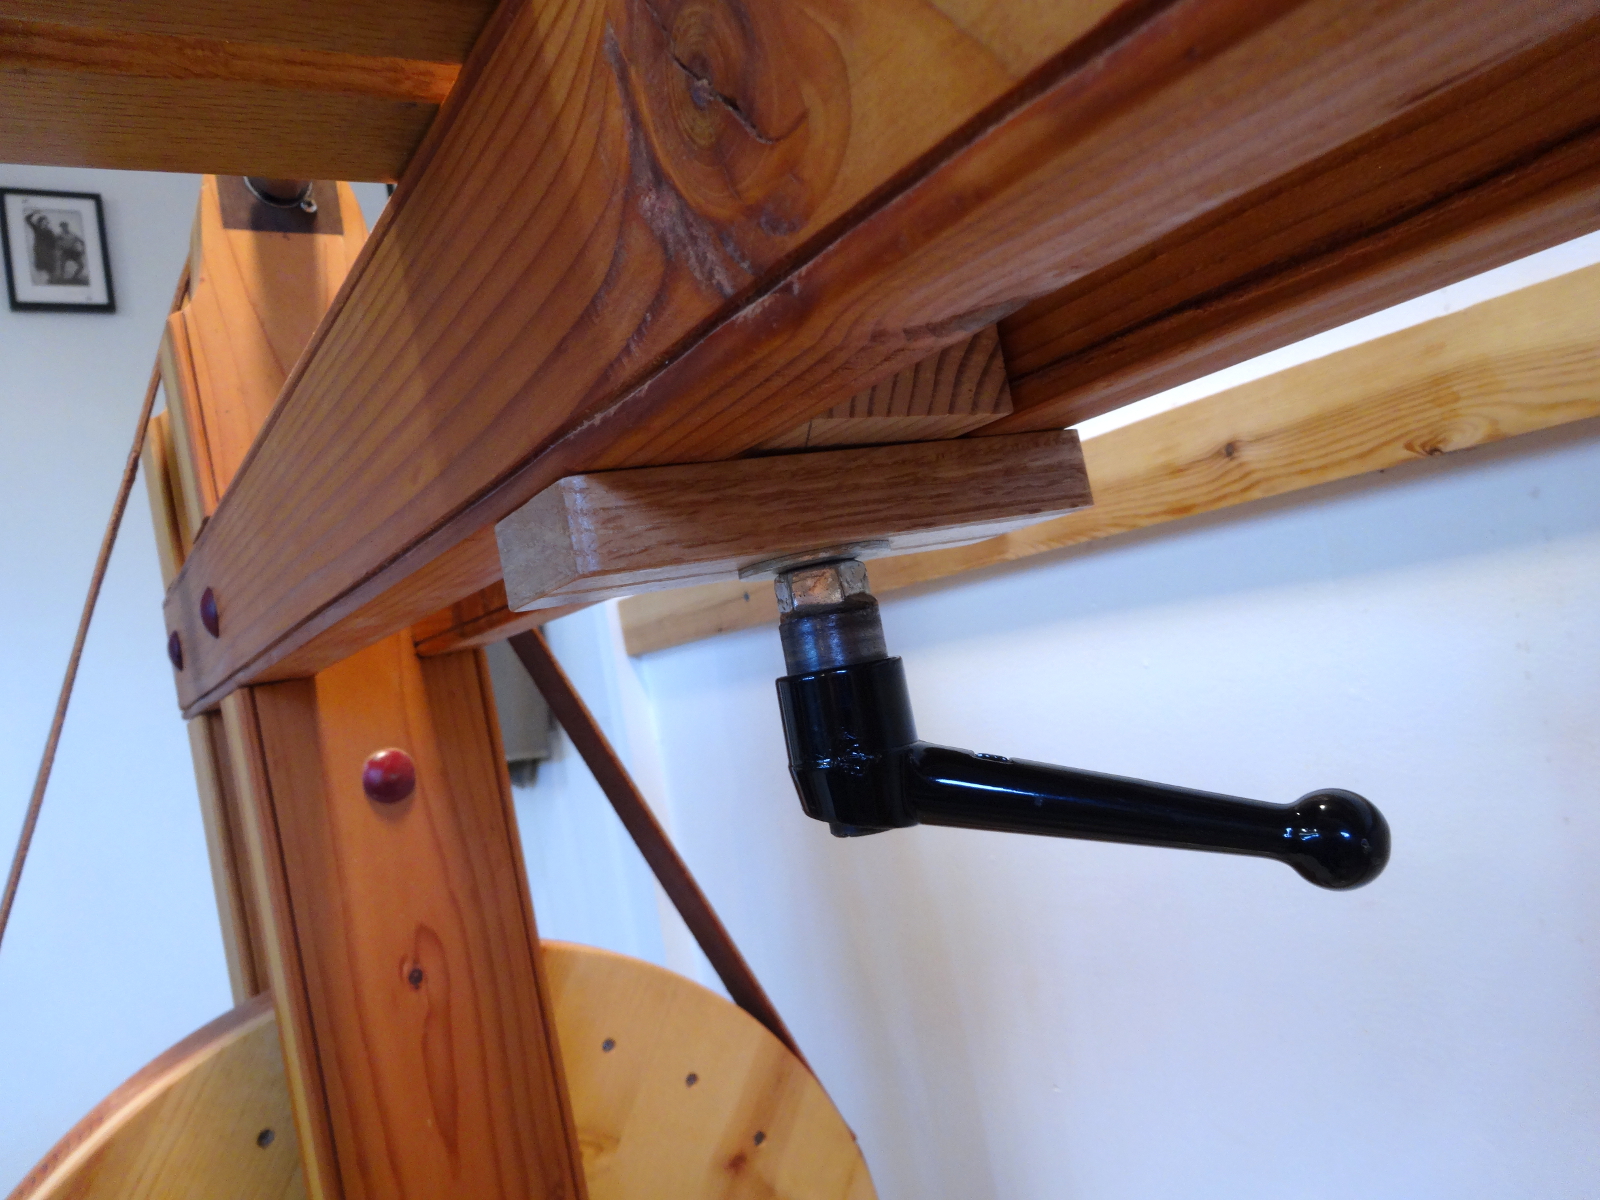
That filler block in the middle is a simple piece of construction lumber, cut loose enough to slide with no friction between the ways, and about 1/8″ shorter than the height of the ways. In other words, it assists sliding around without getting in the way.

Now, those handles. Both are from McMasters Carr.

The short one (3 1/8″) at the top has a 1/4″ unthreaded hole. I cut a piece of 10/24 screw and epoxied it into the handle’s hole. Then, I threaded the pipe to take the screw.

The longer one (4 5/16″) on the bottom also has a 1/4″ unthreaded hole. But in this case, I epoxied a 1/2″ nut that matches the carriage bolt.

Add a simple 1/2″ washer. Then, cut the carriage bolt to allow tightening before bottoming out the nut.

Simple, works easily.  A feature of these handles is that they are adjustable. If the handle gets tightened in such a way that its tail is sticking up in the way, press the button in the center, and rotate it to a more convenient position. Nice!

Filed Under: Shopmade, treadle lathe

Treadle Lathe – Tailstock improvement

March 12, 2016 by Bob Easton Leave a Comment

This one is simple. I drilled a 5/16″ hole in the tail end of the Morse Taper socket and use a simple 1/4″ bolt as a knock out bar for removing whatever I put in that socket.

photo of tailstock knock out bolt

Filed Under: Shopmade, treadle lathe

Kerfing Plane – Done

October 27, 2014 by Bob Easton 9 Comments

There are a lot more pictures this time because I read that a lot of people avoid saw making, rehabilitation and sharpening. I want to show that it’s within easy reach of anyone who wants to try and doesn’t care to wait while saws take long trips to the sharpener and back.

photo of completed plane

We can find many sharpening guides and tutorials online. Nearly all are very useful. For this particular saw plate, I followed Paul Seller’s recent tutorial about cutting saw teeth. The method worked wonderfully!

The plate itself is roughly 10″ by 1.5″, recycled from an old Disston that I cut down to make my frame saw a few years ago. Cutting to this shape was simple hack sawing. The tooth edge was smoothed “flat and straight” with a simple single-cut mill file. I decided to cut it to the same pattern I use for other resawing work, 5 TPI, zero rake, no fleam … just a dead simple aggressive rip pattern.

My ever handy Stanley No. 36 1/2 R rule has multiple scales in  8, 10, 12, 16 parts to the inch. The 10 scale made easy work of laying out a guide. The series of pictures walks through a number of steps, with notes about each. (Click any photo to start a larger slideshow.)

photo of marking the cutting guide
The 10 to the inch scale of a Stanley rule is used for marking out 5 TPI.
photo of cutting set up and two hack saws
The little no-name saw was OK for cutting the guide but gave up when it came to the plate.
photo of saw plate after saw cuts
After making the tooth spacing cuts
photo of two cutting aids
Which to use, the one with 6 moving parts and adjustments that can sometimes loosen, or… ?
photo of toothing set up
Saw filing setup. The adjustable lamp is the most important part.
photo of partially cut teeth
When looking from the edge doesn’t show what you expect, look from the side and seek those glints of light from unsharp teeth.
photo of applying set
Coarse tool, set for a gentle #8.
photo of completed plane from the nose
Finished plane – toe end
photo of completed plane from handle side
Finished plane – business side – What big teeth you have.
photo of completed plane from fence side
Finished plane – fence side
photo - making the first cut
First cut. The angle is off a bit.
photo of first kerfs
Kerfed all around. The slight angle is noticeable at the corners.
photo of first test result
First resawn board. Close enough for government work, but not for me.

End result? A small piece of pine became the test victim. I set the fence to produce a kerf 3/32″ from the edge and went at it with only casual concern. What will this thing do without a lot of fussy attention? Cutting was easy once the initial grabbing was overcome. Hint: start from the far end as one does when planing a molding. You can see in one of the pictures that the kerf is not absolutely square. It’s tilted slightly. Despite that, I ended up with two boards that have less than 1/32″ of roughness left from the cut.
photo of first test result

It will be perfect after I make an adjustment to either the face of the fence or to my right elbow.

UPDATE: It was my right elbow that needed adjustment. The plane is perfect when the monkey pushing it holds it correctly.

Filed Under: Hand tools, kerfing plane, resawing, Shopmade, Woodworking

  • « Go to Previous Page
  • Page 1
  • Interim pages omitted …
  • Page 3
  • Page 4
  • Page 5
  • Page 6
  • Page 7
  • Interim pages omitted …
  • Page 22
  • Go to Next Page »

Primary Sidebar

Footer

Recent Posts

  • New Frame Saw / Scroll Saw
  • Lamppost Sign
  • Goodbye PayPal – Goodbye Bob’s eBooks
  • Anarchist’s Workbench is Done
  • Why we keep offcuts…

Categories

  • About
  • Artwork
  • Boatbuilding
  • Boating
  • bowl carving
  • Boxmaking
  • Clocks
  • Drawings
  • eBook
  • etude
  • Eva Too
  • Eva Won
  • Fiddlehead
  • Fiddlehead model
  • Flying
  • frame saw
  • gilding
  • green woodworking
  • Grinling Gibbons
  • Guns
  • Hand tools
  • Humor
  • kerfing plane
  • Lettercarving
  • Mill Creek 13
  • Model building
  • Power tools
  • Rant
  • resawing
  • scroll saw
  • Shopmade
  • sign painting
  • Stonework
  • Swimming
  • Technology
  • The Wall
  • treadle lathe
  • Uncategorized
  • VSD
  • Woodcarving
  • Woodturning
  • Woodworking
  • workbench

Other stuff

  • About
  • Contact
  • Privacy Policy

Copyright ©2024 · Bob Easton · All Rights Reserved