• Skip to primary navigation
  • Skip to main content
  • Skip to primary sidebar
  • Skip to footer

Bob Easton

Chocolate powered woodworking

  • Home
  • Grinling Gibbons Tour

Woodcarving

Small Storage Box – Radiata Pine – and a Carving

March 17, 2014 by Bob Easton 5 Comments

Card scraper box - finger notch was cut with a #6 gouge
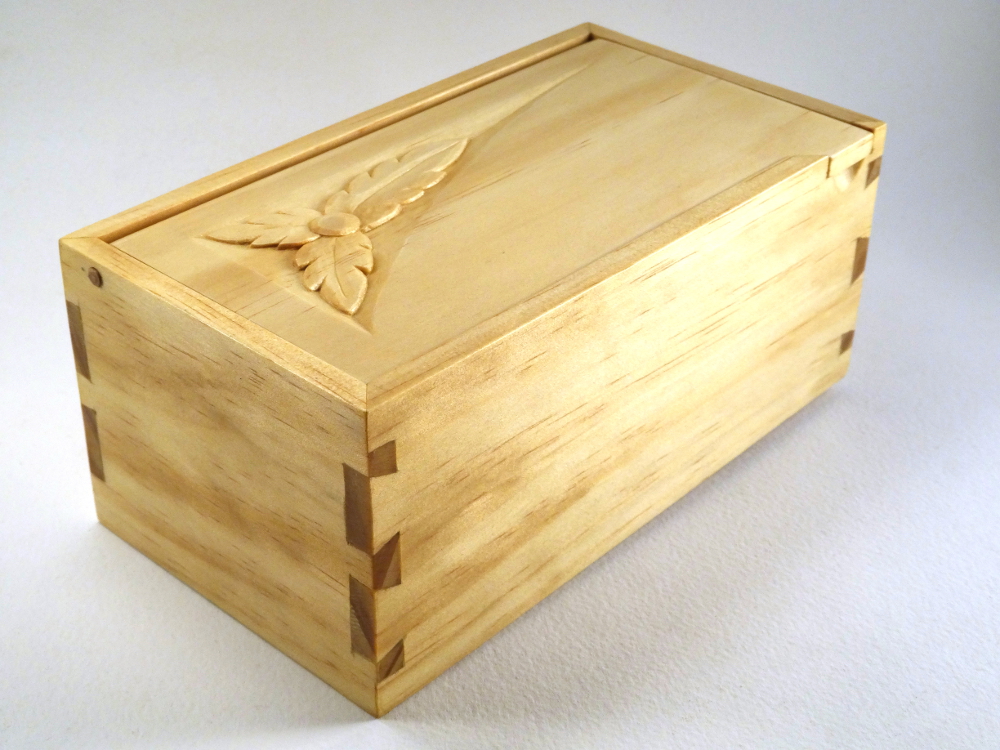
She said, “It turned out pretty well for being chintzy wood.”

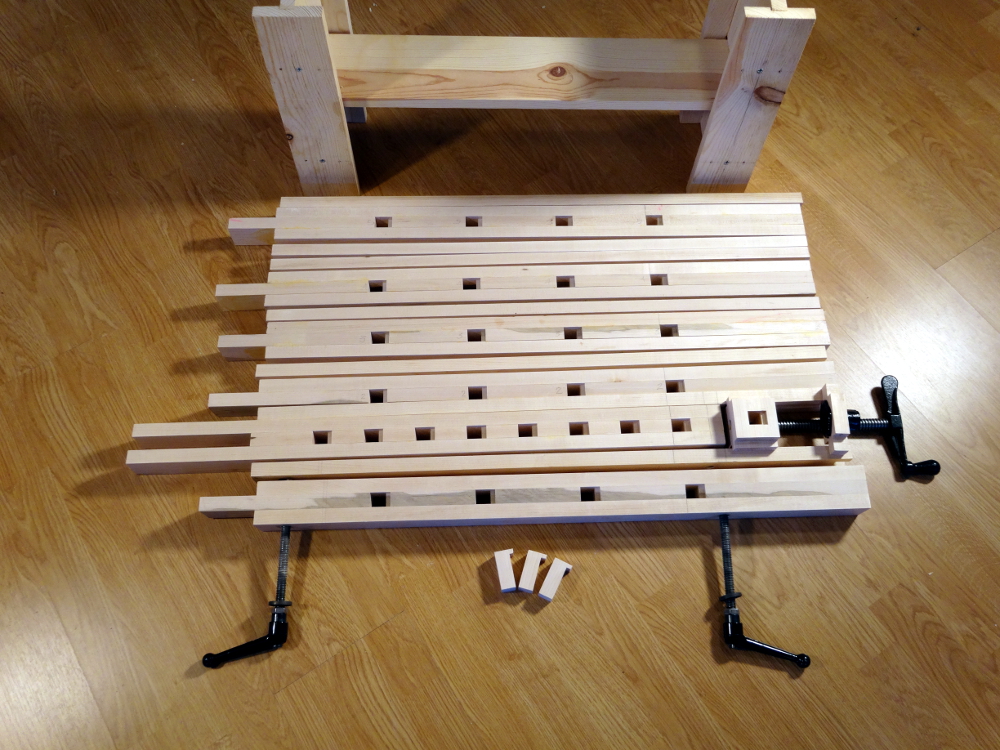
Pines are native to most of the northern hemisphere. So, why is it when I go to nearest home center, the pine they have is the Radiata species grown in New Zealand? I wonder what the market dynamics are that brings the stuff nearly 9000 miles to get to the big orange box store near us. I do have to admit that it is generally very free of knots and usually straight, flat, and straight grained … much better than some of the other stuff in the store.

Card scraper box - room for more
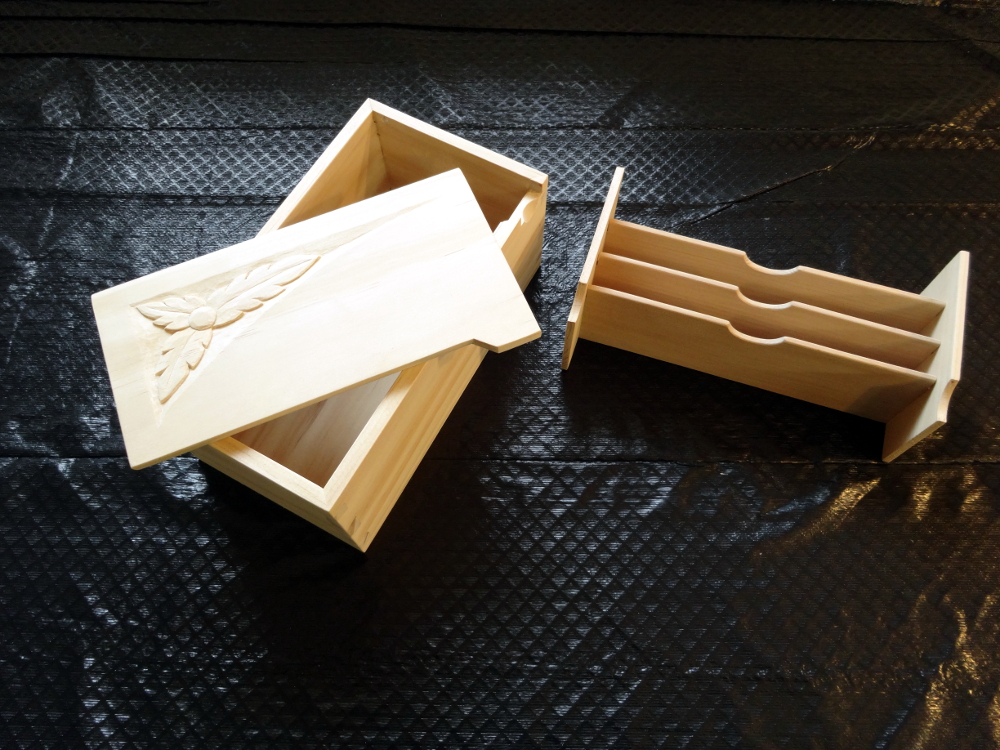
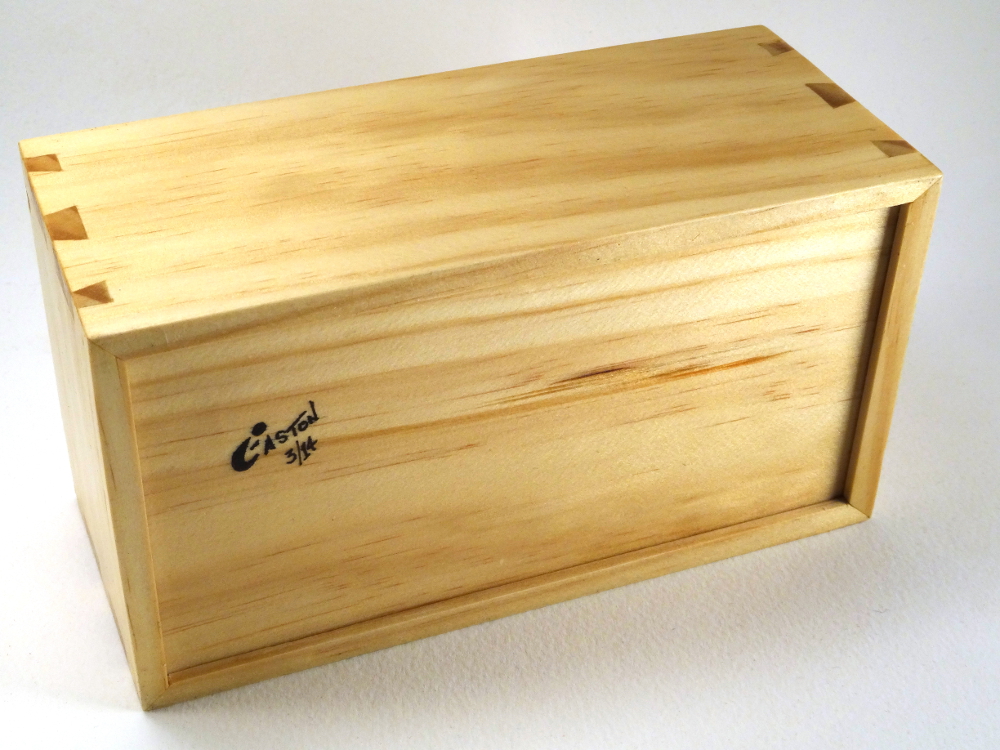
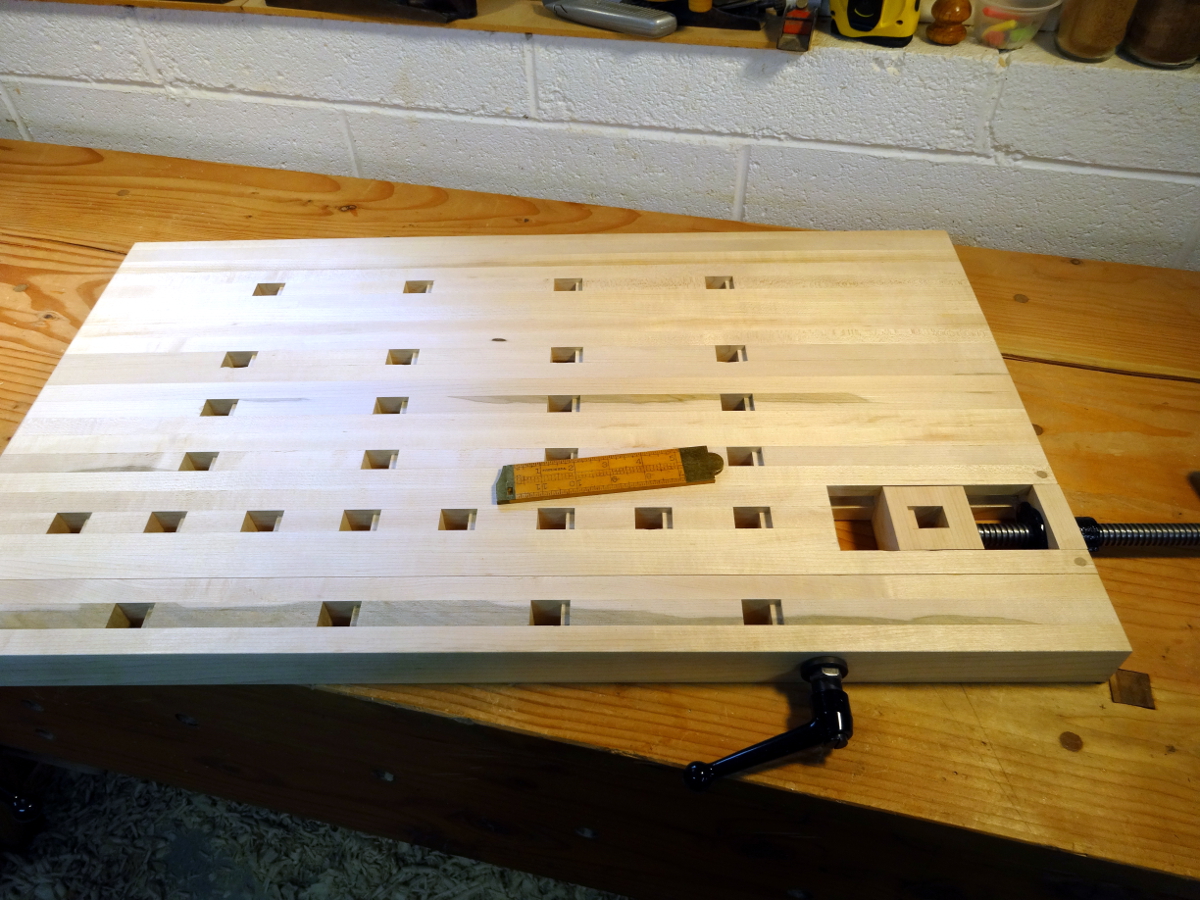
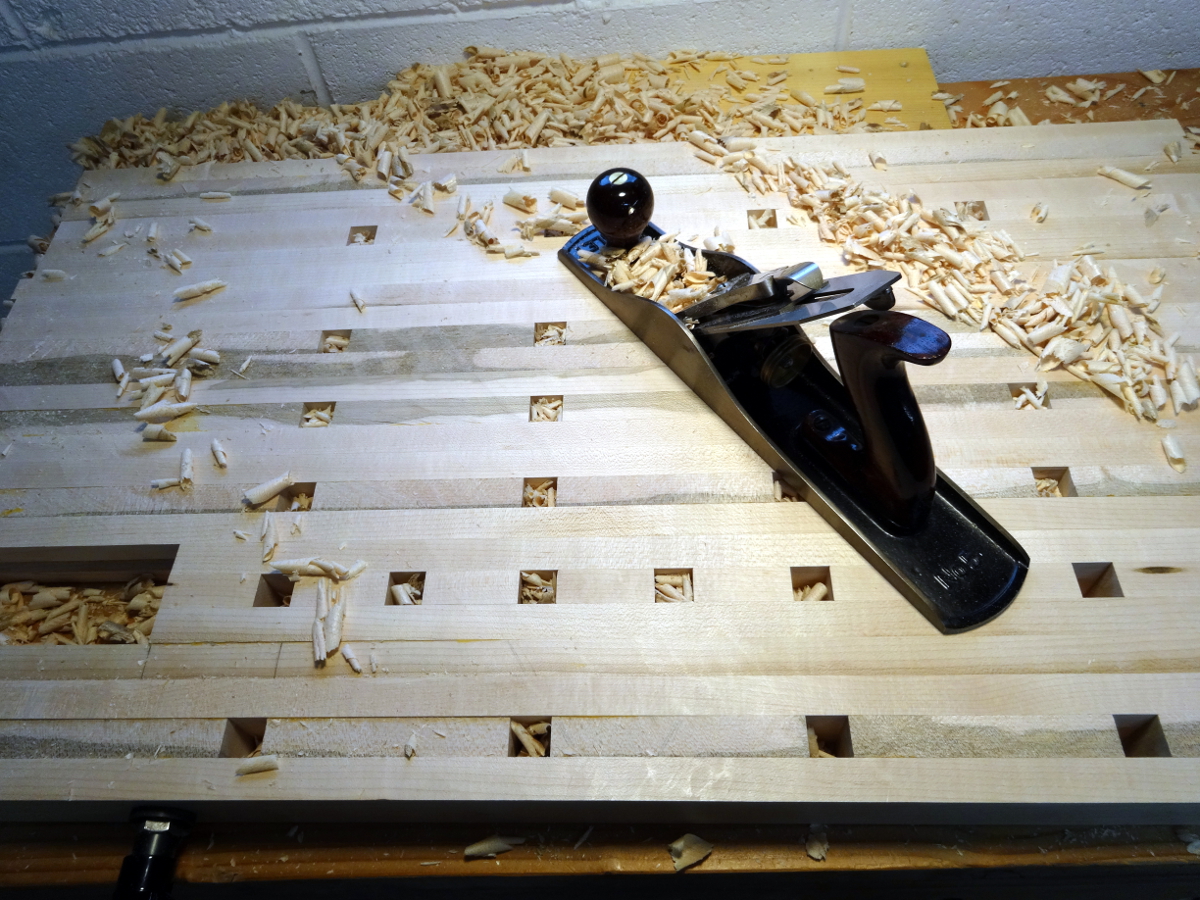
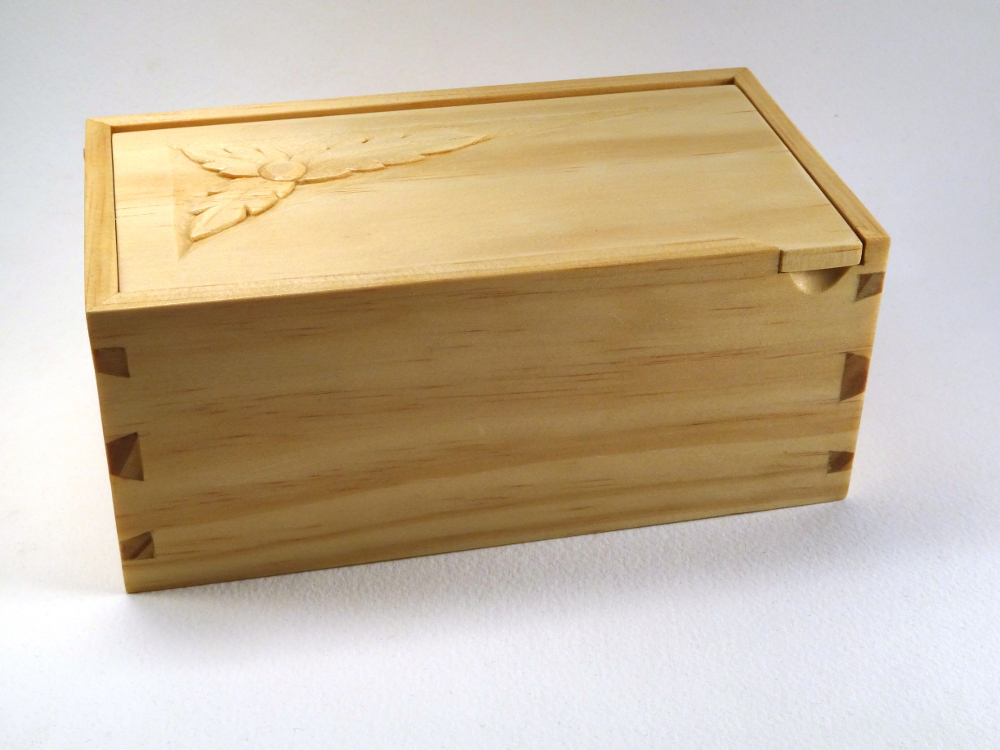
This little flip-lid box is intended as storage for a growing collection of card scrapers. Being a shop accessory, I decided to use some of the radiata pine I have left from other projects and save the hardwood for other times.

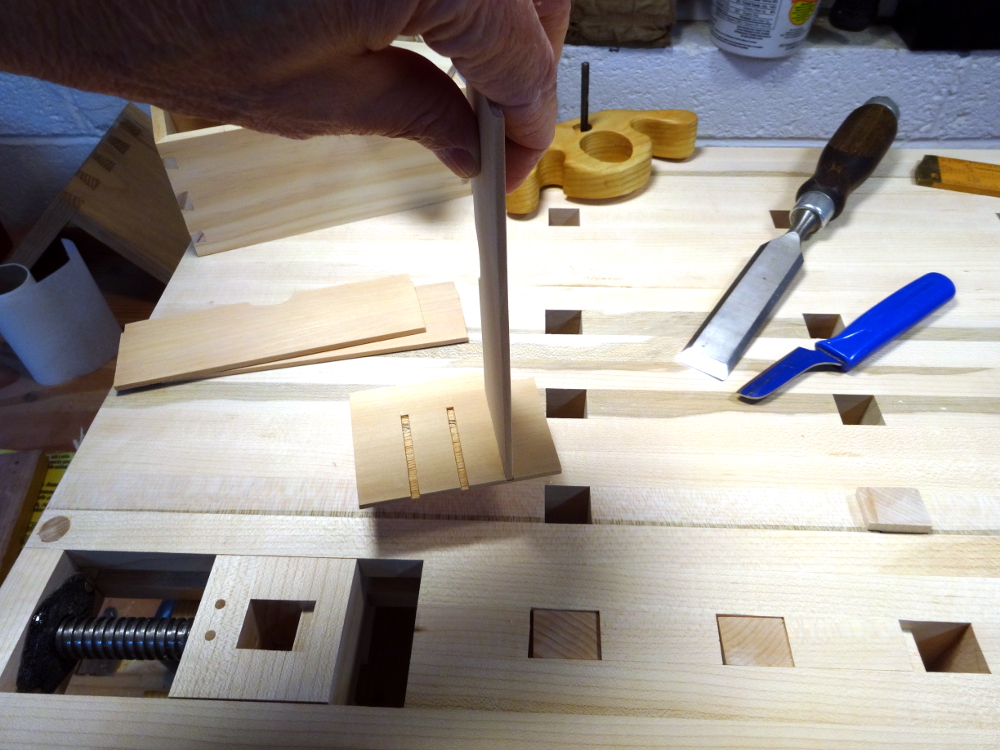
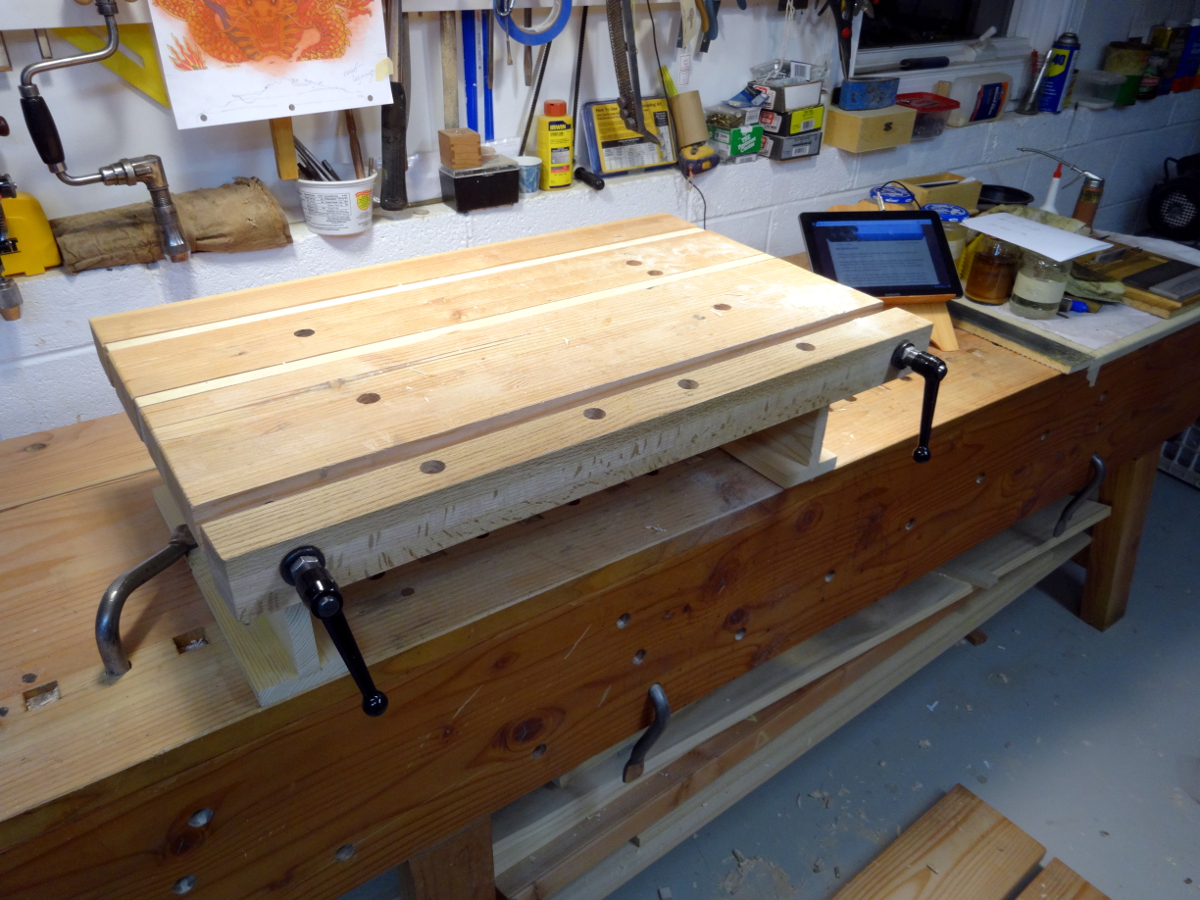
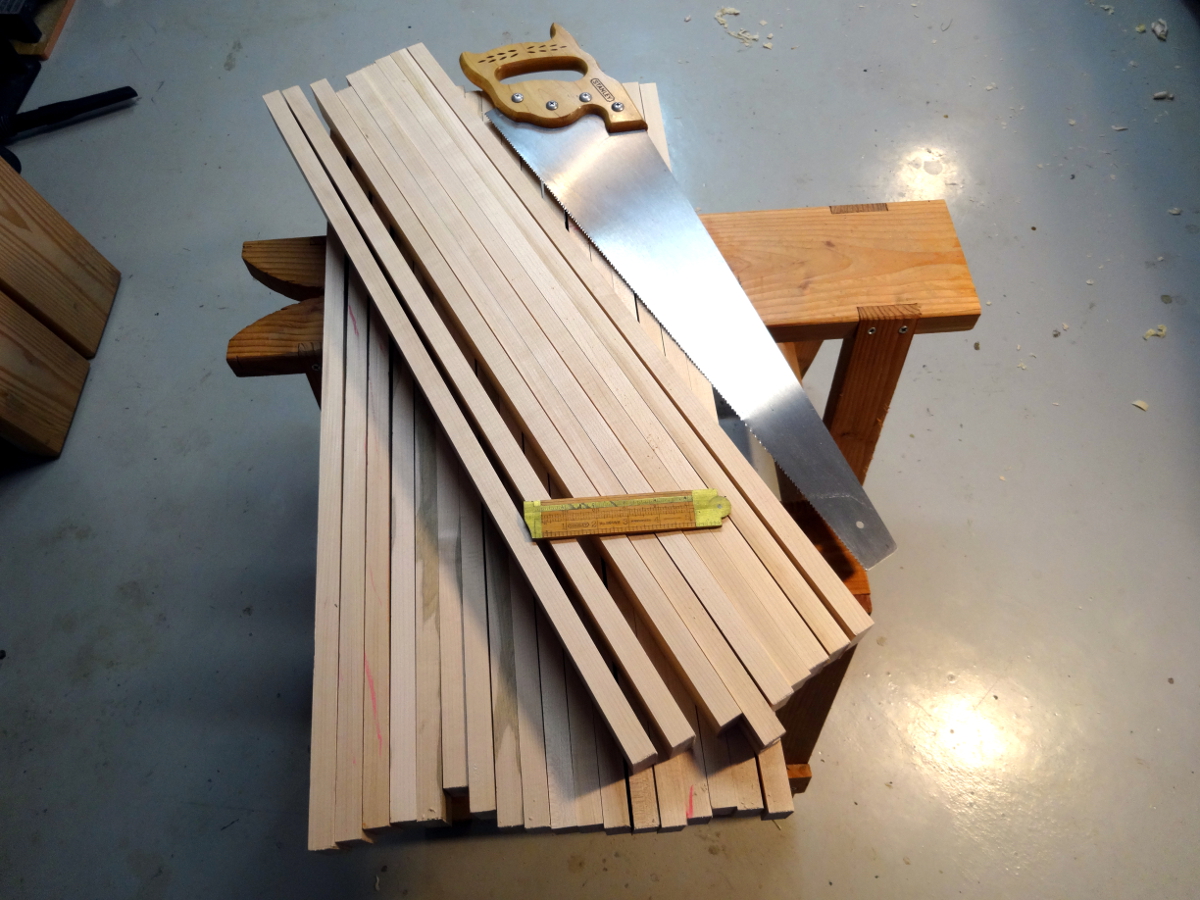
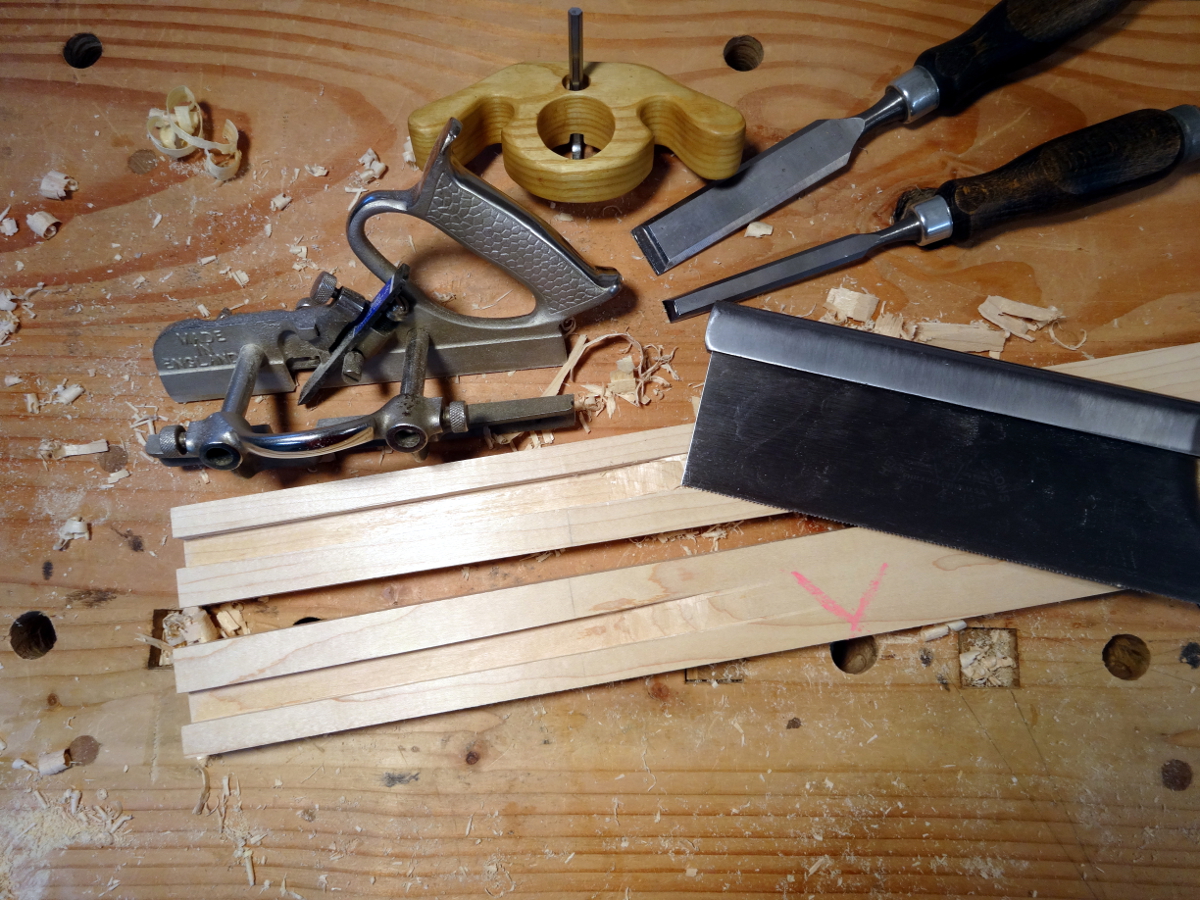
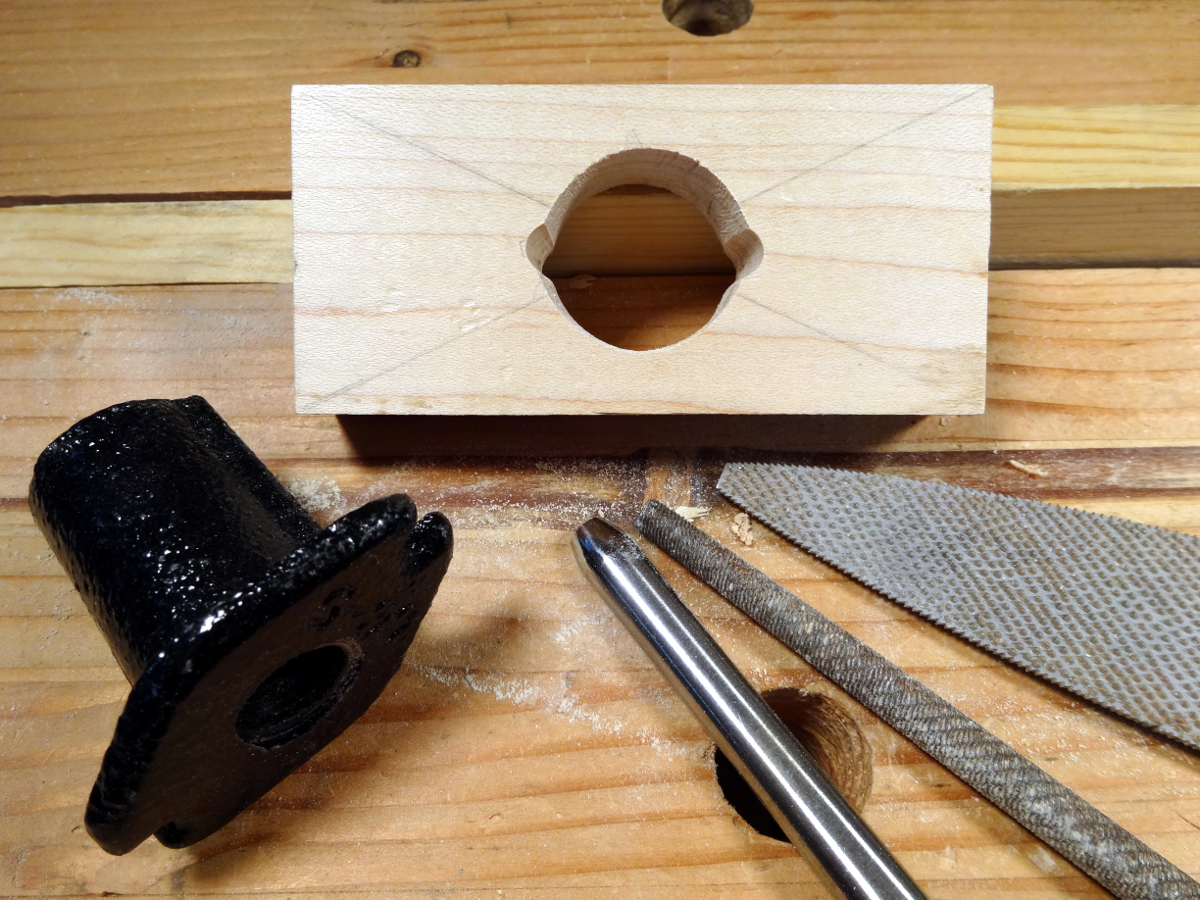
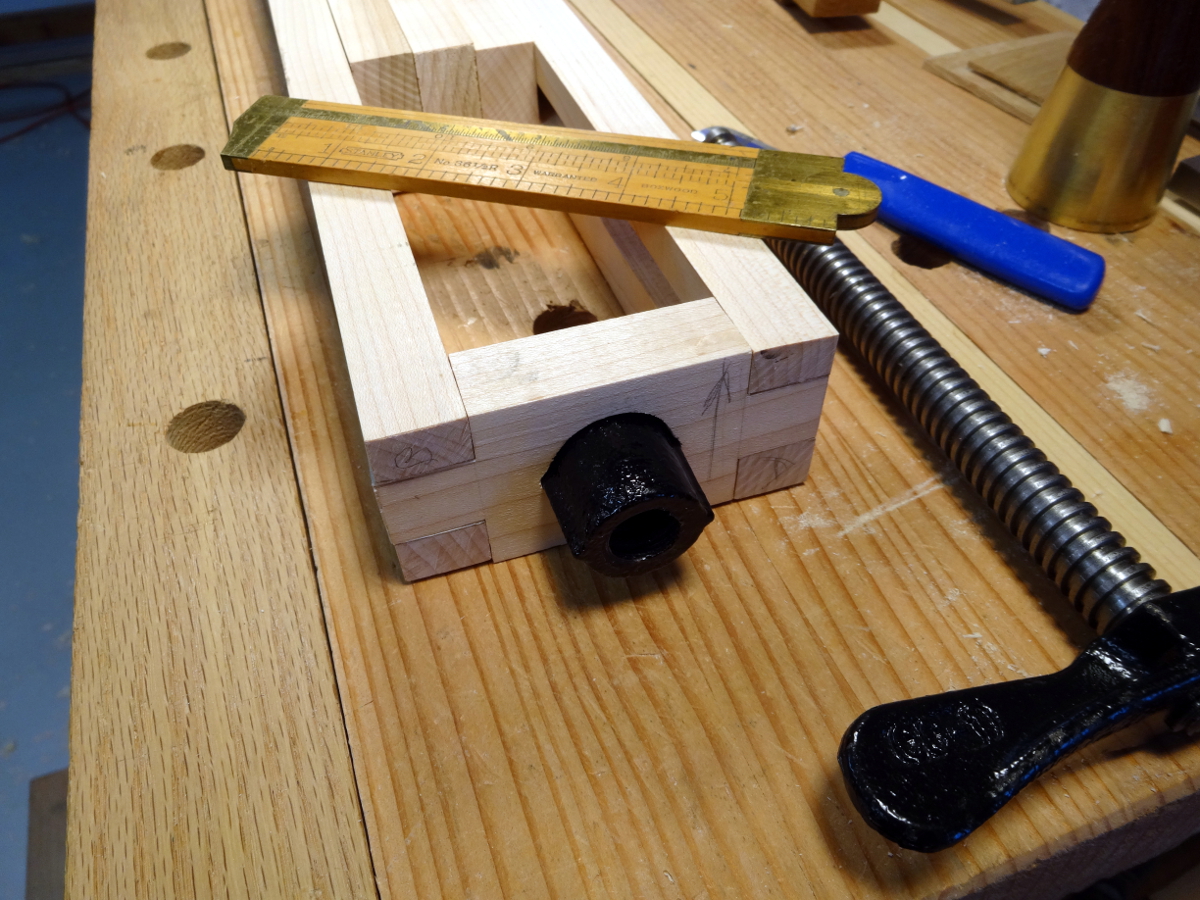
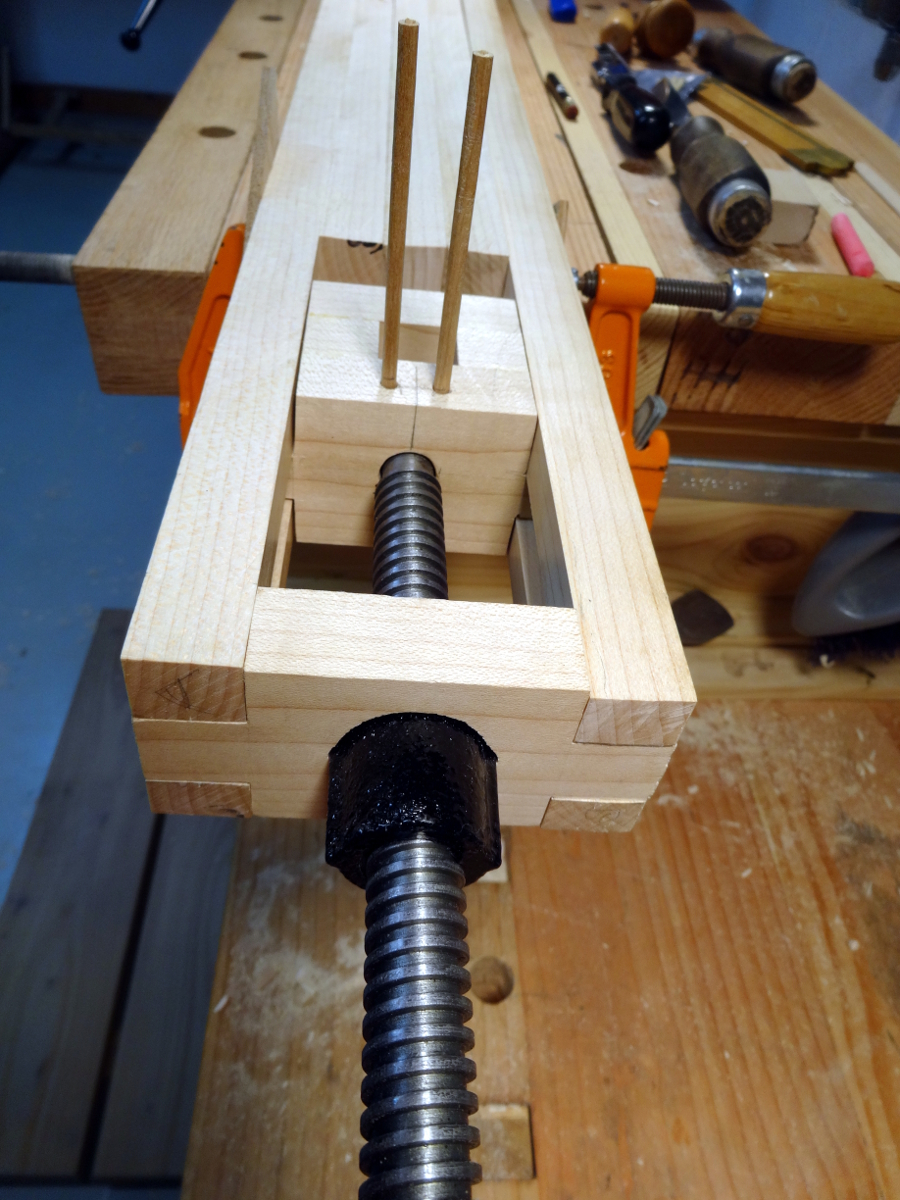
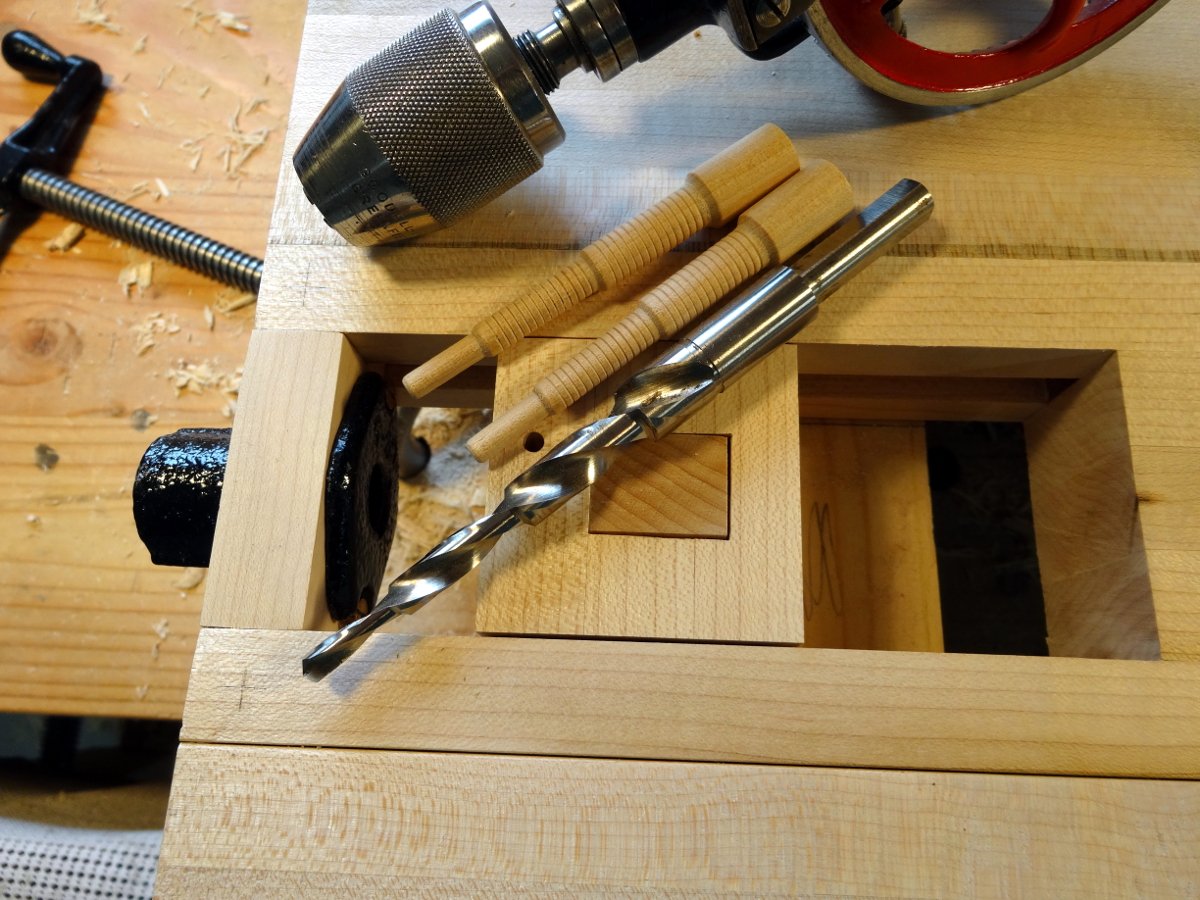
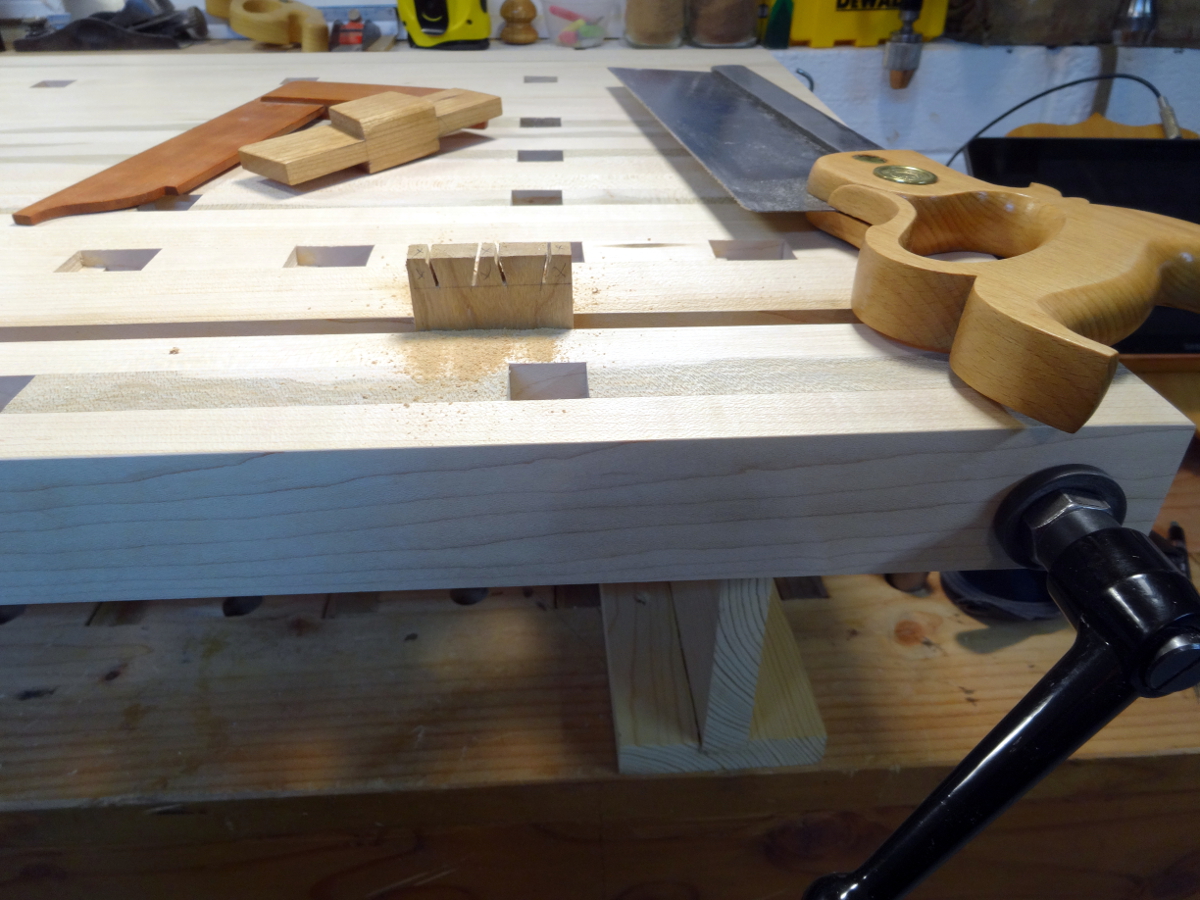
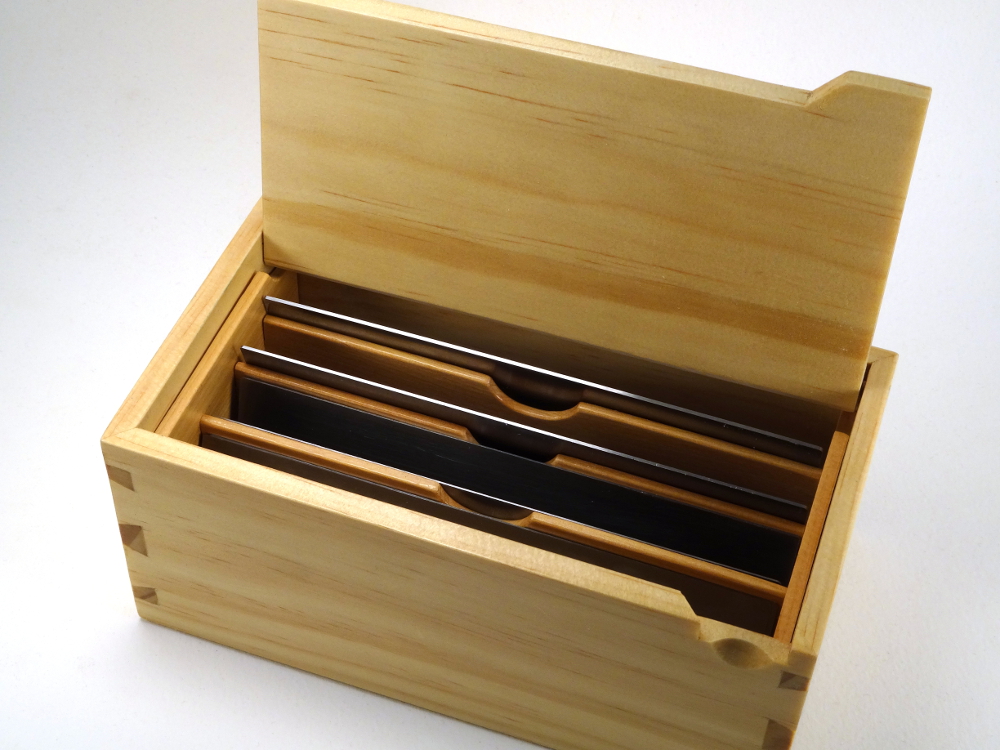
The box needs dividers and I’ve never made them before. I worked out the simple scheme of three dividers and two end pieces to hold them. Another quick wood decision. … photo of dividers, end piece with dadoes and tools
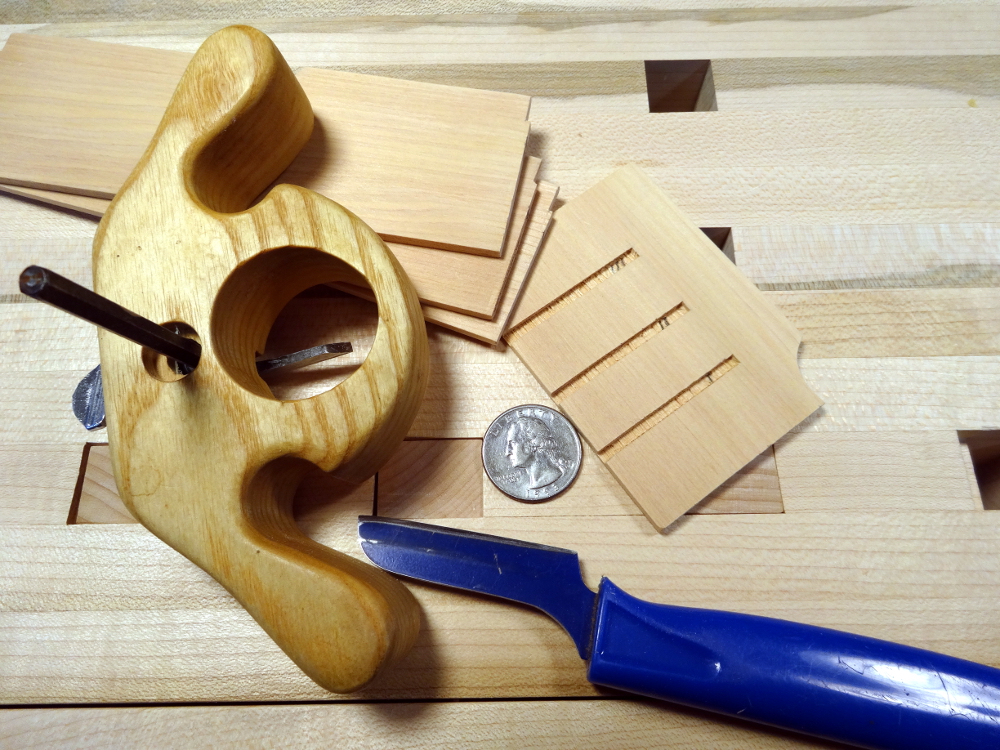
There’s a lot of cedar left from boatbuilding days and it can be cut down to 1/8 inch thickness very quickly. It’s the nature of cedar to crush more easily than cut, so when it came to routing the dadoes, a knife and slicing motions worked better than a chisel. A shop made router rounded out the tools needed for these joints. These are very small dadoes, 1/8 inch wide and only 1/16 inch deep. It turns out that they need exactly as many steps as any of their larger brothers.

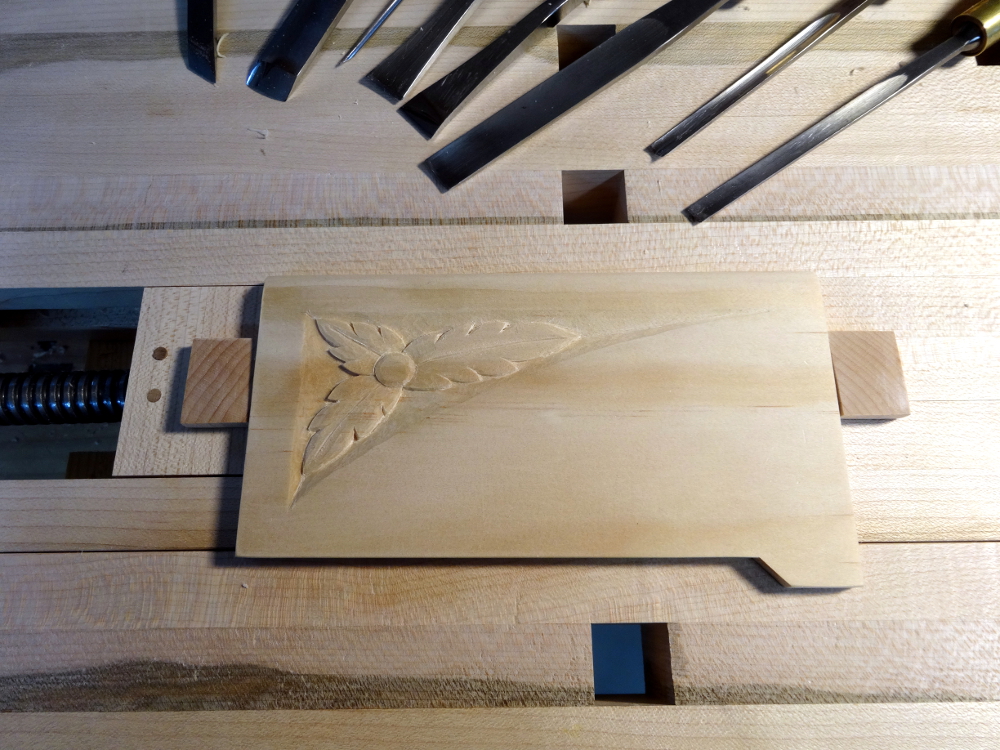
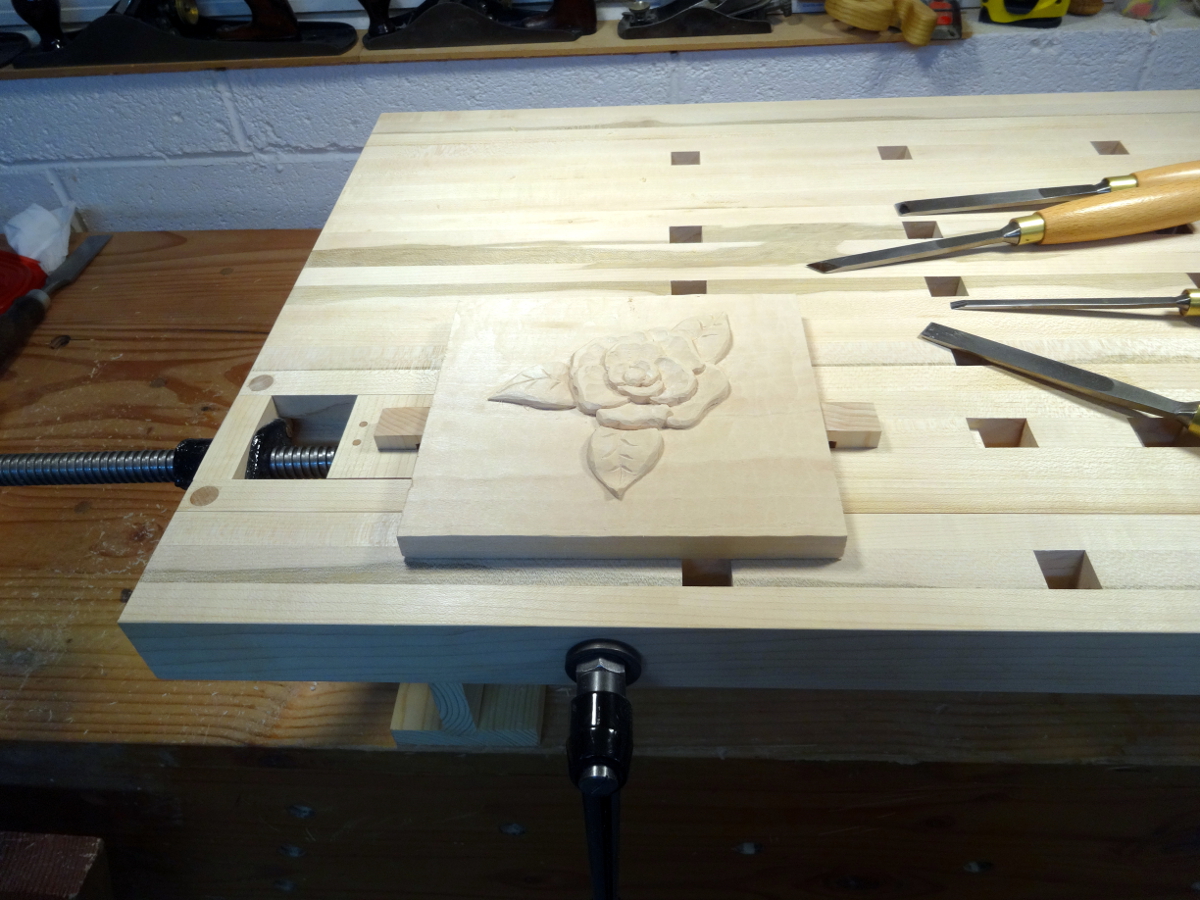
As the box neared completion, regrets about wood choice began to loom. All of the boxes I’ve made recently have been made as much for having something to decorate with carvings as much as having a practical storage box. Carving wasn’t in the original plan, but why not? …. Because it’s stringy pine, that’s why not.

Then, along came Rob Porcaro (Heartwood blog) with “It’s always something.” Read it!

A simple three leaf embellishment, a recent carving lesson from Mary May, originally meant for corner decorations, turned out to be just complicated enough to be satisfying and just simple enough for the pine. Taking shallower cuts to avoid unwanted splitting resulted in more facets than I like in the background, but adding yet more facets even things out.

All in all, she’s right. It turned out to be a satisfying project with a purpose.

Dimensions: 6 3/4 inches (L), 3 3/4 inches (W), 3 inches (H)
Finish: Shellac.

Card scraper box - carving on my new bench-on-bench
Card scraper box – carving on my new bench-on-bench
photo of dividers, end piece with dadoes and tools
Dadoes are 1/8 inch wide and 1/16 inch deep to accept haunched dividers.
photo of divider gripped in a good dado
Like all good dadoes, they fit perfectly.
Card scraper box - ready to finish - waiting for shop to be warm enough - dividers are cedar
Card scraper box – ready to finish – waiting for shop to be warm enough – dividers are cedar
Card scraper box - body pieces are 1/4 inch thick Radiata pine - dividers are 1/8 inch thick cedar - bottom is 1/8 inch thick pine
Card scraper box – body pieces are 1/4 inch thick Radiata pine – dividers are 1/8 inch thick cedar – bottom is 1/8 inch thick pine
Card scraper box - end view shows lid pivot pin
Card scraper box – end view shows lid pivot pin
Card scraper box - finger notch was cut with a #6 gouge
Card scraper box – finger notch was cut with a #6 gouge
Card scraper box - room for more
Card scraper box – room for more
Card scraper box - bottom is only 1/8 inch thick, captured in grooves
Card scraper box – bottom is only 1/8 inch thick, captured in grooves


Filed Under: Boxmaking, Woodcarving

Bob Builds Another BOB – the whole story

February 28, 2014 by Bob Easton 6 Comments

The first Bench On Bench worked well and taught me what improvements it needed.My first Bench On Bench was delightful. It brought carving and joinery tasks to a very comfortable height. Two and a half years later, I still appreciate it, but know of ways to improve it. The most wanted improvement is better work holding capability for carving work. Pinching stuff between dogs in the front vise and the “floating planing stops” just wasn’t working well enough. Shims of various sizes were almost always needed. The front vise itself grew to be a bit floppy, the result of installing the vise screw nuts loosely in softwood sockets. As they floated and wiggled around, they also wallowed the sockets. The best part about the bench was the vise screws, 1/2 inch veneer press screws that were available several years ago from Tools for Working Wood, but are not to be found anywhere today. The handles on those screws can be pulled out and rotated, very convenient for moving them when “tight” leaves them sticking up in the way. Those are keepers! Lastly, the excellent Gramercy holdfasts were rarely useful due to the smaller size of most of my work pieces.

Along comes Chris Schwarz with the “Milkman’s Workbench.” Intended as a portable bench, it has a few features I like and thought would be useful. In the end, I borrowed a few ideas from that bench. The first was lamination from maple instead of fir. This is the last workbench I’m going to build; I might as well use hardwood. The next feature was the wagon vise. However, I’ll use another veneer press screw instead of the wooden screws. I can’t justify the tooling cost for making just one of those wooden screws, and for what it costs to buy one ready made, I can buy a couple of top of the line carving gouges. The last feature was square dogs and their recessed self-storage. I’ll keep the full width front vise and the excellent screws with adjustable handles. I find that vise better suited for the way I work.

Start with 3 boards 1x6 by 8 feet. Rip each into thirds. Then, crosscut into thirds. The color streaks are from spalting.One of the nearby home centers actually carries maple. It’s “mystery maple” since the specific variety isn’t identified. There was some minor spalting in two of the three best boards. My right thumbnail Janka gauge determined the stuff was OK. That’s the discoloration seen in a few spots. Even though the specific type is unknown, it was straight, free of knots and a joy to work.

Plowing 1/2 inch grooves used more than one tool, and a good bit of patience. The 044 plow plane was good at removing waste, but only after the groove sides were cut ahead. Maple is hard.Yes, it is a lot harder than most stuff I work with, and yes the Record 044 didn’t want to plow a 1/2 inch groove without a bit of help, and yes, cranking a 1 inch auger through it with an 8 inch brace was a bit of work. Yet, it is remarkably predictable and finish planing leaves a glass like surface.

All parts catalogs say this is a 1 inch force fit. Yeah right! Asymmetrical, winged, and tapered. Lots of fussing... The Auriou rasp is superb!The new veneer press screw doesn’t deserve nearly as much praise. It is advertised at most all woodworking supply sources and out of stock in almost all. Once acquired, the threaded socket that is advertised as a “1 inch press fit” is found to be an elliptical shape with ribs on the side and must have been the seventieth son of the seventieth son to be so asymmetrical. There’s enough play in the threads to never have to worry about them seizing, but maybe that’s why they hold a setting so well. Fitting something like this is when one learns to really appreciate how well Michel Auriou’s rasps perform  (the one on the right, not the rat tail).

Plan A - Traditional, with wagon vise on the right.About 3/4 of the way through gluing up the pairs of strips that accommodate dog holes, I remembered that some of my working methods really want clear space on the right end of the bench. Actually, I find myself doing several operations that overhang the right side. Oooops, that vise screw is going to be in the way. OK — Plan B! Just flip it over … and smooth finish the bottom side … and make some more dog recesses.

The rest is a matter of careful assembly, lots of gluing and clamping, lots of planing, a bit of drilling and fitting. By the way, the entire project was done with only hand tools. No electrons murdered. No sandpaper martyred. Very sharp plane blades, and well groomed card scrapers gave excellent results. There’s only one area not completely finished. I did not glue the end block for the vise. It is temporarily fixed with press fit Miller Dowels. It is the dry season now, about 25% humidity. In late summer humidity goes to 90%. I’ve left this area free of glue in case it needs to be disassembled and adjusted.

Update: I forgot to mention dimensions in the original post. The bench top measures 31.5 inches by 18.5 inches. The top surface is 8.5 inches above whatever it sits on. It weighs 32 pounds.

The work holding capability is better than I aimed for, and the fit and finish is a big step above the previous version. All of the methods I practice can now be done easier and more reliably with this bench.

Click any image to see a larger view as a slideshow.

The first Bench On Bench worked well and taught me what improvements it needed.
Start with 3 boards 1x6 by 8 feet. Rip each into thirds. Then, crosscut into thirds. The color streaks are from spalting.
Start with 3 boards 1×6 by 8 feet. Rip each into thirds. Then, crosscut into thirds. The color streaks are from spalting.
Plowing 1/2 inch grooves used more than one tool, and a good bit of patience. The 044 plow plane was good at removing waste, but only after the groove sides were cut ahead. Maple is hard.
Checking the layout. Yep, that'll work.
Checking the layout. Yep, that’ll work.
Turning a 1 inch auger, in maple, with an 8 inch brace is near insanity. My 10, 12, and 14 inch braces are still on the 'buy someday' list.
Turning a 1 inch auger, in maple, with an 8 inch brace is near insanity. My 10, 12, and 14 inch braces are still on the ‘buy someday’ list.
All parts catalogs say this is a 1 inch force fit. Yeah right! Asymmetrical, winged, and tapered. Lots of fussing... The Auriou rasp is superb!
All parts catalogs say this is a 1 inch force fit. Yeah right! Asymmetrical, winged, and tapered. Lots of fussing… The Auriou rasp is superb!
Vise dry fit #1
Vise dry fit #1
Ahhhh. Vise dry fit #2. Now, it looks like a vice. Those walnut pins are the garter, temporary for now.
All the parts ready for assembly ... in 'Plan A' configuration.
All the parts ready for assembly … in ‘Plan A’ configuration.
Do this 6 times over the next few days, or go buy 50 more clamps. :)
Do this 6 times over the next few days, or go buy 50 more clamps. 🙂
Nuts for the front vise screws are mortised in very snugly, and then epoxied to prevent any wiggle.
Plan A - Traditional, with wagon vise on the right.
Plan A – Traditional, with wagon vise on the right.
Plan B - Flip it over. Wagon vise on the left and better use of the right end of the bench.
Plan B – Flip it over. Wagon vise on the left and better use of the right end of the bench.
Scrub baby, scrub! I have an alternate curved iron for the #5. Maple is hard, but predictable, and finishes very nicely.
Miller dowels through the bridle joints make the vise strong enough. Nothing here was glued for now. It's the dry season and may need disassembly when the humid season arrives.
Miller dowels through the bridle joints make the vise strong enough. Nothing here was glued for now. It’s the dry season and may need disassembly when the humid season arrives.
Work holding - a typical relief carving
Work holding – a typical relief carving
Work holding - a larger and scarier relief carving - space for much larger...
Work holding – a larger and scarier relief carving – space for much larger…
Work holding - This one is hard to hold well, but this works, a good test for moderate sized 'in the round' carvings.
Work holding – This one is hard to hold well, but this works, a good test for moderate sized ‘in the round’ carvings.
Work holding - typical joinery cutting - 22 inches between vise screws gives lots of capability.
Work holding – typical joinery cutting – 22 inches between vise screws gives lots of capability.
Work holding - on the bench surface - plenty of capability for my scale of box making
Work holding – on the bench surface – plenty of capability for my scale of box making
Work holding - Needed a slight overhang. Easy. Drop the left end of the front chop and use the wagon vise. Easiest grooving ever.
Work holding – Needed a slight overhang. Easy. Drop the left end of the front chop and use the wagon vise. Easiest grooving ever.


Filed Under: Boxmaking, Shopmade, Woodcarving, workbench

Bob Builds Another BOB

February 17, 2014 by Bob Easton Leave a Comment

just one photo for now…

bob-2-parts

Filed Under: Boxmaking, Shopmade, Woodcarving, workbench

  • « Go to Previous Page
  • Page 1
  • Interim pages omitted …
  • Page 10
  • Page 11
  • Page 12
  • Page 13
  • Page 14
  • Interim pages omitted …
  • Page 27
  • Go to Next Page »

Primary Sidebar

Footer

Recent Posts

  • New Frame Saw / Scroll Saw
  • Lamppost Sign
  • Goodbye PayPal – Goodbye Bob’s eBooks
  • Anarchist’s Workbench is Done
  • Why we keep offcuts…

Categories

  • About
  • Artwork
  • Boatbuilding
  • Boating
  • bowl carving
  • Boxmaking
  • Clocks
  • Drawings
  • eBook
  • etude
  • Eva Too
  • Eva Won
  • Fiddlehead
  • Fiddlehead model
  • Flying
  • frame saw
  • gilding
  • green woodworking
  • Grinling Gibbons
  • Guns
  • Hand tools
  • Humor
  • kerfing plane
  • Lettercarving
  • Mill Creek 13
  • Model building
  • Power tools
  • Rant
  • resawing
  • scroll saw
  • Shopmade
  • sign painting
  • Stonework
  • Swimming
  • Technology
  • The Wall
  • treadle lathe
  • Uncategorized
  • VSD
  • Woodcarving
  • Woodturning
  • Woodworking
  • workbench

Other stuff

  • About
  • Contact
  • Privacy Policy

Copyright ©2024 · Bob Easton · All Rights Reserved