• Skip to primary navigation
  • Skip to main content
  • Skip to primary sidebar
  • Skip to footer

Bob Easton

Chocolate powered woodworking

  • Home
  • Grinling Gibbons Tour

Woodcarving

Carving on a Turned Lidded Container

May 8, 2013 by Bob Easton 1 Comment

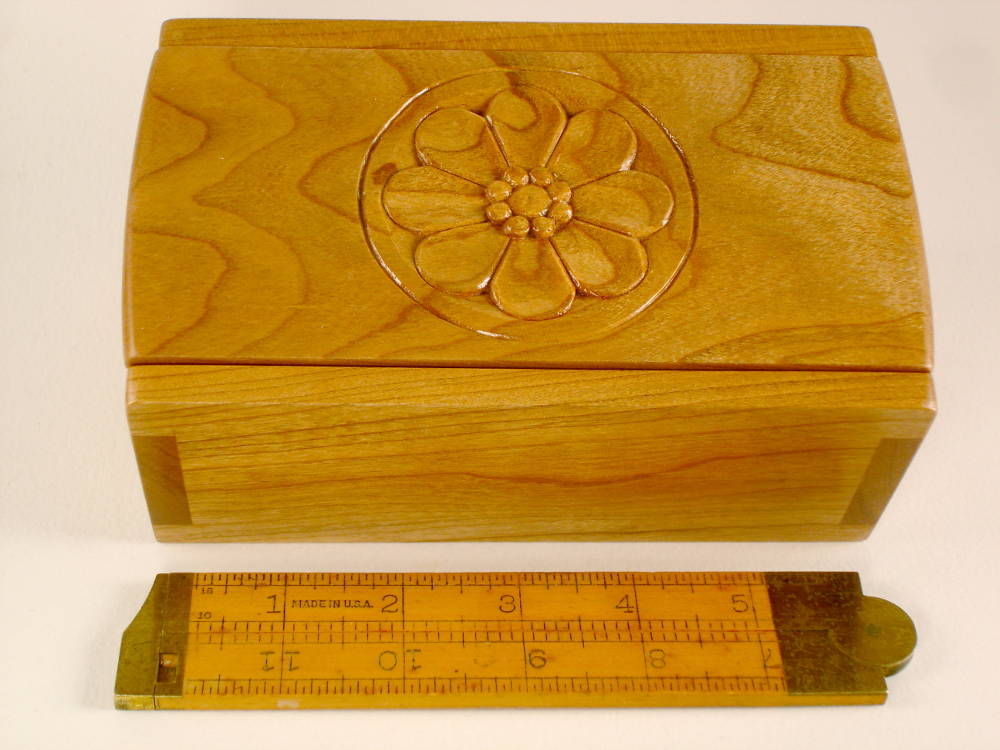
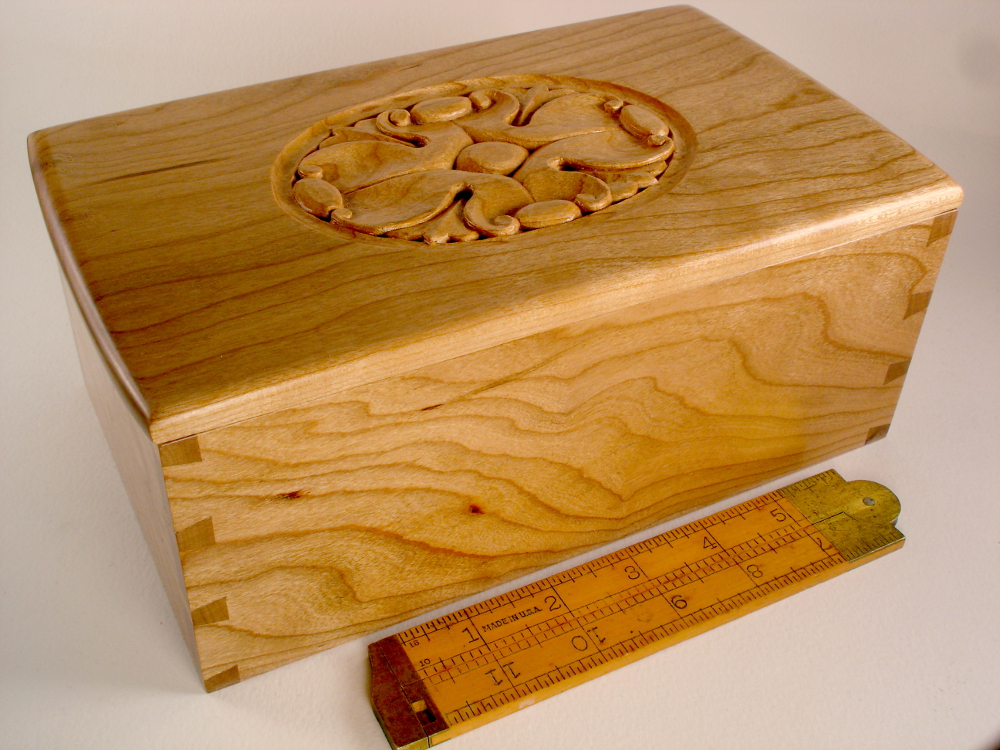
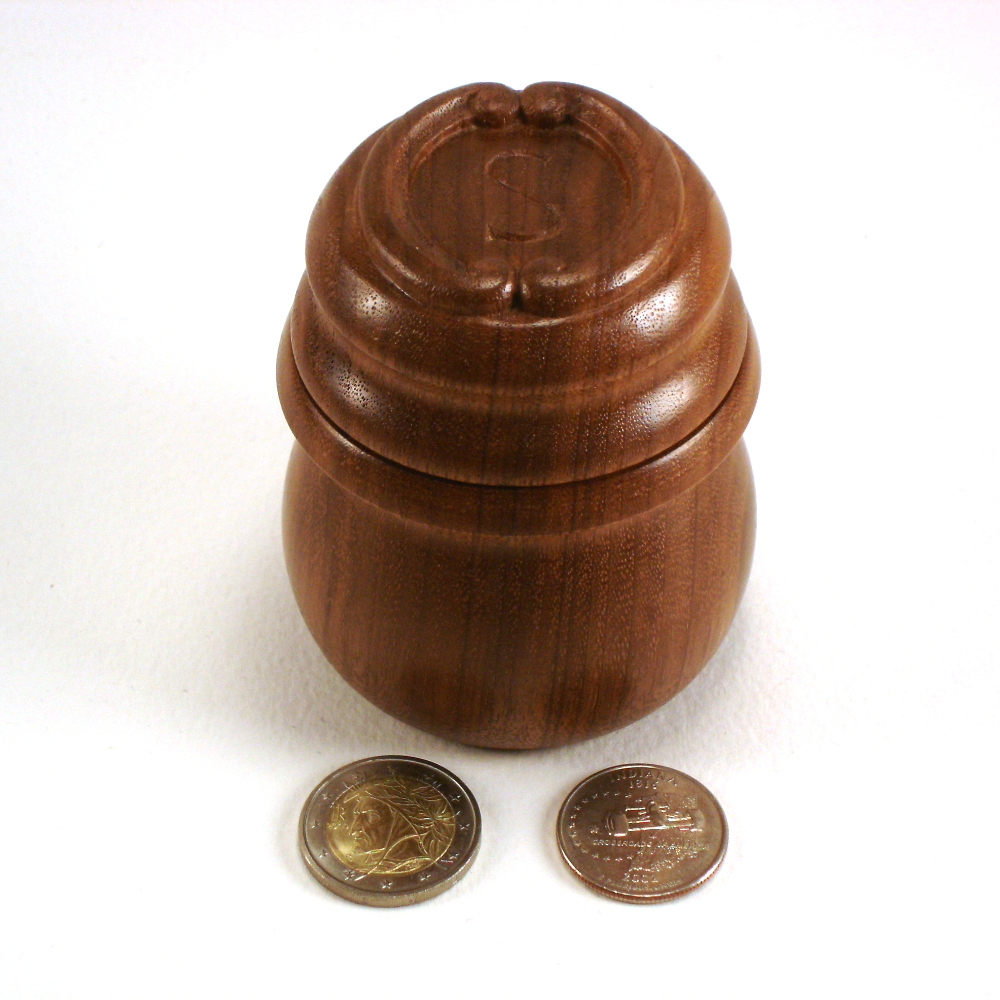
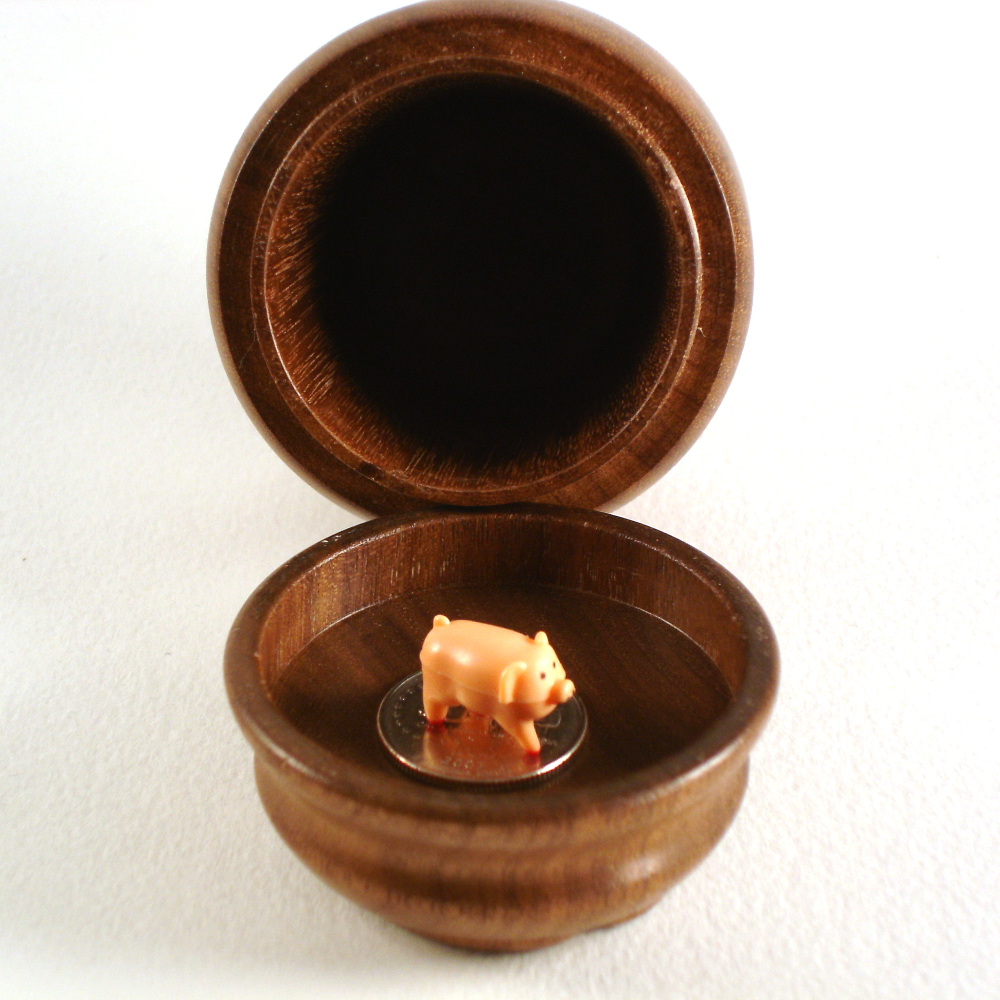
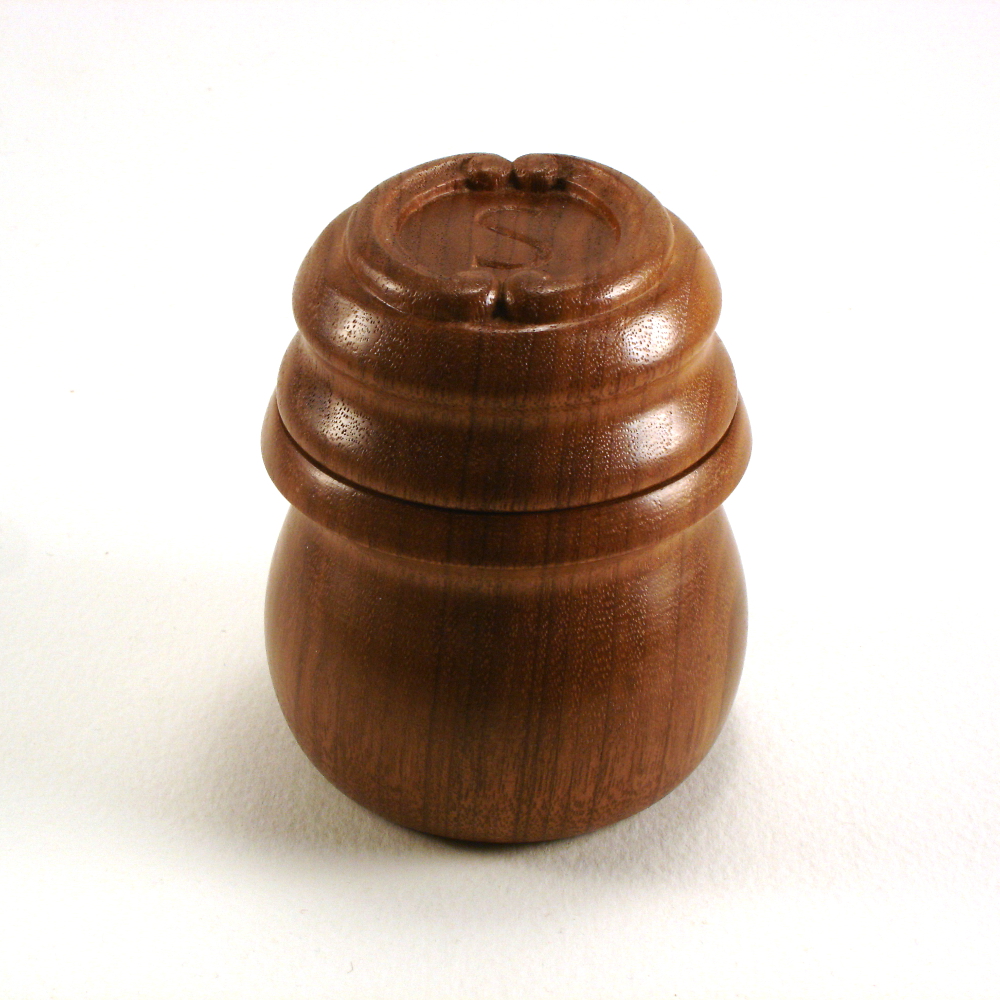
Walnut. 2 and 3/4 inches in diameter. 3 and 3/8 inches tall. The grain matches from container to lid. This is the first container turned on the treadle lathe, and my first turned container in about 30 years. Coins in the photo are for size reference, a 2 Euro (Italian/Dante) and a US Quarter (Indiana/Indy 500 – we used to live 1/2 mile from there.) The pig is an Austrian good luck charm. Turning and carving details follow these photos.

photo of a turned walnut box with monogrammed lidphoto of a turned walnut box with monogrammed lidphoto of a turned walnut box with monogrammed lidphoto of a turned walnut box with monogrammed lid

Having watched half a gazillion YouTube videos about container turning techniques, I did this one a bit differently than what I saw in any of the videos. Being of Scottish heritage and a bit “thrifty,” I haven’t yet bought one of the 4-jaw chucks we so often see used for this type of work.

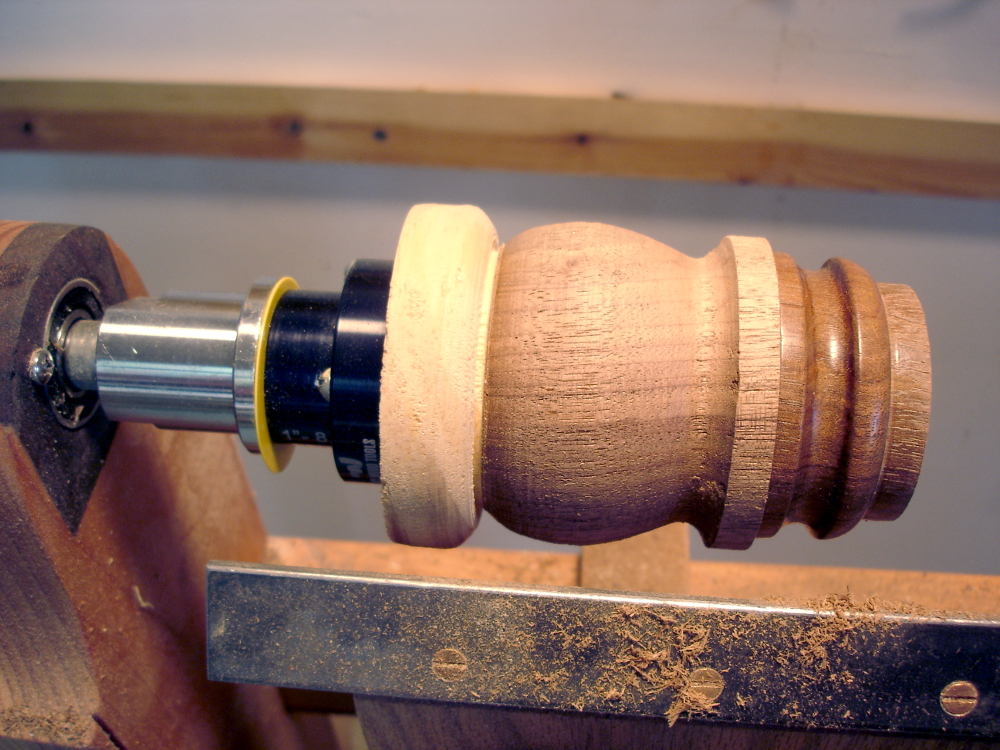
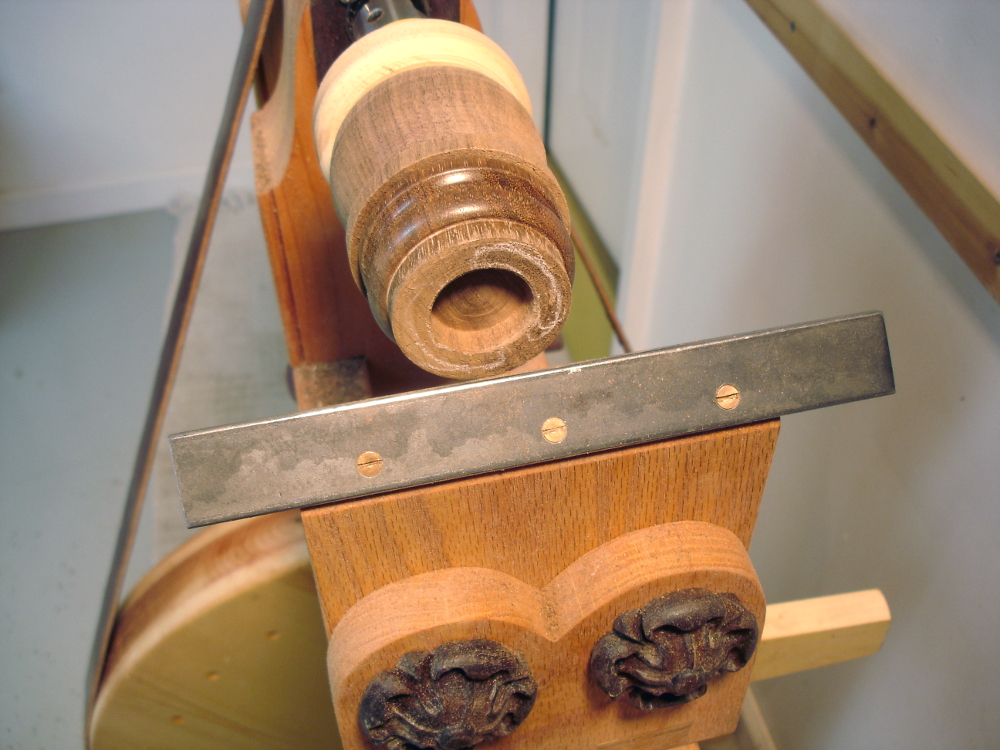
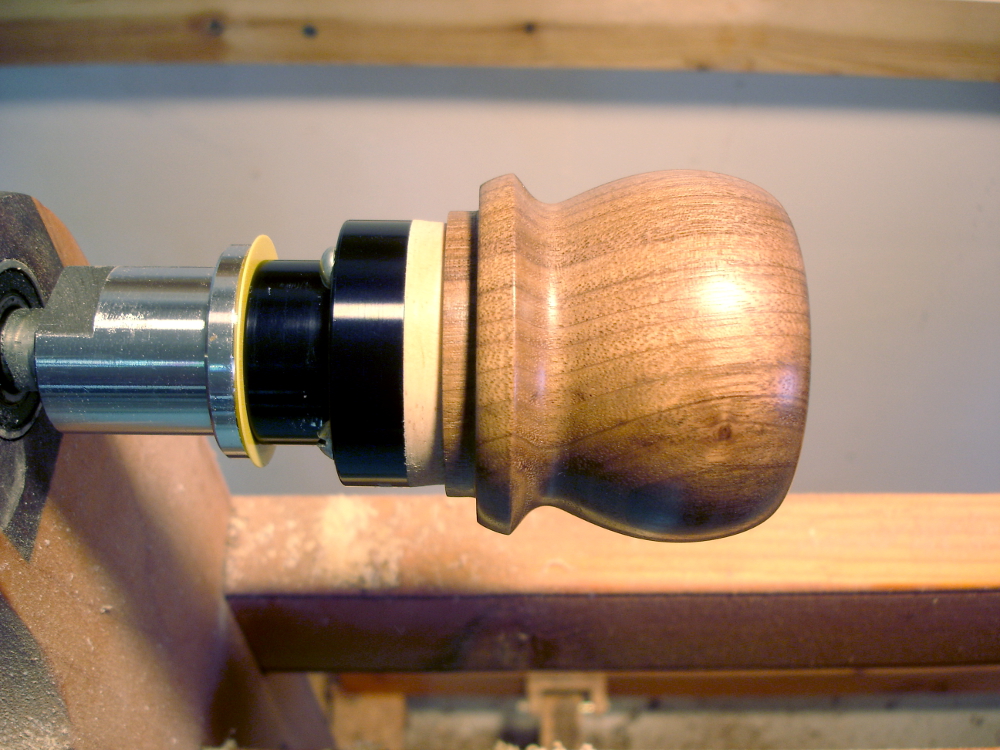
Instead, I sandwiched the walnut blank between two pine waste blocks (saves wasting 50 cents worth of walnut) and mounted the sandwich on a simple $10 faceplate. I trued the blank with a live center taking up the tail. After truing the blank into a cylinder, I trued a perpendicular face on the tail end of the blank, i.e on the end of the waste block there. That prepared a surface for mounting yet another simple $10 faceplate for working the lid.

The rest of the turning followed fairly standard procedure.

  • Turn a rough profile for the entire container.
  • Refine the lid profile to nearly final shape.
  • Part off the lid piece.
  • Mount a faceplate on the lid piece.
  • Remove the body from the lathe and mount the lid piece.
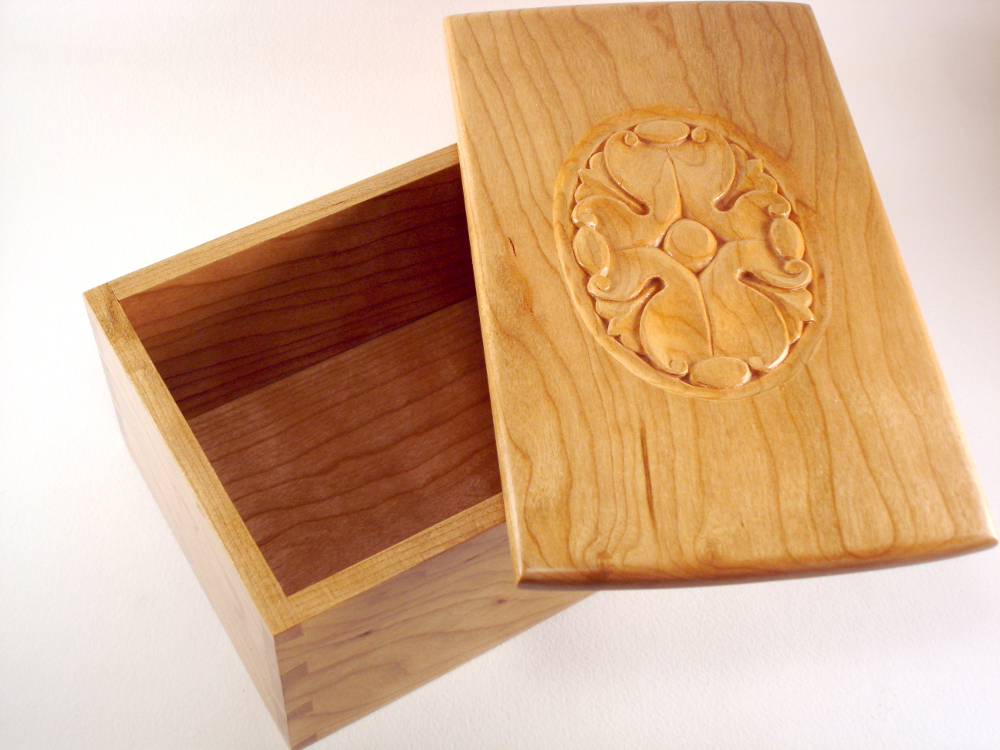
  • This leaves the inside of the lid accessible. Hollow the inside to desired depth. Refine, sand and finish the inside.
  • Remove the lid from the lathe and mount the body.
  • Turn a tenon on the body that accepts the lid as a very snug press fit.
  • Remove the lid’s waste block and faceplate. (The waste block was glued in place with a paper separator layer, hence easily cut off.)
  • Press the lid onto the body’s tenon.
  • Complete the shaping and finishing of the lid. For this particular turning, I left a raised ring of wood on the lid that later becomes the “C-bars” in the carving.
  • Refine the outside shape of the body.
  • Hollow the body.
  • Sand and finish the inside. (Did I say “sand?” Hate sanding anything!)
  • Cut the body from the waste block.
  • While still mounted, turn the waste block to form a plug / jam chuck for the body.
  • Press fit the body onto the plug and turn a very slight concave bottom surface. Sand and finish the body.
  • Remove all from the lathe.
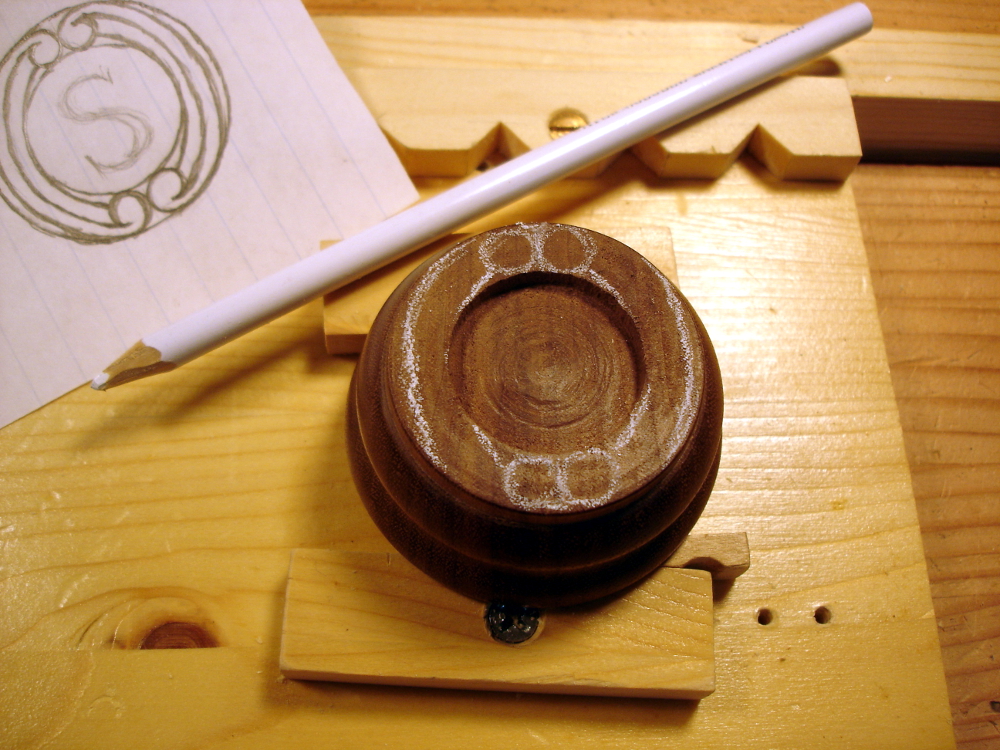
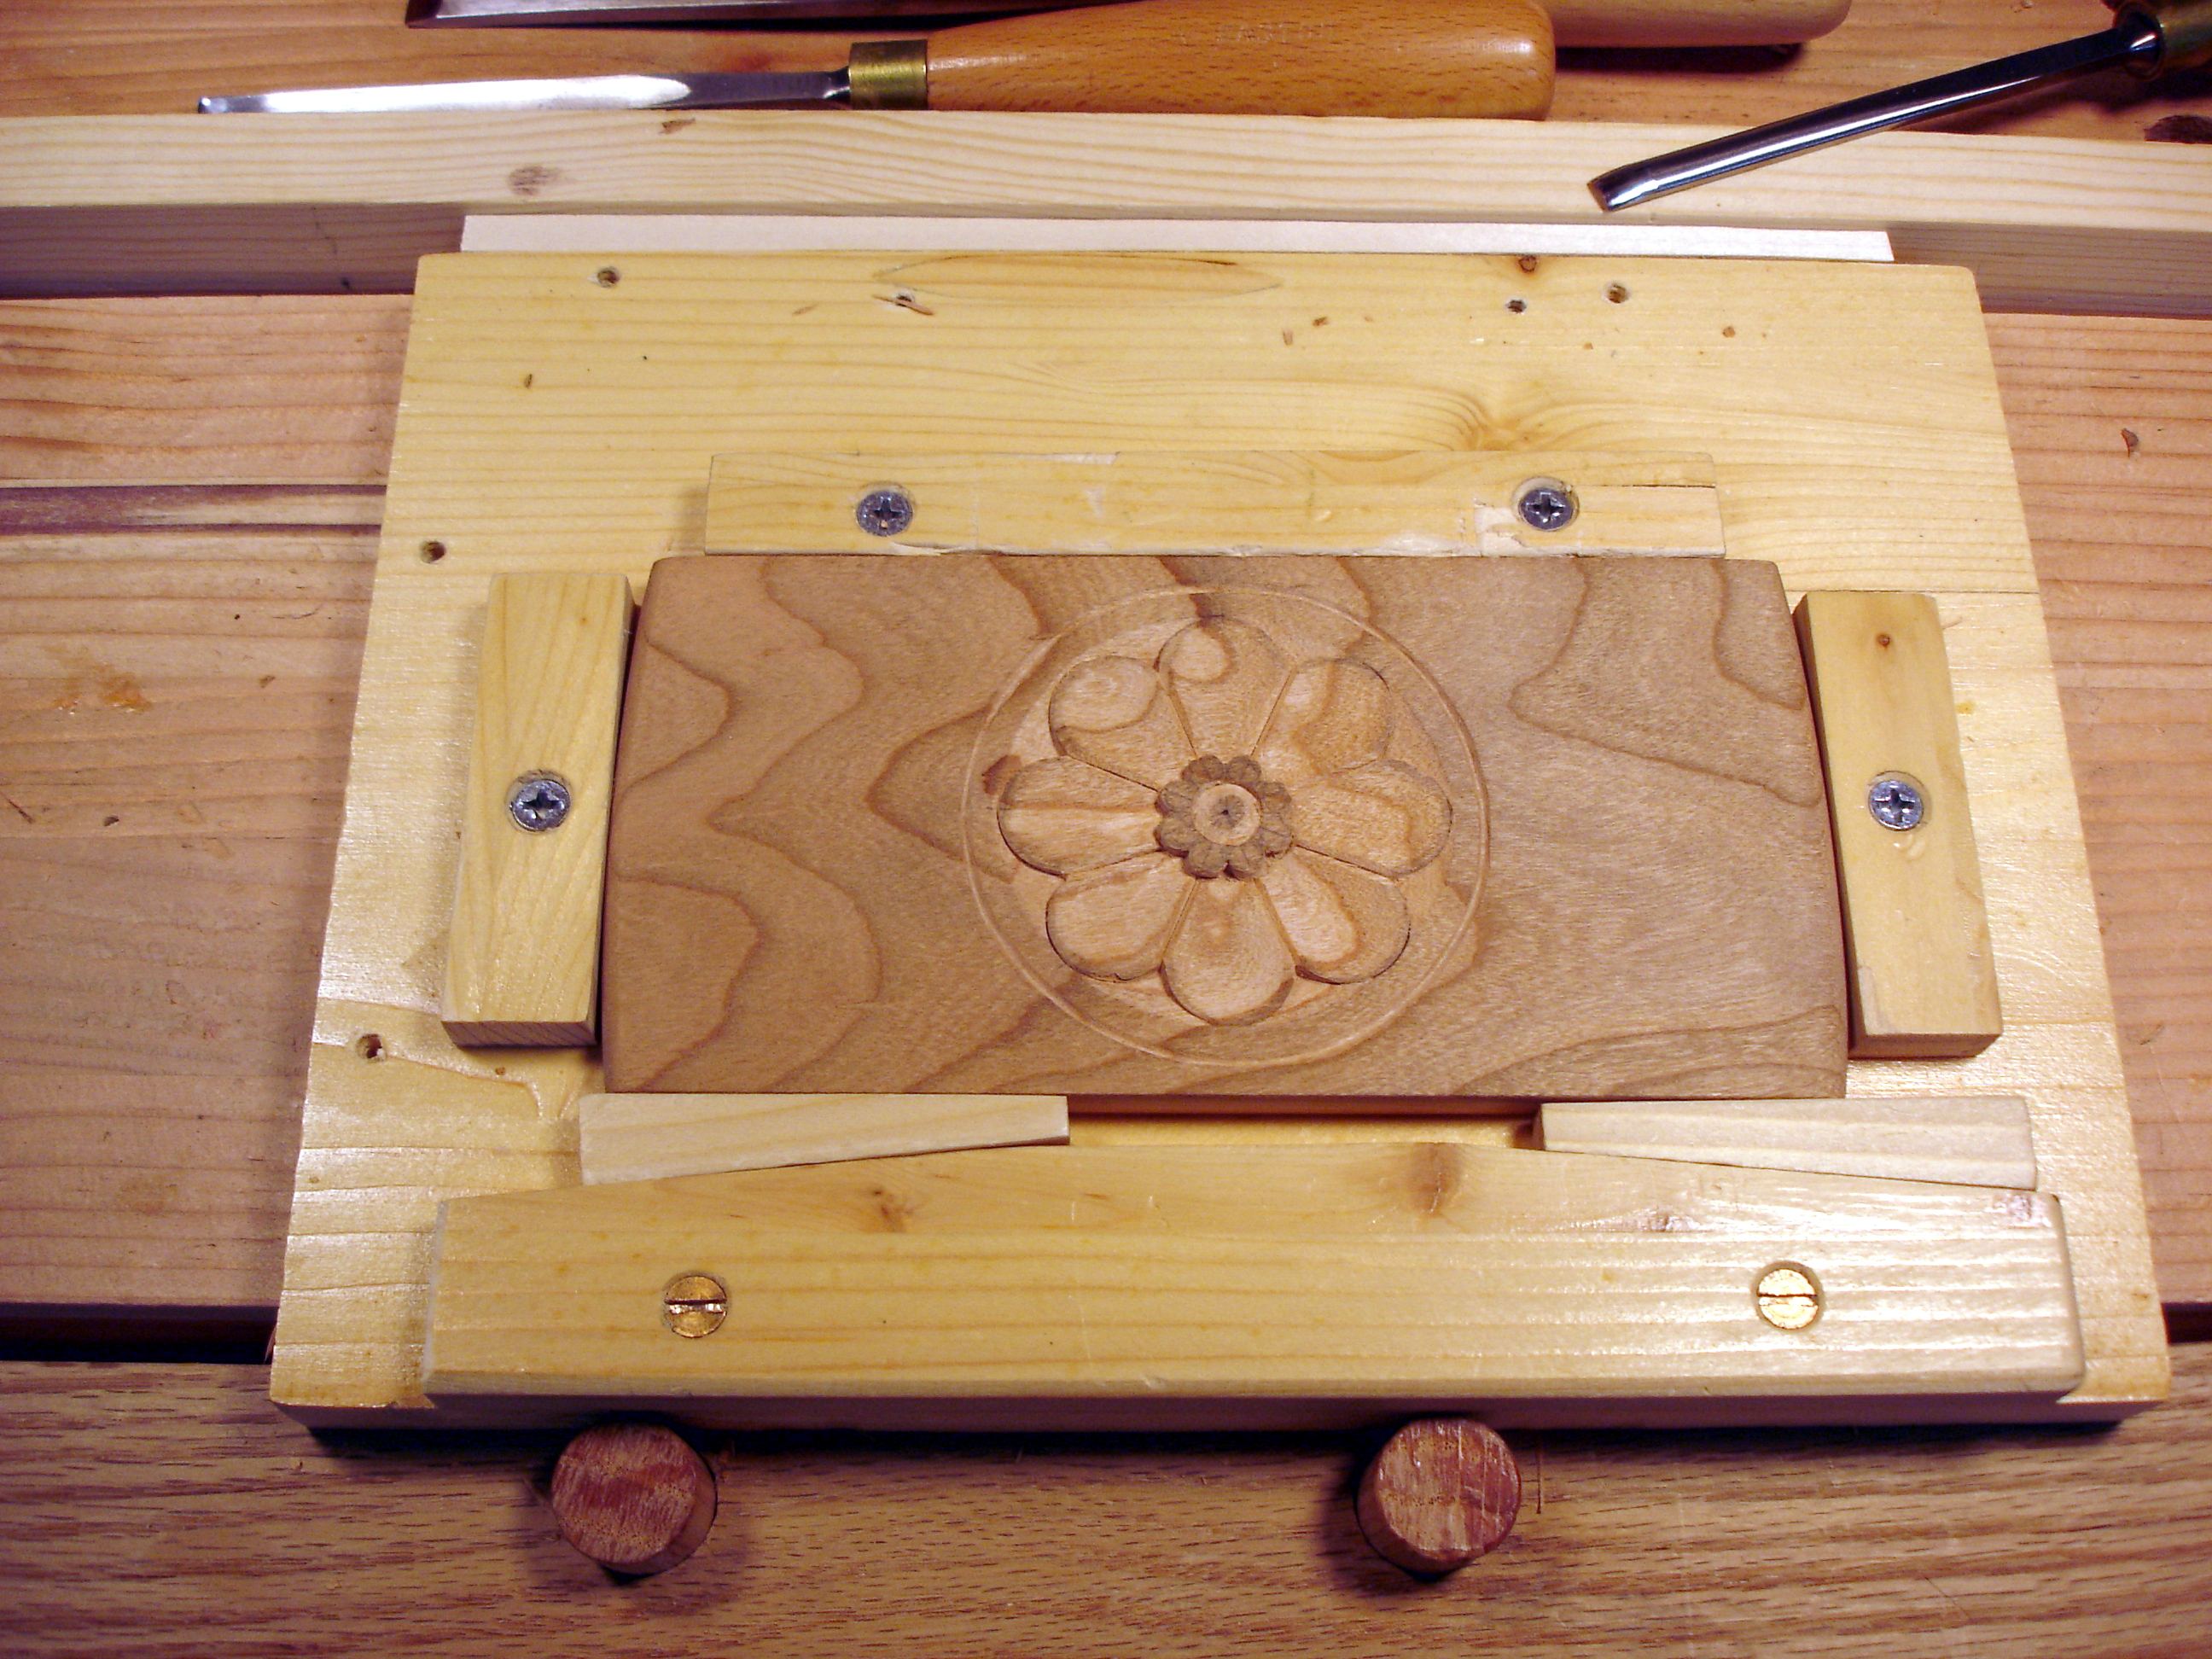
  • Remount the waste block used for the lid and turn it to form a plug / jam chuck that fits inside the lid. This is not used for any more turning, but as a mount for holding the lid while carving.

photo of turned box on the lathephoto of turned box on the lathephoto of turned box on the lathe

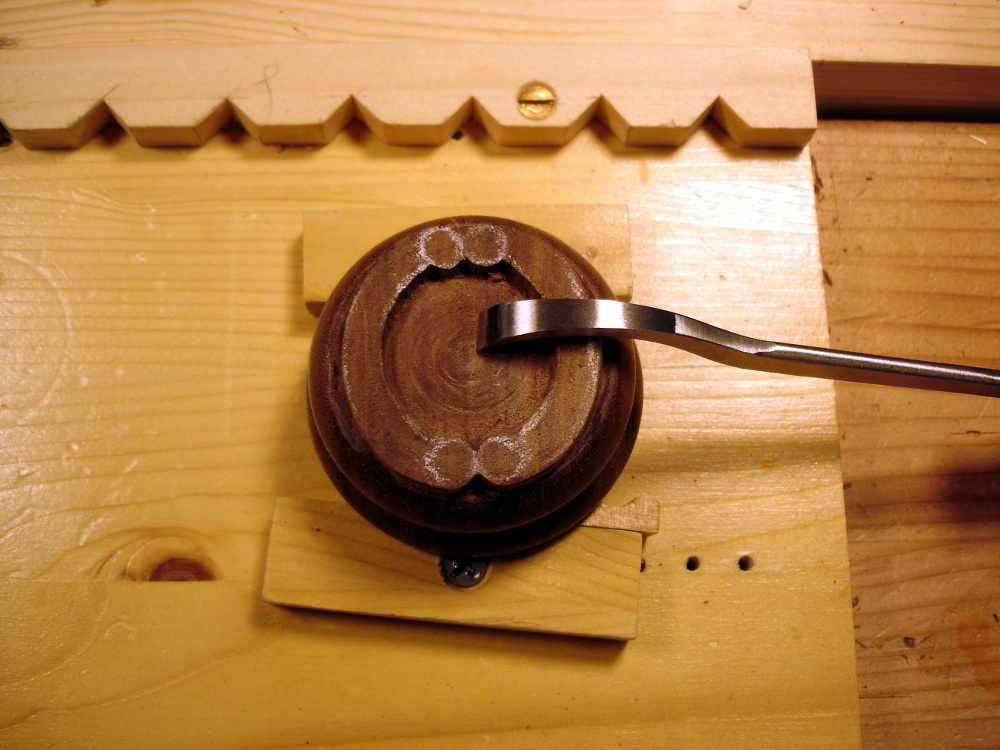
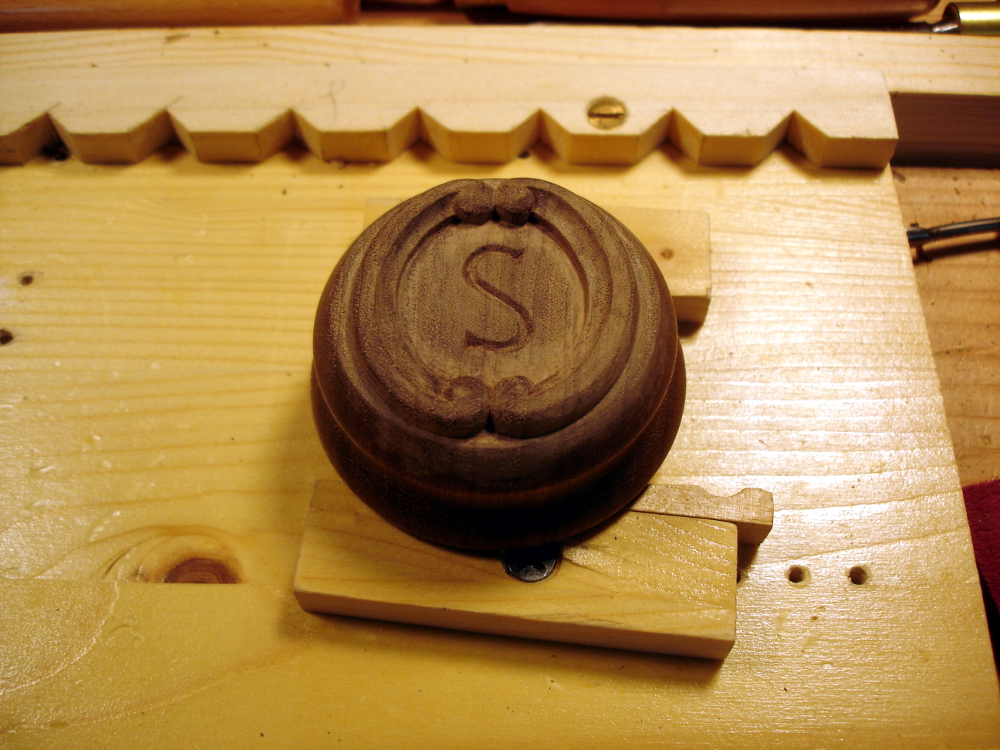
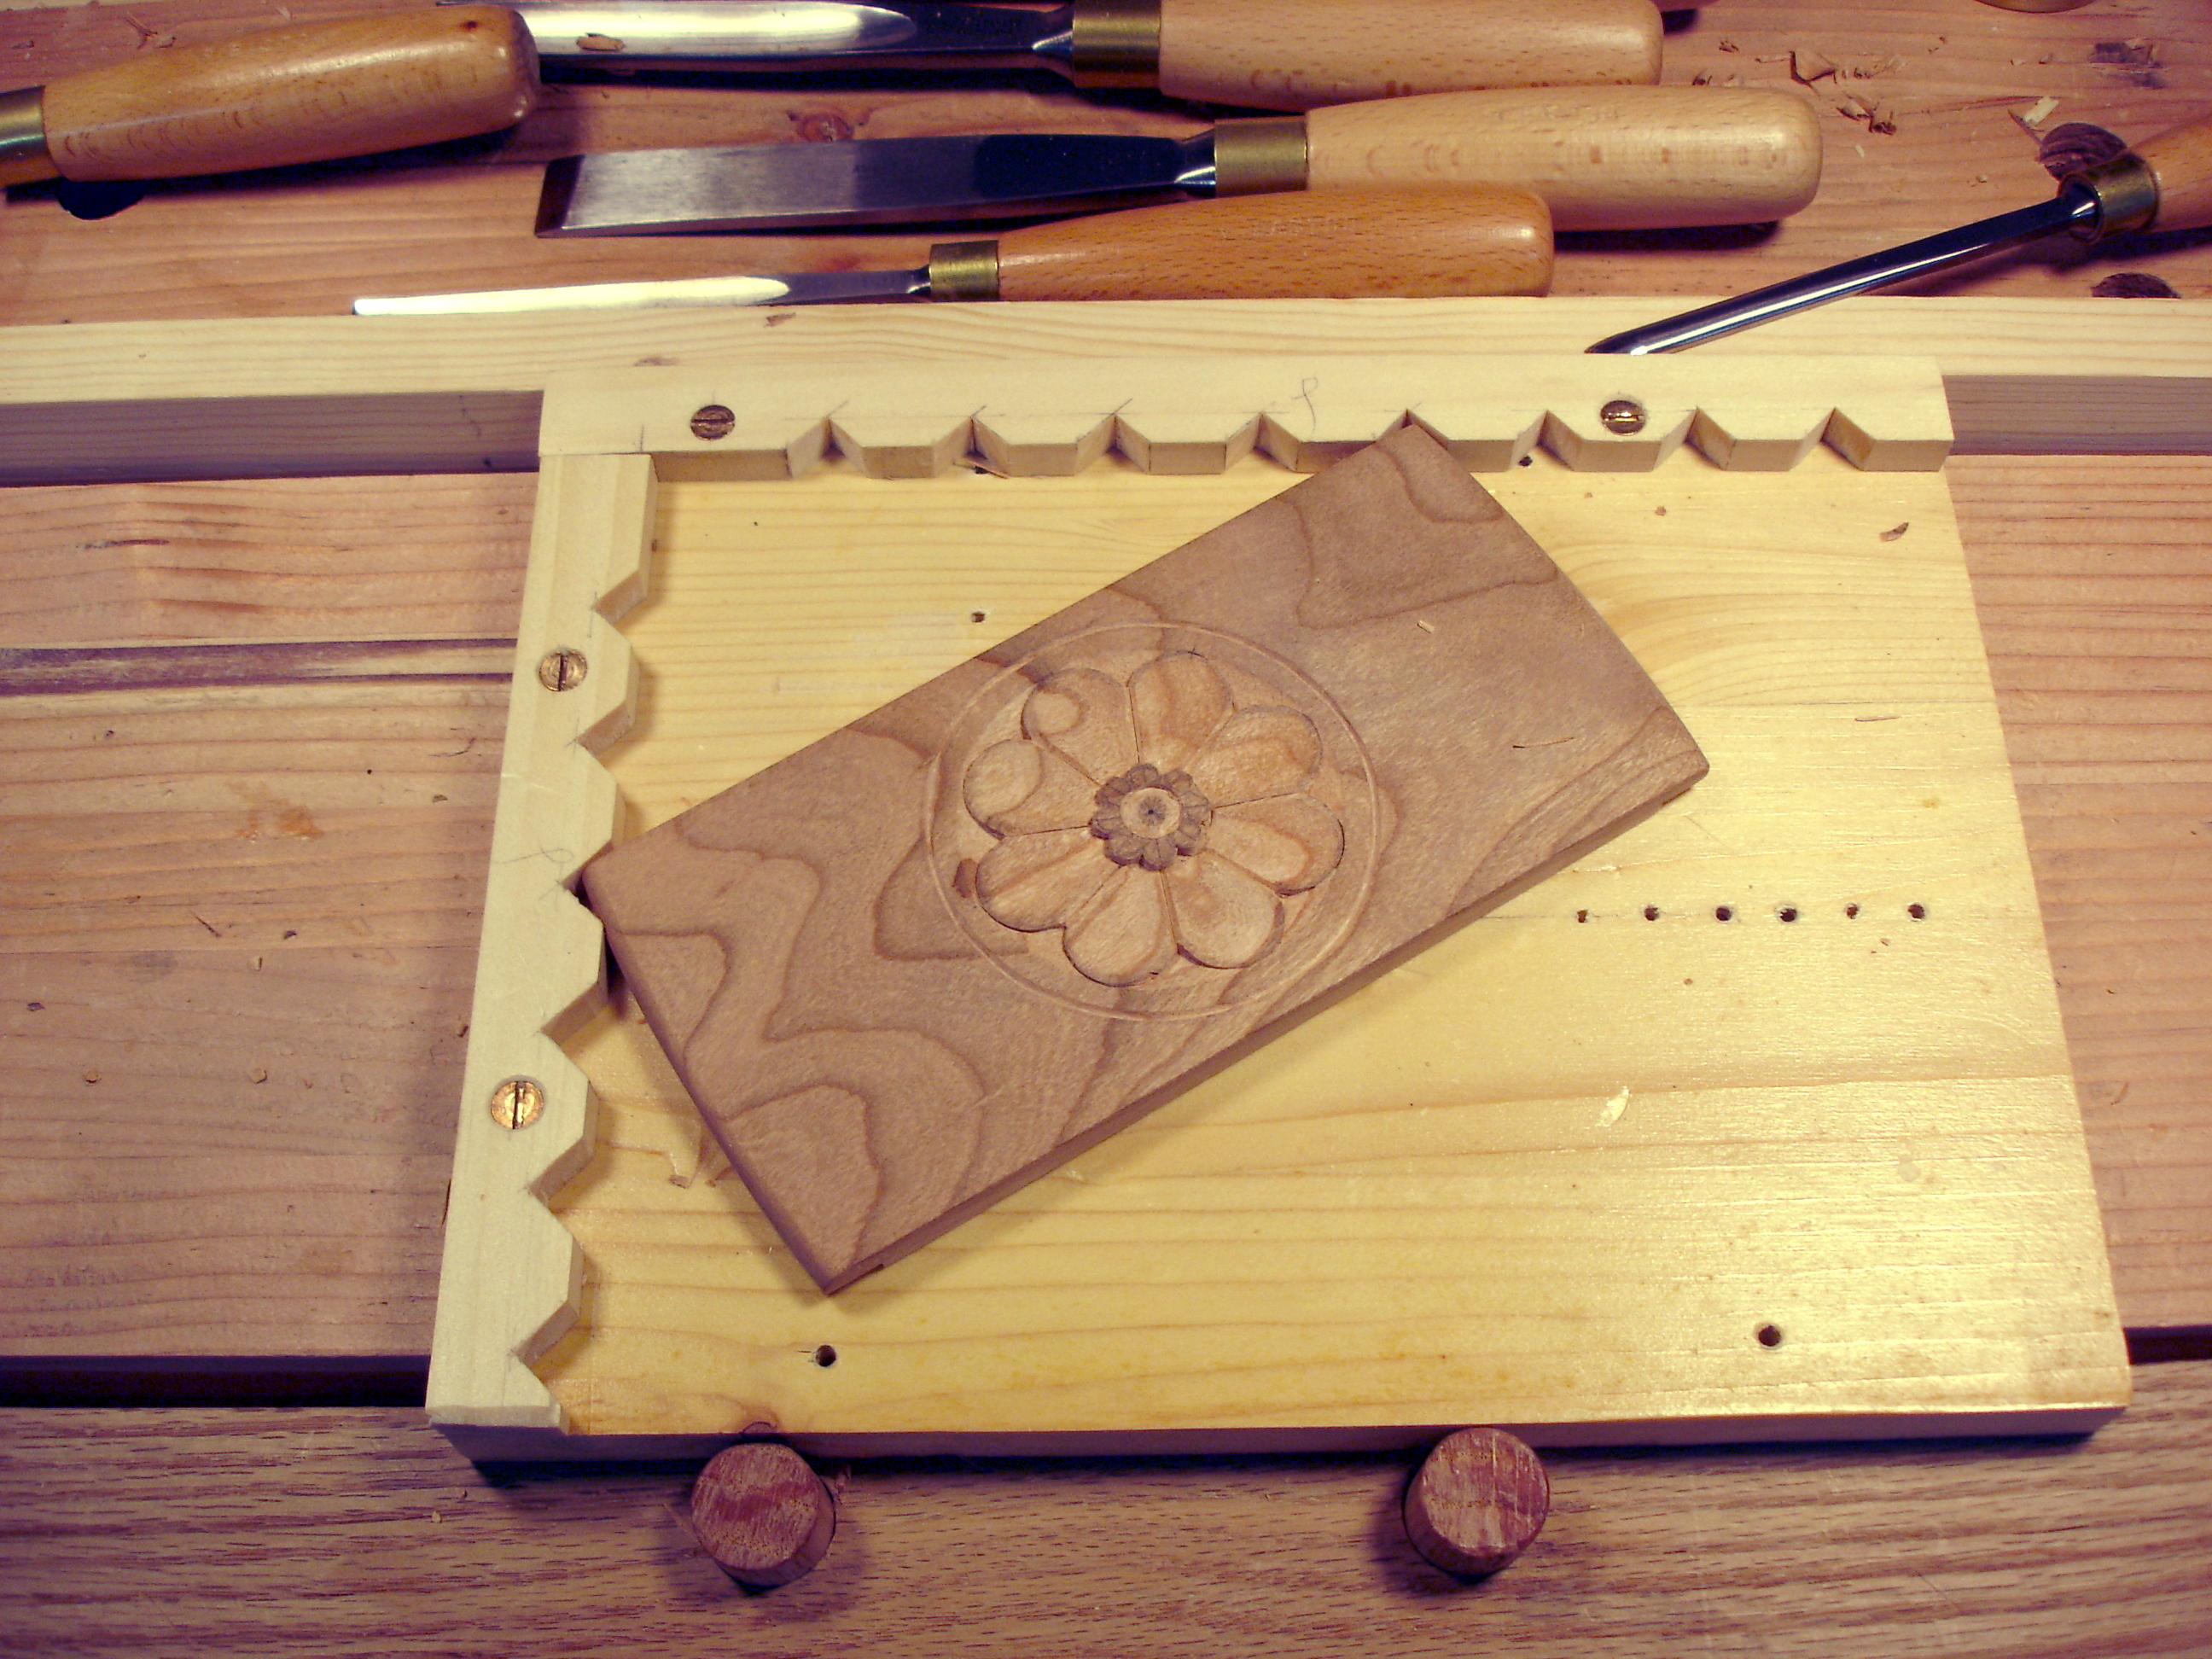
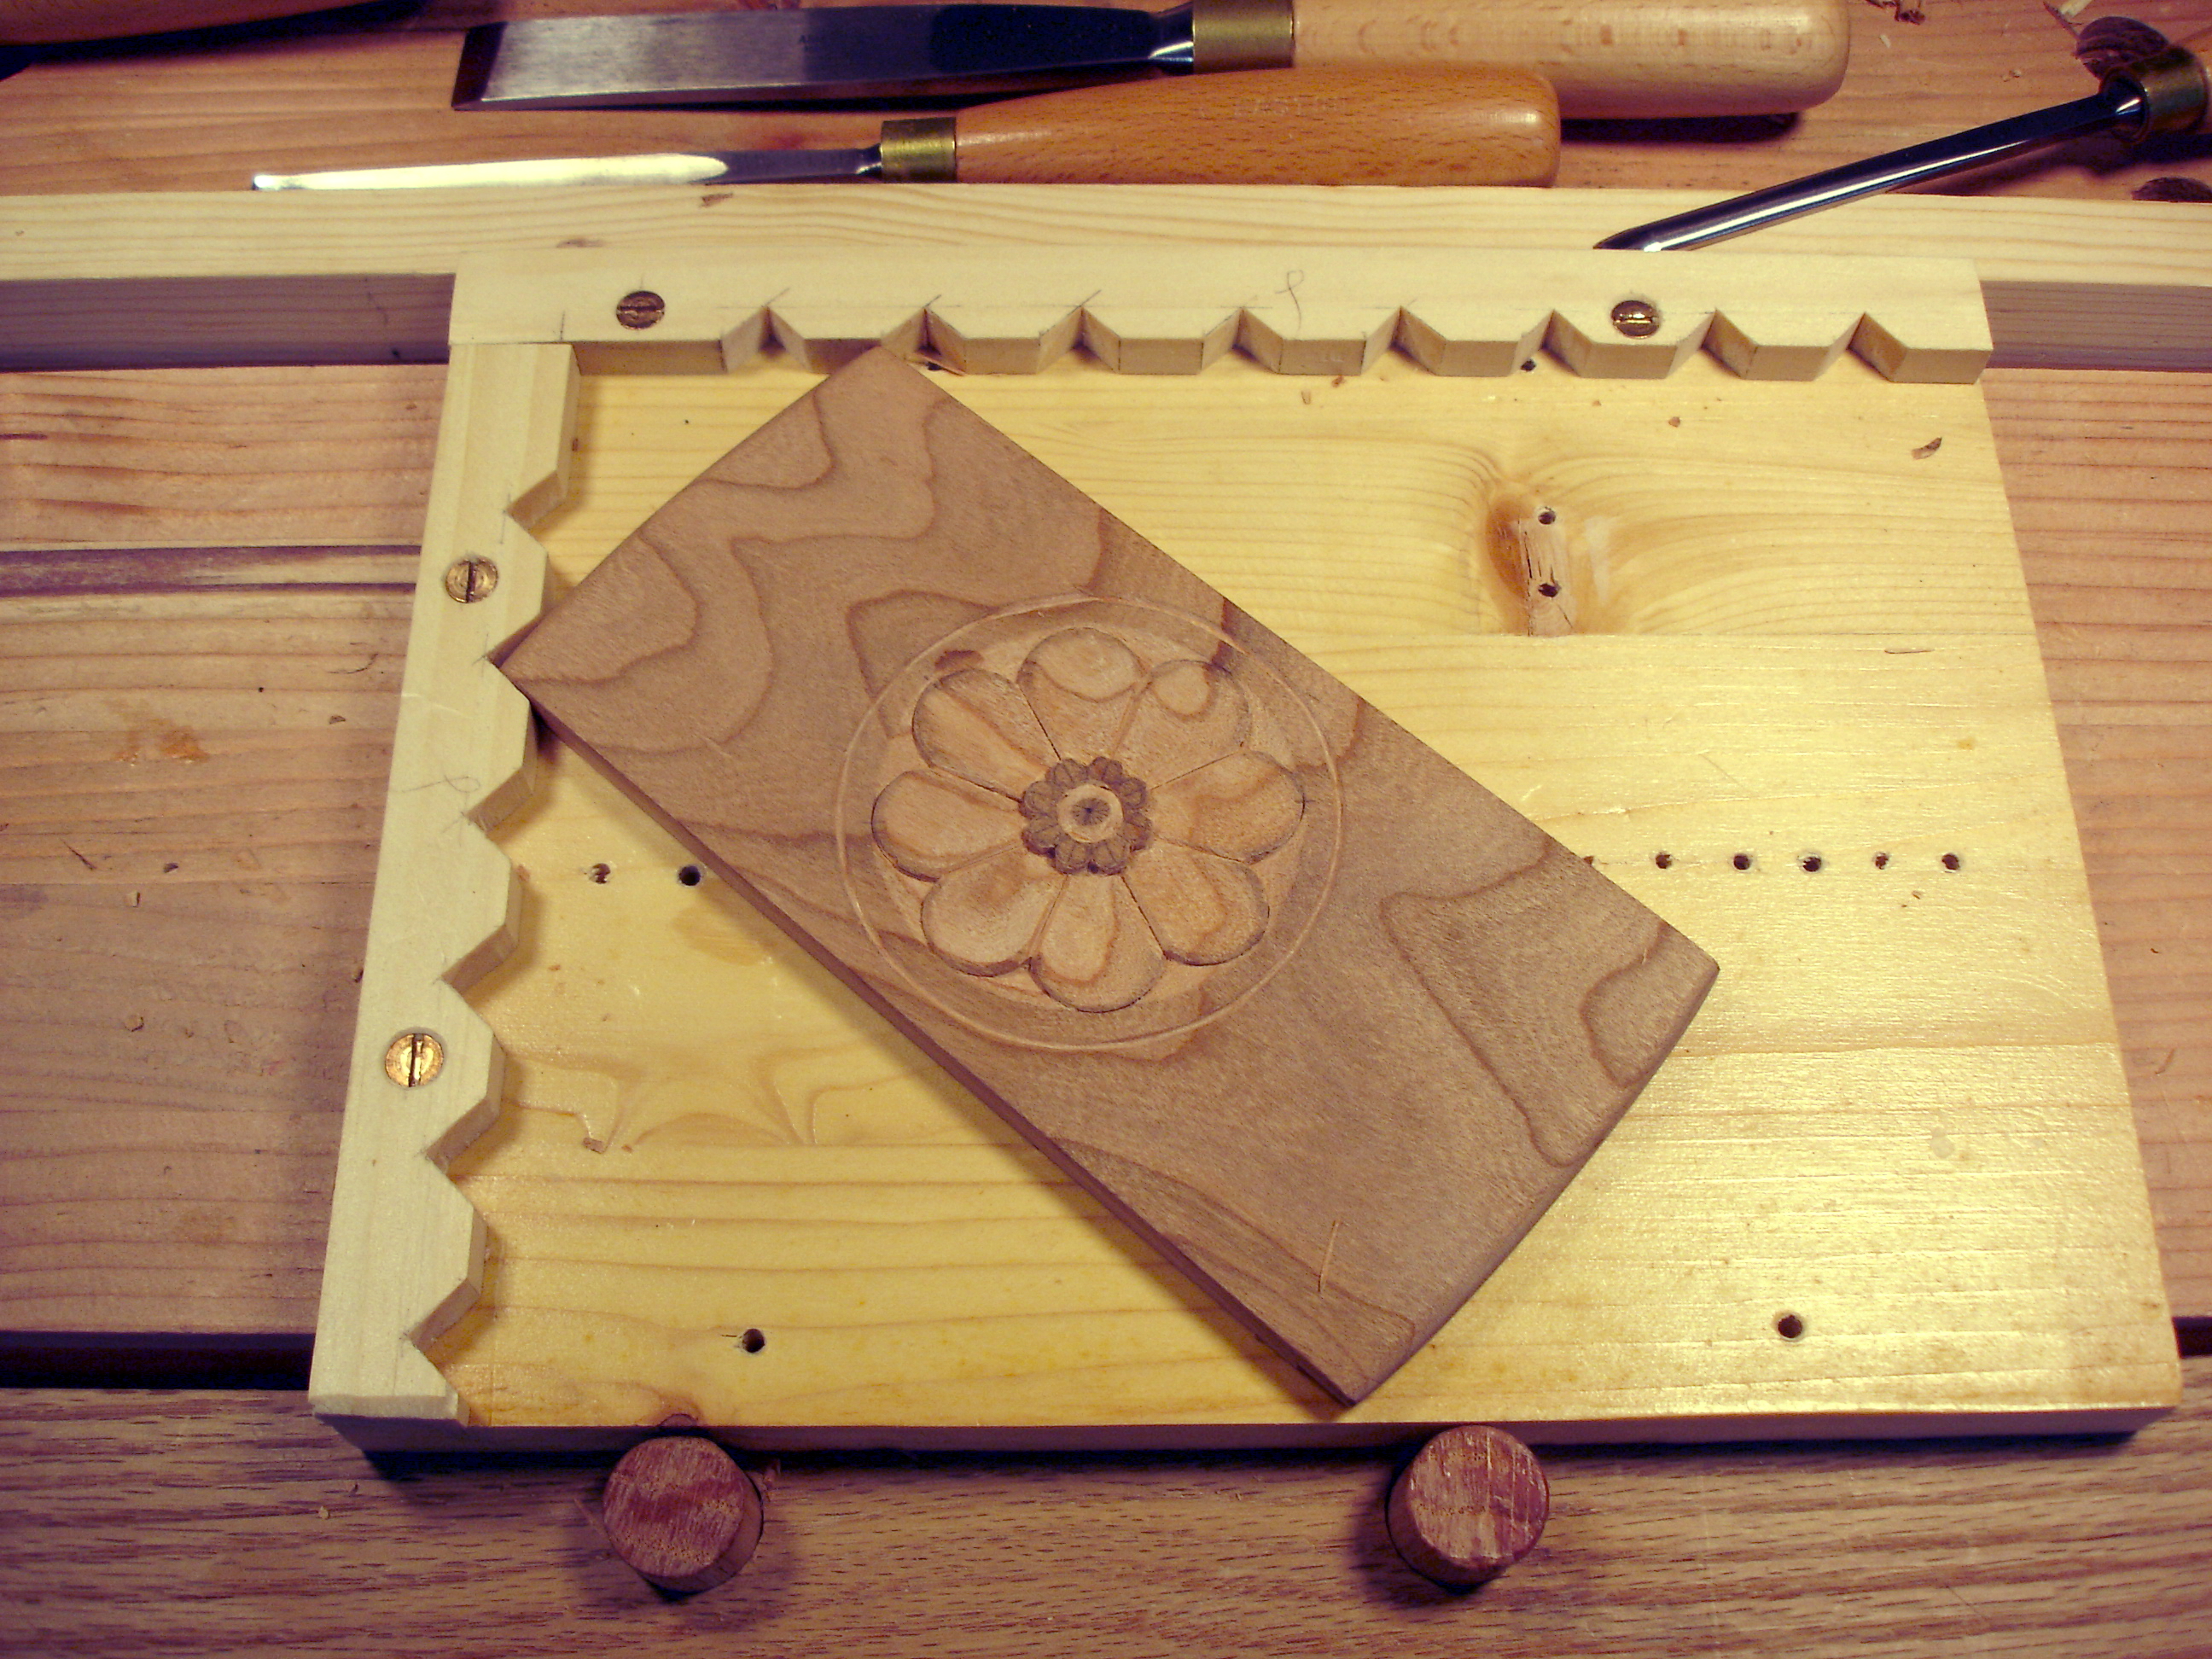
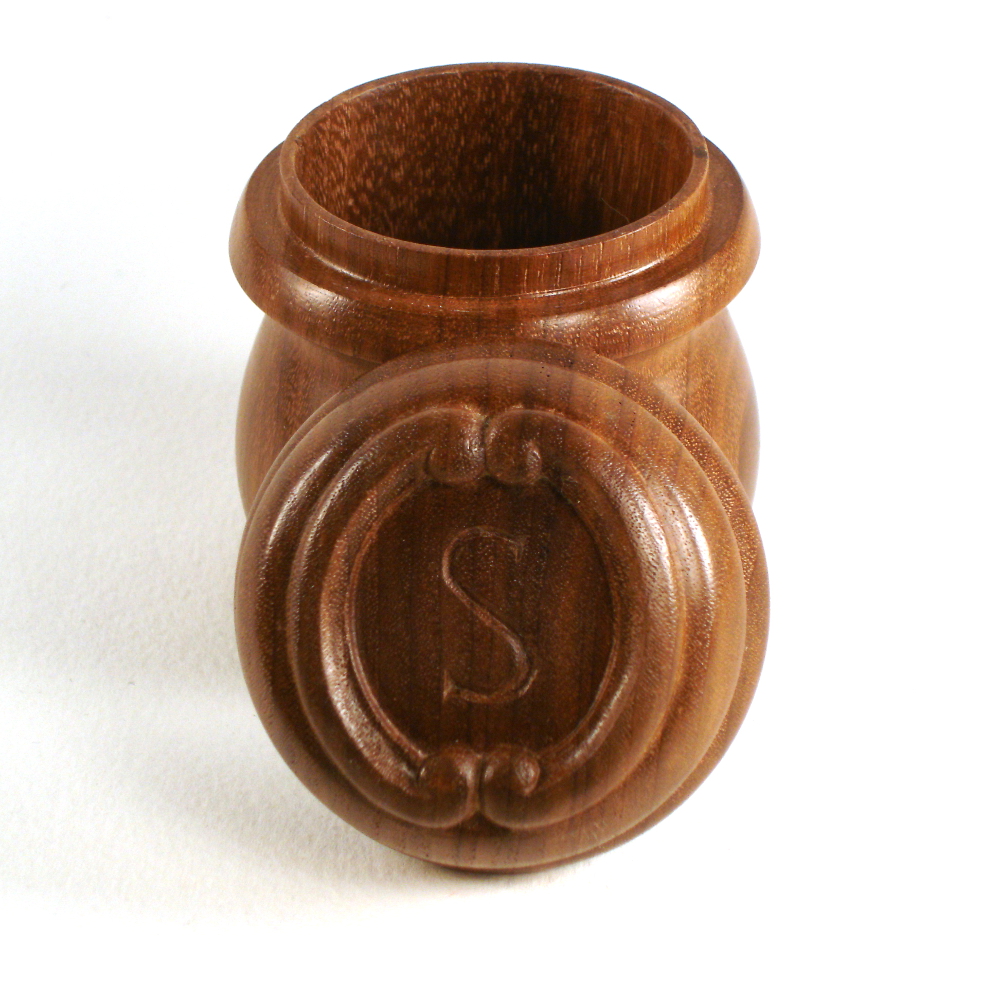
All that remains is a simple matter of carving. The design is a single letter monogram set between two classic “C-bars.” The carving is different from most in that it is carved in end grain. While that eliminates the usual grain sensitivity of carving, it presents another difficulty. Carving in end grain is like pressing a knife into the end of a bundle of soda straws. Extra sharp tools are the order of the day, along with a healthy helping of patience. Also helpful are a white wax marker and a fine spoon shaped chisel.

I’m not sure what the recipient will keep in such a container. It has enough room for about 211 calories worth of Gummy Bears, or maybe a few spare gold coins. We’ll see.

photo of carving the lidphoto of carving the lidphoto of carving the lidphoto of carving the lid

Filed Under: Boxmaking, Woodcarving, Woodturning

Carvings on Two New Boxes

April 12, 2013 by Bob Easton 7 Comments

Browse through the sites selling handmade goods, and you’ll find a tremendous number of wooden boxes. It looks like recent trends are for boxes made of contrasting woods, or combinations of various exotic woods. Decoration is mostly in the color contrasts, and sometimes with the addition of things like splines on joints, and occasionally some inlay. There are many well made and beautiful examples to be found. (Hint: Etsy > Keepsake Box)

The decorations rarely seen on these boxes are carvings. Here and there some might be found, but not many. Which is why … I’m using hand made wooden boxes as a platform for classic woodcarvings. You might have seen this coming in recent months.

Here are two new boxes. Both are made of Cherry. This Cherry is S2S material 15/16″ thick, which I resaw by hand. The sides and end walls are 3/8″ thick, the result of resawing the stock in even halves. The top and bottom material is finished at 1/2″ thick for the top and 1/8″ thick for the bottom, the result of resawing off center. This gives one the opportunity of using “book matched” pieces to display the grain wrapping around the box, and to have a top with a grain pattern that matches the bottom. Note, I said “opportunity”, and that depends on keeping careful track of such things.

First is a small box featuring a classic flower rosette on the lid, the lid shown as work in progress in the previous post. This style of flower is very common in architectural and furniture decoration and dates back many centuries. The box’s construction is a single-tail dovetail at each corner. The bottom is trapped in stopped grooves. The lid is a snap fit, nestled between the long sides, standing proud about 1/8 inch.

click any image to enlarge
classic flower box classic flower box classic flower box classic flower box

The second box is another centuries old design, a Tudor rose. This particular variant has 4 petals instead of the usual 5, as a better fit for an oval. As with the first box. the design is incised. The box is larger, having more tails in each join. It too has a trapped bottom piece. This box measures 5 1/2 inches wide by 9 1/4 inches long by 3 3/4 inches high. Interior dimensions are 4 5/8 inches by 8 1/8 inches (long enough for new pencils) by 3 1/4 inches. The lift-of lid covers all 4 walls of the box and overhangs slightly on the ends for easy removal.

Both are currently available in my Etsy store.

Tudor rose box Tudor rose box Tudor rose box Tudor rose box

Filed Under: Boxmaking, Woodcarving

Woodcarving – Work holding

March 12, 2013 by Bob Easton 11 Comments

photo of old work holding techniqueMost of my woodcarving has been rather small stuff, 3 inches square, 4 inches square, 4 by 6, 5 by 7, nothing very large. It’s been my practice to hold it securely in a frame like device that has movable stops. If a stop doesn’t fit the work piece exactly, a couple of wedges tighten things up.

It works great. Nothing moves. Nothing slips. All cuts are secure. Yet, sometimes the directions of cutting is awkward. Oh yes, one needs to become ambidextrous in tool handling and that’s not very hard. However, there are times when the angles just don’t work out well for either hand.

photo of new work holding techniqueSo, I tripped across someone using a different method (YouTube, you know). Actually, I’ve seen similar work several times. The work piece is loose, but jammed into a corner or into other stops to absorb the work force. Other than the moments that cuts are being made, the piece can be moved around easily and quickly. Some wood workers plane wood this way. One particular arrangement for “stops” looked interesting, so I fabricated the contraption. As you see, it’s simply a pair of wood strips with notches cut in them. photo of new work holding techniqueSince, I’m right handed, arranging them as shown is natural. The work piece can now be quickly oriented in almost any direction and always have two points of contact to keep is steady.

This box lid is about 3.5 inches by 6 inches and I’ve used this frame for both hand powered cuts and mallet assisted cuts. It’s worked well for this piece. And… all of the work is done atop my carving bench, or my BoB, bench on bench.

photo of carving benchBTW, the work in progress is the lid for a small cherry box you’ll see later.

Oh yeah, none of this works well unless the screw slots are “clocked.”

Filed Under: Boxmaking, Woodcarving

  • « Go to Previous Page
  • Page 1
  • Interim pages omitted …
  • Page 13
  • Page 14
  • Page 15
  • Page 16
  • Page 17
  • Interim pages omitted …
  • Page 27
  • Go to Next Page »

Primary Sidebar

Footer

Recent Posts

  • New Frame Saw / Scroll Saw
  • Lamppost Sign
  • Goodbye PayPal – Goodbye Bob’s eBooks
  • Anarchist’s Workbench is Done
  • Why we keep offcuts…

Categories

  • About
  • Artwork
  • Boatbuilding
  • Boating
  • bowl carving
  • Boxmaking
  • Clocks
  • Drawings
  • eBook
  • etude
  • Eva Too
  • Eva Won
  • Fiddlehead
  • Fiddlehead model
  • Flying
  • frame saw
  • gilding
  • green woodworking
  • Grinling Gibbons
  • Guns
  • Hand tools
  • Humor
  • kerfing plane
  • Lettercarving
  • Mill Creek 13
  • Model building
  • Power tools
  • Rant
  • resawing
  • scroll saw
  • Shopmade
  • sign painting
  • Stonework
  • Swimming
  • Technology
  • The Wall
  • treadle lathe
  • Uncategorized
  • VSD
  • Woodcarving
  • Woodturning
  • Woodworking
  • workbench

Other stuff

  • About
  • Contact
  • Privacy Policy

Copyright ©2024 · Bob Easton · All Rights Reserved