“Gratitude” — Ebonized mahogany – Approx 12″ by 5″ by 5/8″ – 23K gold leaf gilding – Coved edges – Shellac finish
Each of us, with a few moments thought, can find something for which to be thankful. Even with the usual ups and downs of life, and the completely unwanted misfortunes, there are still reasons for gratitude.
“Gratitude” is an old fashioned word, and I chose to keep it “soft” by using a script style of lettering, and intentionally keeping the baseline flat to hang onto the gravity that “gratitude” deserves.
Making “Gratitude”
Unlike most of my posts, I’m including lots of photos and descriptions about how I made this sign. Click on any image for a larger view.
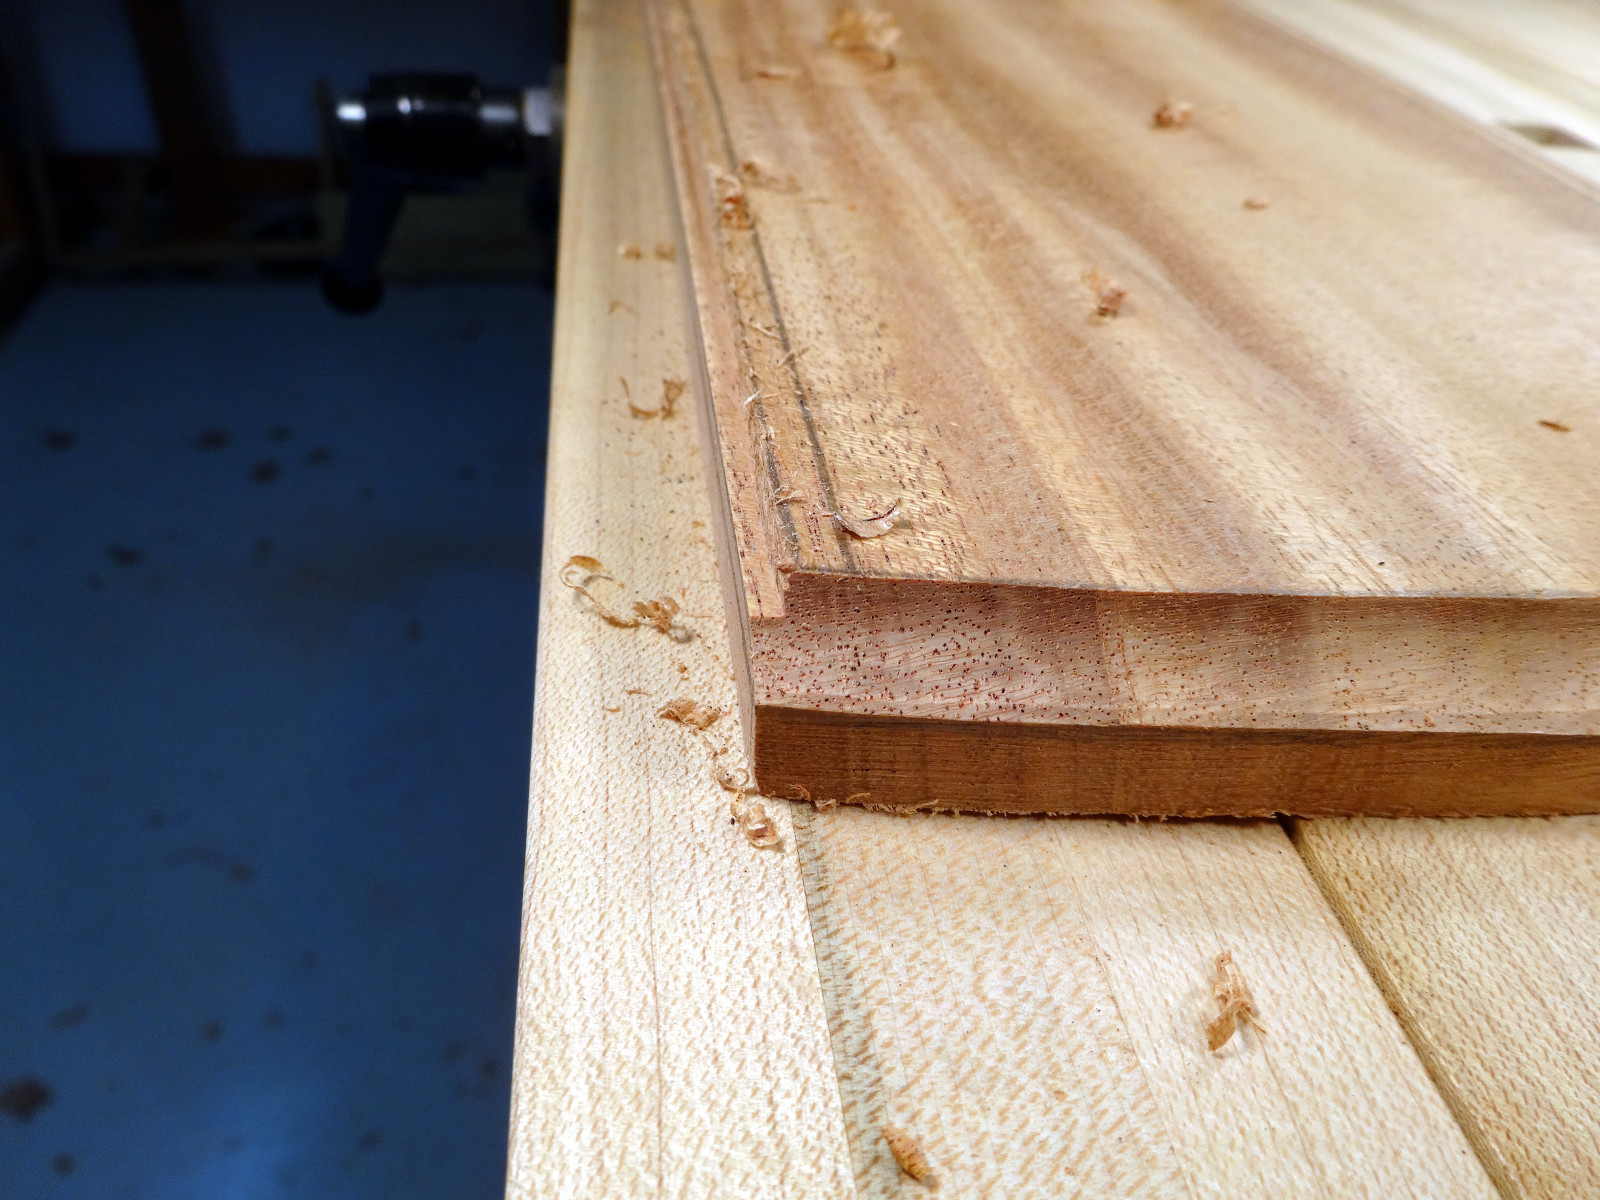
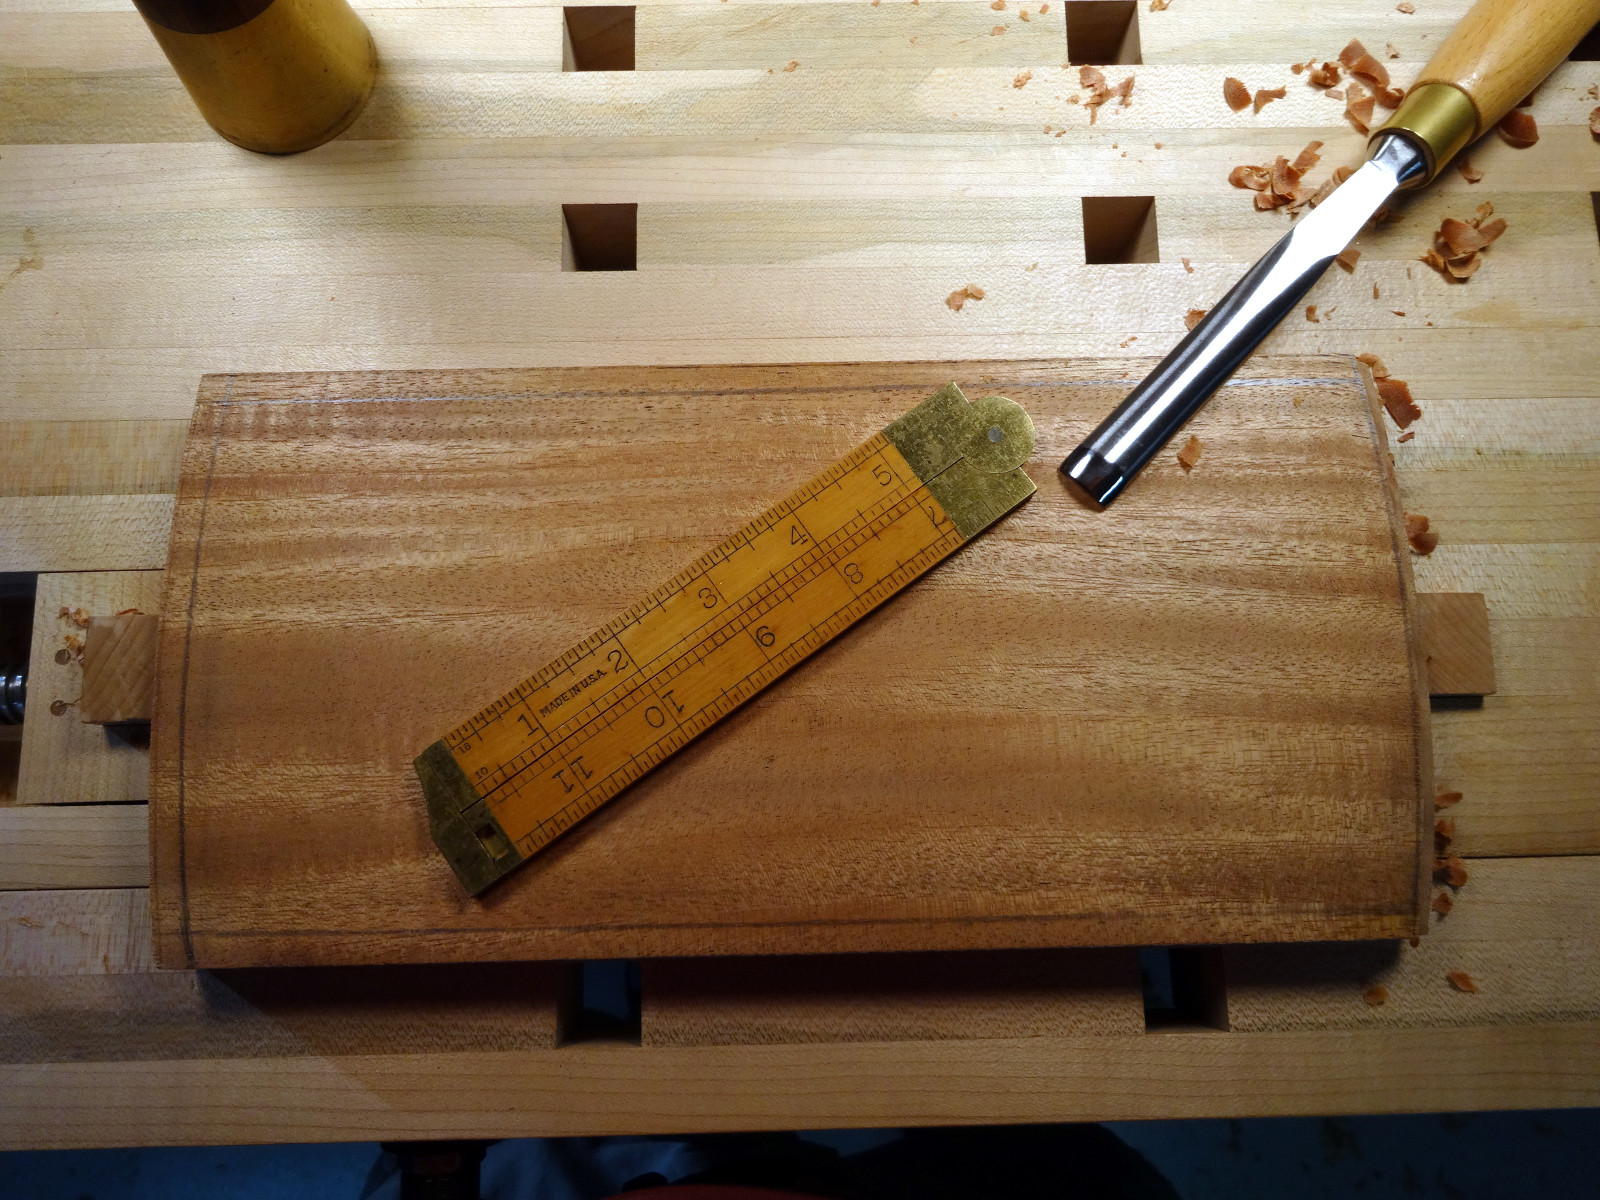 The usual, and often mundane, parts of the work were recovering this board from some previously resawn stock, rounding the ends with chisels and rasp, and finishing the surfaces.
The lumber is African mahogany from a plentiful supply I have. It is a beautiful wood (gratitude), but has a growth characteristic that requires patience (and the gratitude to have a sufficient store of patience). The wood grows in wide ribbons, or bands, with each one having a different grain orientation than its neighbor. 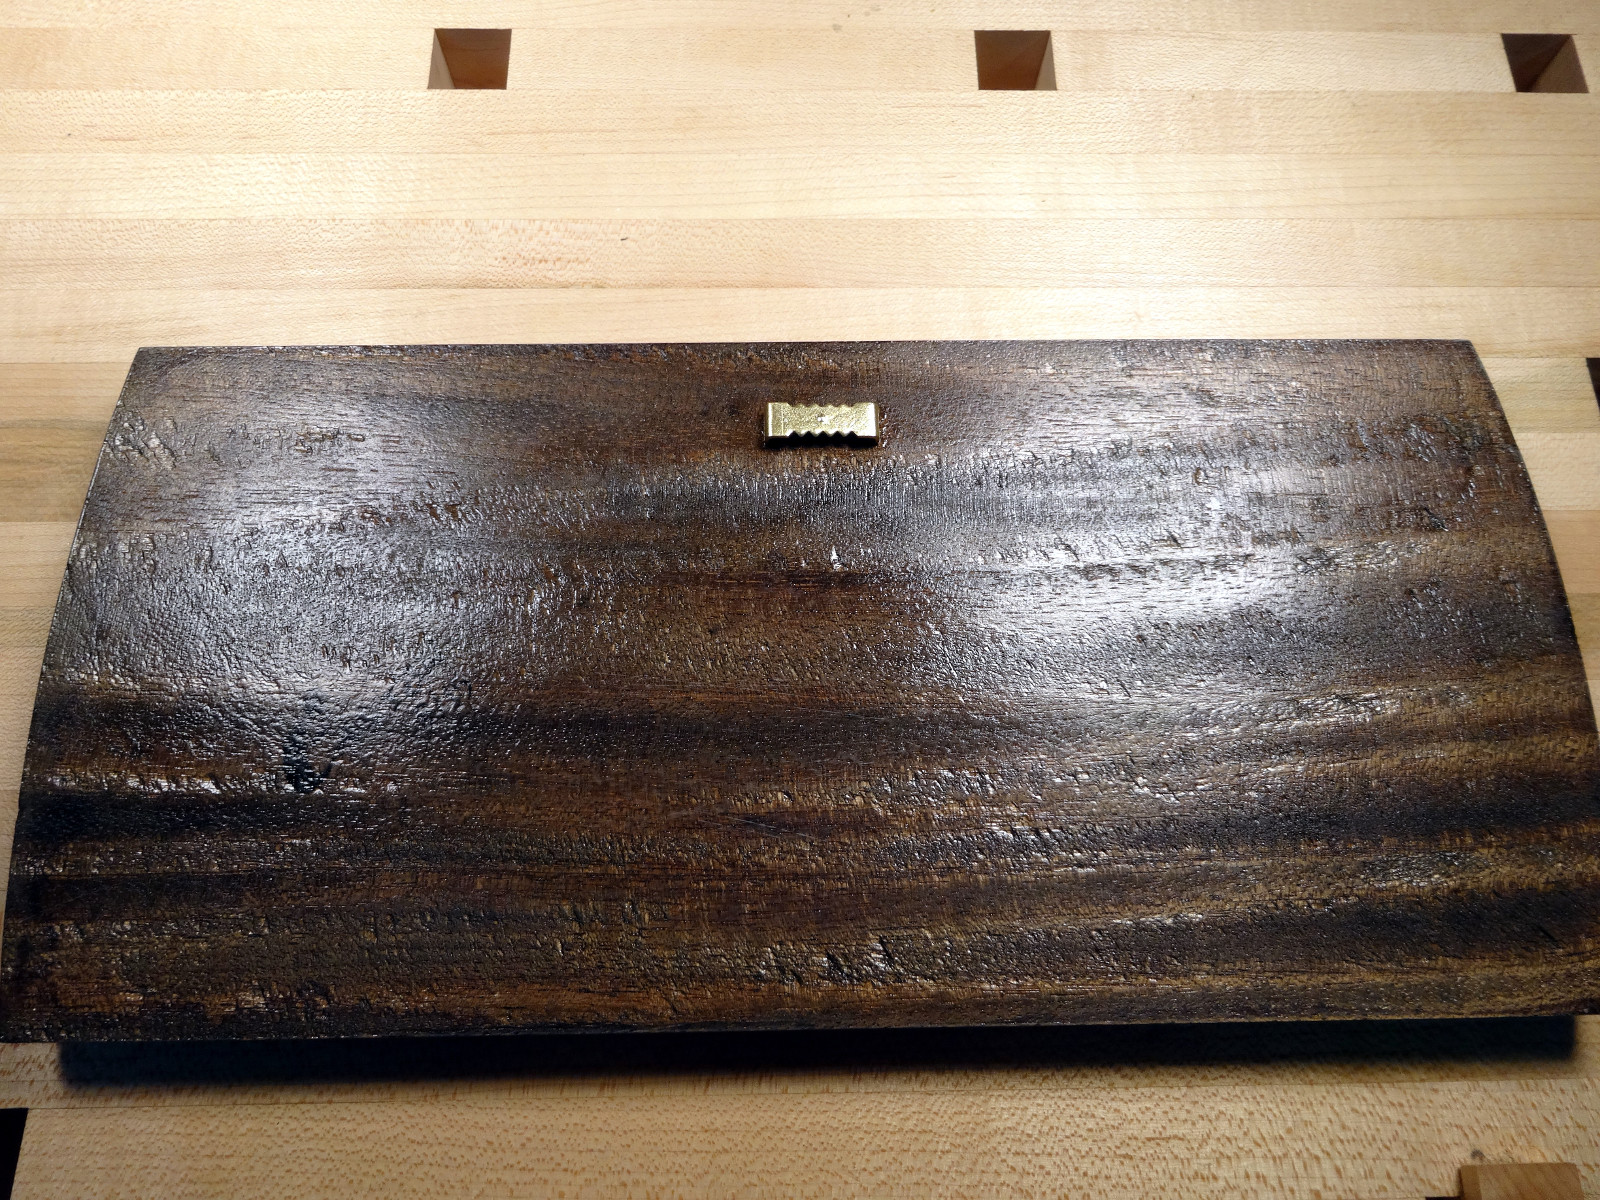 Surface planing, especially heavy passes, can result in lots of tearout. The owner of this sign can attest to that by checking the reverse. The secret to a successful “show” surface is combining a very finely sharpened plane iron with a cap iron set to nearly zero setback. (Hint: Carefully watch the 3 cap iron videos by “The English Woodworker,” Richard Maquire, here.)
 The edge treatment for this sign is a simple cove that does not compete with the meaning of the sign. It is a portion of a 1/2″ cove, formed by using a #8 sweep gouge and a #8 round plane. Those two tools match very nicely.
Yes, I could have used just the plane, even on the curves of the end grain. 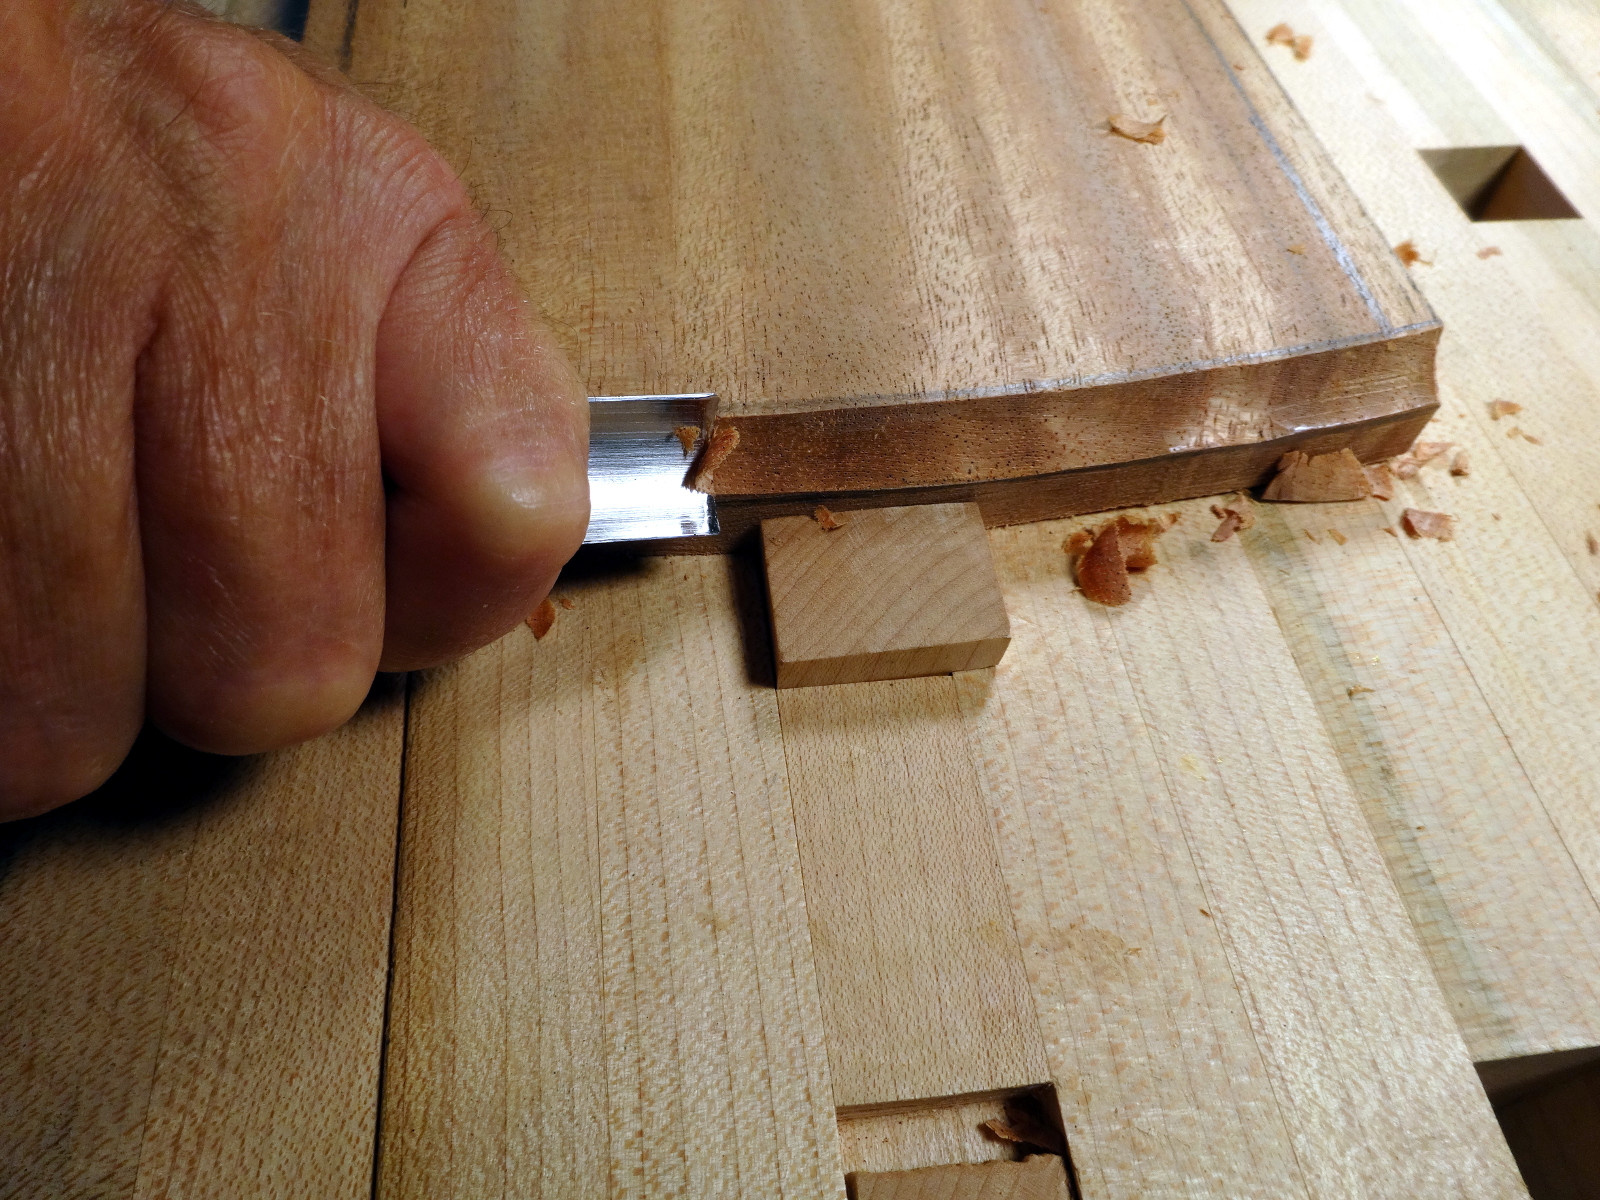 My hollows and rounds do quite well on end grain, but, the gouge gives finer control. The ends are first … as a practical matter in case of breakout at an edge. Even if there is breakout, it won’t matter.
Next up, coves on the long edges. This is the perfect use of round planes. I use the method suggested by Matthew Bickford, an H&R plane maker. 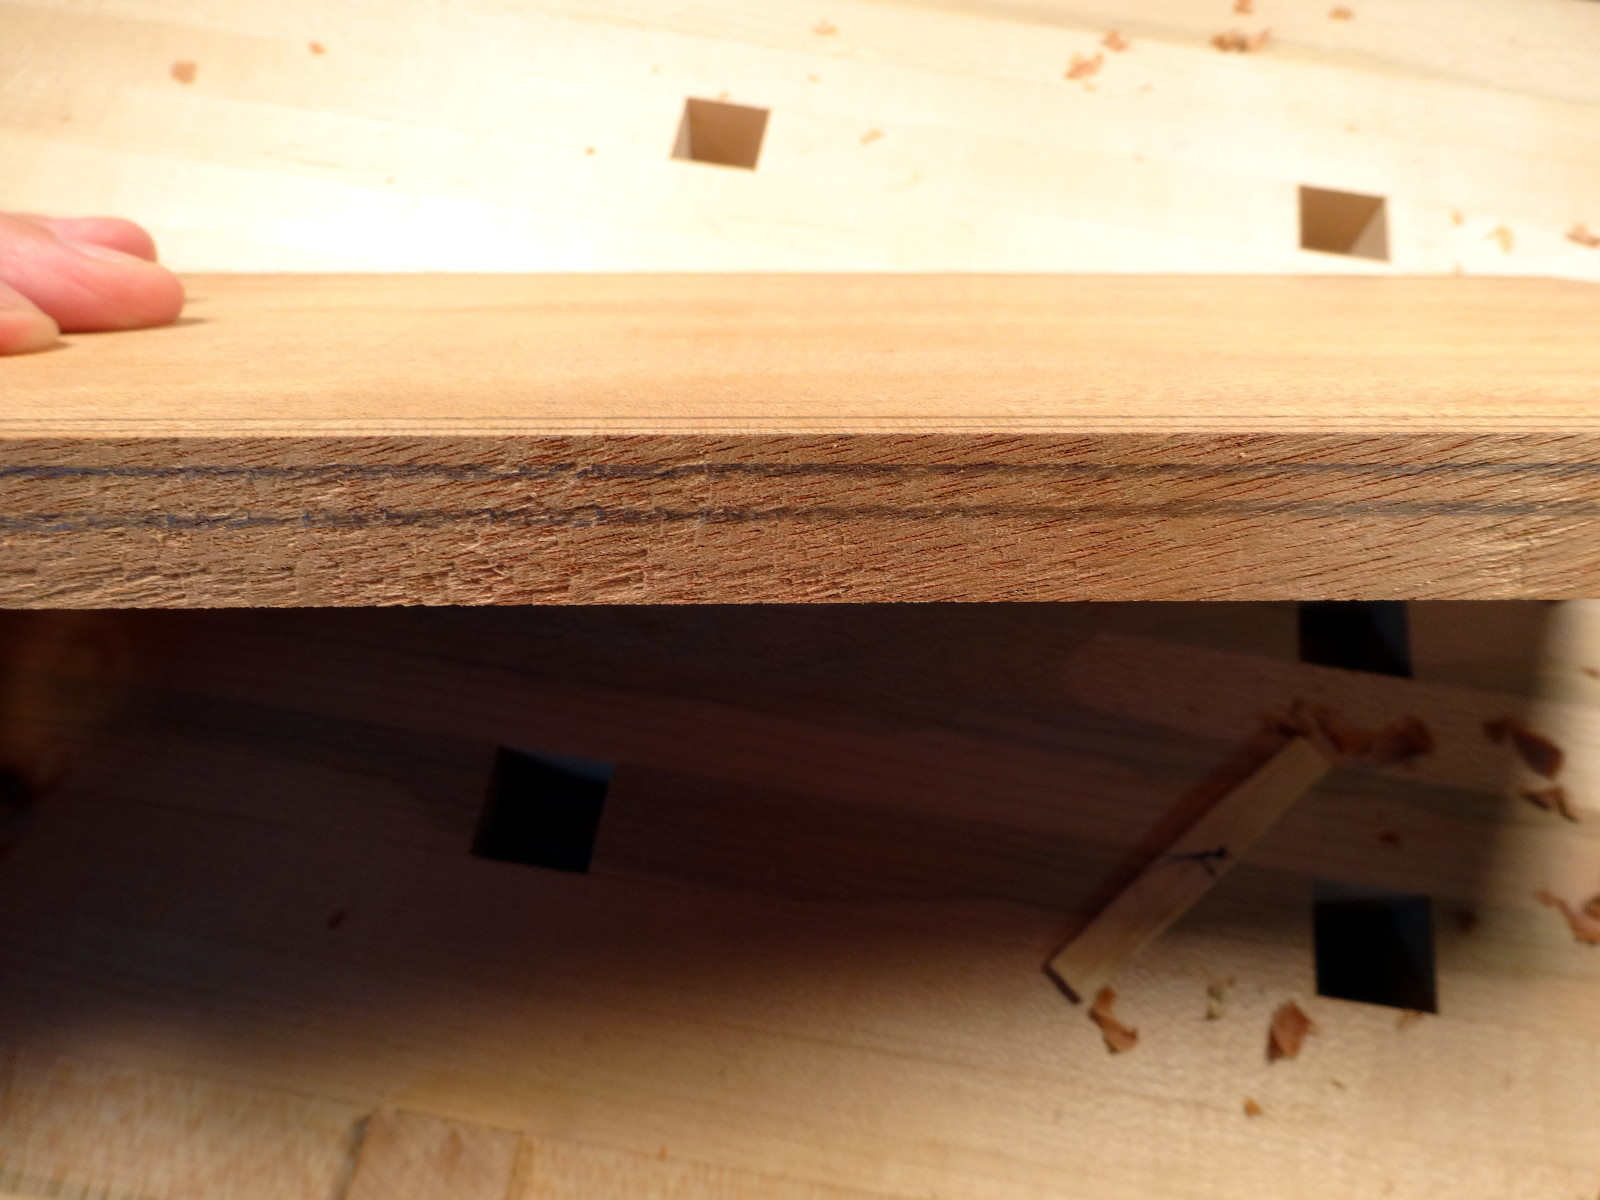 Matt suggests making a rabbet first. The rabbet removes a lot of waste, and provides edges which naturally guide the round plane. Here, the edge is marked for both the rabbet and the cove.
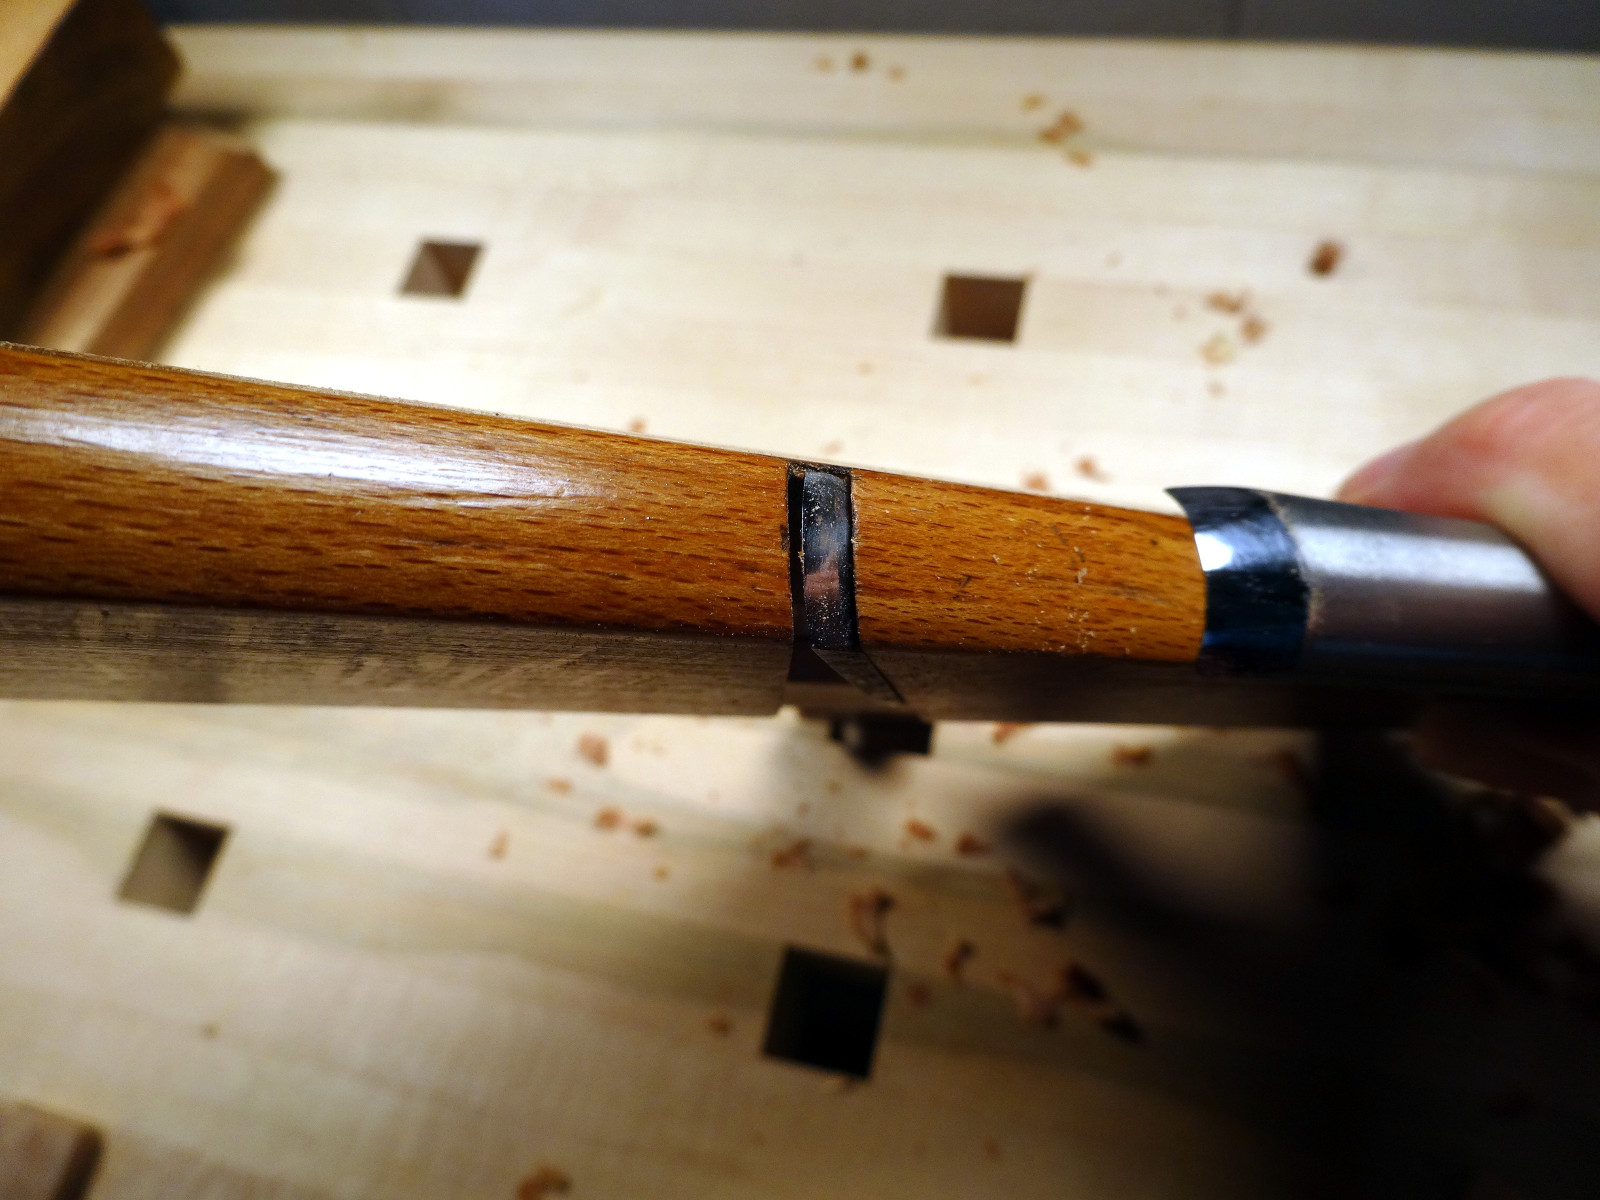
I have a metal filletster plane with both depth and edge fences that can make rabbets, but it’s a PIA to set up. A simple, ancient (unknown date) skewed rabbet is a LOT faster. 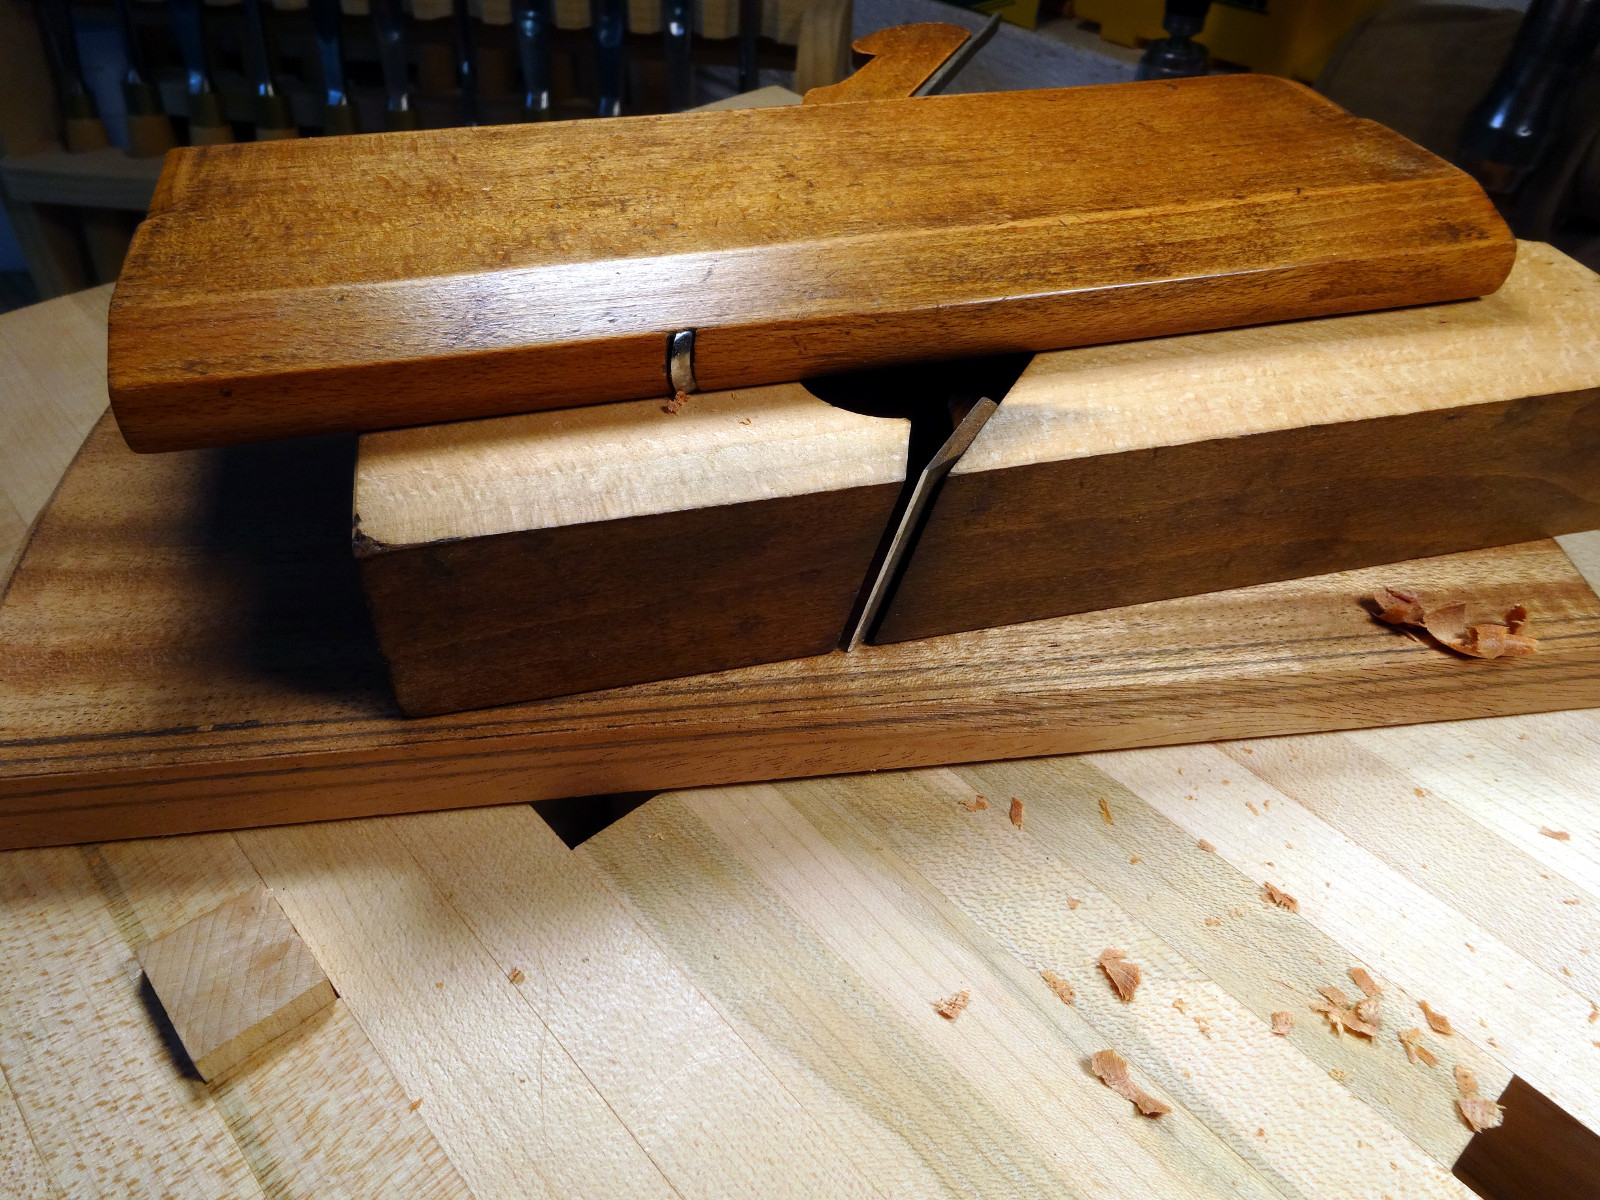 It’s huge, compared to the rabbet I want to cut, but works well and is easily controlled. Here’s how…
Tilt the plane way over and make the very first pass (or two) with only the inside corner of the iron. Being right handed, I move the plane with my right hand, while using a finger of my left hand to cradle the bottom of the plane and act as a fence, keeping that first pass straight. After that first pass, stand the plane up square and cut the rest of the rabbet.
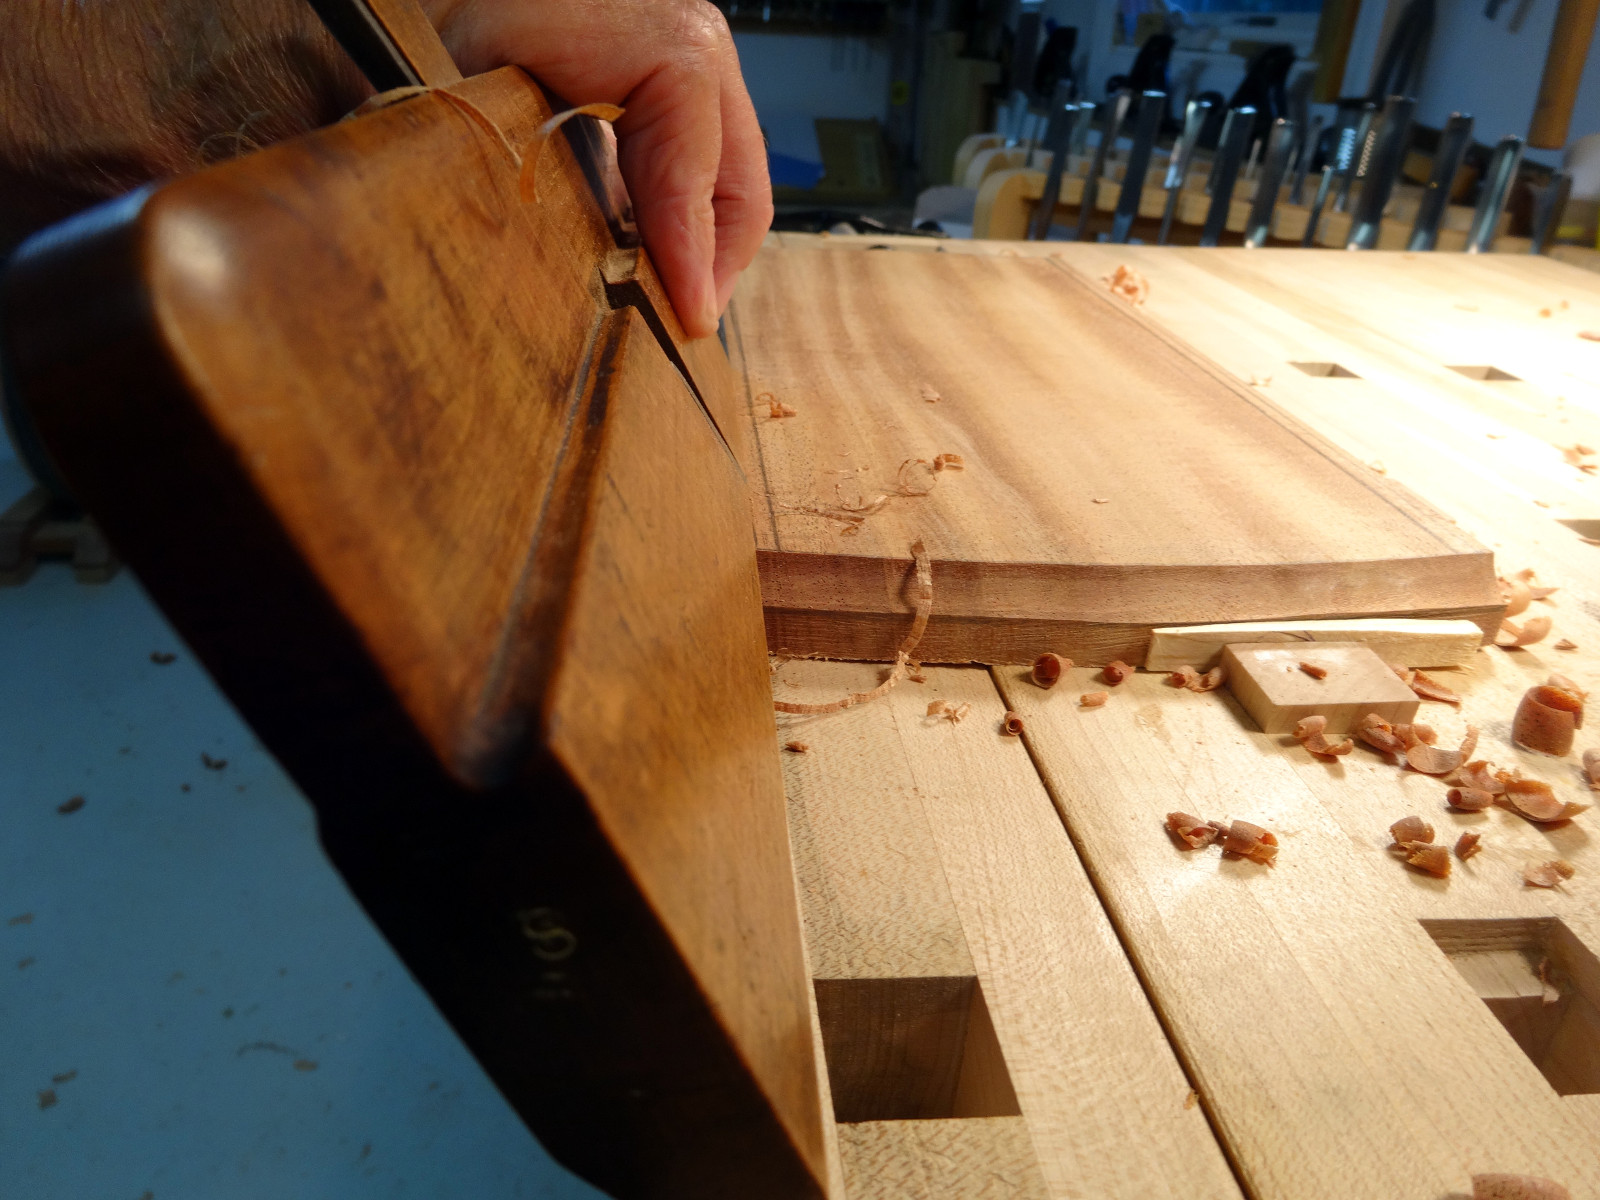 Now, a good bit of the cove waste has been removed, and there are two crisp edges which makes it very easy to guide the round plane. As always with hollows and rounds, start cutting at the far end and then walk the starting point back toward the end of the board where we normally begin planing.
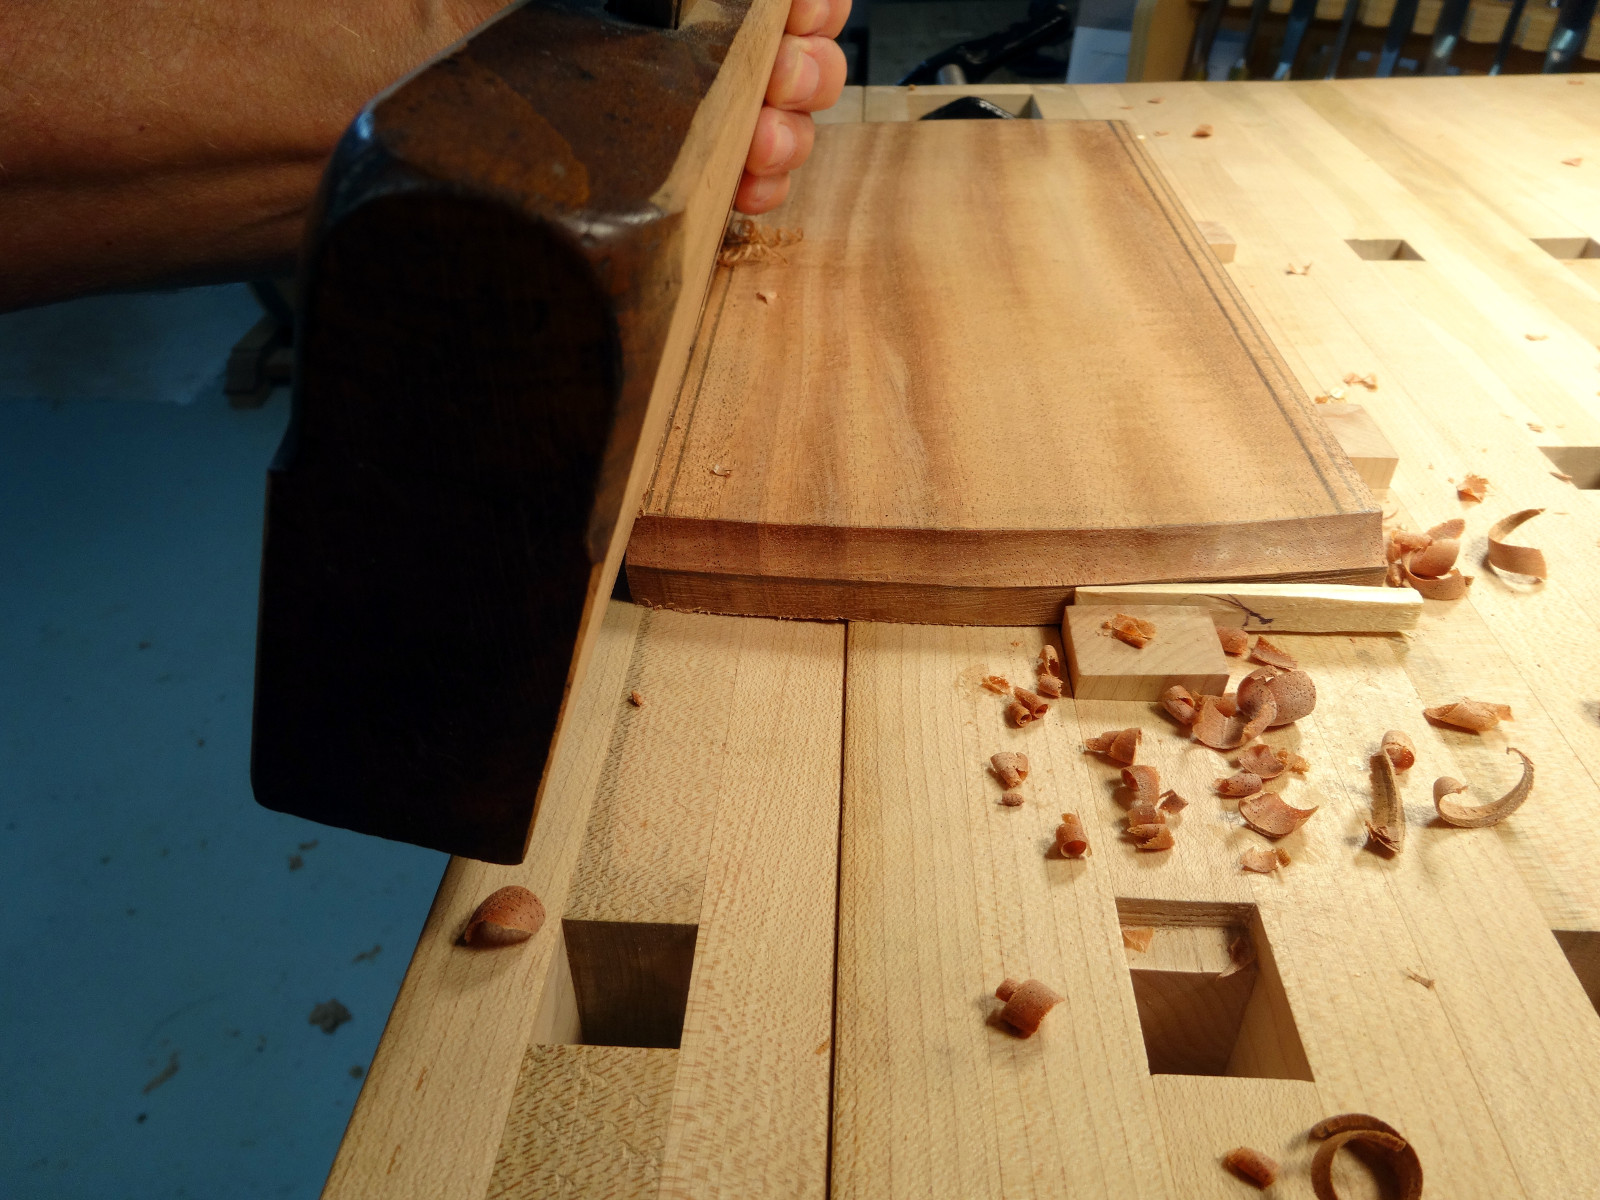
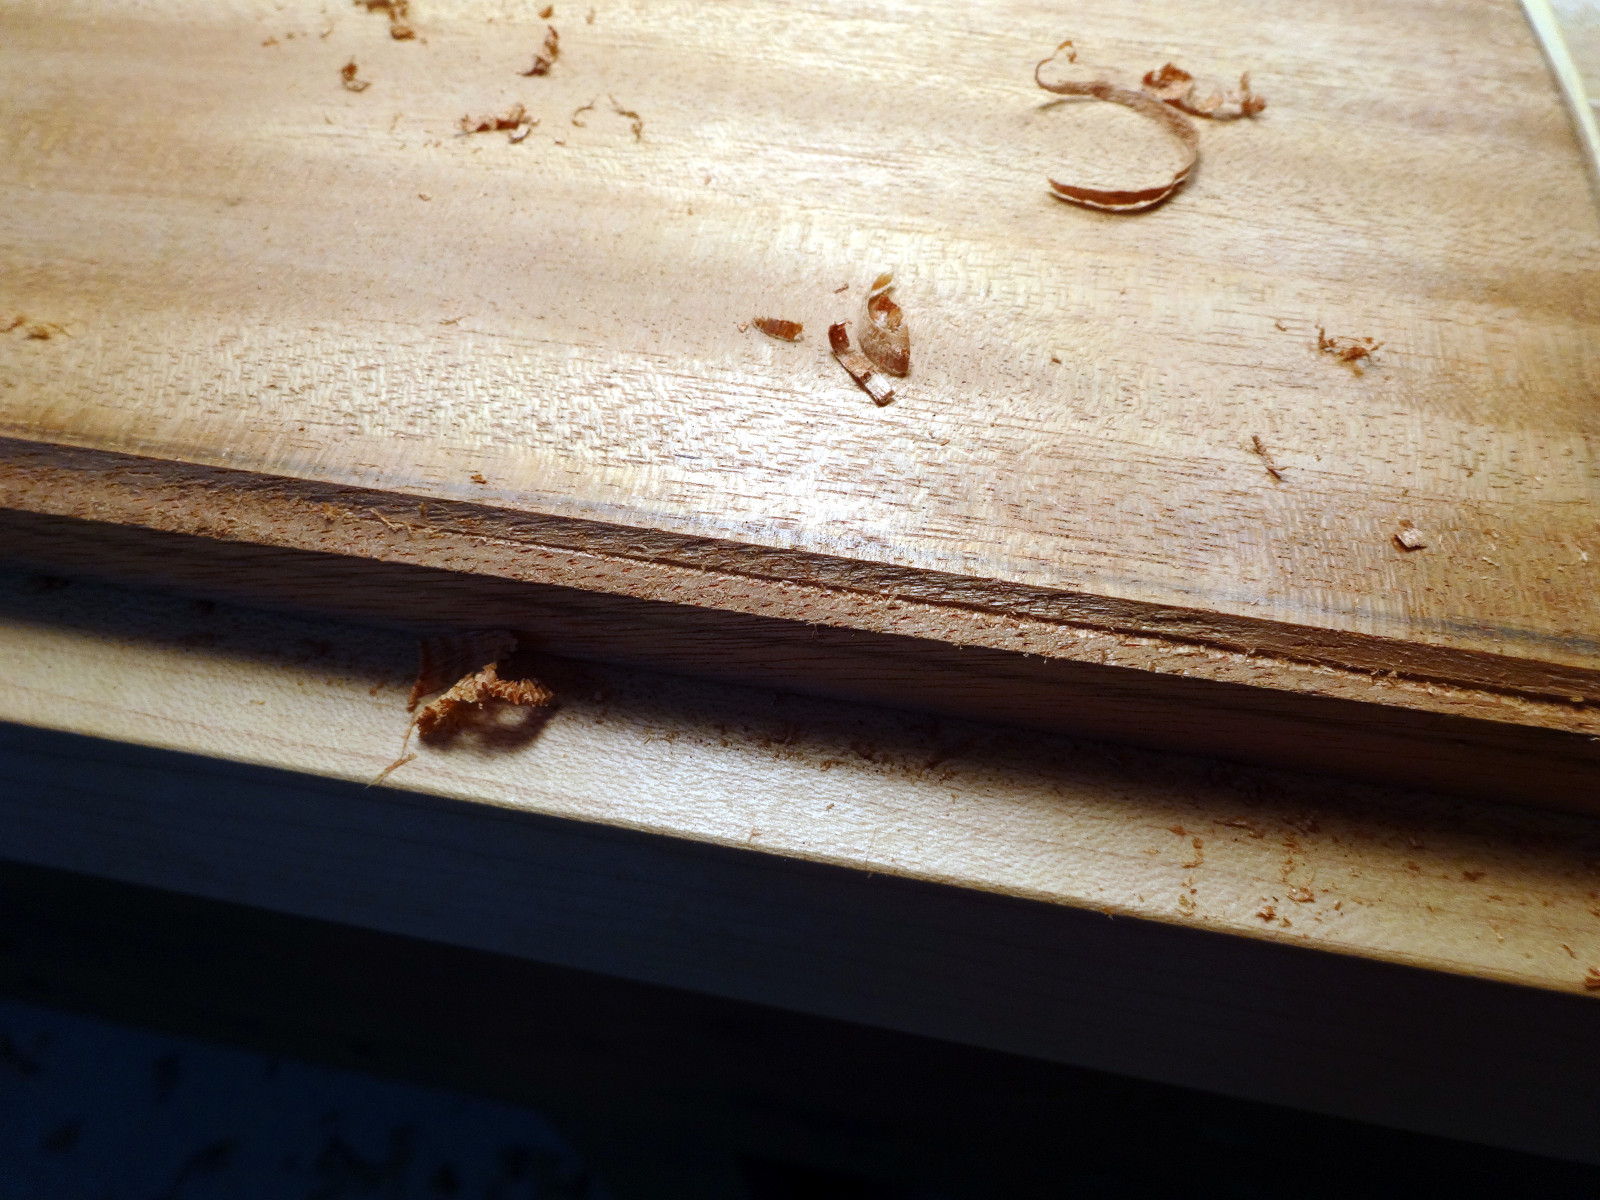 About the time that the round makes enough progress to “erase” the rabbet, the cove is almost done. The rabbet not only produces a great way to guide the round plane. It reduces the number of passes the round plane needs to make by about half, and that’s a significant way to reduce sharpening for the more complex hollow and rounds irons.
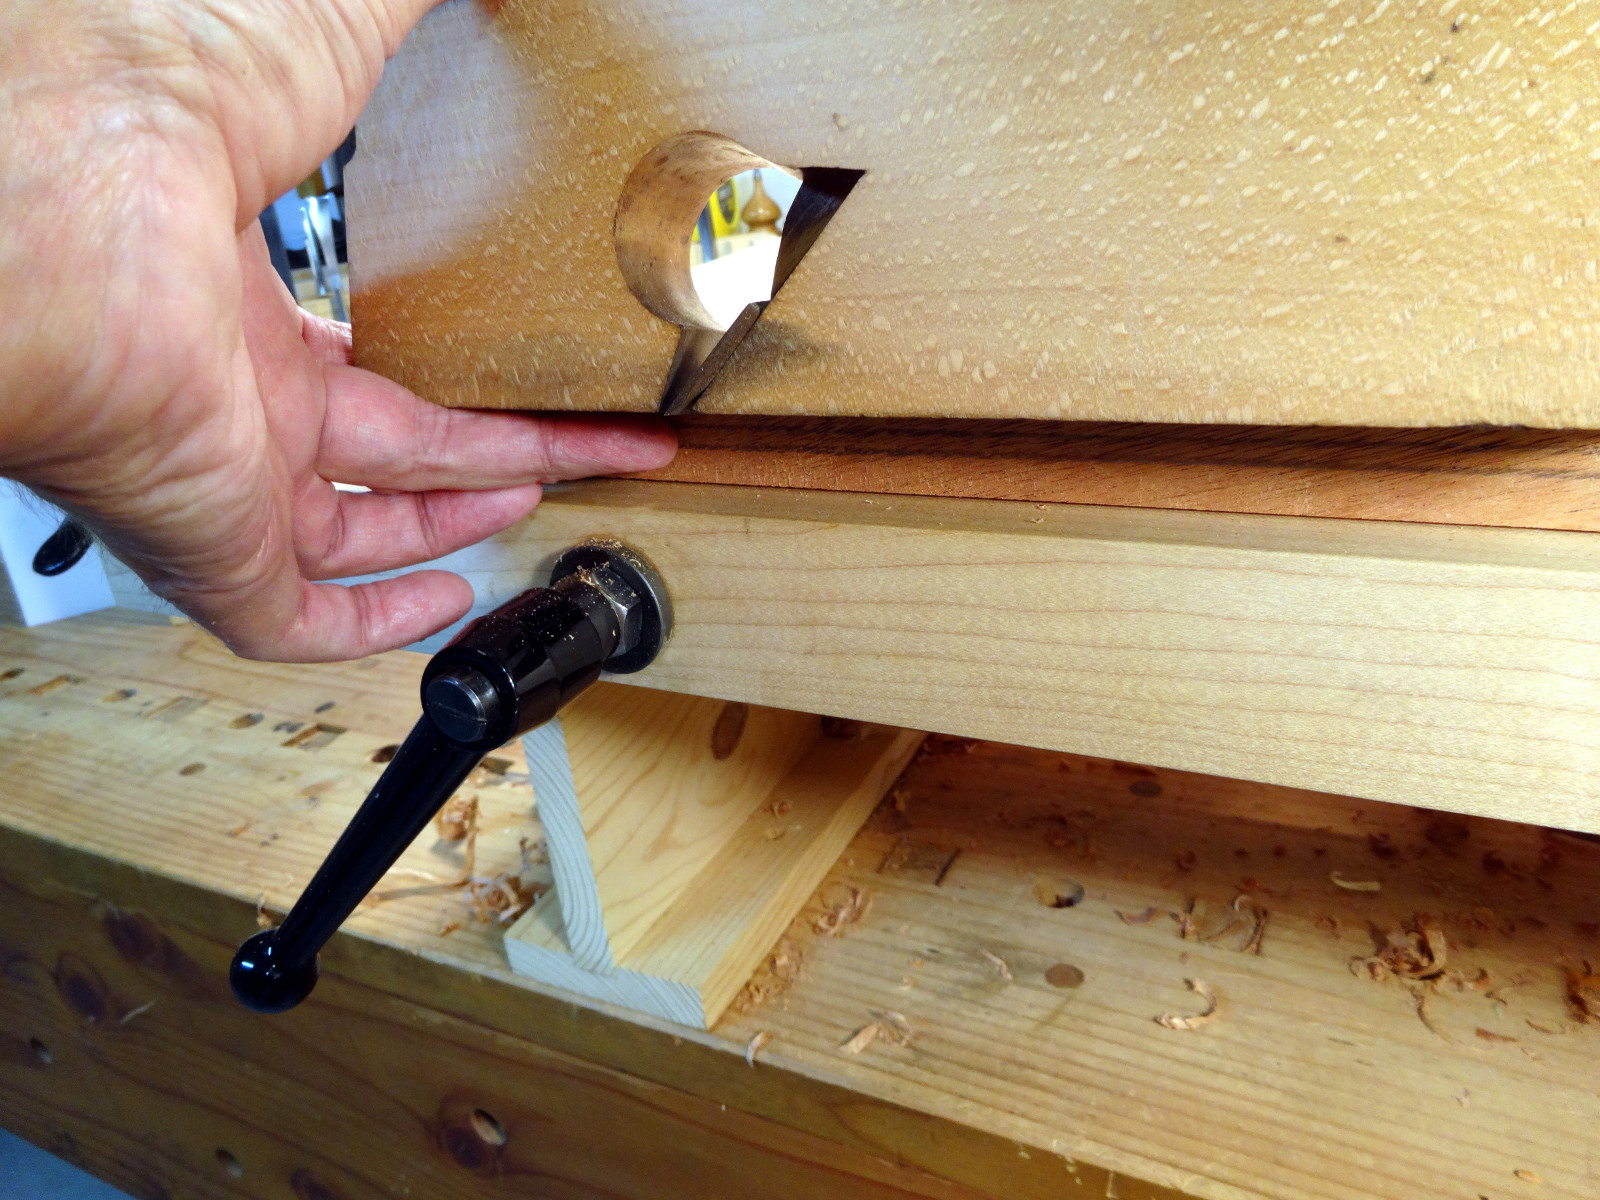
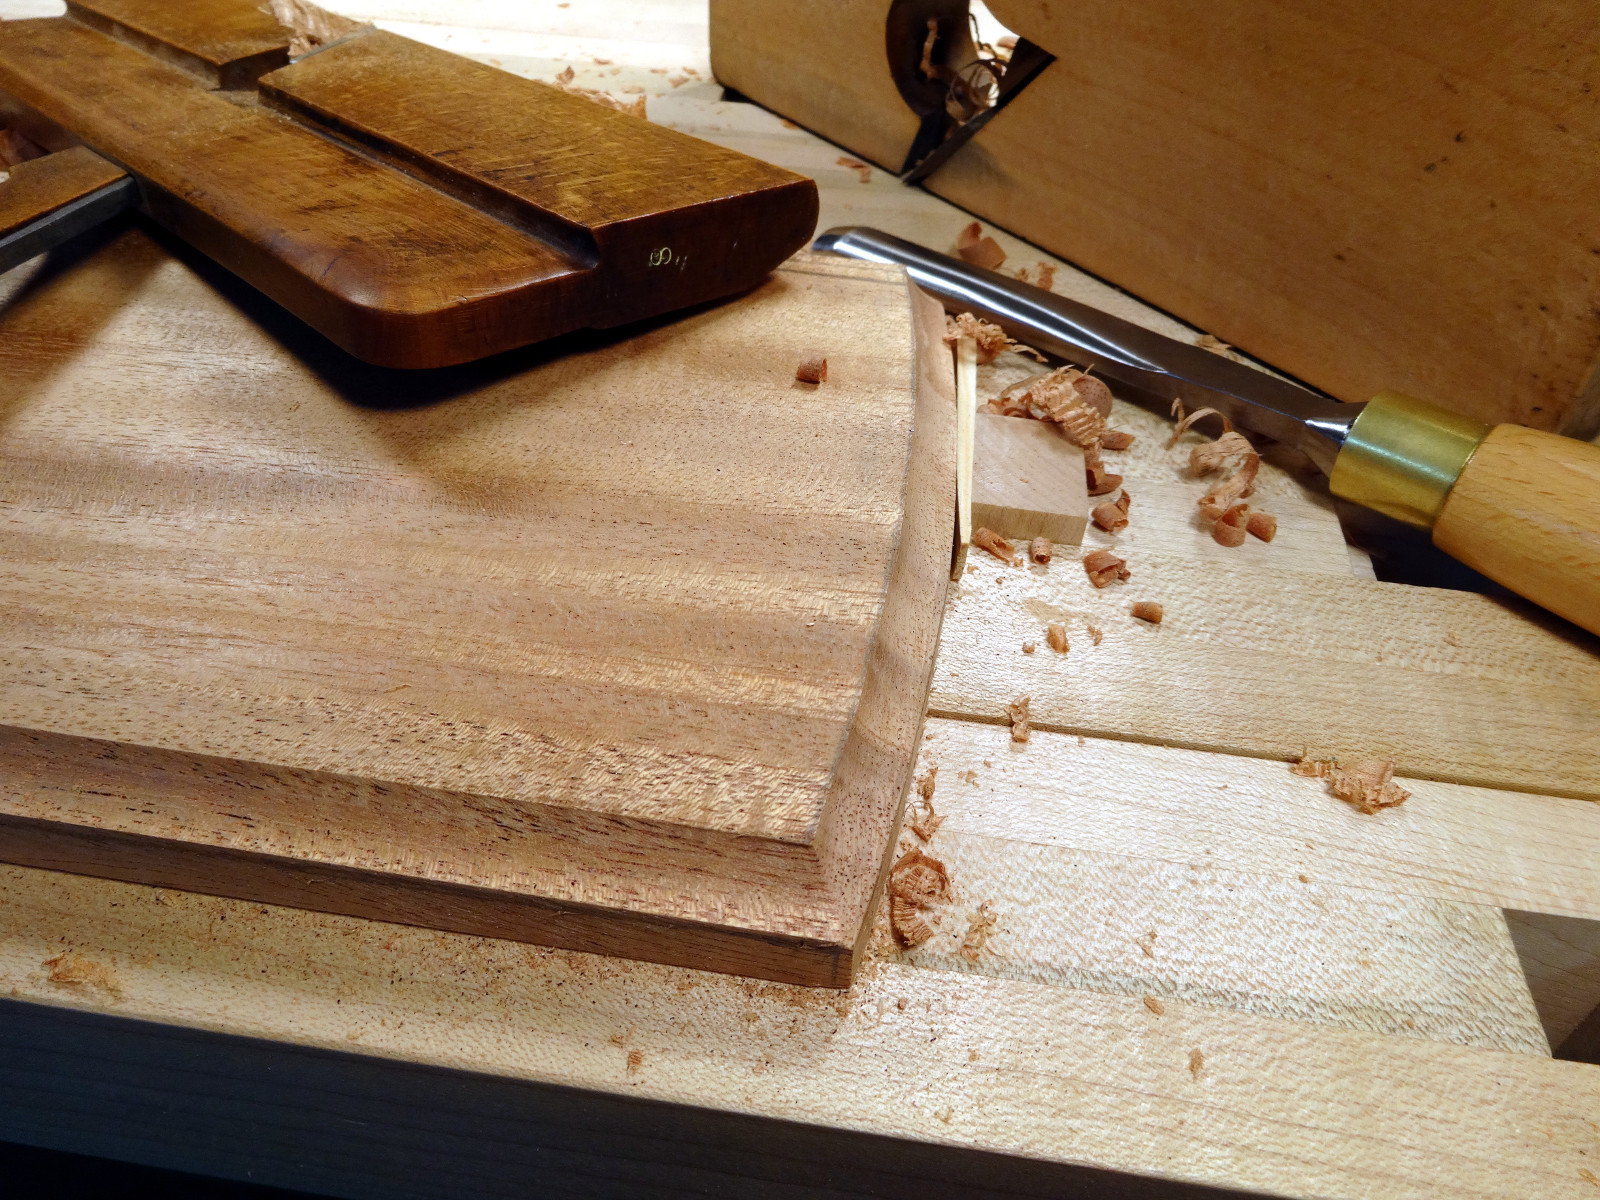 Careful
 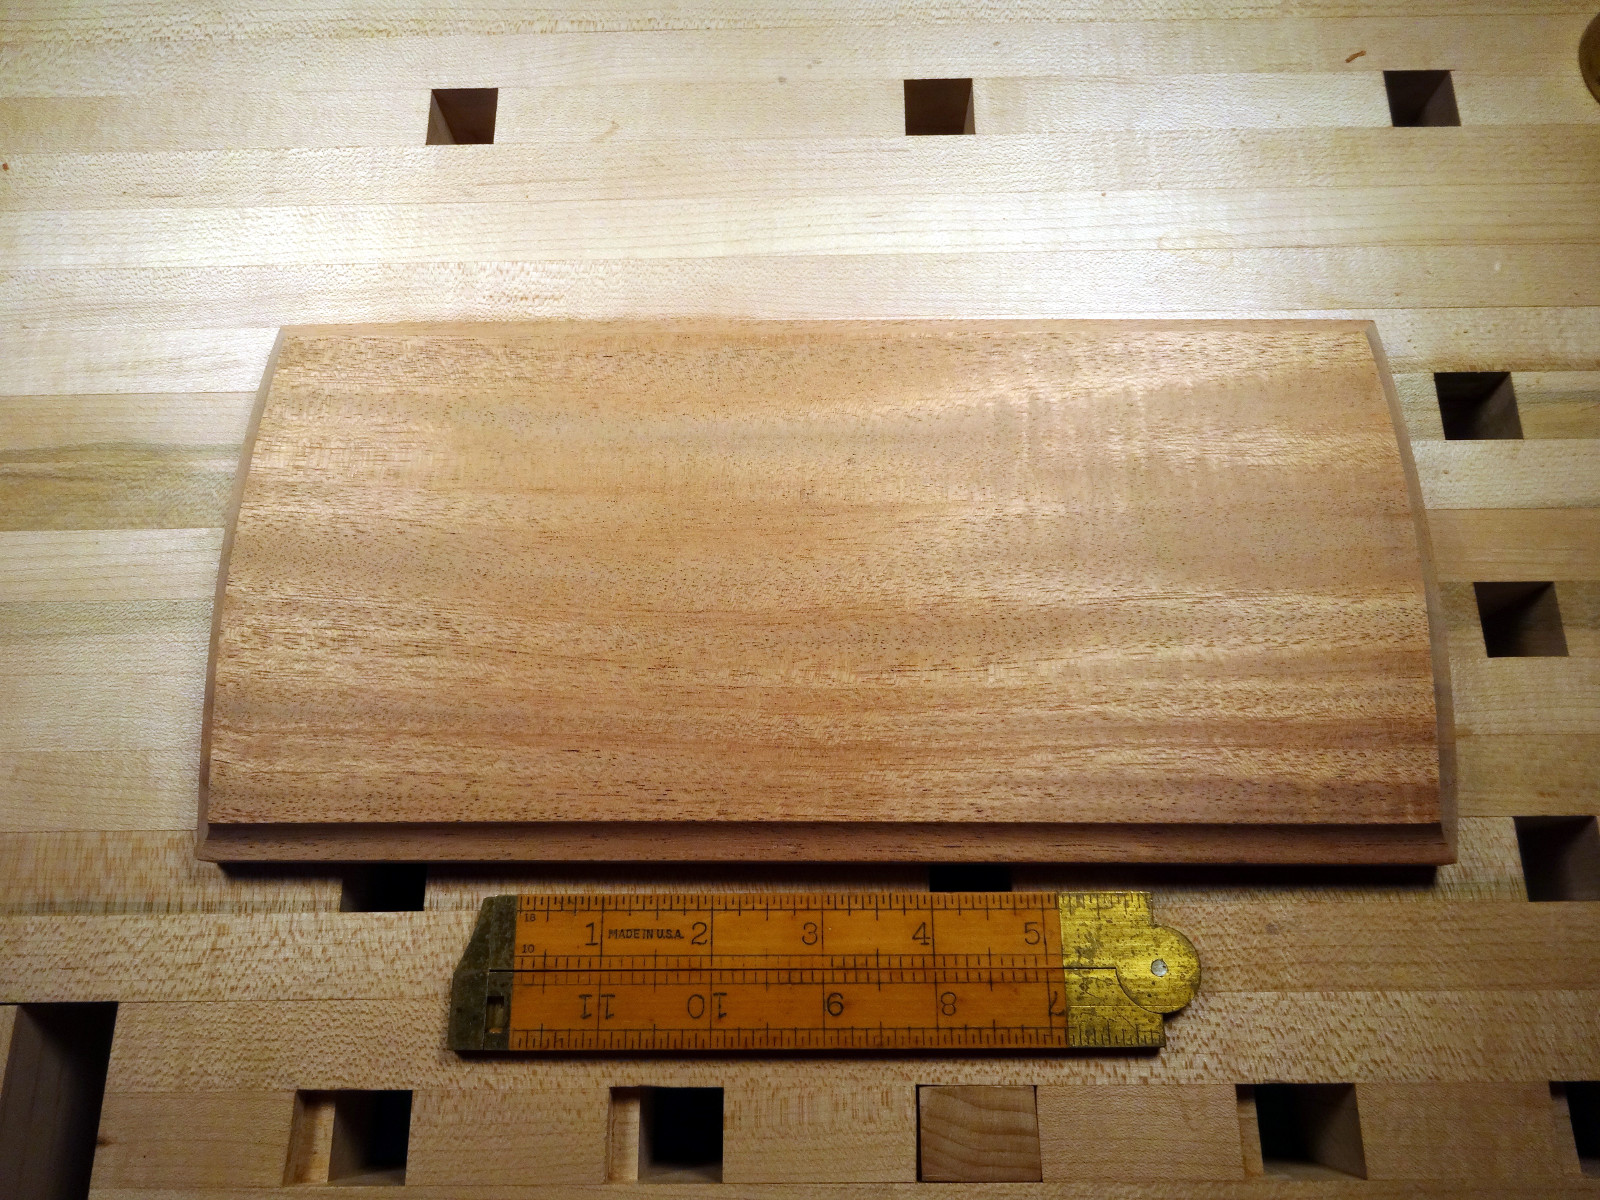 work leads to nicely matched corners, the completion of the sign blank.
This particular sign is headed for a household full 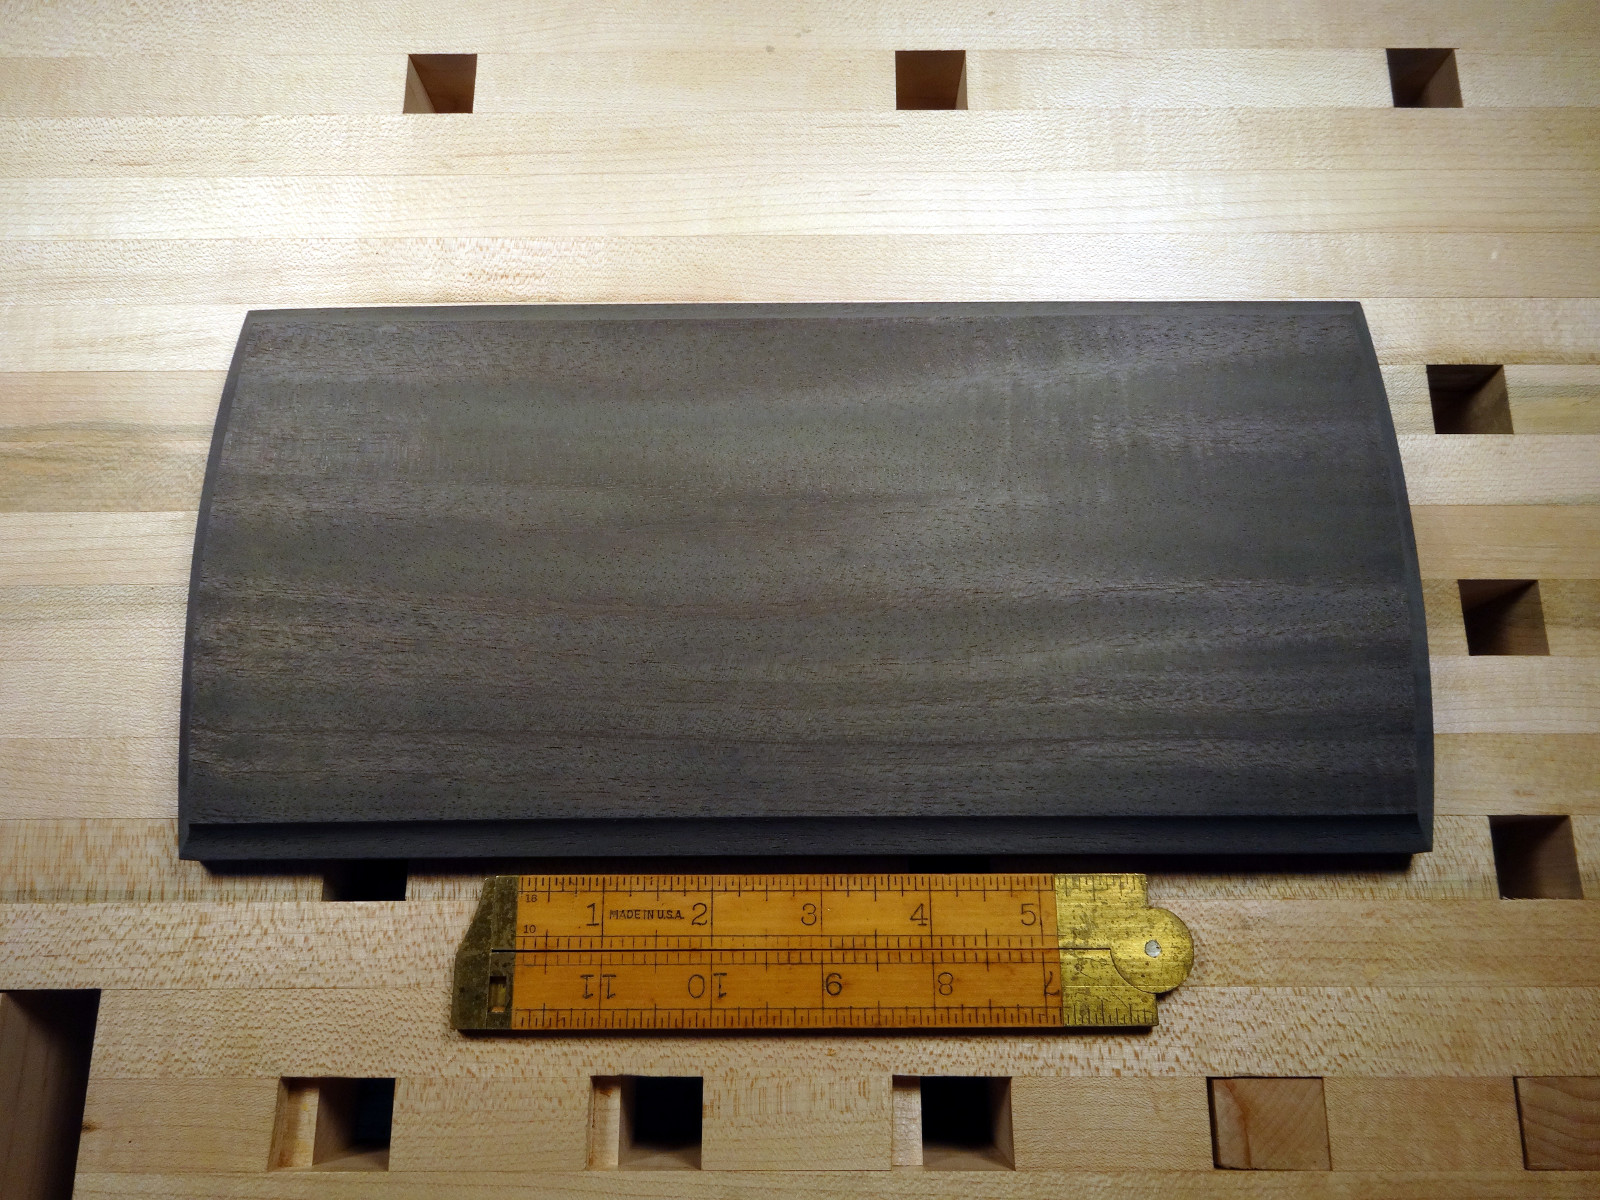 of dark furniture. So, lets make the sign fit in better by ebonizing the blank. My previous post told how to make and use an ebonizing stain. Several coatings brought this blank to the darkness I wanted. Finally, it’s almost time to get carving.
My pattern is hand drawn lettering, made from numerous iterations to get to the style of script that includes a couple of smooth flowing flourishes. 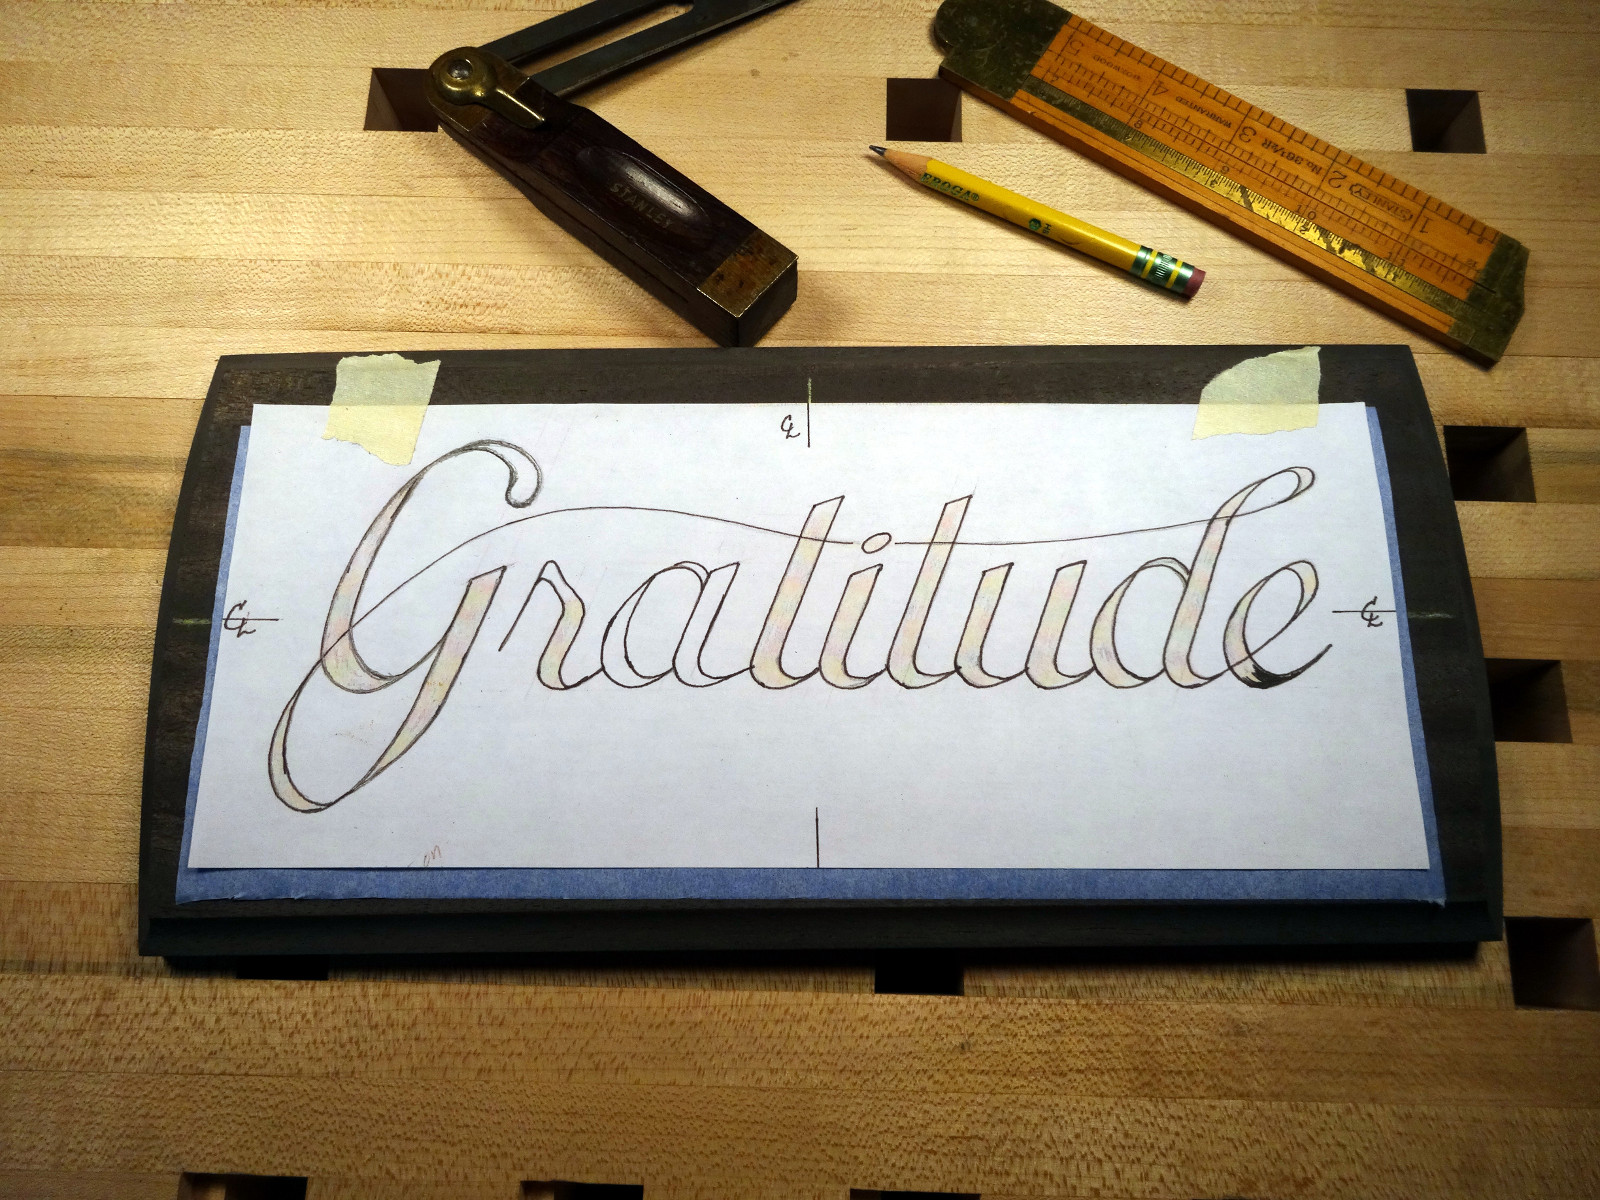 I recently found a transfer paper that works really well, Saral transfer paper. Unfortunately, my first roll of the stuff is blue, and at the time I needed it, the yellow version hadn’t arrived. Hint: when using this paper, go over the entire surface of the wood with an eraser. It removes any surface oil and affords a very nice transfer.
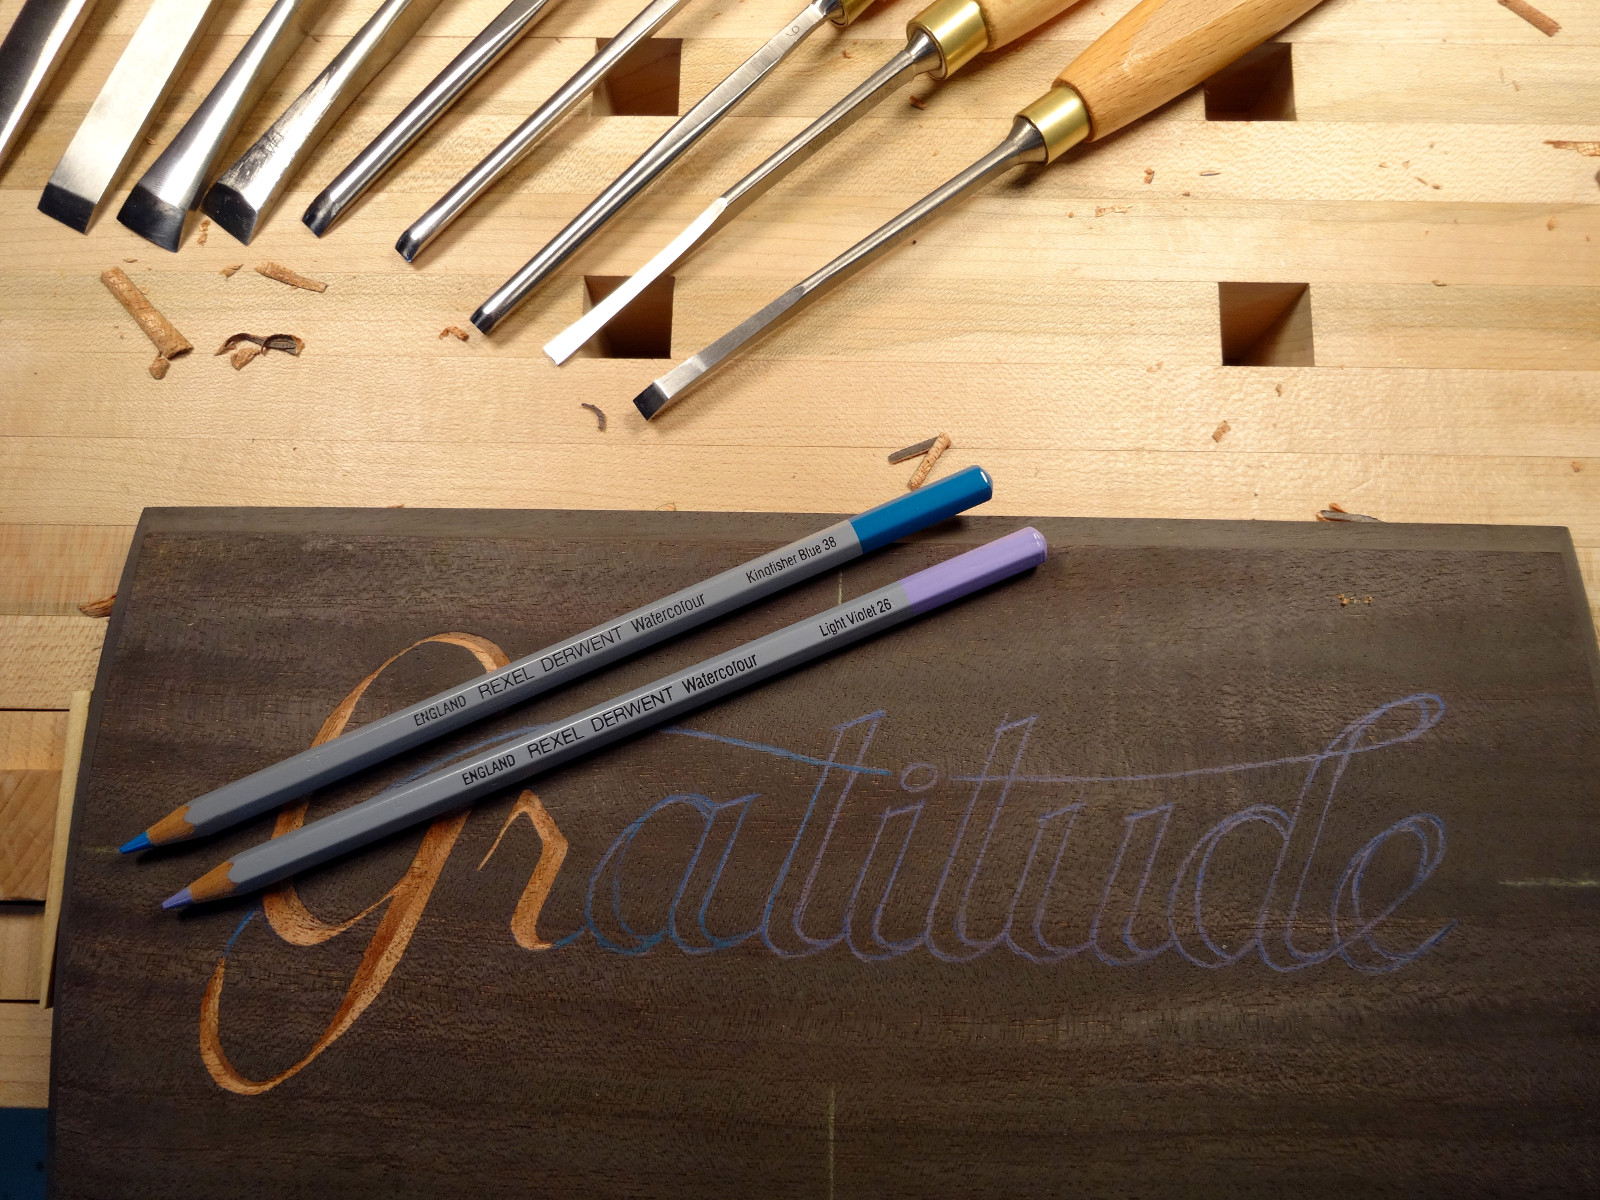 The blue transfer was workable, but barely. Rummaging through my art supplies, I found some watercolor pencils that were good for making those trace lines more visible. Much better….
Doing the actual carving was the easy part of the work. I’ve done enough letter carving to begin to feel comfortable, not highly confident, but comfortable. 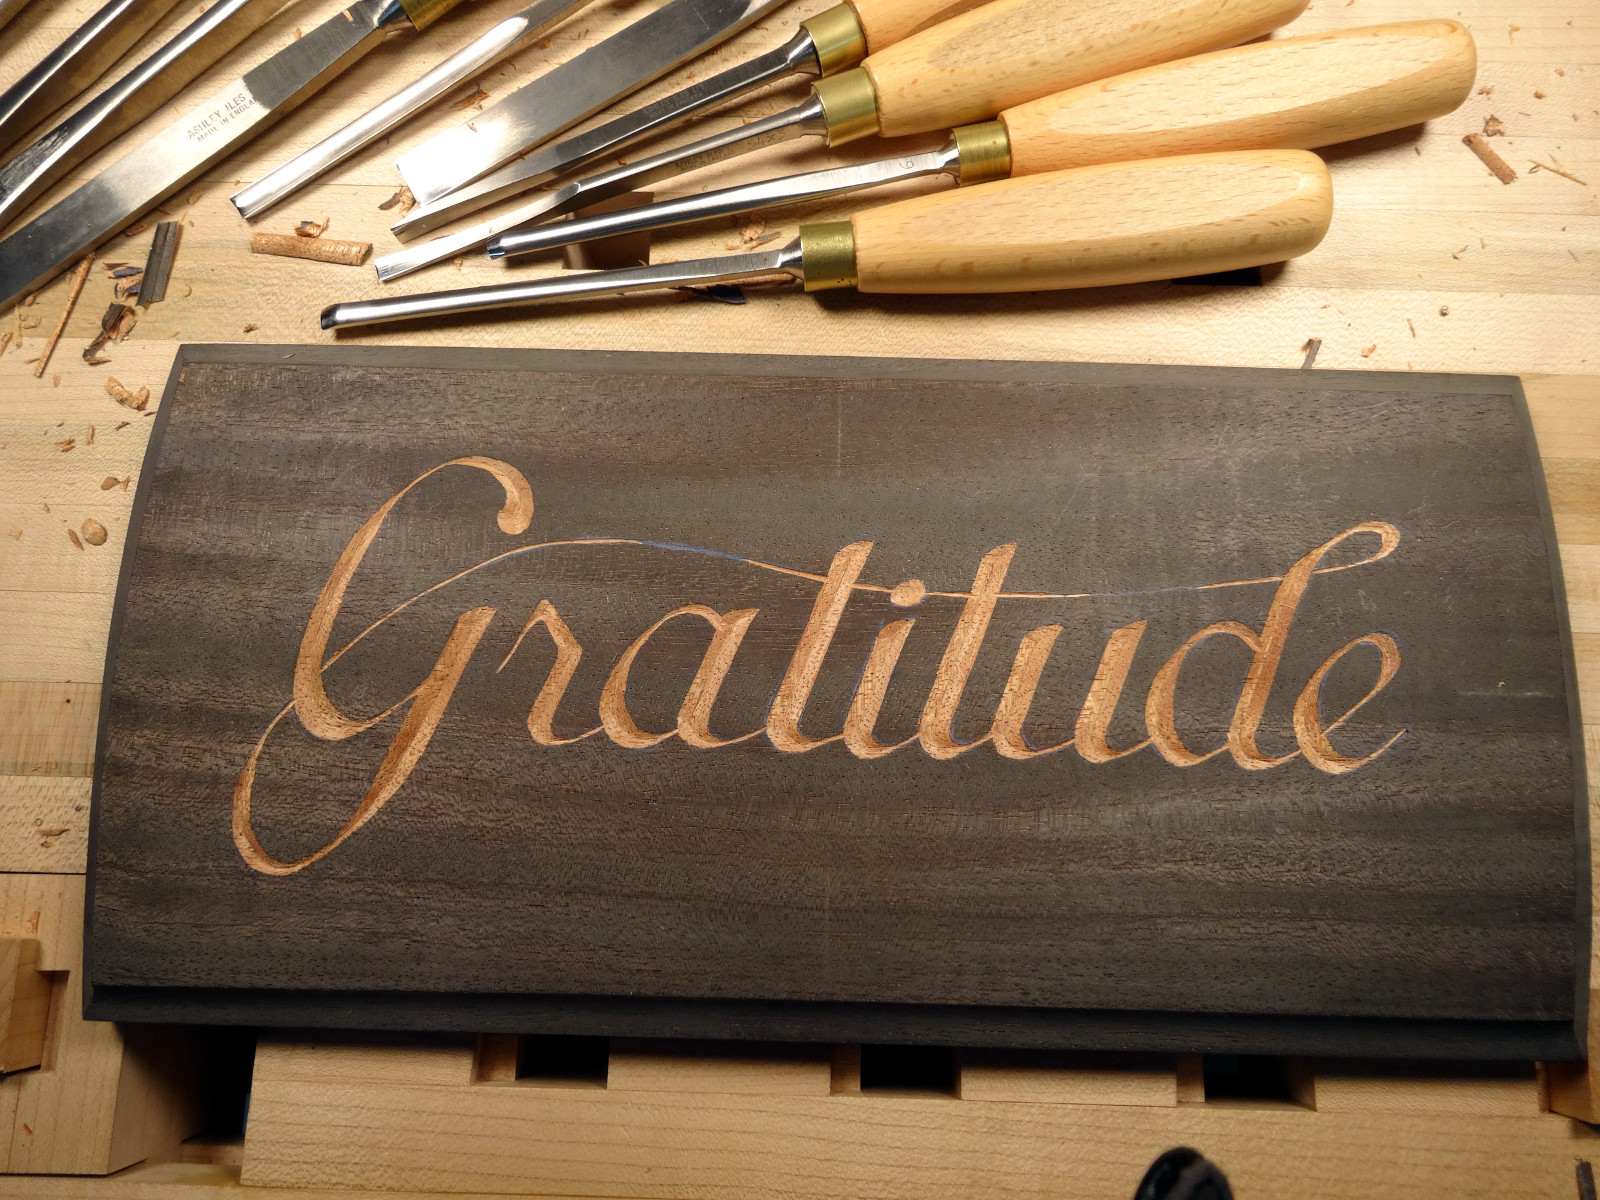 If this sign was planned as the typical sign, this would be a good place to stop carving and start applying finish.
For a gilded sign, there’s more work… As I learned from the previous post, leaving the carving “straight off the gouges” is not smooth enough.
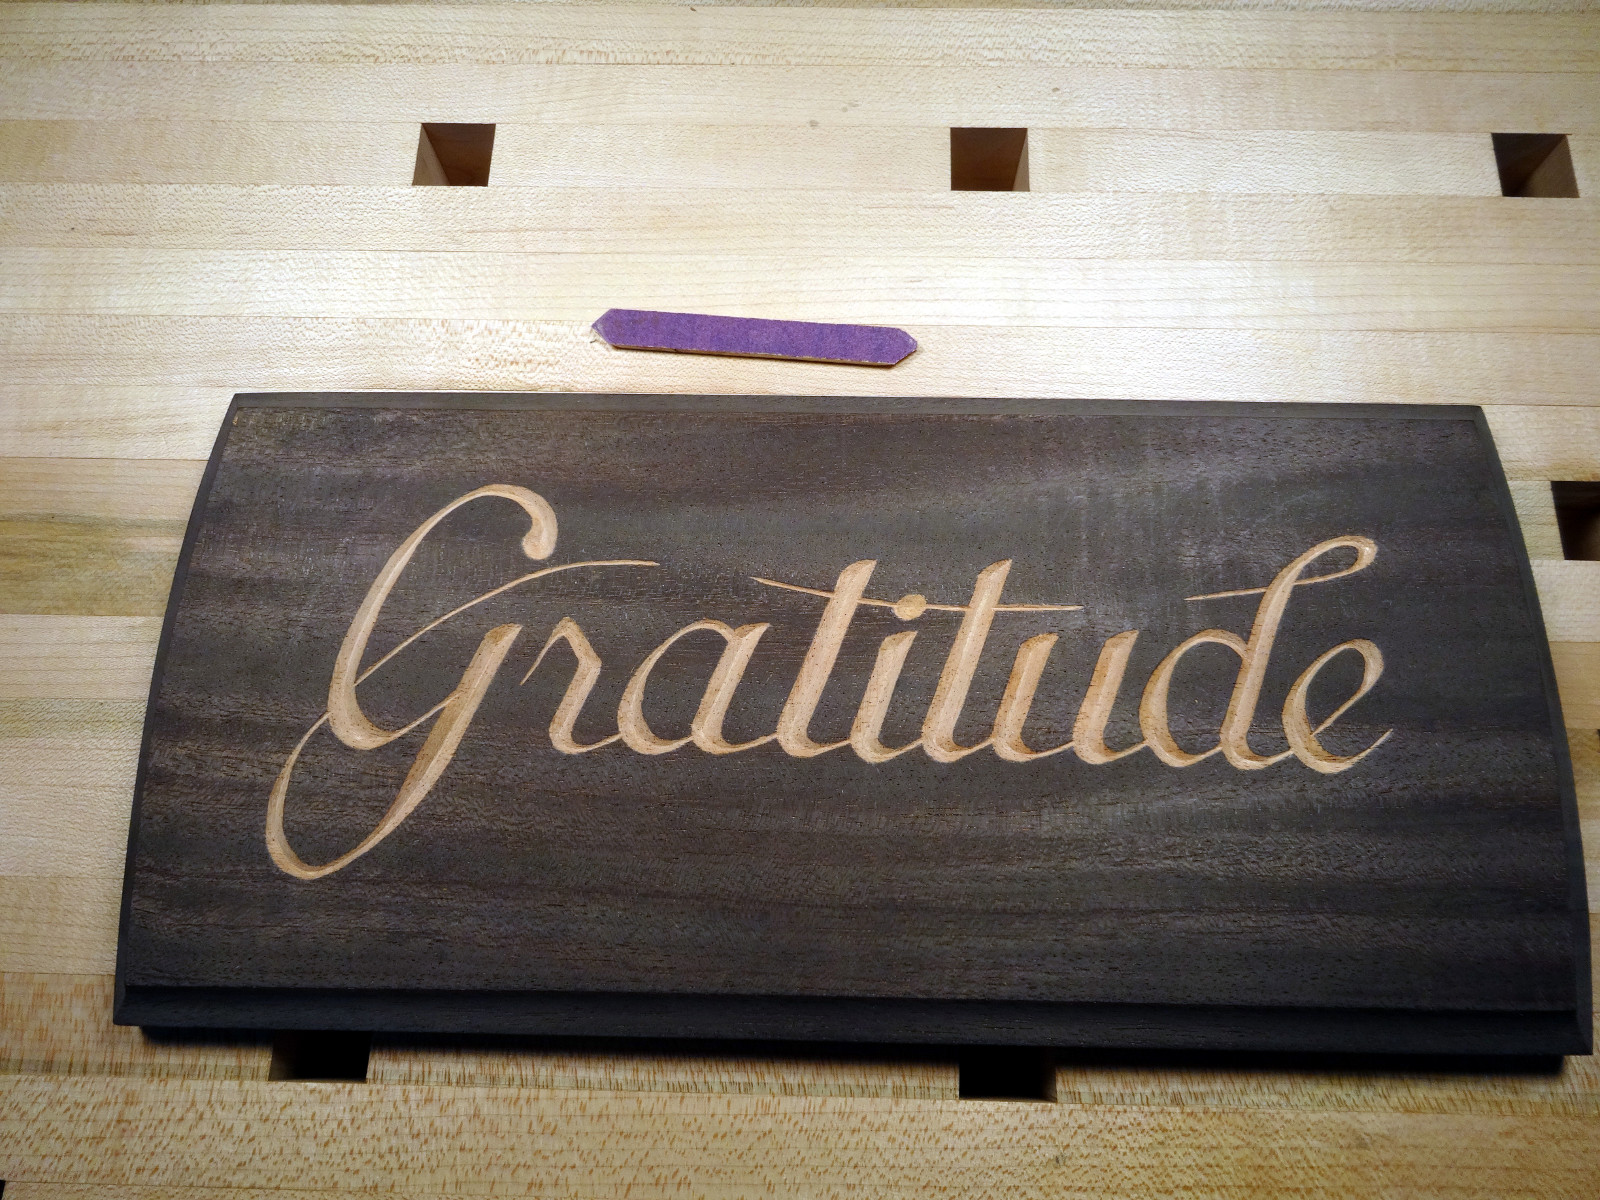 So, out comes the dreaded sandpaper. I made up a few sanding sticks by gluing 220 and 320 grit sandpaper to ice cream sticks. They can be cut to convenient shapes for sanding the carved surfaces. The most enjoyable part of this process is removing the ice cream from the sticks before applying the sandpaper.
Next, I applied 4 coats of clear shellac. The intention is to provide a smooth surface before gilding. I wanted the extremely thin gold leaf to have a smooth base. I also wanted to ensure a good cushion of shellac so that after the gold is applied the subsequent clean up doesn’t break into the layer of ebonizing stain.
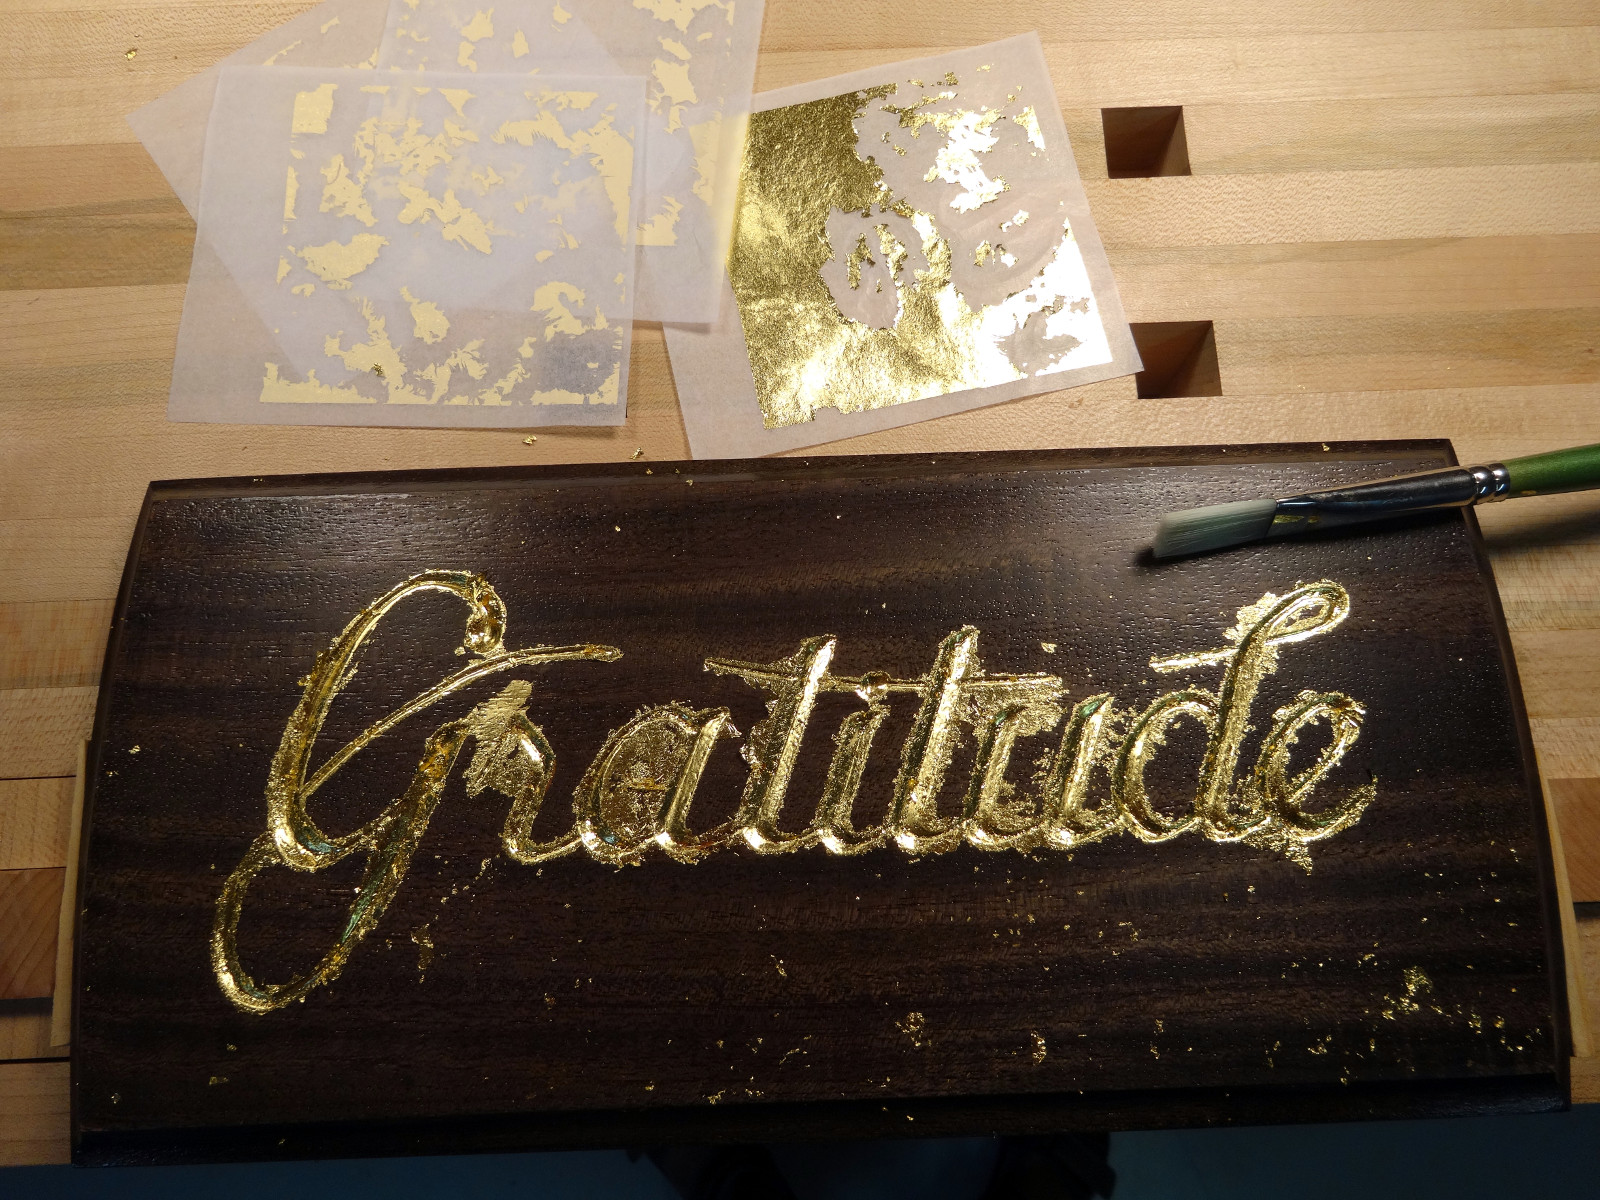 When the shellac had set a couple of days, I painted the letters with 1 Shot gold size, a kind of clear enamel, and then waited for it to reach the right level of tackiness, about an hour and a half. I used “patent” 23 karat gold leaf. “Patent” means the gold is delivered adhered to thin tissue sheets (as opposed to being completely loose). Application is by pressing the gold into the carved areas with a brush from the back side of the sheets.
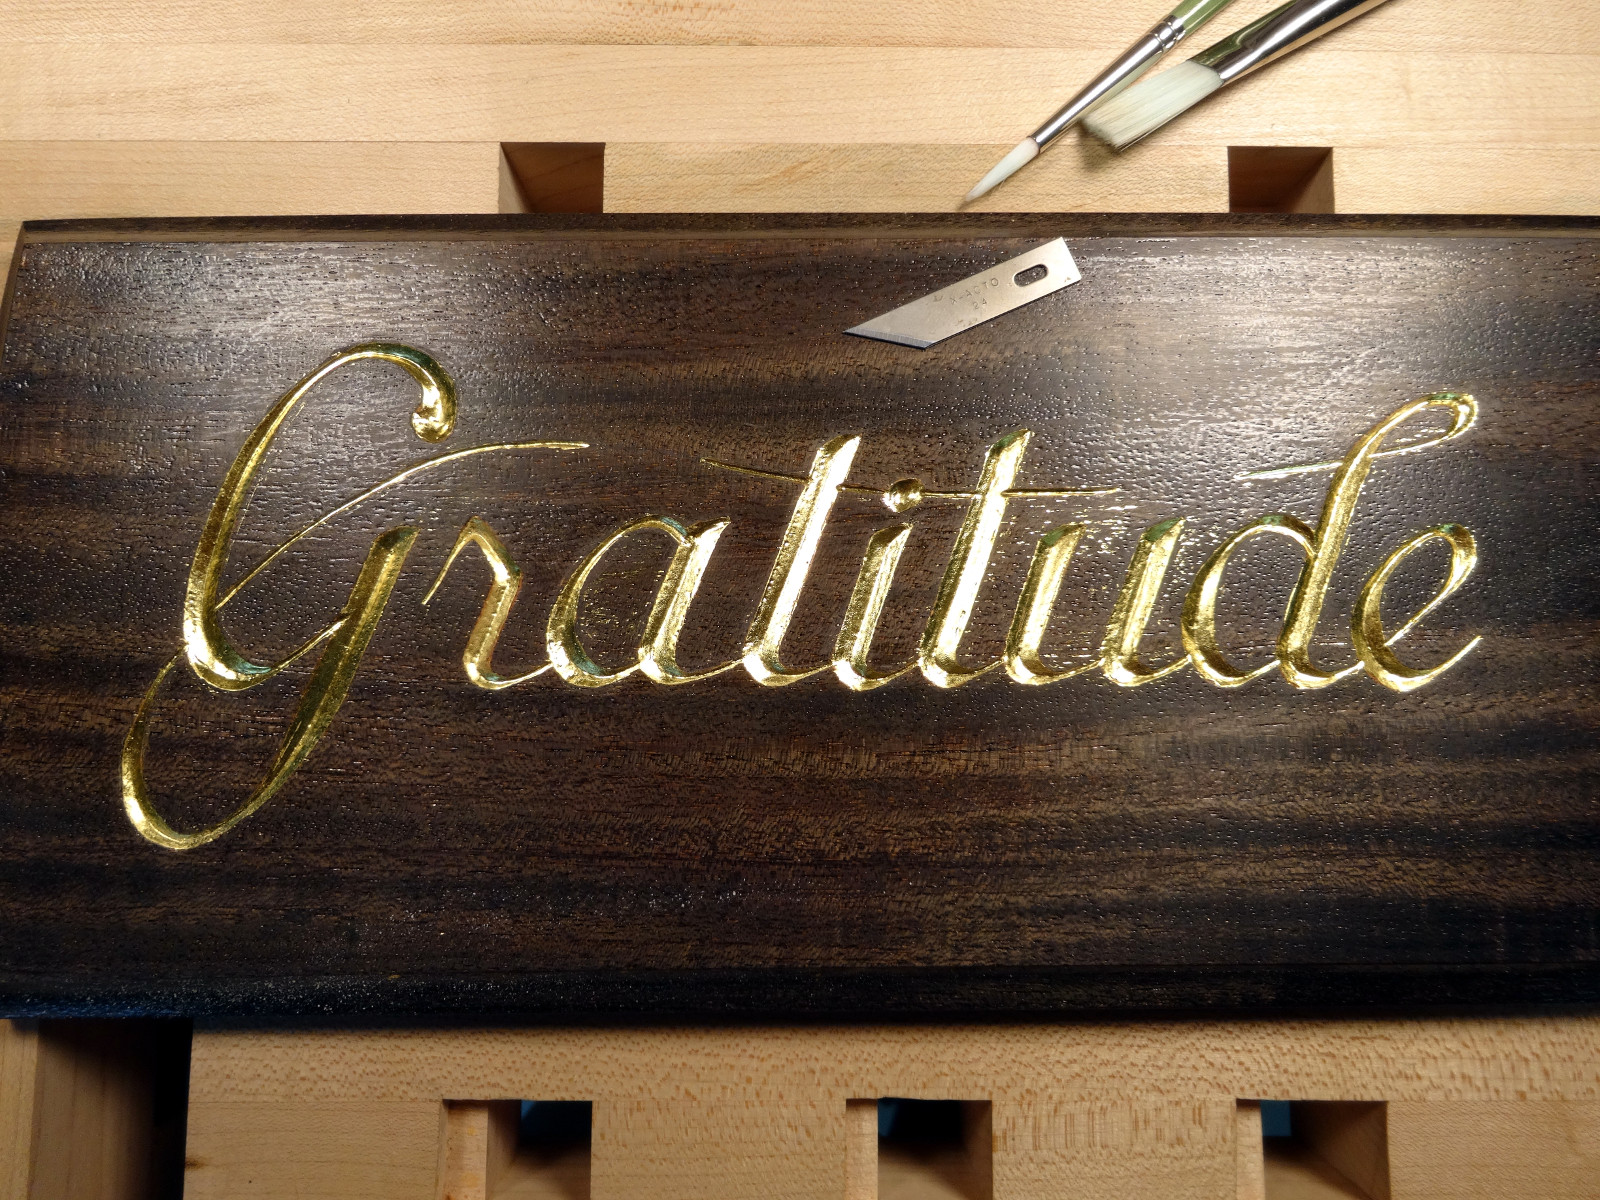 Now, comes something almost as fun as sanding, removing the extraneous gold. Fortunately, most of it dusts off with the same brush I used to apply it. That brush is also useful for gently tamping the gold into place, assuring everything is covered. That X-acto blade was for gently scraping excess from around the edges where precise “painting” of the sizing strayed outside the letters. Interestingly, some gold leaf adhered more than wanted to the nice smooth shellac, and even into some of the grain pores. By experimentation, I found that one of those ice cream sticks, sans ice cream, and also sans sandpaper, could be sharpened to a point that scraped out pores without damaging the underlying shellac or ebonizing stain.
A top coat of shellac brings us to a completed sign of “Gratitude.”
Related product:
Make Gratitude a habit. Rewire your brain. The Five Minute Journal gives you a delightful tool for building your gratitude habit. It has just the right ingredients for making the habit easy to get started and continue. It’s loaded with amazing advice. Give it a try!