• Skip to primary navigation
  • Skip to main content
  • Skip to primary sidebar
  • Skip to footer

Bob Easton

Chocolate powered woodworking

  • Home
  • Grinling Gibbons Tour

Woodworking

The Sandpaper Rack (aka Spoon Rack)

April 18, 2016 by Bob Easton 8 Comments

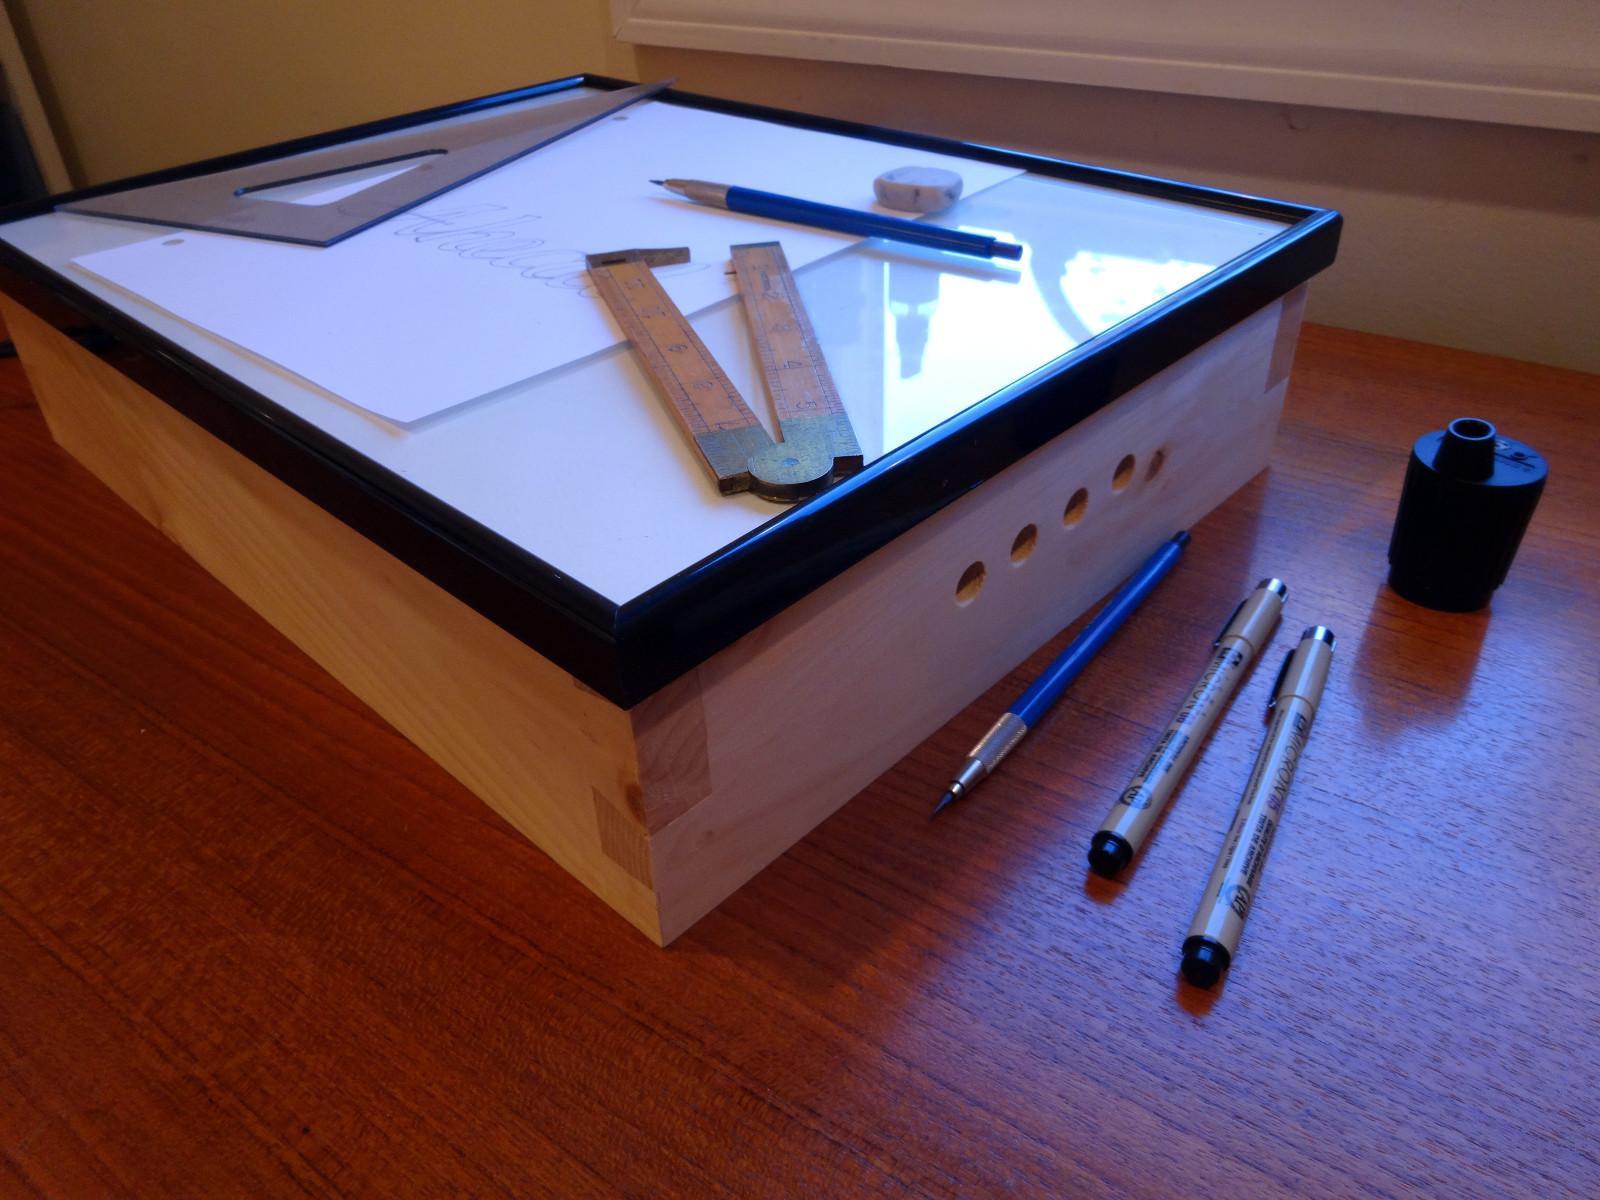
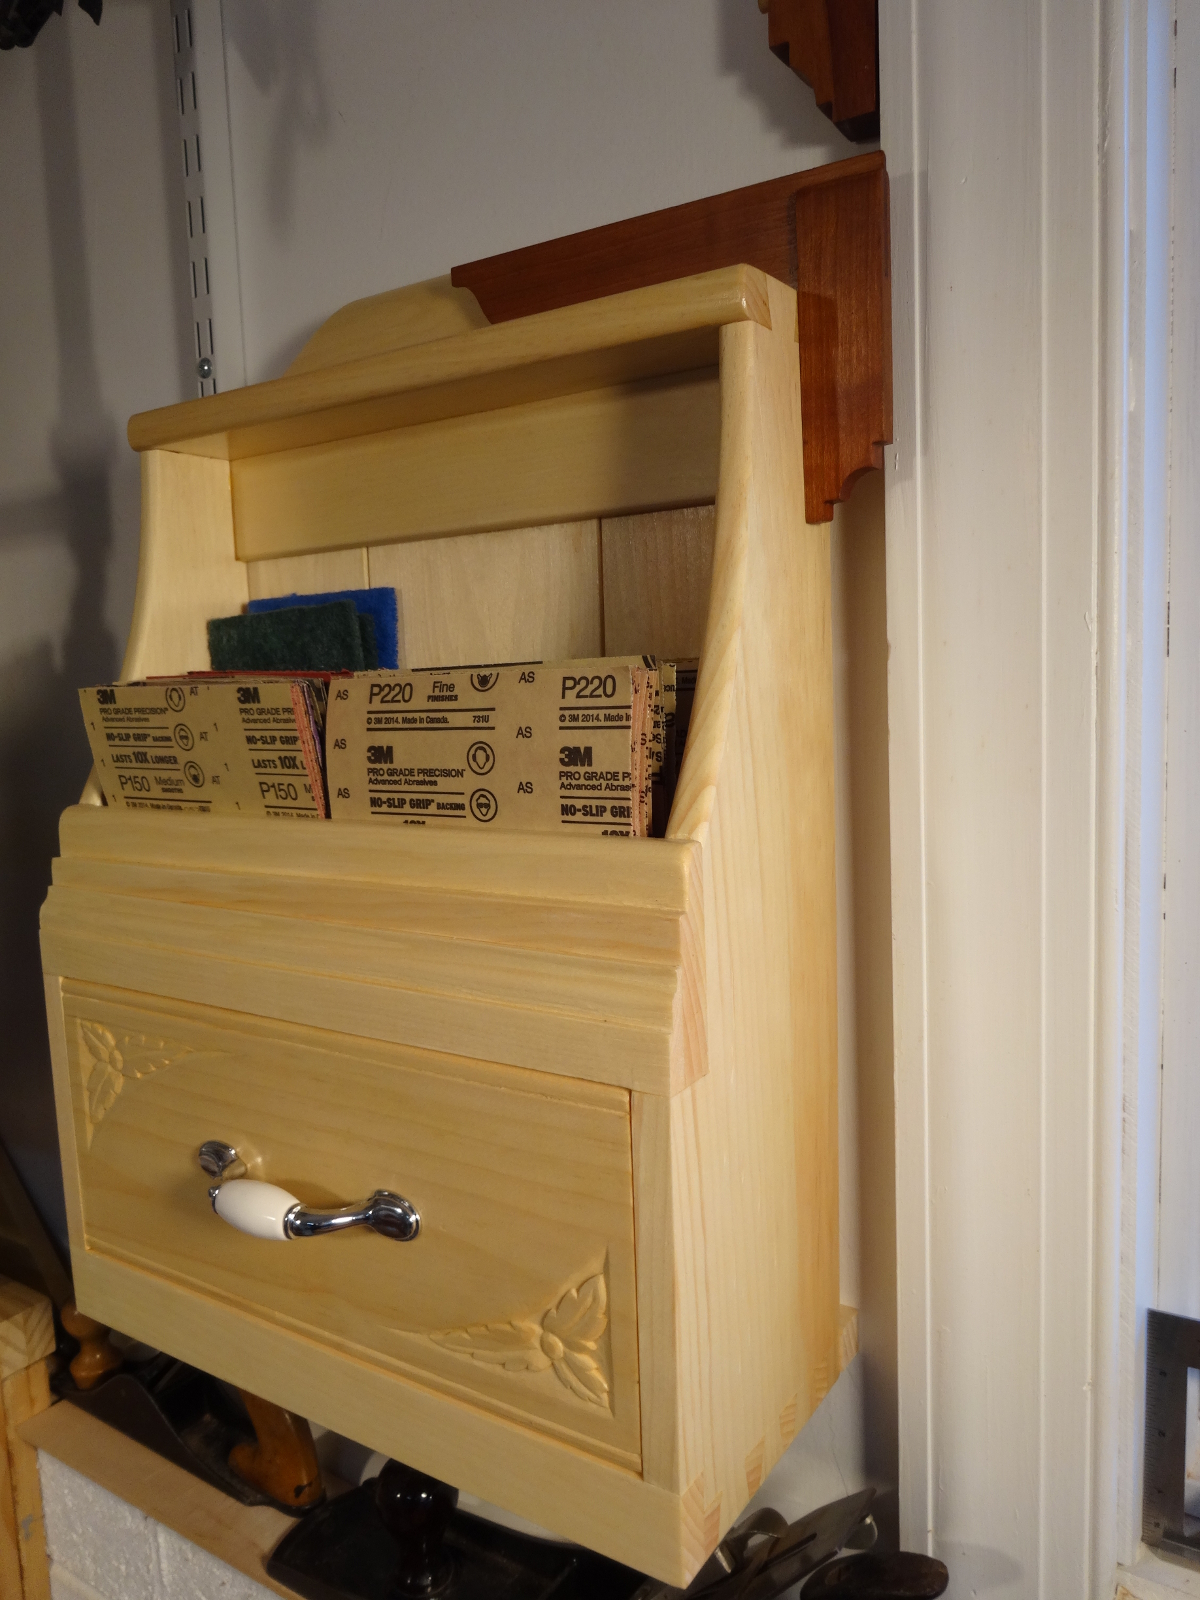
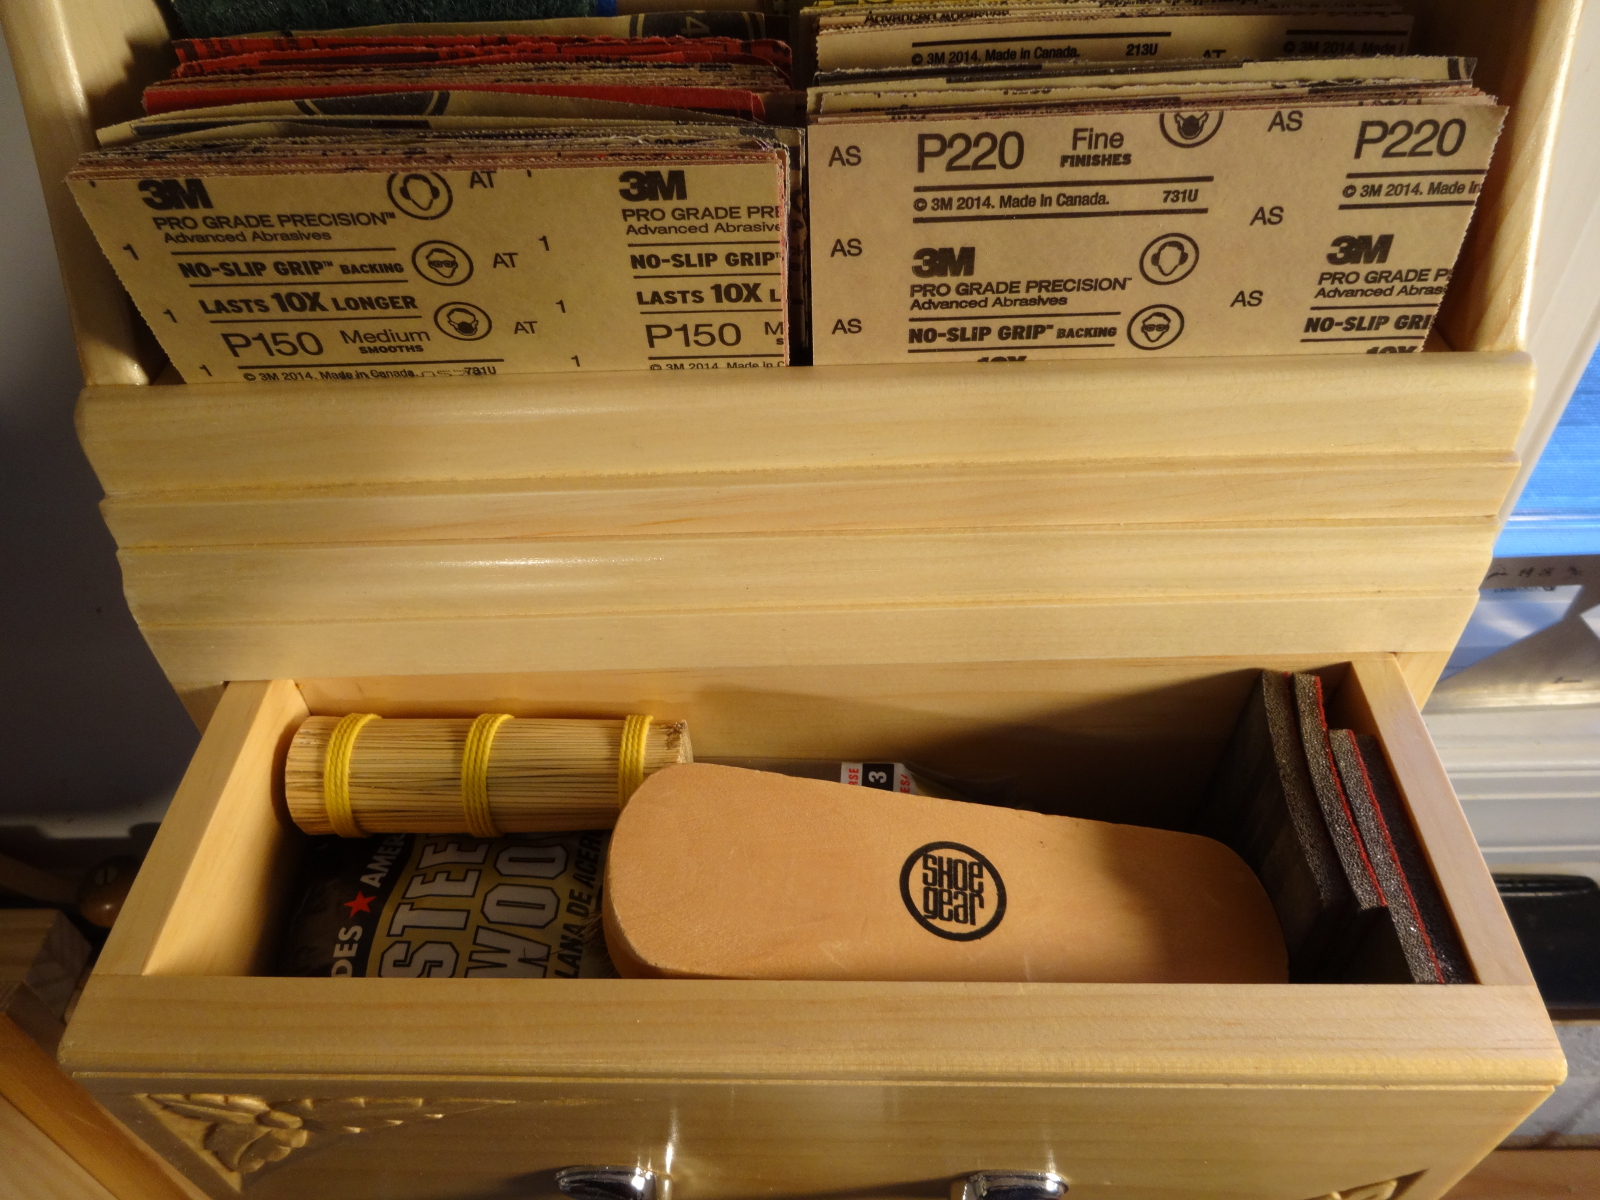
First, as I’ve said many times, I hate sanding. Consequently, the sandpaper bin has never been well organized. a mishmosh of new and used sandpaper of all grades and sizes. No more … at least no more mishmosh. Still can’t stand sanding.

photo of sand paper rack“I certainly don’t need a rack to put my spoons in. But, I saw this lovely old piece…” says Richard Maguire in the first video of the “Spoon Rack”
series at The English Woodworker’s site. Richard and Helen Fisher, longtime proprietors of a business that created top quality woodworking benches, have recently changed direction and begun offering video lessons. If you don’t know of them, go visit. You’re in for a real treat.

My spoons don’t need a rack either, but I saw this project as a chance to organize the sandpaper bin. I’m not big on step by step guides, so what you see here are results. … very satisfying results from my point of view. Richard packed a lot of woodworking techniques into this project:

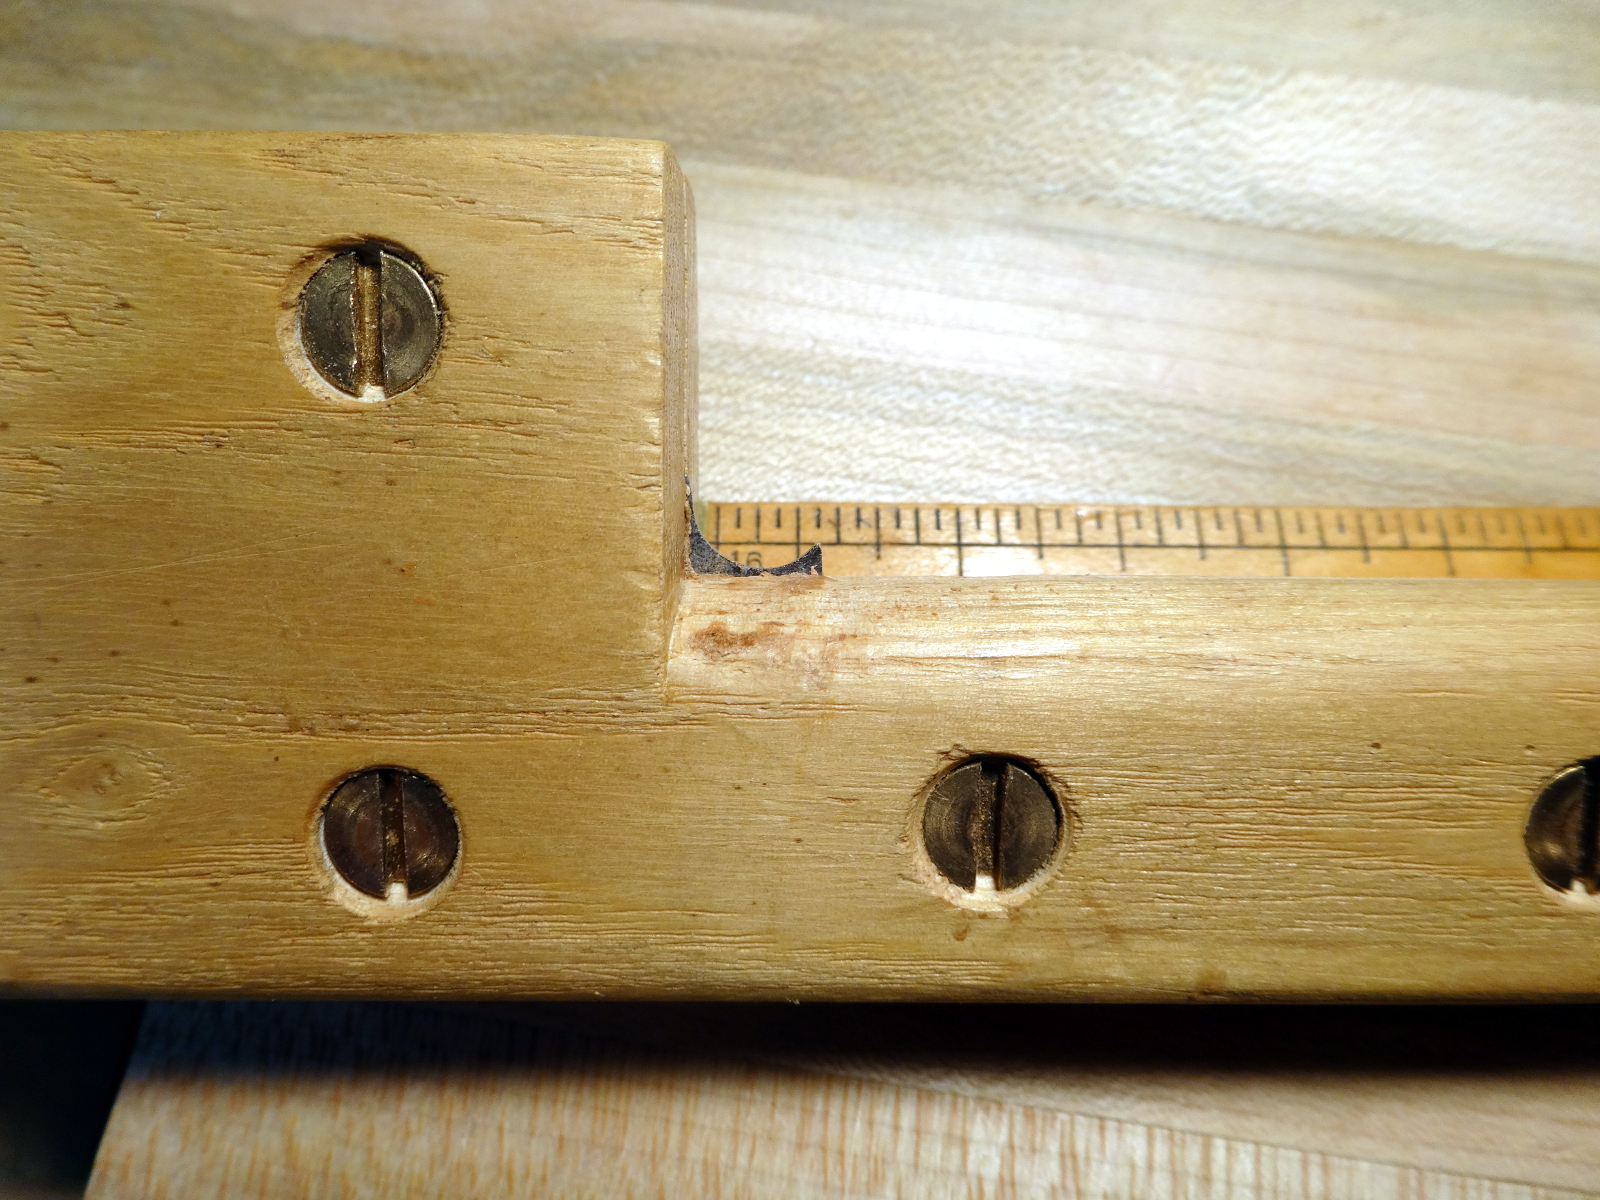
  • Through “Duvtail” joinery for the cabinet frame. (you’ll enjoy his UK accent)
  • Half blind and through dovetail joinery for the drawer.
  • Drawer bottom fitted into a hidden groove.
  • Dado / housing joinery for the shelf.
  • Ship-lap joinery for the back pieces.
  • Tongue and groove joinery for the upper back.
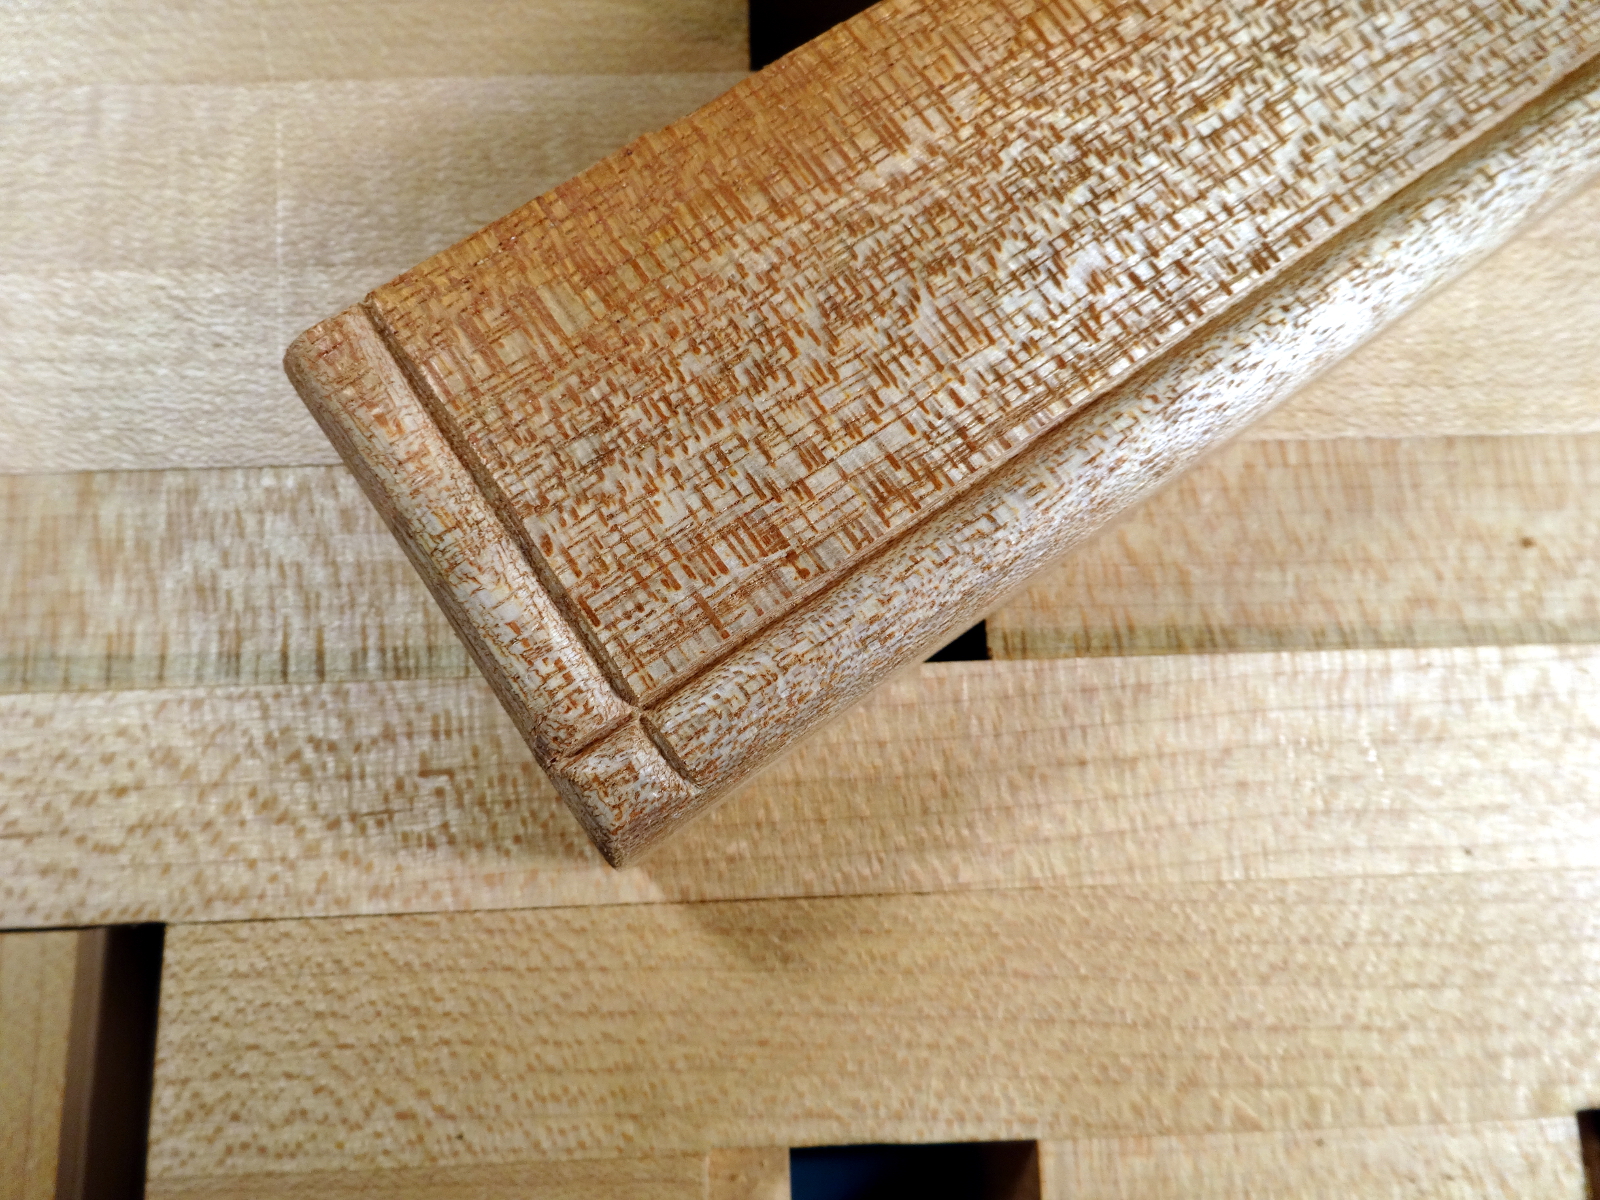
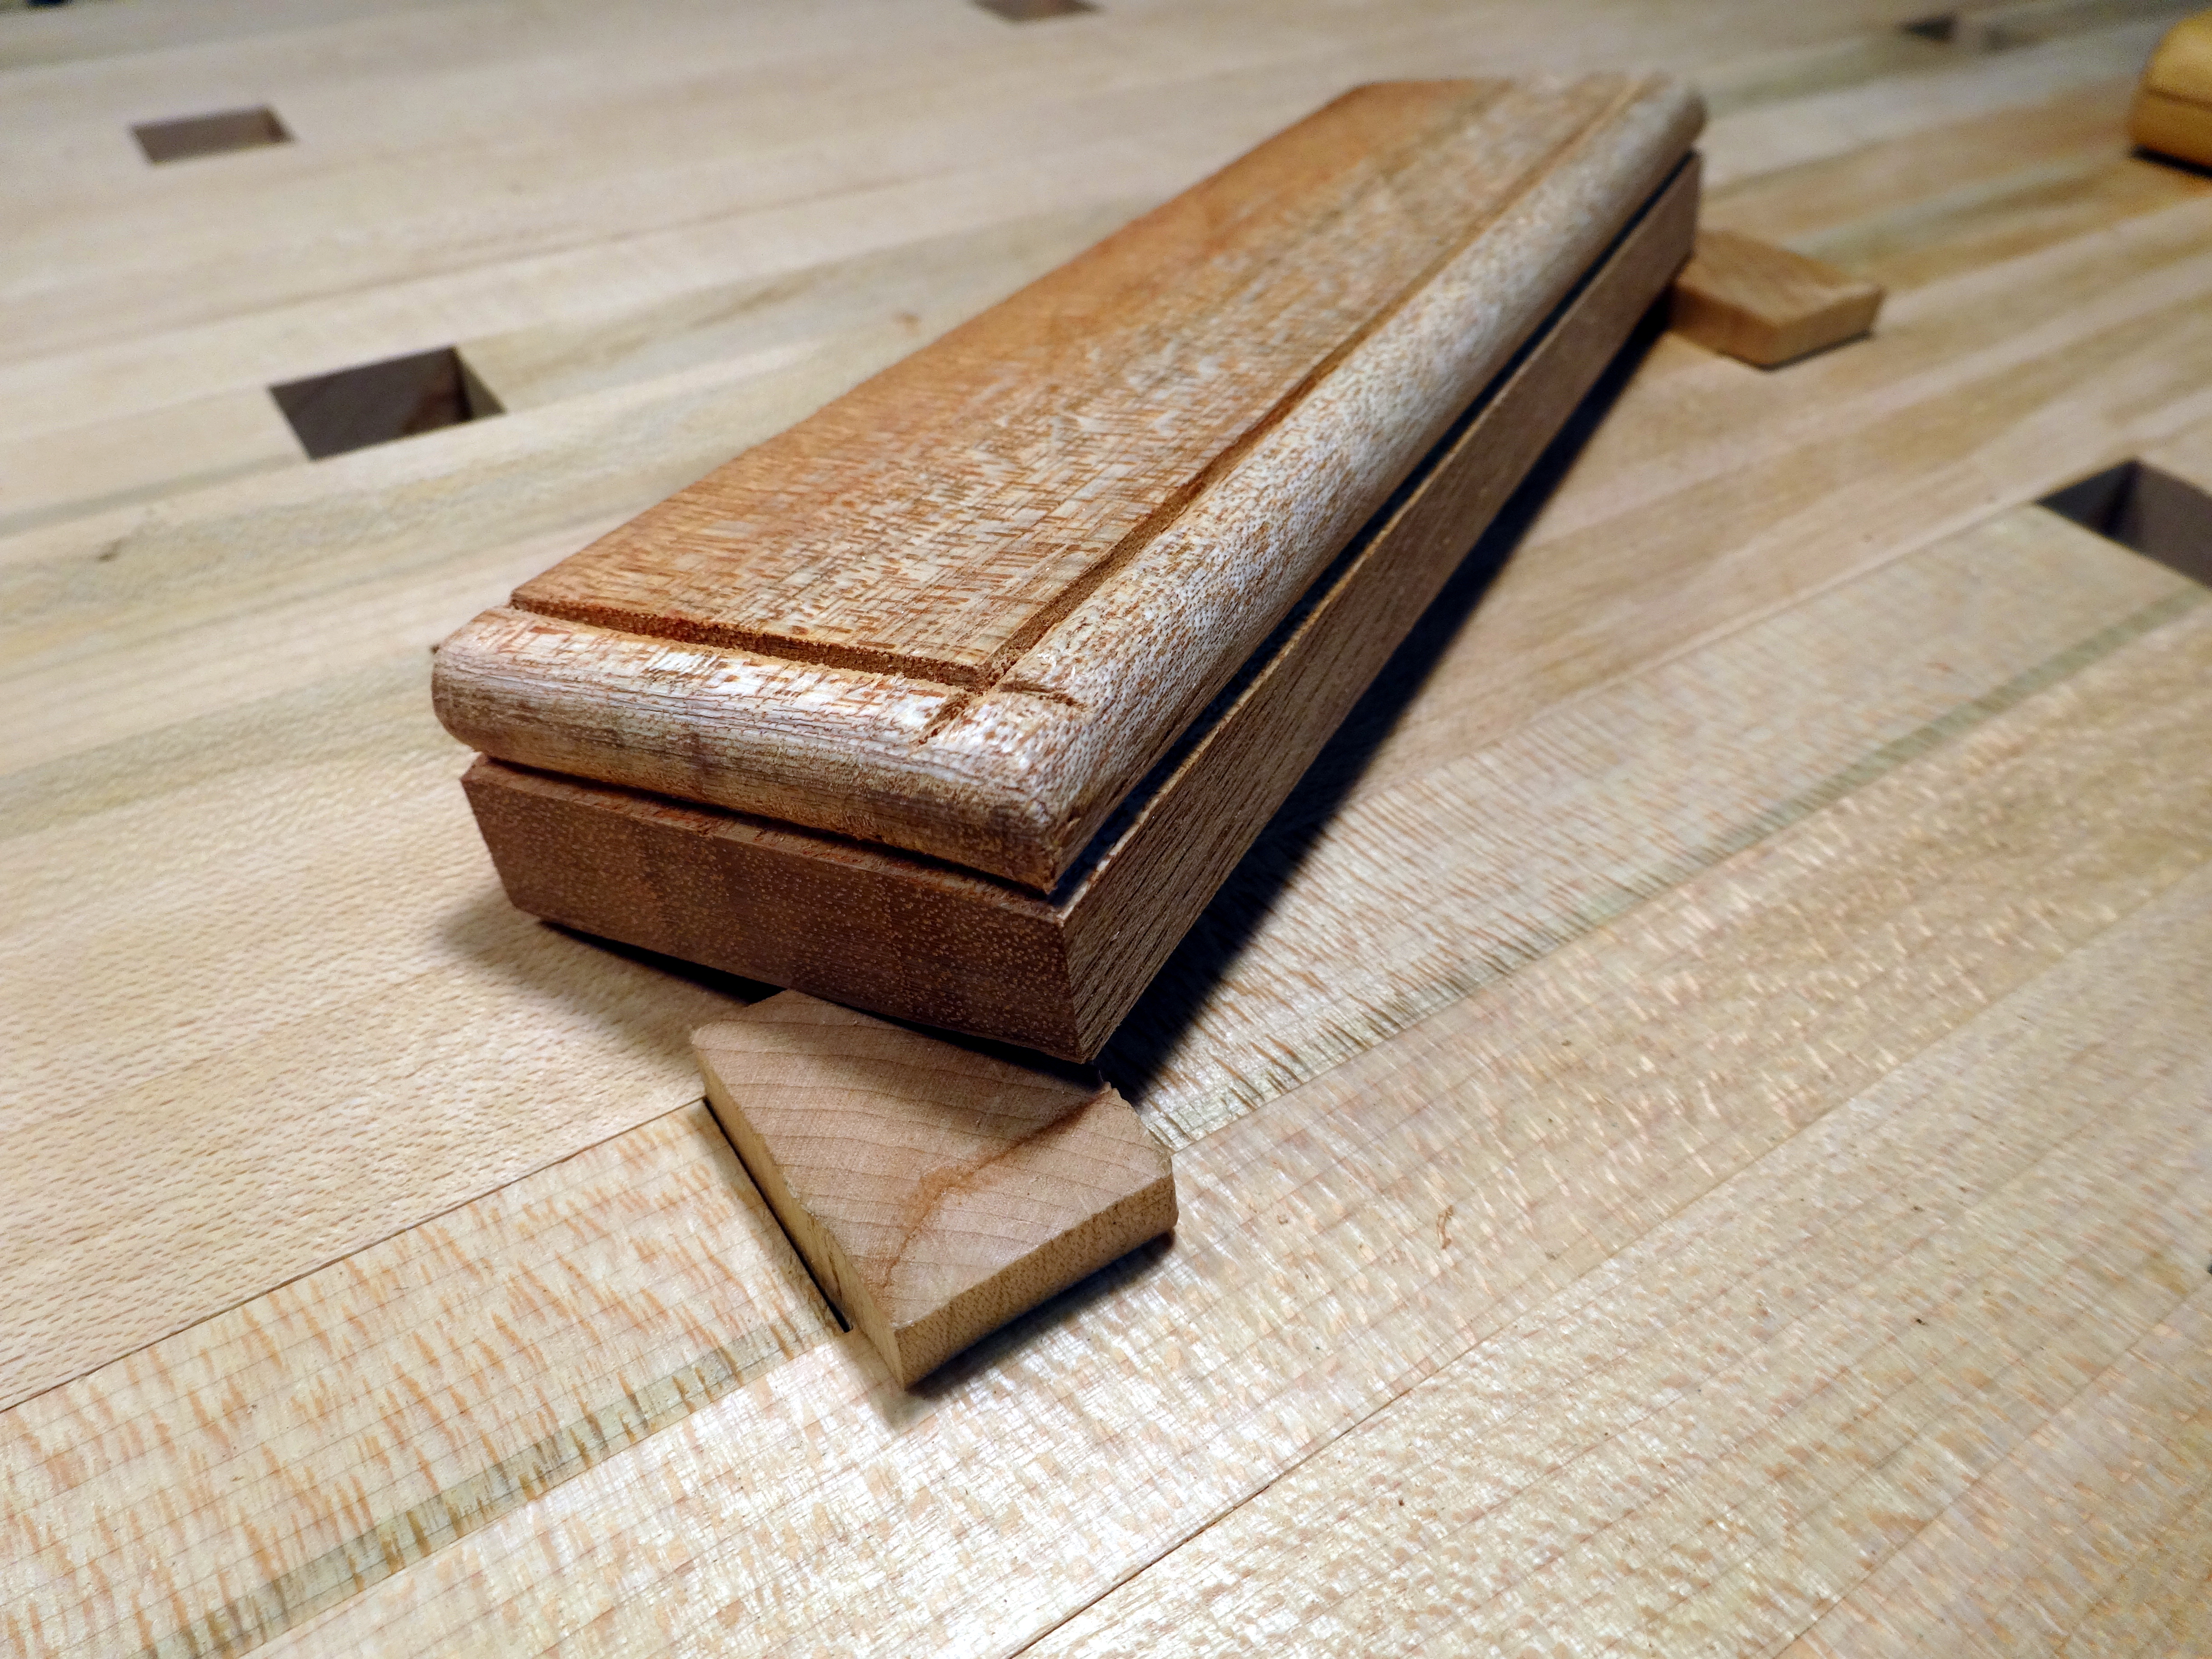
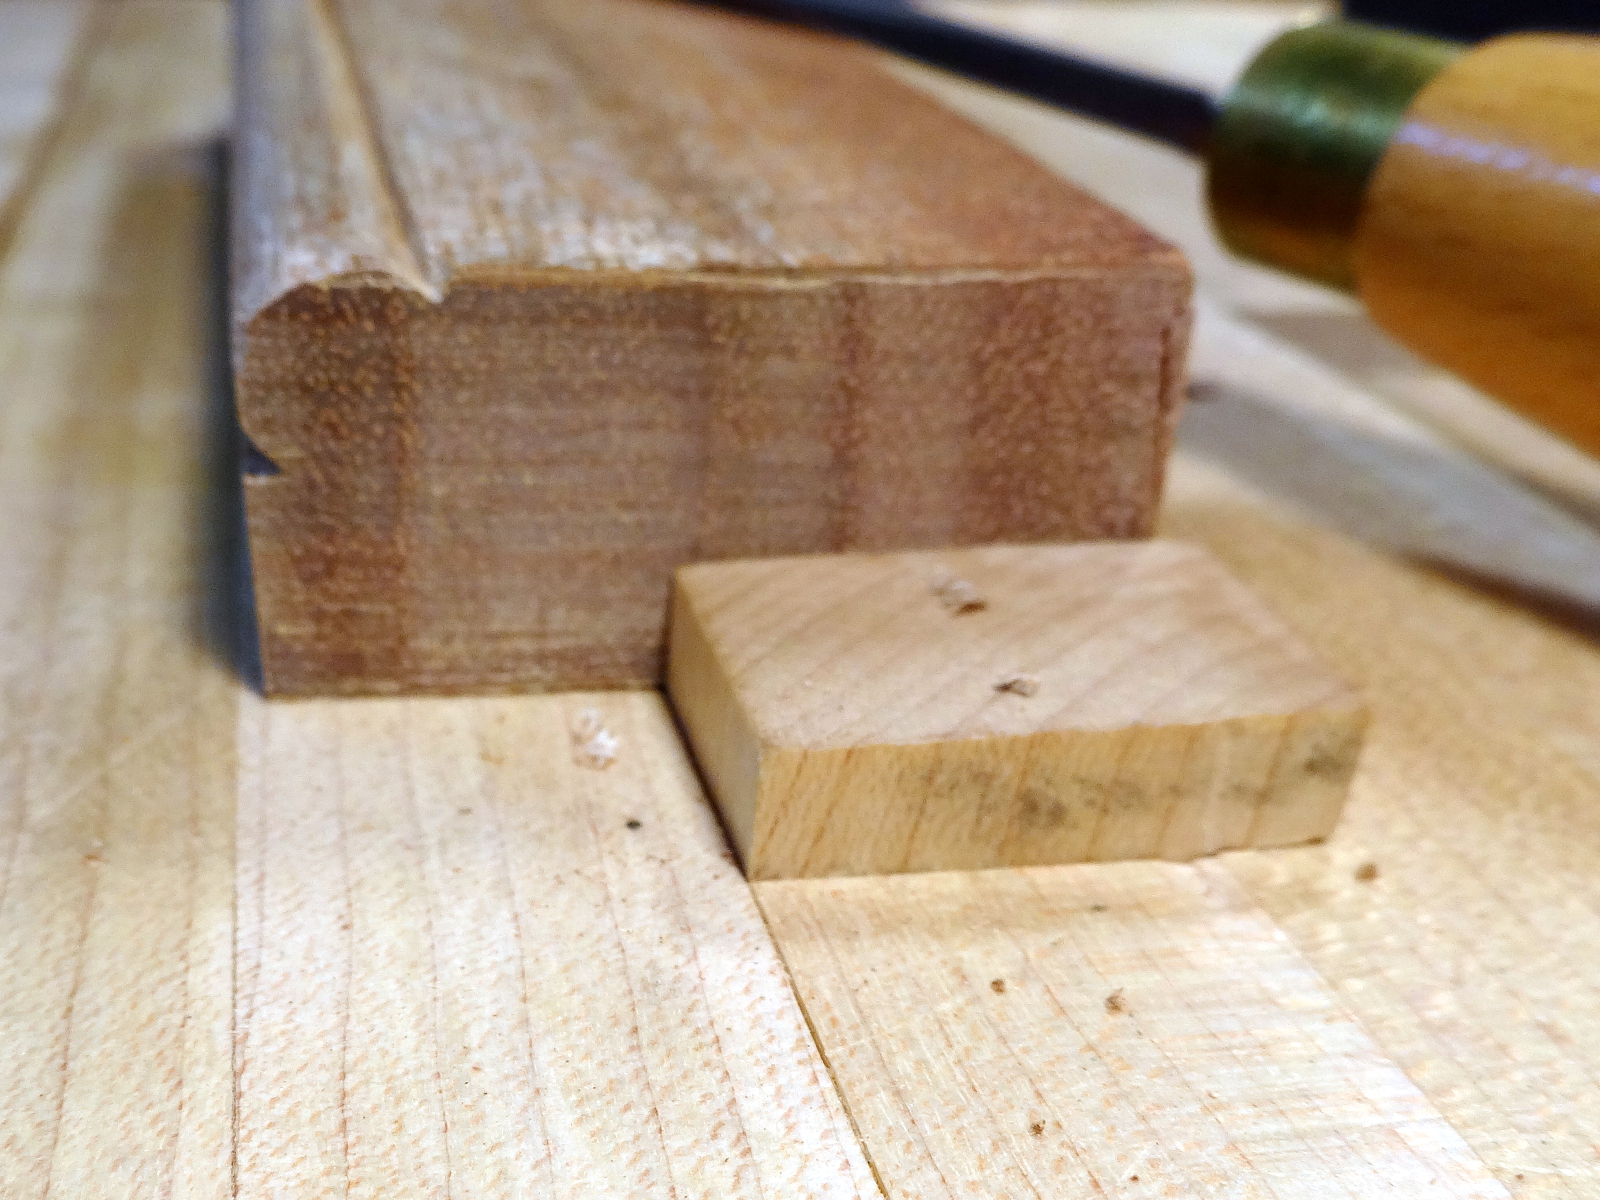
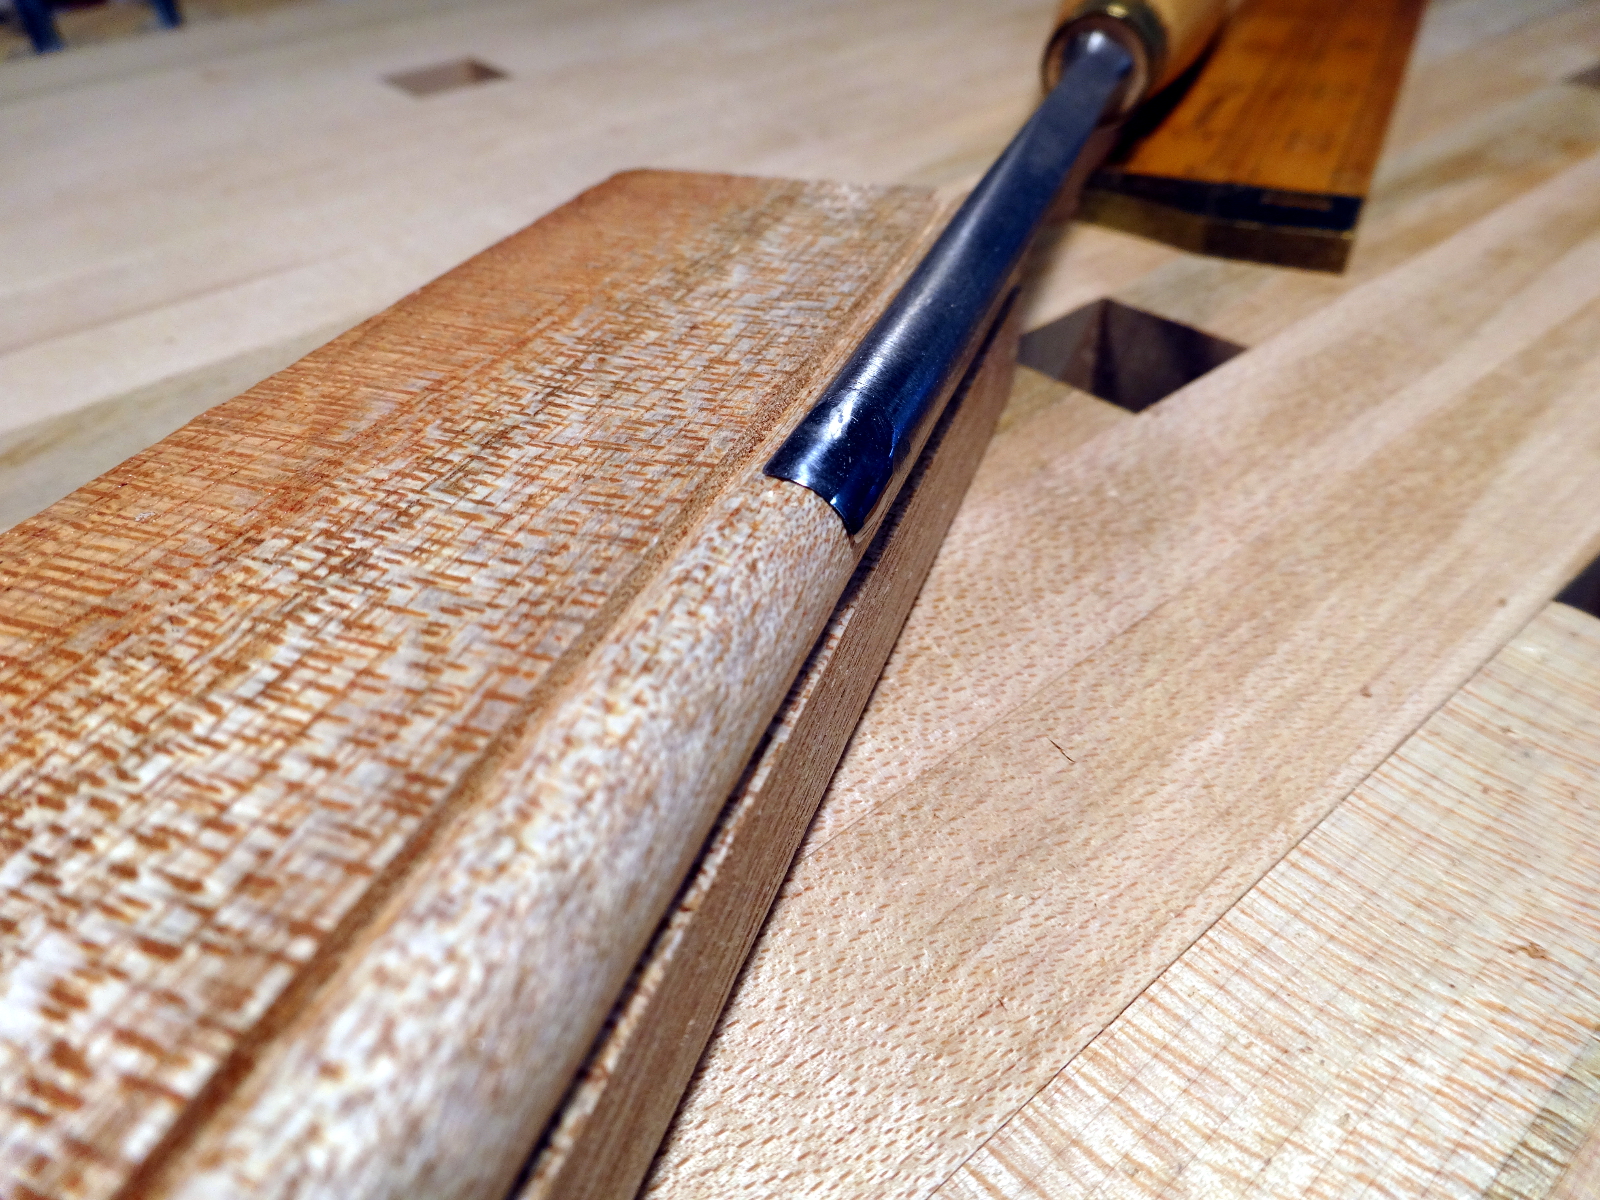
  • Mouldings accomplished in several ways.

photo of stuff in the drawerSome of the work also “goes to the dogs.” Richard shows an unexpected way of using pinch dogs, and Jeremy the shop dog shows up too.

My version of the rack is as described in the videos. My only addition was a simple divider that I placed inside the shelf to offer 3 compartments for different grades of sandpaper.

As Richards says, the drawer is a very odd size, almost taller than it is deep. Yet, it’s just fine for a few other finishing supplies and tools.

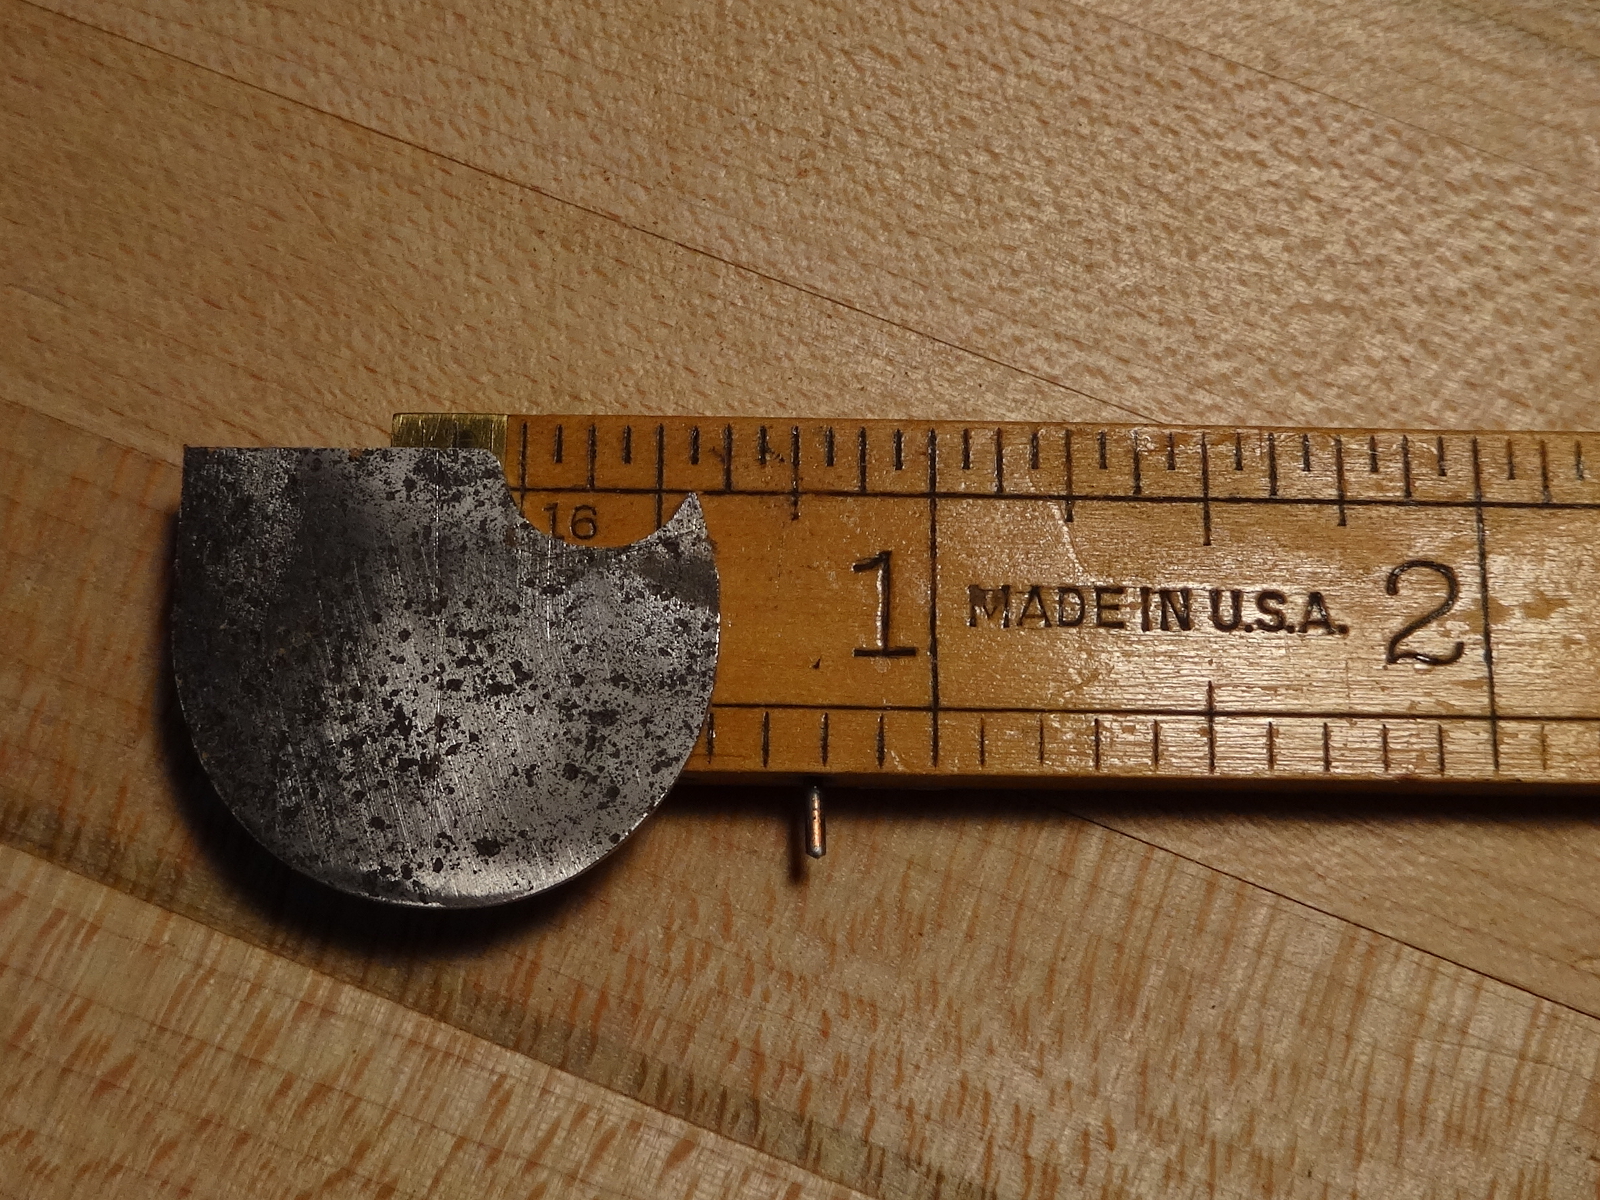
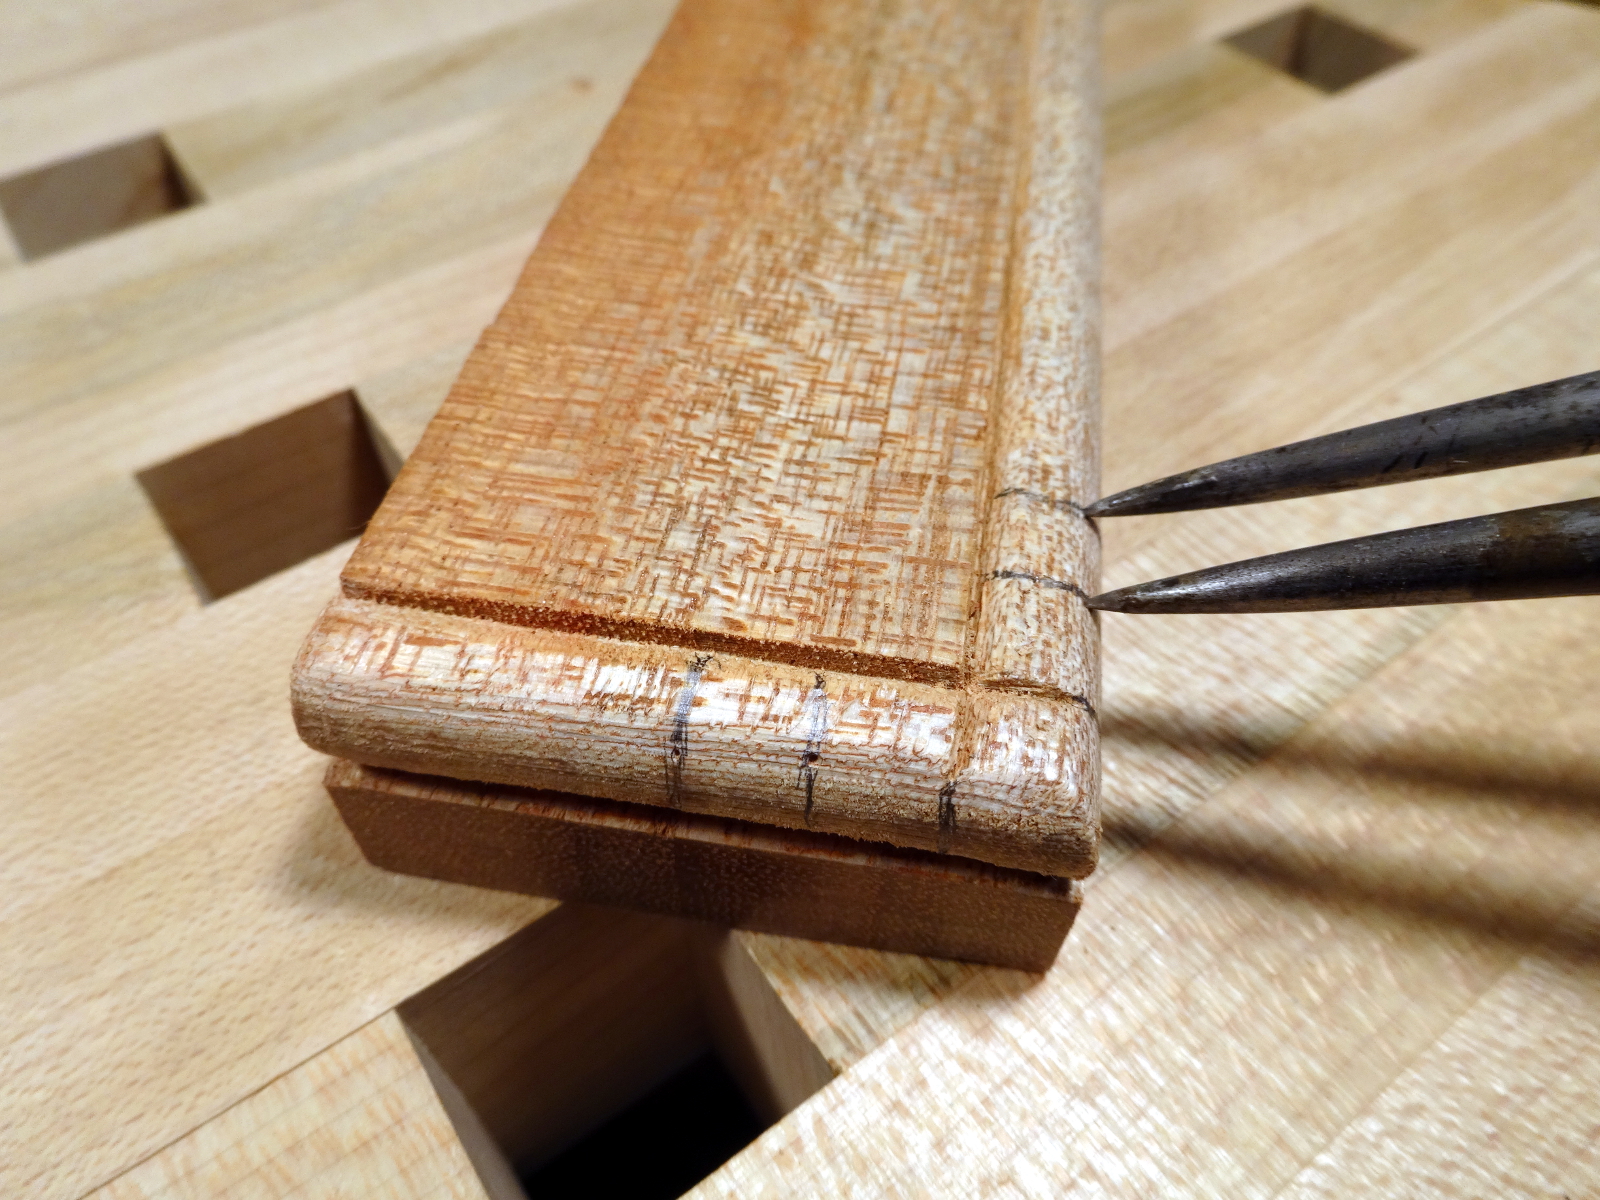
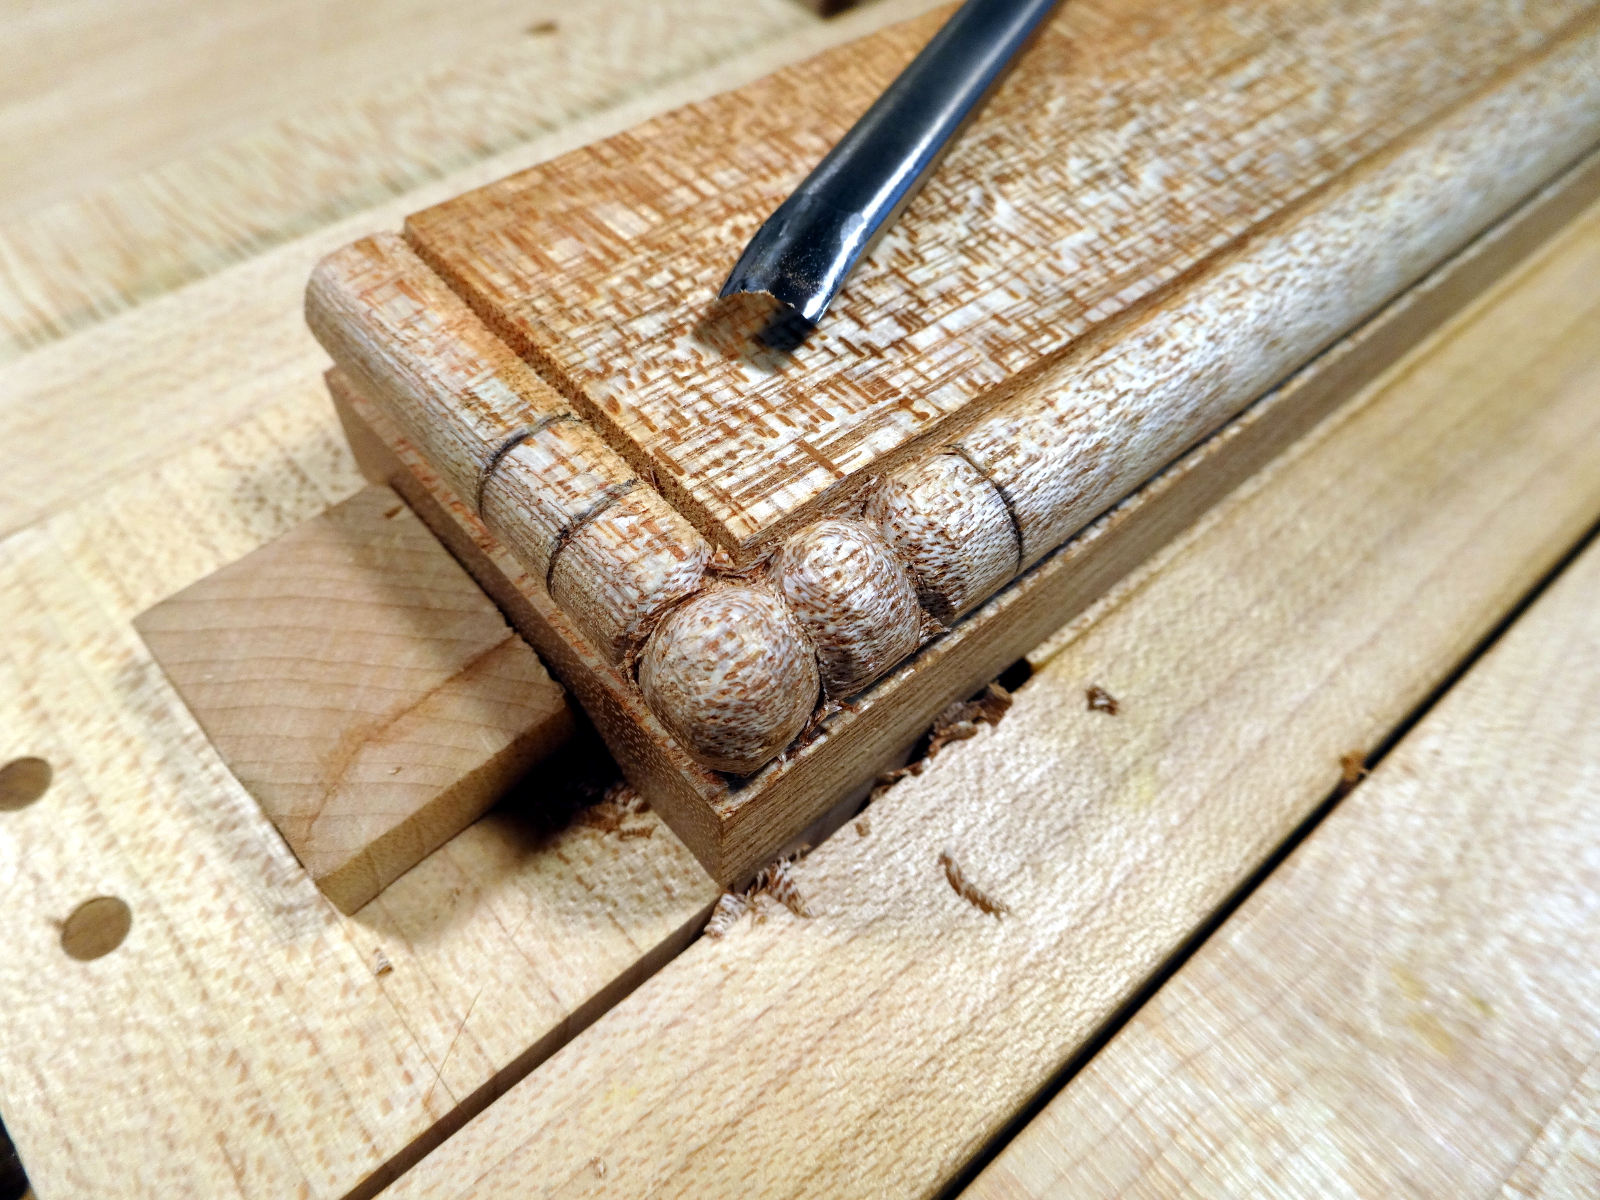
And of course, the drawer wanted some carving.

Finish is the usual shellac and wax.

Richard has a very entertaining colloquial style of teaching and Helen has done a superb job of videography. The series consists of 6 videos totalling a bit over 3 hours. A few PDF files bring concise drawings. There are also a couple of video “rants” about thicknessing timbers and managing fillister planes. Richard at his best!

I thoroughly enjoyed the series. In the end, I have only two complaints.

  1. Jeremy, the shop dog didn’t really do much work.
  2. Days in the U.K. must be very much longer than days here in the U.S. Richard described this as a one-day project. That can’t possibly be right. 🙂

sp-cutter-1600

The series is a real bargain at £26, currently $38.30 US. The quality of the teaching, the quality of the presentation, and the overall value delivered is easily worth a lot more in my mind.

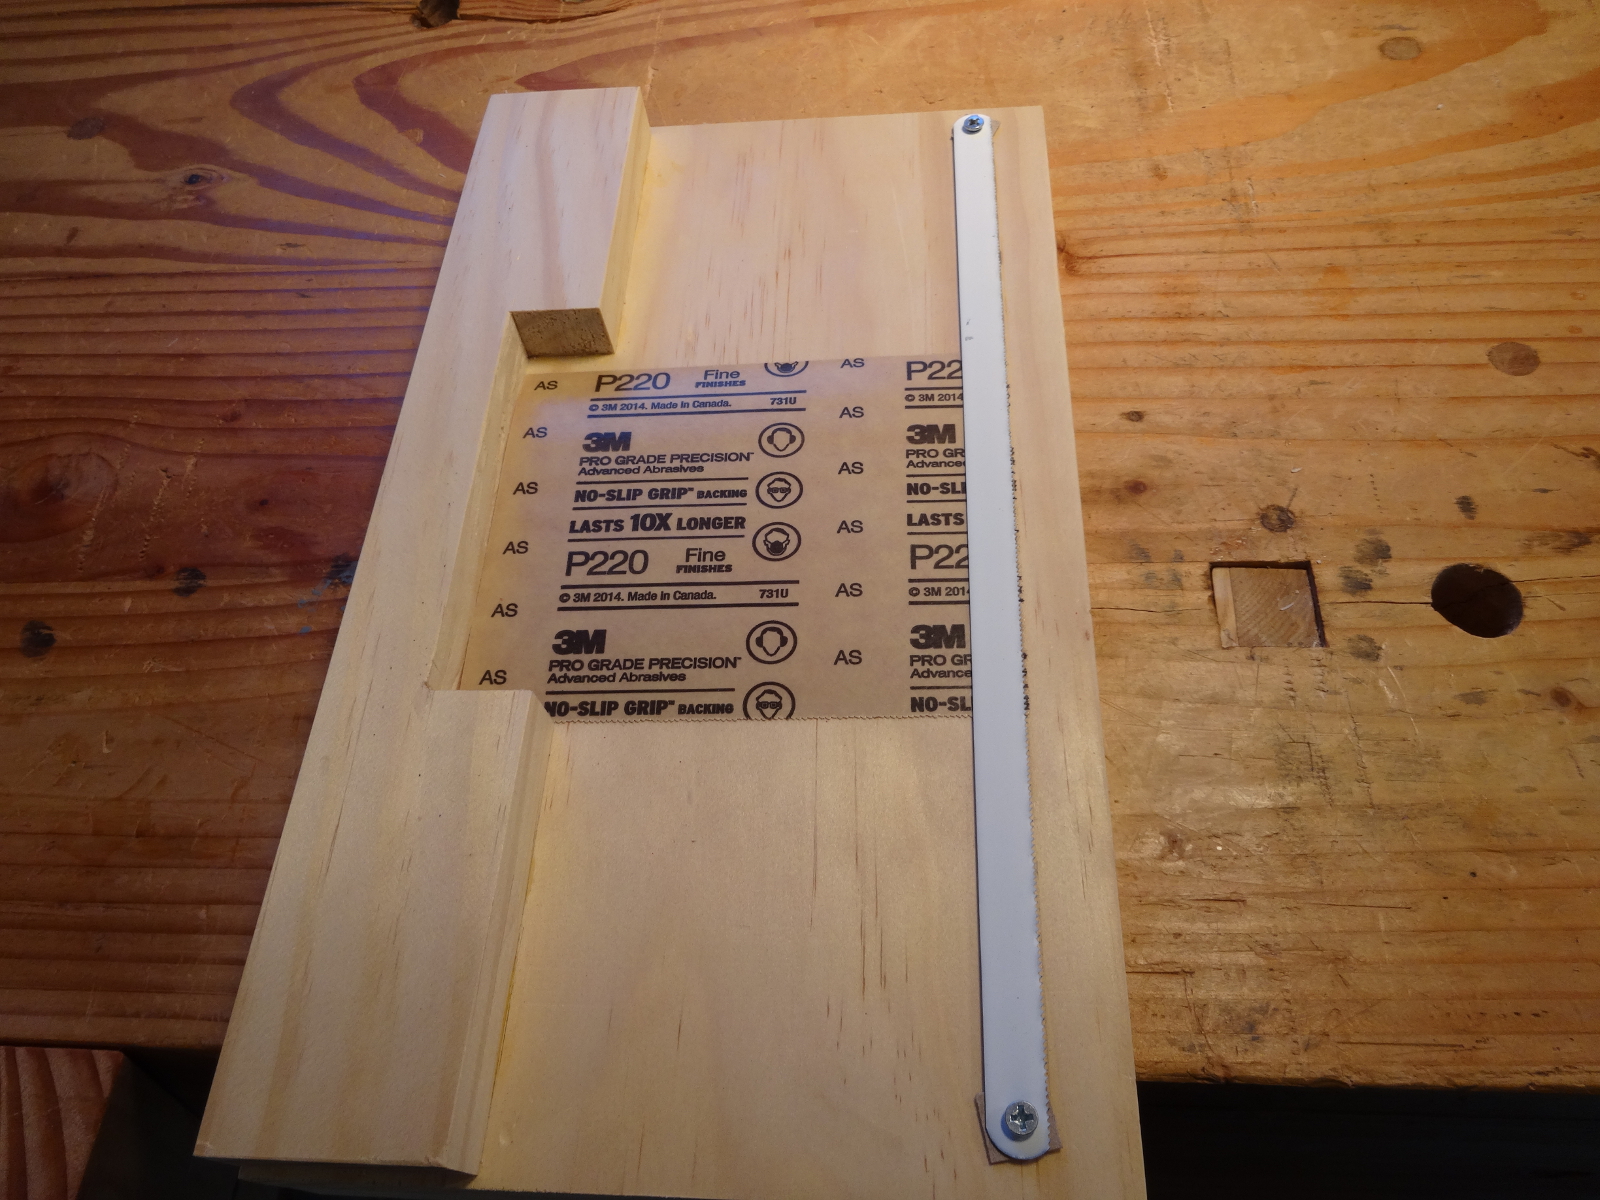
Lastly, kudos to Greg Merrit for helping organize the sandpaper. His sandpaper cutting jig makes it easy to stock the rack.

P.S. New rule in the shop: NO used sandpaper goes back into the rack. It’s expendable. Don’t clutter things up with partially used junk.

Filed Under: Shopmade, Woodworking

Hand Carved Sign – Bead details

January 12, 2016 by Bob Easton 2 Comments

Previously on Hand Carved Signs, John asked about carving the beads. Which came first; the scratch stock or the gouge?

Actually, I didn’t force fit either. I used a previously made scratch stock and happily I had a gouge that matched well. I picked up a cutoff and made these photos for a tutorial better than words alone.

The scratch stock - made a long time ago.
Cutter - piece of an old saw blade
Scrathcing the first face
Two faces scratched
Scratching done - 2 faces - 2 edges
View from the end
See if the gouge fits - Perfect!
Set dividers to bead width. Then, walk of distances. Pencil mark for visibility.
Carve til done...

Yes, we end up with facets … the things that distinguish hand carved from CNC milled junk.

If you like beads, see Mary May’s lesson about a stunning beaded fireplace panel. I’m stealing that one for an upcoming sign!


Filed Under: Woodcarving, Woodworking

Hand lettering – Lightbox

October 12, 2015 by Bob Easton 8 Comments

photo of tracing box

If you are among those who do their drawing and drafting with modern computer tools, move along; nothing to see here.

This is a lightbox for tracing, not a lightbox for photographing objects.

I am among the club of old fogies who still use pencil and paper for all of my hand lettering as well as other design work. Many times, the next iteration is easy to accomplish by tracing from an existing draft. I used to employ a window for tracing. Tape the original to a convenient window, tape the new drawing over the original, trace. It works great, but only in the daytime.

Did I ever mention I have Scots heritage? I inherited the thrifty part of Scotch, not the single malt part :(. This box was made mostly from materials on hand. Rummaging through a stack of unused picture frames, I found a thrifty frame measuring 12″ by 16.” It included the frame, glass, flimsy paper mat, and 1/8″ thick masonite back board. I tossed the mat and kept the rest. Some 1 x 4 pine from the lumber stash provided for the box, constructed to the size of the inside of the frame.

Construction is simple: a single (no stress) dovetail on each corner. The bottom part of each corner, below the dovetail, is mitered. The miter hides the 1/8″ groove that holds the bottom, which is that masonite from the frame. A few 1/2″ inch holes in each end offer ventilation and a place for the power pigtail.

The inside of the box is painted white to maximize light. Light comes from a very thrifty string of LED lights. The associated  12 volt power brick provides exactly enough current for the full 16 feet of lights.. So, I used the entire string. It has an adhesive backing, making installation a 5 minute job.

By the way, if you buy those components, be aware that the string of lights already includes a pigtail on one end that matches the output of the power brick, and a pigtail on the other end made of wires to solder to a power supply. You don’t need to buy any other connectors. (DAMHIKT)

Topping it off is a piece of heavy paper, for watercolor painting, that has good diffusion without blocking too much light, and the glass of course. Yes, the standard single strength glass is strong enough for this sort of work.

It works any time of day or night, better than a window, and doubles as a laptop drafting table.

photo of tracing box interior photo of tracing box - lighted and in use

Filed Under: Drawings, Woodworking

  • « Go to Previous Page
  • Page 1
  • Interim pages omitted …
  • Page 9
  • Page 10
  • Page 11
  • Page 12
  • Page 13
  • Interim pages omitted …
  • Page 32
  • Go to Next Page »

Primary Sidebar

Footer

Recent Posts

  • New Frame Saw / Scroll Saw
  • Lamppost Sign
  • Goodbye PayPal – Goodbye Bob’s eBooks
  • Anarchist’s Workbench is Done
  • Why we keep offcuts…

Categories

  • About
  • Artwork
  • Boatbuilding
  • Boating
  • bowl carving
  • Boxmaking
  • Clocks
  • Drawings
  • eBook
  • etude
  • Eva Too
  • Eva Won
  • Fiddlehead
  • Fiddlehead model
  • Flying
  • frame saw
  • gilding
  • green woodworking
  • Grinling Gibbons
  • Guns
  • Hand tools
  • Humor
  • kerfing plane
  • Lettercarving
  • Mill Creek 13
  • Model building
  • Power tools
  • Rant
  • resawing
  • scroll saw
  • Shopmade
  • sign painting
  • Stonework
  • Swimming
  • Technology
  • The Wall
  • treadle lathe
  • Uncategorized
  • VSD
  • Woodcarving
  • Woodturning
  • Woodworking
  • workbench

Other stuff

  • About
  • Contact
  • Privacy Policy

Copyright ©2024 · Bob Easton · All Rights Reserved