• Skip to primary navigation
  • Skip to main content
  • Skip to primary sidebar
  • Skip to footer

Bob Easton

Chocolate powered woodworking

  • Home
  • Grinling Gibbons Tour

Woodworking

A “Weekend” Project – Adirondack Chair

September 3, 2015 by Bob Easton 11 Comments

Anyone should be able to build an Adirondack chair in a weekend right? Go get some wood, whack out the parts, screw it together, and slap on some paint. Right? Dang! Why build one at all? Down at the nearby garden center, they have some for sale at $39. Of course, those look like they were made from pallet wood and are flat in every dimension. They might not “sit” so well.

Adirondack chair - front viewThis one started with some wood resawing back in April. I finally wrapped it up and moved it outside a couple of weeks ago.

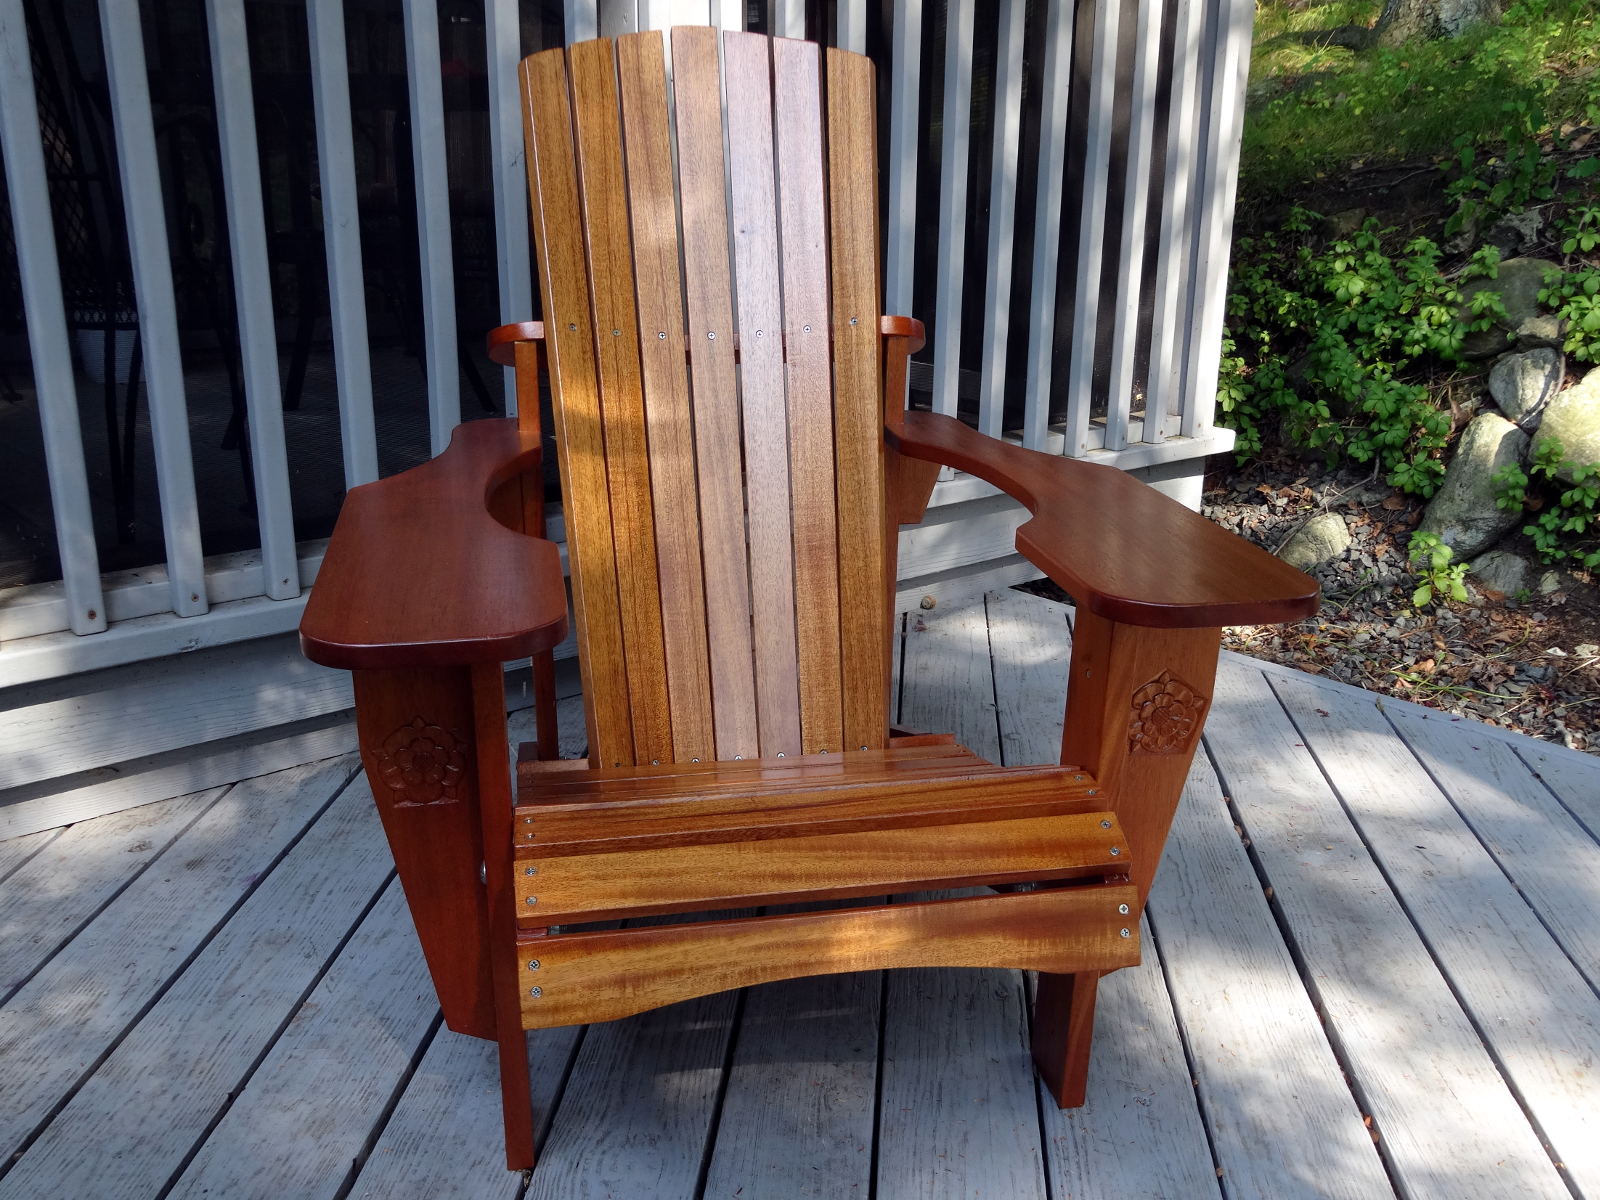
Plans: I’m old enough to like things comfortable. Too many of these chairs have flat seats, flat backs, and look more like torture devices than chairs. I found one with curved seat and back. It’s a Fine Woodworking project. Oh look! It says “An Adirondack chair can be built in a day.” A companion article contains a video with a foolproof assembly sequence. Adirondack chair - side view
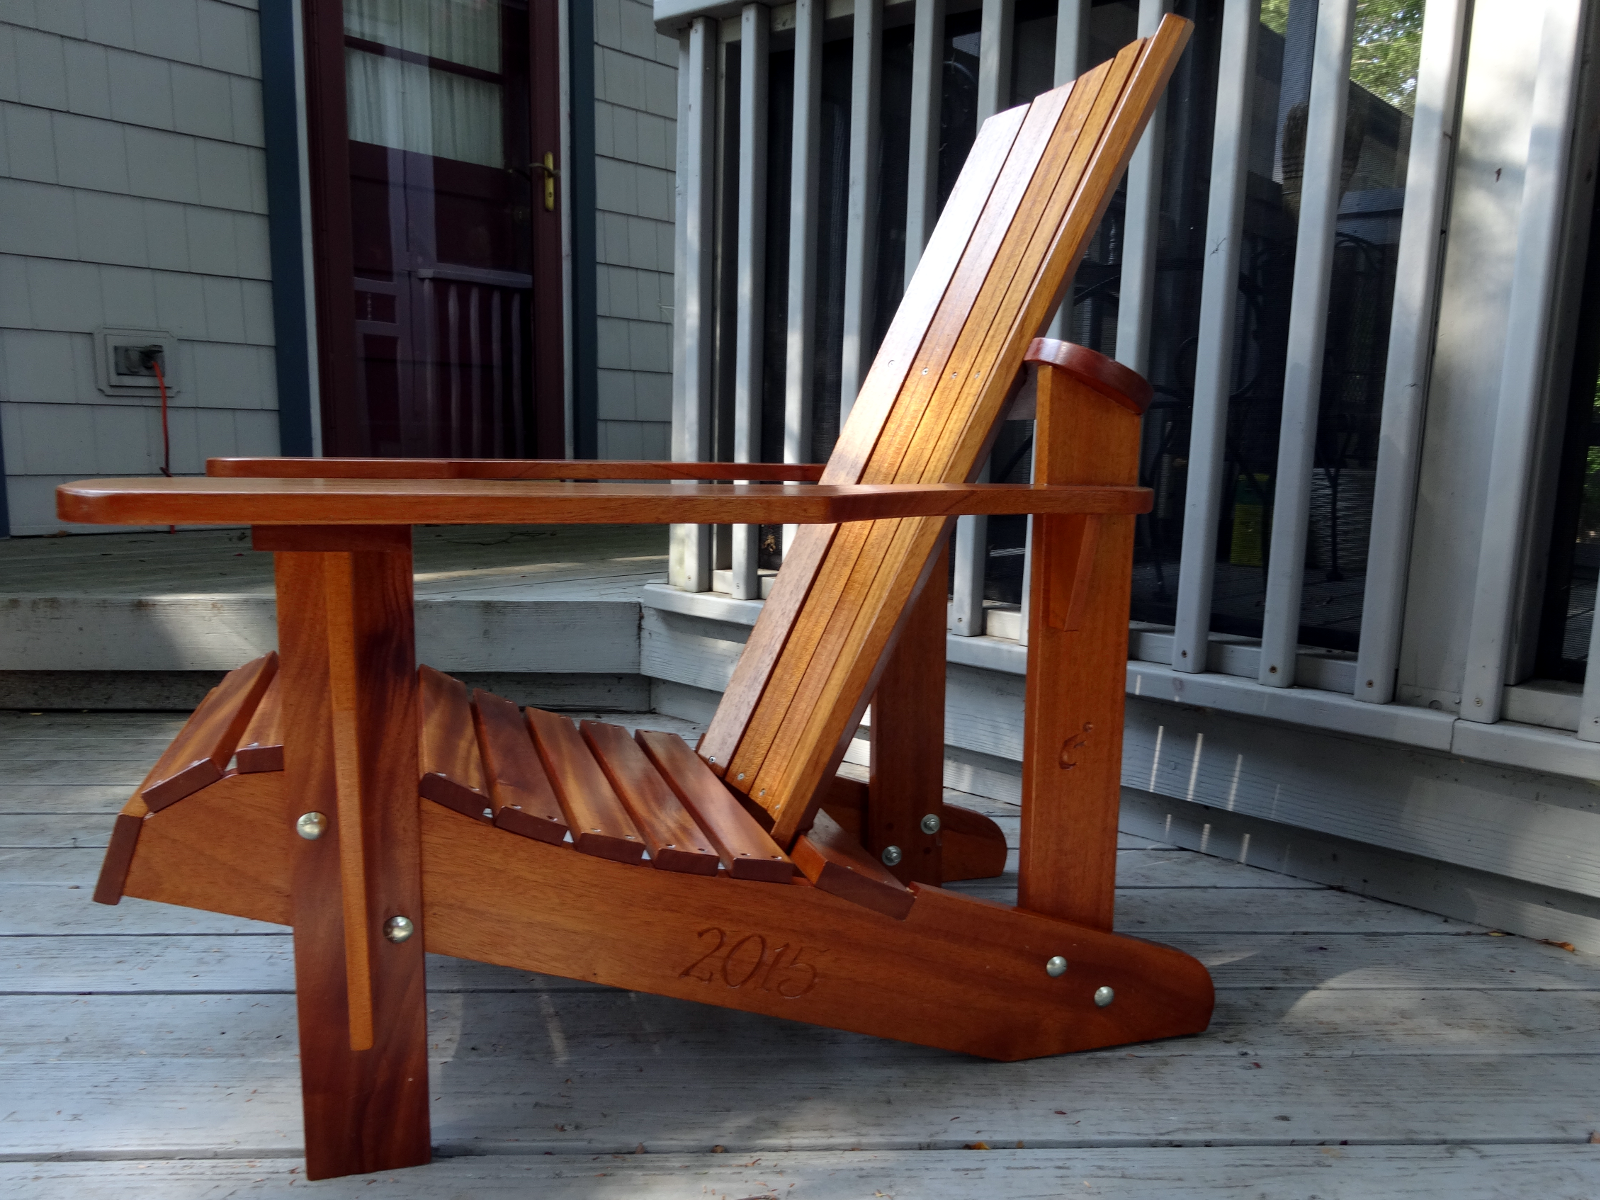
Plans are available for order, but by squinting (and imagining) a lot, I found enough detail in the low resolution online drawing. Who needs precise dimensions?

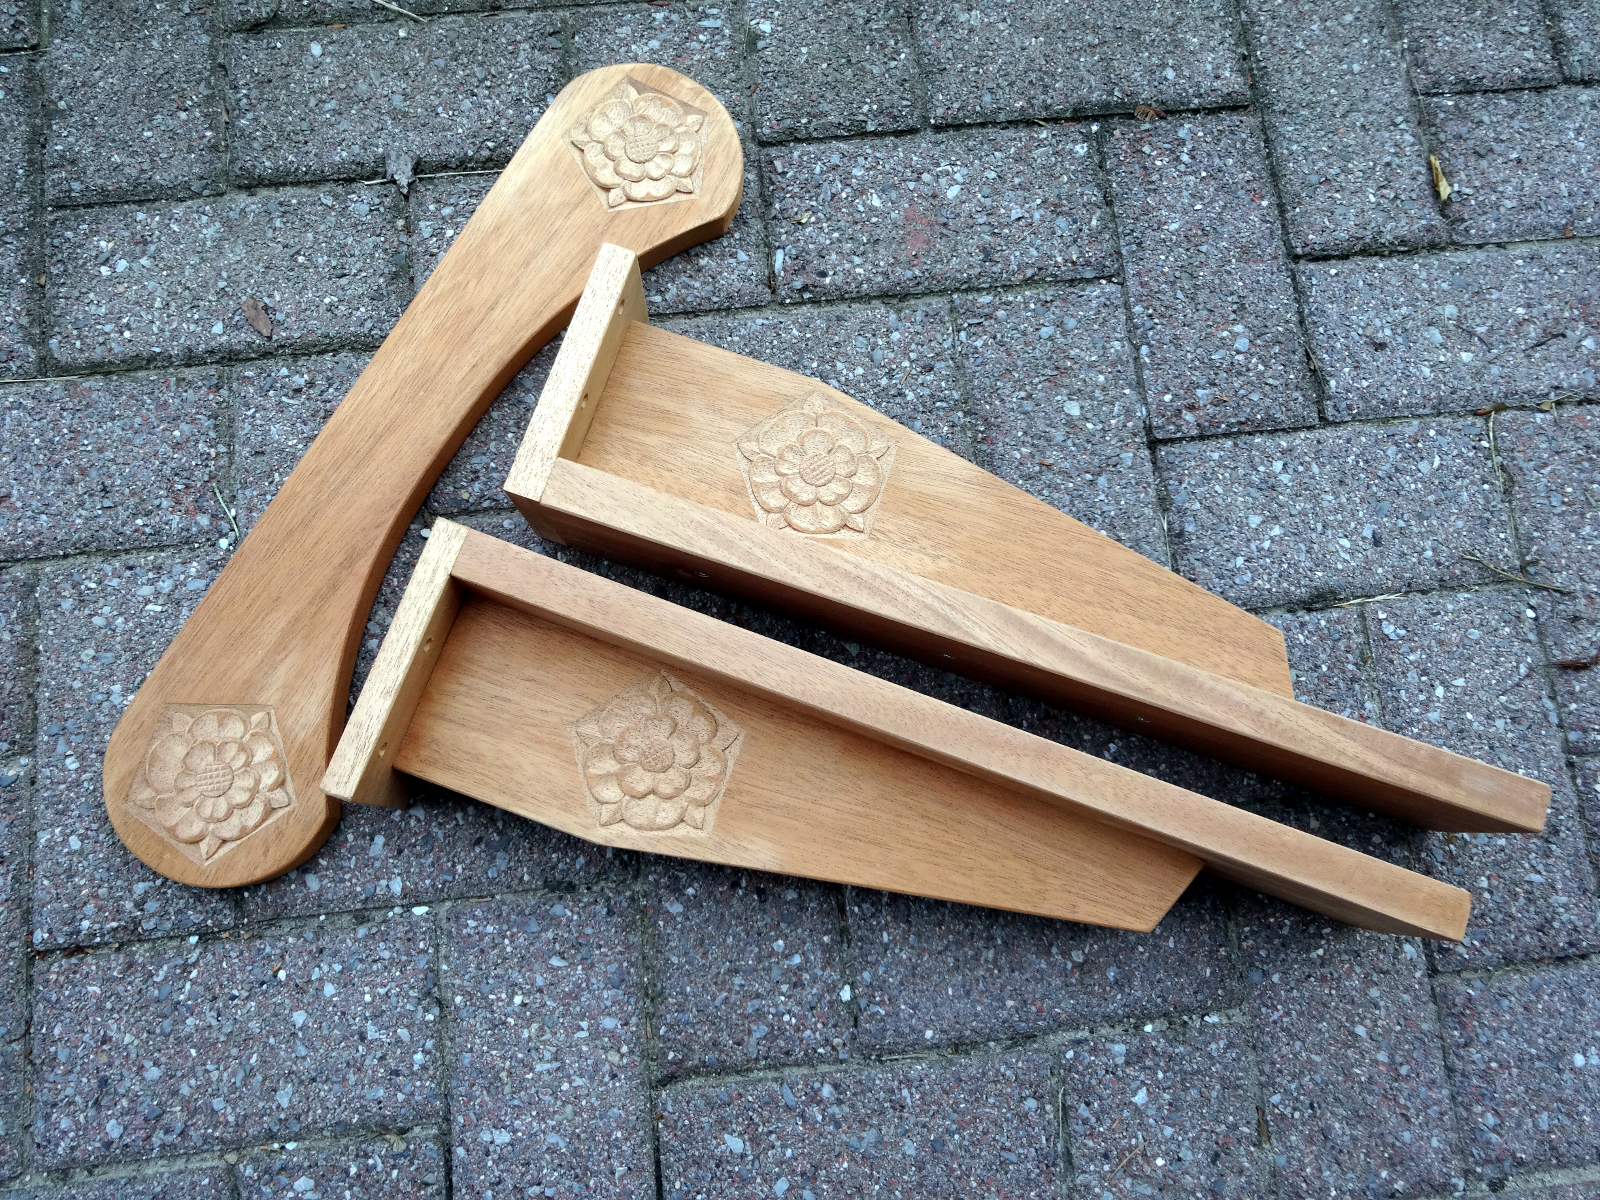
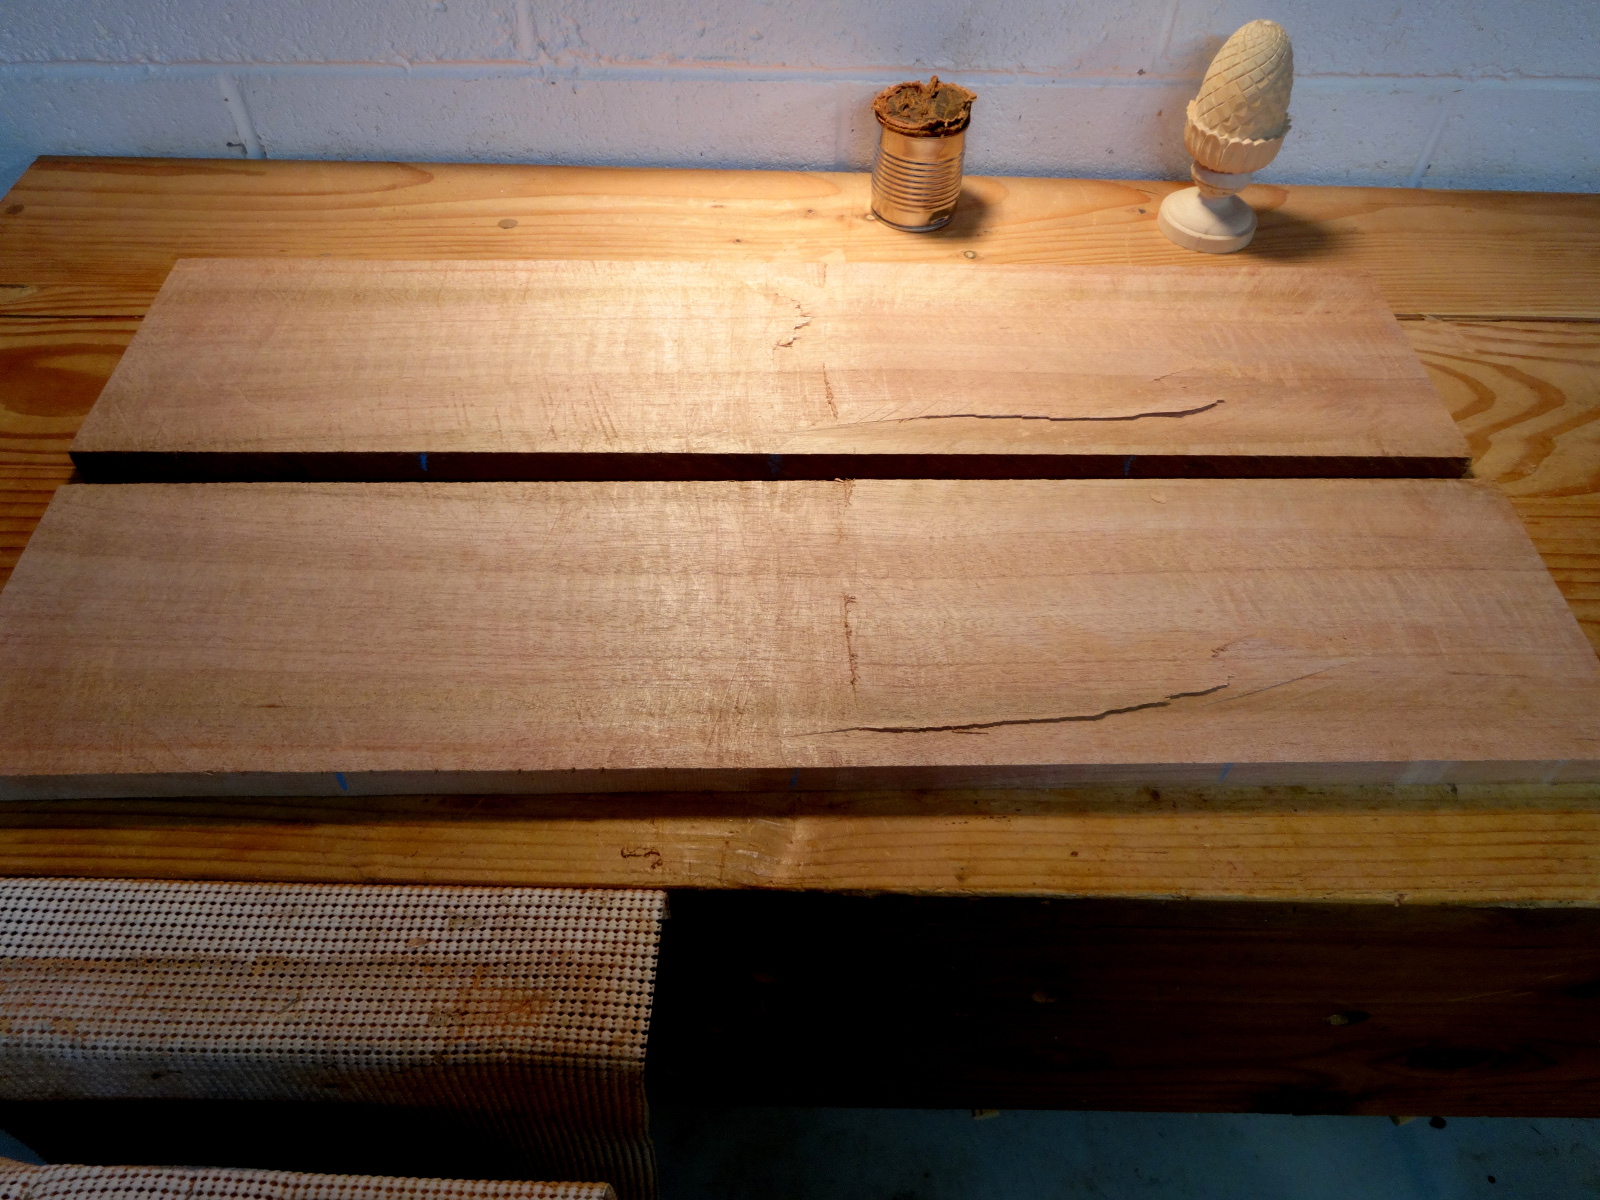
Lumber: 8/4 Mahogany (African) from Steve Wall. One 20 bd. ft. bundle will do if careful when resawing. 🙂

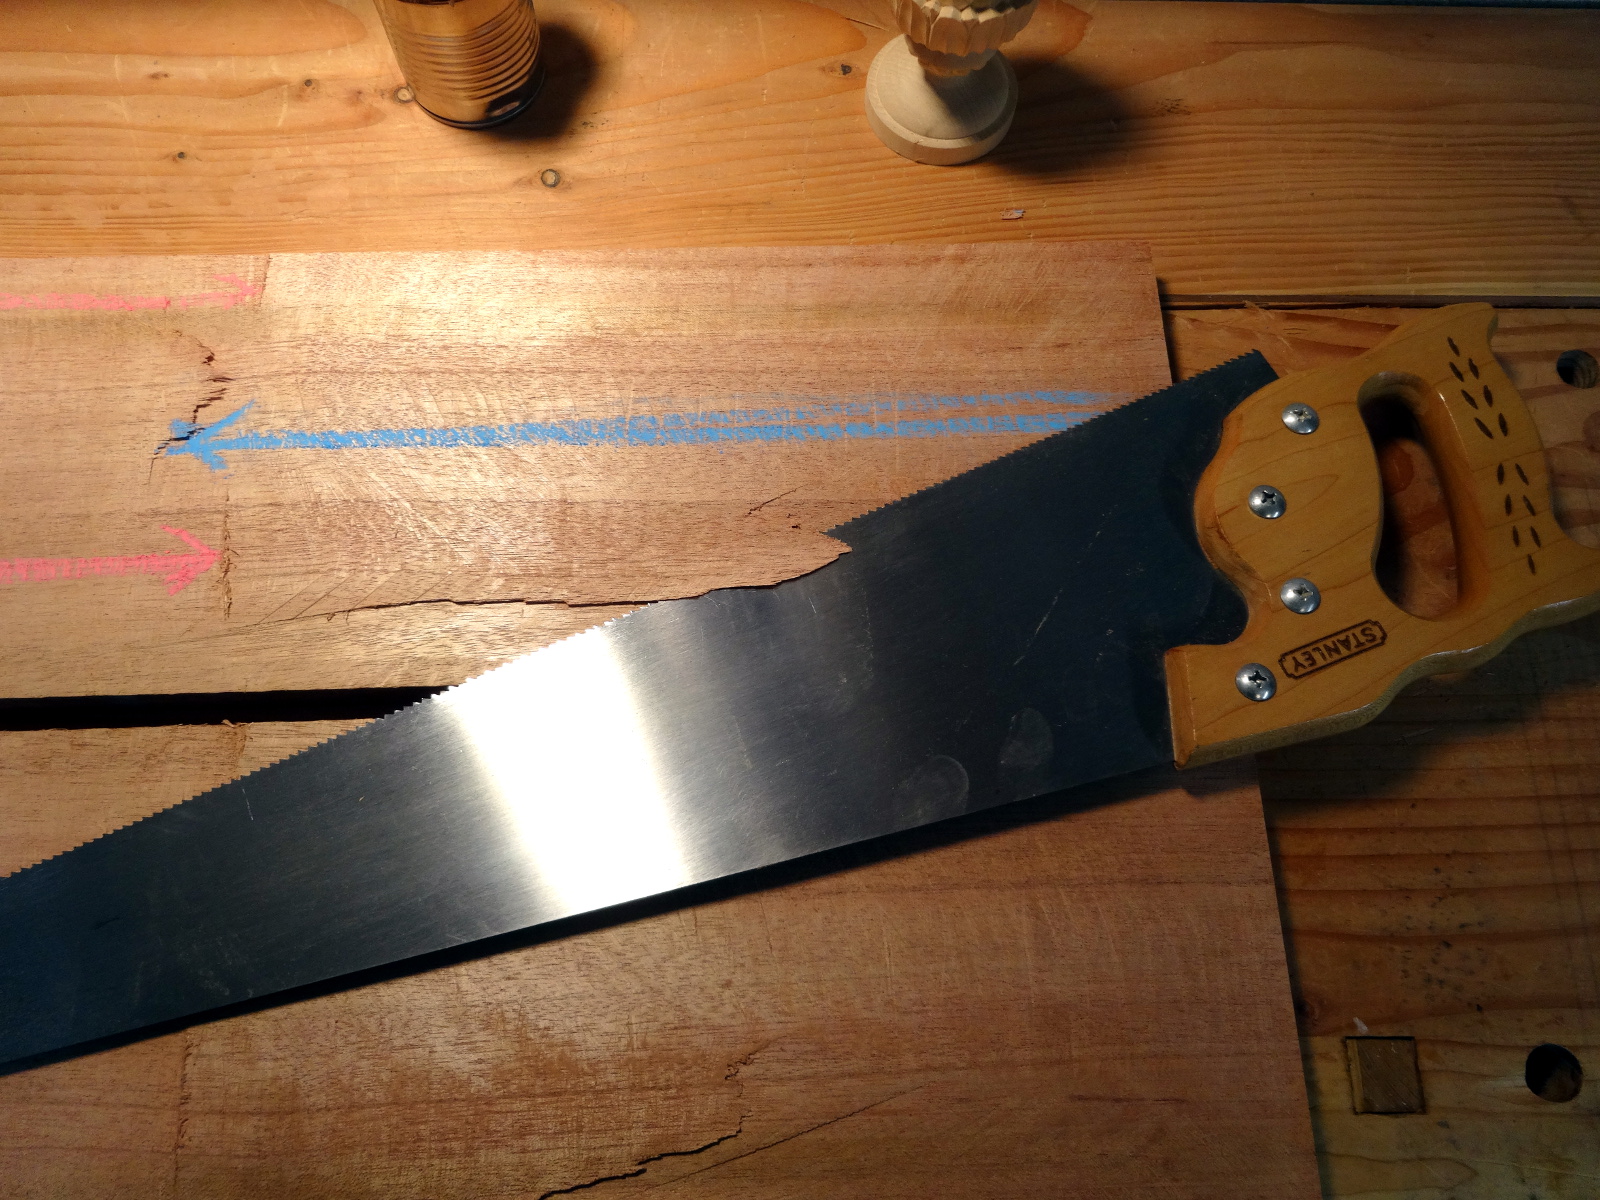
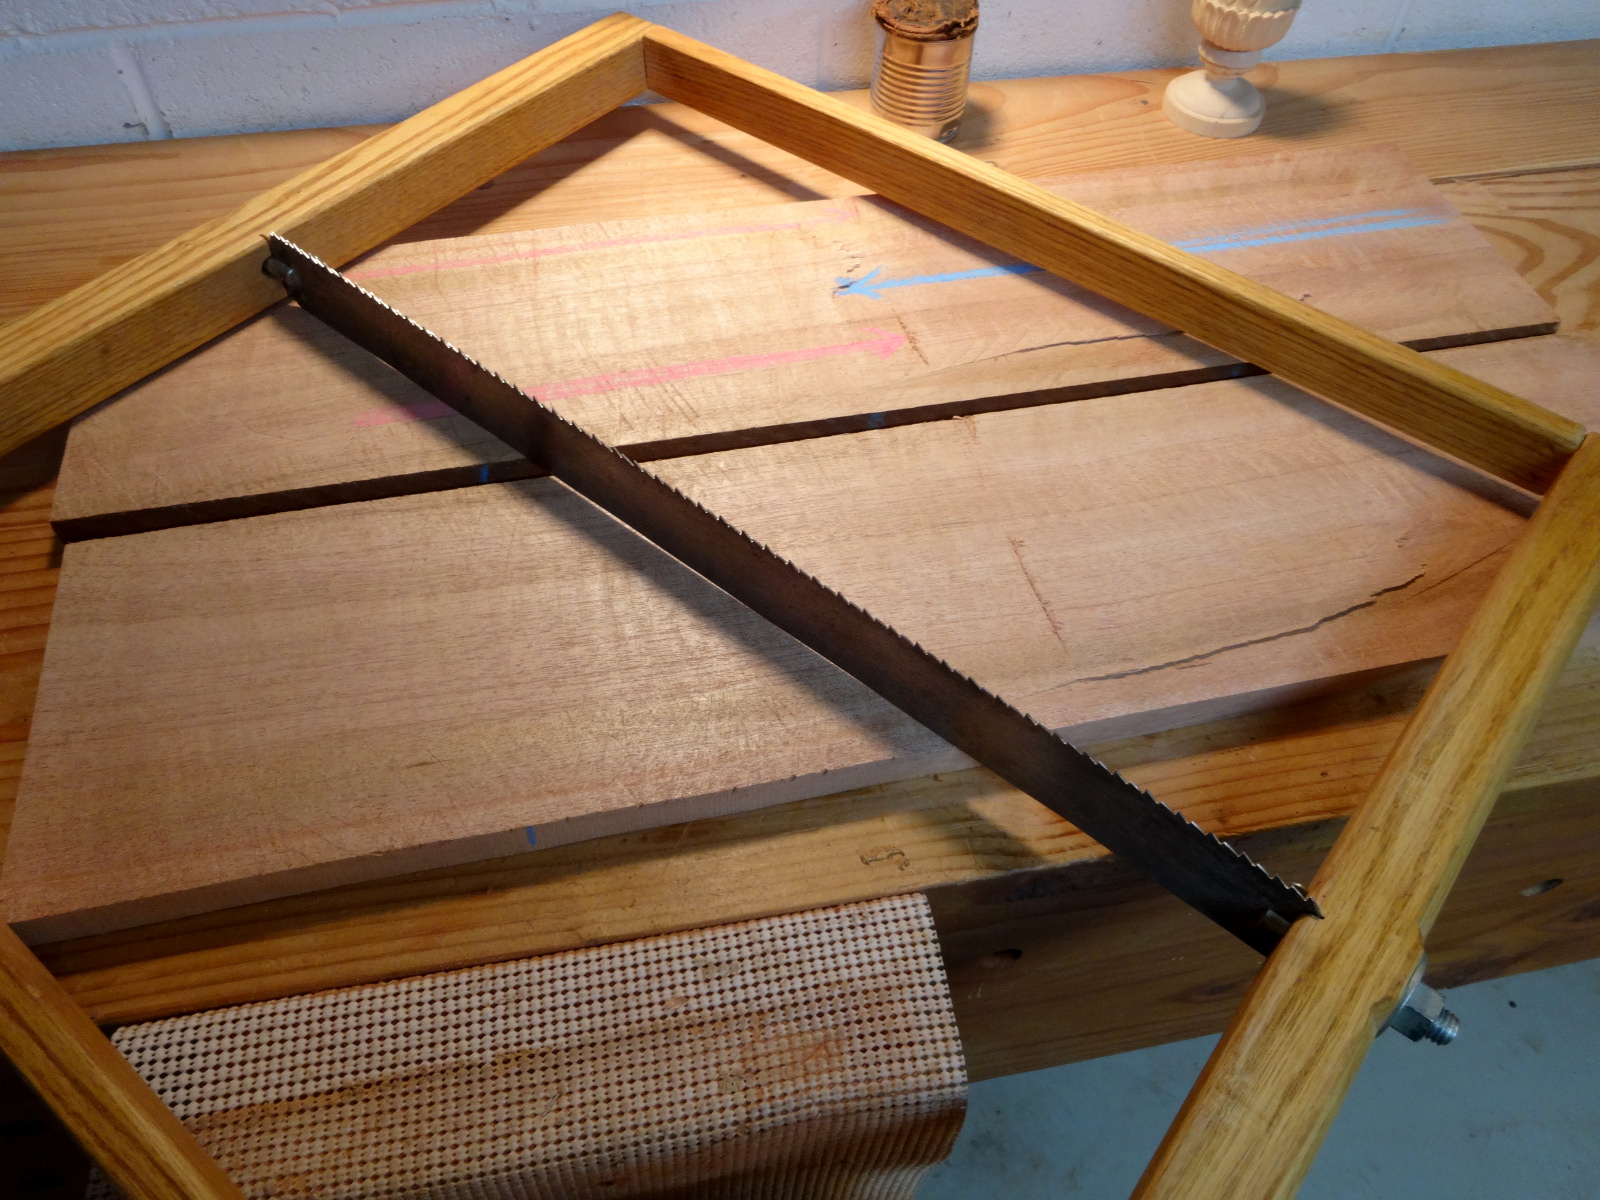
Process: No electrons (other than for lighting) were murdered in creating this chair. carvings on the chair legs
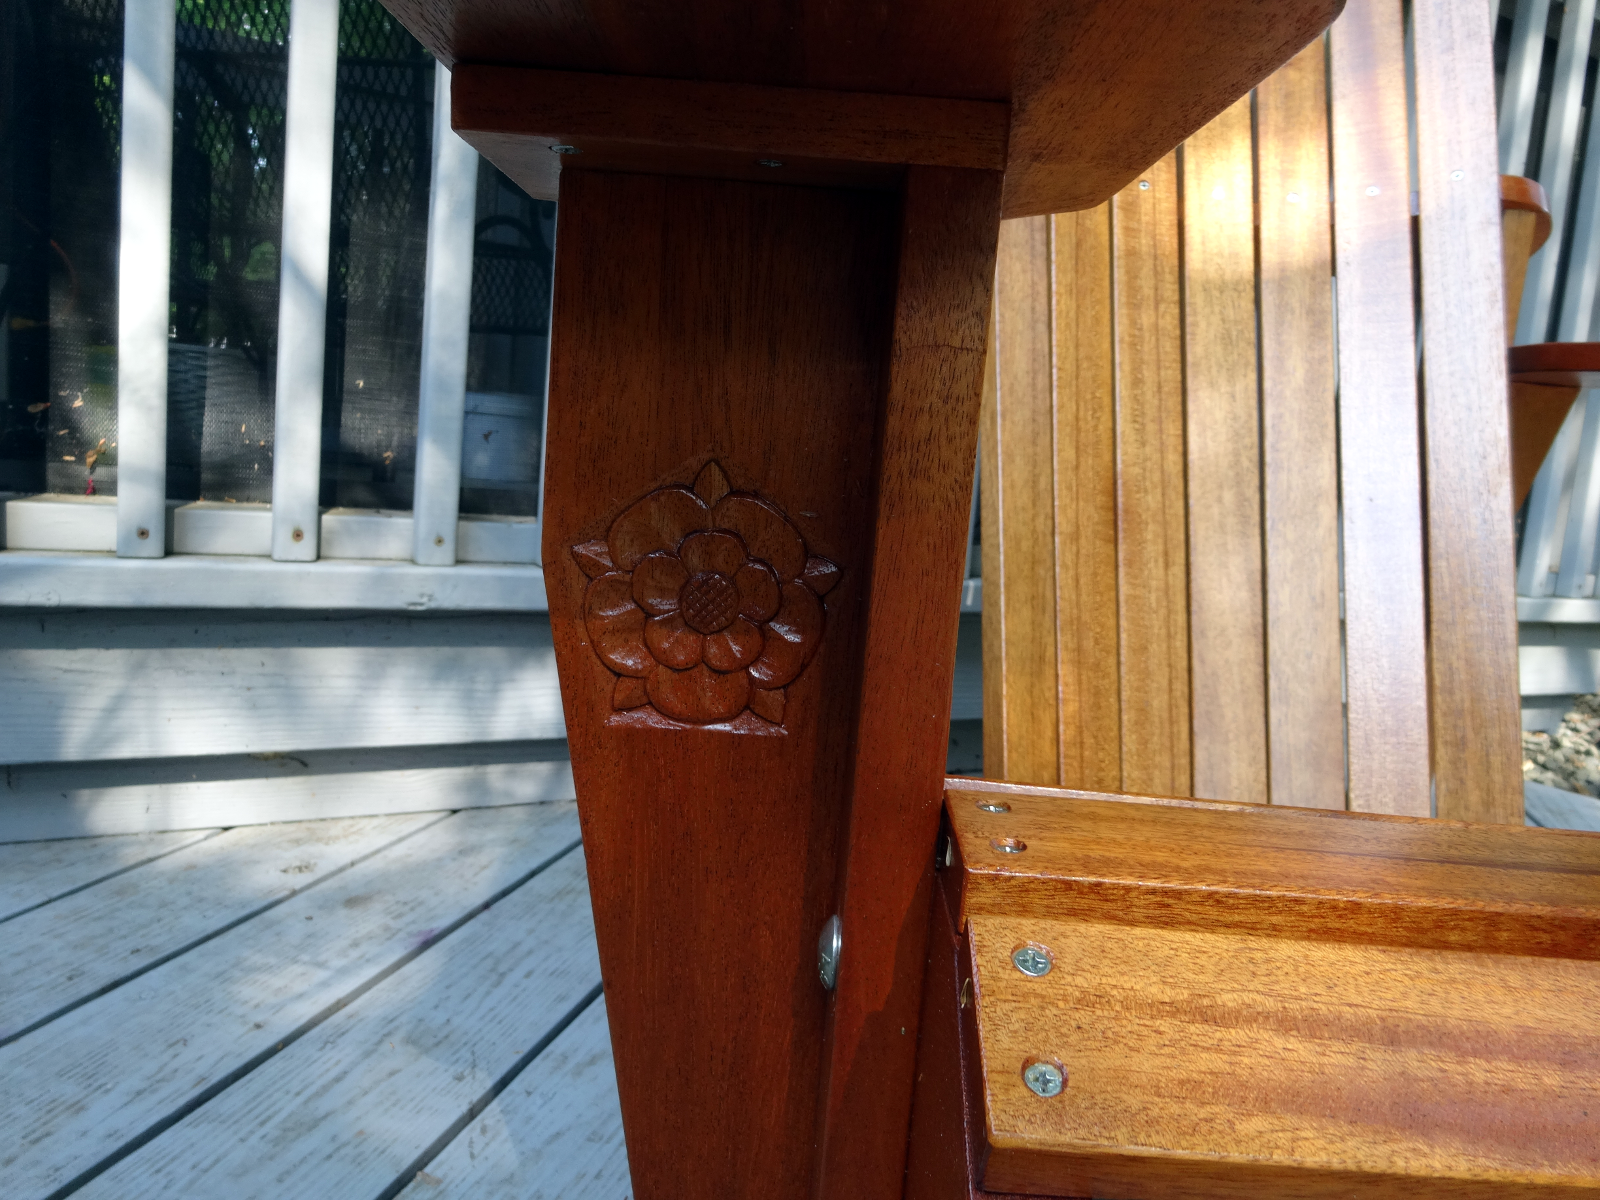
Nor were numerous photos taken along the way. It’s a simple one-day project, right? I resawed the 8/4 stuff into boards of two thicknesses, approximating 1″ and 3/4″. From those, I hand sawed all of the parts. I used the saw and chisel technique on all curves, and then faired them with a spokeshave. I drilled the bolt holes with a simple brace and Jennings bit, then the bazillion screw holes with my eggbeater and Fuller bits which drill a tapered hole and countersink all in one go.

Carvings: Carvings on the back of the chair
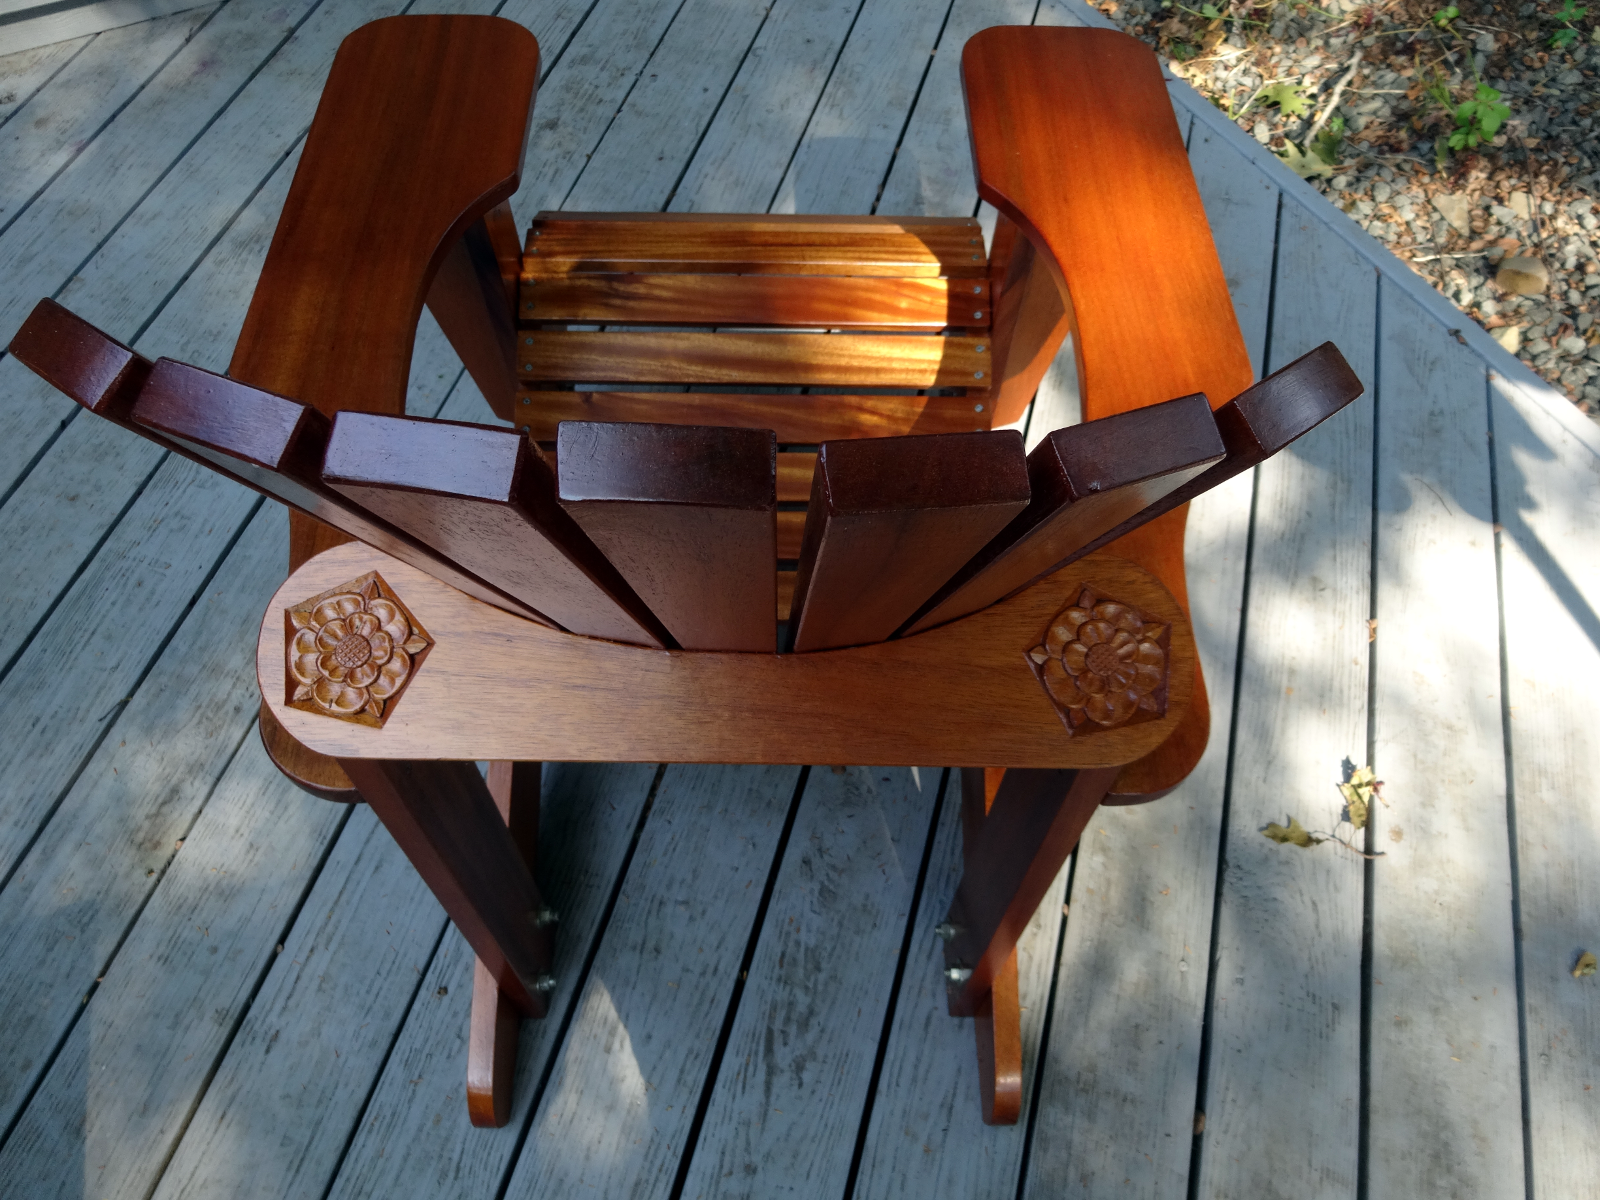
Everything I make these days carries one or more carvings. Carving is what I enjoy most. The rest of woodworking is to make something that supports a carving. This chair has 4 Tudor Roses adapted from Mary May’s Tudor Rose lesson. It’s not that there’s any commonality between Tudor Roses and Adirondacks. It’s just that I like them. Add in a little bit of lettercarving with a year mark on one leg, and I’m delighted.

Finish: Three coats of Minwax Helmsman Semi-gloss spar varnish. I used to hate brushing on a finish … and I have no place where I can use any sort of spray. This was one of the first finishing projects I actually enjoyed. Two reasons: getting the work at a comfortable height (saw benches) and using a very good Purdy 1″ soft bristle angle brush.

Once done, it “sits” well, very comfortable indeed.

Filed Under: Woodcarving, Woodworking

Resawn lumber – Work in progress

July 16, 2015 by Bob Easton 4 Comments

Did you know that mahogany, like Cherry and I’m sure other wood types, darkens when exposed to light? That if you stack up a bunch of pieces and come back to them 2 months later, you’ll find lighter silhouettes of the smaller pieces that were placed atop others?

Yeah, that’s what I get for doing other things… More sunlight will fix them.

All the parts for the project were cut, shaped, and had their surfaces smoothed long ago. I deferred assembly of this “you can do it in a weekend” project until the carvings were done. Now, what’s my excuse?

photo of project parts - carved with tudor roses

The carvings are Tudor Roses. Mary May has a lesson that shows how to carve them.

Filed Under: frame saw, resawing, Woodcarving, Woodworking

Resawing – Dueling Saws

April 8, 2015 by Bob Easton Leave a Comment

This was a purposeful test: Two choices to learn from.

a comparison of 2 cuts

When starting this batch of resawing (mahogany for an Adirondack chair), I reasoned that using the plain ole rip saw would be OK because it was lighter and easier to handle than the 24″ frame saw. At one point I did show the frame saw to a cut in process but quit because the frame saw had decidedly stronger set and I didn’t want to resaw a resawing cut. Then, along came comments from others about frame saws. So, out it came for the second half of a board.

The saws:

The plain saw is a Stanley rip saw of 1970’s vintage, 26″ long, filed at 5 ppi, sharpened just before starting this recent work. Plate thickness is 0.034 inch. Weight: 1 and 1/2 pounds.

The frame saw is one I built from a Disston 1897 saw cut down to 24″ It is filed 4 ppi and I’m not sure when last sharpened. It has an identical plate thickness of 0.034 inch, and something like 50% more set than the plain saw. (I remembered it as 5 ppi, but it really measures 4 ppi.) Weight: 5 pounds.

The lumber for this comparison is an 8/4 piece of mahogany, 7 and 1/4 inches wide and 32 inches long. The resawing line is right down the middle of its thickness.

shallow angle cut - bad idea

I sawed the first half with the plain saw (marked with blue chalk in one of the pictures). I added something different to the routine … cutting in from the end at a shallow angle. It was not easy cutting from that direction and I broke the “manhandling” rule. Bad idea! I knew from the feel of the saw that the cut had gone a little wrong, but couldn’t see inside to know how it had gone wrong.

When it came time to cut from the other end, I switched to the frame saw. I kept to the routine prescribed in the previous post, without the shallow cut from the end: the saw didn’t fit well in that position.

The difference is remarkable! While heavier, the weight of the saw makes a bigger difference than I imagined it would. The combination of its weight and slightly stronger set made for both smoother sawing and faster sawing. It was almost twice as fast as the plain saw! Better yet, it has far less tendency to wander. The blade, being held taut from both ends has much less opportunity to go its own way.

my 24 inch frame saw

More points to add to the learning:

  1. ALWAYS resaw with the frame saw, no matter what the size of the workpiece. Don’t be tempted to say, “Aw, it’s small, the hand saw will do.” Use the frame saw EVERY time. Even though heavier, the weight of the frame saw is an advantage and the blade under tension significantly adds to accuracy.
  2. Avoid the shallow, oblique, cut that has too little guidance and too easily goes astray.
  3. Oh yeah, don’t manhandle it!

Filed Under: frame saw, resawing, Woodworking

  • « Go to Previous Page
  • Page 1
  • Interim pages omitted …
  • Page 10
  • Page 11
  • Page 12
  • Page 13
  • Page 14
  • Interim pages omitted …
  • Page 32
  • Go to Next Page »

Primary Sidebar

Footer

Recent Posts

  • New Frame Saw / Scroll Saw
  • Lamppost Sign
  • Goodbye PayPal – Goodbye Bob’s eBooks
  • Anarchist’s Workbench is Done
  • Why we keep offcuts…

Categories

  • About
  • Artwork
  • Boatbuilding
  • Boating
  • bowl carving
  • Boxmaking
  • Clocks
  • Drawings
  • eBook
  • etude
  • Eva Too
  • Eva Won
  • Fiddlehead
  • Fiddlehead model
  • Flying
  • frame saw
  • gilding
  • green woodworking
  • Grinling Gibbons
  • Guns
  • Hand tools
  • Humor
  • kerfing plane
  • Lettercarving
  • Mill Creek 13
  • Model building
  • Power tools
  • Rant
  • resawing
  • scroll saw
  • Shopmade
  • sign painting
  • Stonework
  • Swimming
  • Technology
  • The Wall
  • treadle lathe
  • Uncategorized
  • VSD
  • Woodcarving
  • Woodturning
  • Woodworking
  • workbench

Other stuff

  • About
  • Contact
  • Privacy Policy

Copyright ©2024 · Bob Easton · All Rights Reserved