• Skip to primary navigation
  • Skip to main content
  • Skip to primary sidebar
  • Skip to footer

Bob Easton

Chocolate powered woodworking

  • Home
  • Grinling Gibbons Tour

Woodworking

Anschütz 1827 Custom Stock

August 16, 2010 by Bob Easton Leave a Comment

Nope, not a boat, but a very special project.
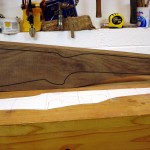
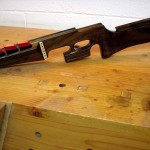
photo of a piece of walnut
Walnut blank – the seller draws outlines on the blanks.
photo of completed stock
Done – ready for shipping

My daughter in law decided to ski a biathlon this coming winter, and started training some months ago. The biathlon is a combination of cross-country skiing and shooting, a fascinating competition. She will likely use an Anschütz 1827 target rifle, the gun that 95% of all biatleletes use. She wants a “dummy” gun to carry while training, and one that can also be customized to fit the way she wants to hold and use the gun. We decided to make a custom stock that could be modified as wanted.

Maybe there will be a more detailed post someday, showing some step-by-step work. For now, we have beginning and ending photos.
Filed Under: Guns, Woodworking

Pencil Box

April 24, 2010 by Bob Easton 11 Comments

Inspiration from Roy Underhill, Kari Hultman, and Dan Lauder. THANKS to all! (click any image for a larger version.)

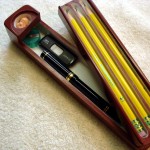
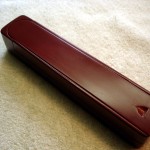
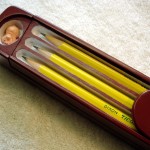
photo of closed box photo of box with sliding lid removed photo of fully open box

Roy Underhill, author, Colonial era woodworking master, and proprietor of The Woodwright’s Shop, opened his 2009 season with the making of a palm sized grease pot that used a sliding lid and dovetail latch to secure its contents. Some of us live in parts of the country “too sophisticated” to carry a back woods woodworking show on TV. (New York City’s last country music radio station shut down in April of 1983, giving way to light jazz or some other kind of funk.)

So, along comes Kari Hultman, The Village Carpenter, to tell us about her replica of Roy’s little grease pot. Like Kari, I had that project on my to-do list. She got there first with a very nicely made box and some great construction photos.

It was Dan Lauder, and an approaching birthday, that moved the project to the top of the list with his discovery of an 1879 pencil box. While a bit different than the grease pot, the pencil box shared a similar 3 part construction of interlocking parts that qualifies it, like the grease pot, as “clever.”

The lid slides in a dovetailed track. Sliding it out reveals the top tray. That action also unlocks the top tray so that it can swing sideways revealing the bottom of the box. As an aside, the box that Dan discovered had a little pocket in top layer. I don’t know it’s purpose, but in my version, that pocket is now a resting place for a good luck charm, the happy little pig.

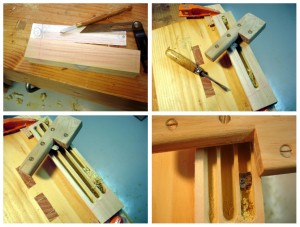
photo collage of making the pencil groovesOK, let’s look into how it was made. The lumber was stuff on hand, some tulip poplar. More about that later.

That roughly drawn sketch was my only “plan.” Like Kari, I used only hand tools. Unlike Dan, I don’t have a huge choice of planes, so I routed the pencil grooves with a scratch stock. It was slow going, but worked out OK. It needed more than one scratch. Use your sharp eyes to find my first error. It’s in the very first photo.

photo collage of making the lidThe sliding lid is about 1/8 inch thick. A router plane provided the space for it, and another small scratch (no photo) made the dovetailed tracks.

photo collage of making the bottomThe bottom, and the piggy’s nest, were excavated with forstner bits. Back to the router plane for cleanup. The last photo in this sequence shows that error corrected.

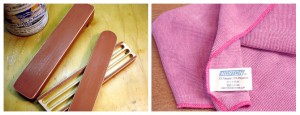
photo of raw edges and tack clothFinishing took more time than building. That’s because I don’t have a clean room for finishing (blame the tools) and I used a very slow drying paint. I wanted to use the same color as the gift recipient’s (not-yet-done) boat, a slow drying enamel. I call it “siren paint,” because as it dries it is constantly singing “Come to Me” to every dust bit in the building. To counteract the dust, I used a hand rubbed finish technique. After a few coats, that technique highlighted the fact that sharp edges need to be rounded to hold paint. So, correction and more coats. As an aside, the Norton tack cloth is a very handy aid. No more waxy cheesecloth.

Briefly, my hand rubbed finishing regime included: wet sanding with 600 grit, fine sanding with 0000 steel wool, rubbing with pumice, then with rottenstone, and lastly several layers of paste wax to bring to a high satin sheen. For service veterans, “spit shining” is the paste wax method that works best.

Lessons Learned

  • Double, triple, quadruple check that angled cuts lean the right way.
  • Hardwood would have been a better choice and avoided a few little “dings.” A lot of labor gets invested, and why invest in anything less than the best quality wood?
  • Double, triple, quadruple check that angled cuts lean the right way.
  • Make the sliding top thicker to lessen bow and give more “meat” to the dovetails.
  • Double, triple, quadruple check that angled cuts lean the right way.
  • A shellac sealer would have been better than the white sealer I used. The white really shows brightly when edge finish wears.
  • Double, triple, quadruple check that angled cuts lean the right way.
  • Slow drying paint gathers more dust than fast drying paint. (Doh!)
  • Double, triple, quadruple check that angled cuts lean the right way.
  • Finish gets really thin on sharp edges. Rounded edges hold finish much better and will wear better. I’ve often read this, but needed to wrestle with the problem myself, and ended up reshaping the work after several rounds of white undercoating showing up as I polished the finish.
  • Double, triple, quadruple check that angled cuts lean the right way.
  • Hand rubbed finishing takes a lot of time. Well actually, waiting for paint to dry firm enough for hand rubbing take a lot of time.
  • Starting 4 days before a birthday isn’t enough time when finishing alone needs 16 days.

Filed Under: Woodworking

Art Display Easels

January 16, 2010 by Bob Easton 3 Comments

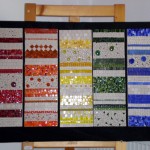
Heidi, our daughter, is a mosaic artist. She displays her artwork at a variety of places and shows, and sometime uses simple easels for display. We visited her recently and heard her complaining about needing to return some borrowed easels before the current display period ended. What to do? Her mother suggested making more easels and looked my way. … hmmm? … OK.

Heidi and her family live in Austria. Like most homeowners, they have a collection of home fix-it tools that see frequent use, but is not the sort most of us wood workers would intentionally use for a furniture building project. The alternative of retrieving tools from my shop 6000 miles away was a non-starter, as was the idea of acquiring special purpose tools for a single project. Heidi had already determined the style of easel she wanted. My decision was what kind of joinery could be accomplished with the tools at hand.

I quizzed Franz-Georg, our son-in-law, about tools as we drove to the local home center. Having helped him with certain projects at their house before, I knew about most of their tools, but not about the chisels. The “yes, we have one or two” answer made my joinery decision. Goodbye to any joinery more complex than simple half-laps.

Lumber choice was limited both by availability and cost. There might have been a hardwood supplier nearby, but we didn’t look for one, so off to the Borg we went. The Borg stores in Austria are much like here in the US and also use the color orange for their branding. Their lumber selection is similar to ours, but almost twice as expensive. The EU has had “cap and trade” for a number of years already, and it shows in price tags of almost everything. We found some very clear larch for the stiles and fir for the rails, the different wood types limited by size choices (no larch in the smaller size). One of the interesting aspects of their S4S lumber is that when it says 20mm by 80mm, the lumber is actually that size! We carried home a number of pieces 2 meters long, along with a collection of hinges, fasteners, pegs, etc.

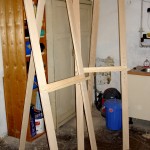
The easels are very simple, consisting of a rectangular frame for the face, a single leg in the back centered and hinged at the top. The leg extension is moderated by a brass chain that can be hooked into slightly opened eye screws. A simple shallow shelf supports the artwork and is supported by two pegs. The choice of several shelf positions is made available by a series of holes in the face stiles. These two stand 2 meters tall and 66cm wide. The width was determined by a 2 meter length of lumber cut into 3 even pieces. They look good enough to avoid detracting from the artwork, but not fancy enough to overpower the artwork. They are more stable than the loaners Heidi is currently using. Most important, she’s satisfied with them.

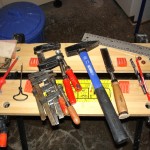
Making them teaches that something practical, useful, and reasonably attractive can be done with a minimal set of tools. I did use a couple of tailed demons. We used the side of a masonry blade in a cutoff grinder to regrind a 25mm chisel. Sort of like a high speed, no-control, two-person (one holds the grinder, the other holds the chisel), Tormek sharpener. 🙂 Having removed the dings and nicks (looks like the kids had been cutting nails with the chisels), the rest of the sharpening was done with sandpaper at 120 and 240 grit. Now you see why half-lap joinery was as sophisticated as I wanted to get. The other power tool was a drill and 10mm brad point bit used for the holes in the stiles. The photo shows the rest of the tools: a simple square, two dowel points, pencil, brad point drill bit complete with a rubber ring used almost as a depth stop, the wonderfully honed chisel, a hammer, 4 clamps, a gimlet!, a Phillips screwdriver, some sandpaper, and a Workmate bench. A little 8 inch utility handsaw failed to show up for the photo shoot. Too bad we missed it. If one avoided the kink about 3/4 an inch from the tip, some roughly precise laps could be cut, then trimmed with the chisel. I was really delighted to find the gimlet. I used it to make pilot holes for the screws that hold the hinges. One of the best tools in the collection!

Two sorts of PVA glue were available, “Classic” and “waterproof.” I used the Classic, thinking it likely to be the stronger. I originally considered doweling the joints for added longevity, but rejected the idea on considering how to flush cut the dowels without making an ugly mess of things. Finish consisted of sanding down to 240, edges rounded over, pseudo chamfered, and a few coats of a clear substance similar to poly.

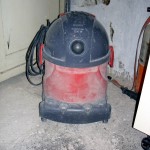
Workroom cleanup fell to the really cute R2D2 shop vac. Unfortunately, he needs a new bag and didn’t suck.

Filed Under: Woodworking

  • « Go to Previous Page
  • Page 1
  • Interim pages omitted …
  • Page 23
  • Page 24
  • Page 25
  • Page 26
  • Page 27
  • Interim pages omitted …
  • Page 32
  • Go to Next Page »

Primary Sidebar

Footer

Recent Posts

  • New Frame Saw / Scroll Saw
  • Lamppost Sign
  • Goodbye PayPal – Goodbye Bob’s eBooks
  • Anarchist’s Workbench is Done
  • Why we keep offcuts…

Categories

  • About
  • Artwork
  • Boatbuilding
  • Boating
  • bowl carving
  • Boxmaking
  • Clocks
  • Drawings
  • eBook
  • etude
  • Eva Too
  • Eva Won
  • Fiddlehead
  • Fiddlehead model
  • Flying
  • frame saw
  • gilding
  • green woodworking
  • Grinling Gibbons
  • Guns
  • Hand tools
  • Humor
  • kerfing plane
  • Lettercarving
  • Mill Creek 13
  • Model building
  • Power tools
  • Rant
  • resawing
  • scroll saw
  • Shopmade
  • sign painting
  • Stonework
  • Swimming
  • Technology
  • The Wall
  • treadle lathe
  • Uncategorized
  • VSD
  • Woodcarving
  • Woodturning
  • Woodworking
  • workbench

Other stuff

  • About
  • Contact
  • Privacy Policy

Copyright ©2024 · Bob Easton · All Rights Reserved