• Skip to primary navigation
  • Skip to main content
  • Skip to primary sidebar
  • Skip to footer

Bob Easton

Chocolate powered woodworking

  • Home
  • Grinling Gibbons Tour

workbench

Resawing again – Problems and Solutions

April 6, 2015 by Bob Easton 22 Comments

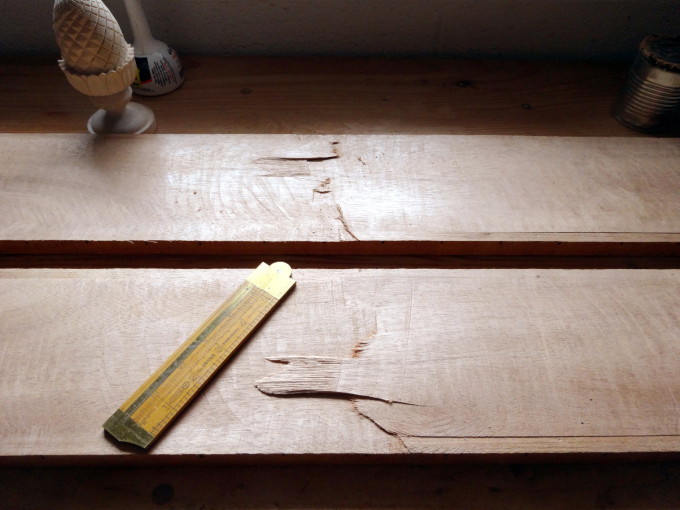
Learning to resaw well has been a long journey. With all the resawing I’ve done, I’ve found it’s very easy to end up with something like this: a dished out area in one board and an matching hump on the other board. That kind of result is rather minor on small boards, or with stock where there’s ample room for error. But as board sizes increase, so do the probabilities and the scale of the mishaps. How do these things happen and how can they be avoided? I picked up some useful suggestions at the School of Hard Knocks.

photo of dished cut

Long ago, I built  a couple of wonderful small boats. For one of those boats, I made a frame saw and resawed a LOT of cedar into very long planks. (4/4 live edge white cedar, up to 10.5 inches wide and 16 feet long). Minor mishaps there were no problem because the raw boards had more than enough material to produce two 5/16 inch thick boards.  More recently, I’ve resawn cherry and walnut, but on a much smaller scale for desk boxes. Smaller pieces mean less opportunity to go astray.

Now, I’m working on something larger than desk boxes and smaller than boats. My lumber for this project is 8/4 African mahogany that varies from 6 inches wide to 10 inches wide. I bought this lumber from Steve Wall Lumber in Mayodan, NC. They have 20 board foot bundles that are packaged for delivery by FedEx. I bought two bundles and am delighted with what Wall Lumber delivers. Both bundles contained clear lumber, S2S, in generous widths, and easily 20 bd. ft. No end checks, splits, knots or other defects. None! The only one complaining is the FedEx delivery guy who carries the 62 pound packages up our steep driveway. (Takes too much time to get out the hand cart.)

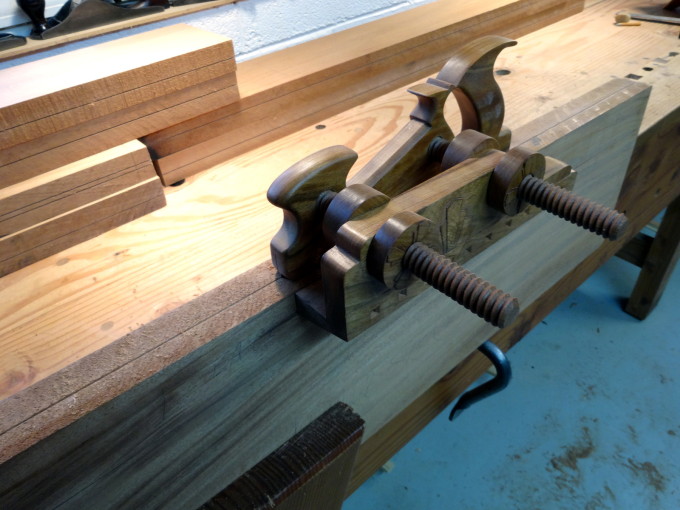
setting a kerf

The project calls for boards 1 inch thick and 3/4 inch thick. With careful resawing, I can get one of each out of an 8/4 board. OK, scant 1 inch and scant 3/4 inch That’s plenty sturdy enough for a project that is not super critical about board thickness. Scant thicknesses will work. But, there’s not much margin for error. Which also means, no room for going astray. However, the boards are long, up to 4 feet, giving yet more opportunity to go astray.

OK. What goes wrong? What causes the problems? In a single word: inaccuracy. BTW, I used my kerfing plane to establish a 1/2 inch deep kerf around all edges of these boards. That kerf is a lot better at guiding the saw than is a pencil line.

Problems

Inaccuracy in resawing can come from a lot of things:

  1. Sawing too long from one position.
  2. Guiding the saw instead of letting the kerf guide the saw.
  3. Being too aggressive with the saw — “manhandling.”
  4. Impatience.

No matter what the cause, here’s what happens. Resawing is always done a little from one side, then a little from the other. Switching back and forth frequently eliminates irregularities before they become bothersome. Imagine the cut becoming off by a mere fraction in one direction or the other. Sawing too long from one side lets the problem grow. Then, when you move to the other side, the saw will take the path of least resistance, through that inaccurate kerf. This results in the saw bowing within the cut, creating a dish on one side of the cut. The longer the sawing goes with a bowed path, the deeper the dish gets. Since you can’t see inside the board, the only external awareness you have about this happening is increased friction. It sneaks up slowly, and if you’re manhandling the saw, or holding it with a death grip, you won’t notice the increased friction until it’s too late.

Once a bowed path gets established inside the board it is almost impossible to correct. So, don’t let it get started.

Frequent direction changes are the most important factor for success. Aligning yourself to the work is equally important. As an aside, unlike the boat lumber that I did with a frame saw, I’m cutting this lumber with a common rip saw. Nicely sharpened, but nothing special. It is lighter than the frame saw and has a broader blade that (one hopes) helps keep it moving straight. No matter which saw, the body and saw both have to line up precisely with the cut line.

Stance: I face the work with my shoulders square to the work piece, so that both arms can move as one. I spread my feet about a shoulder’s width distance apart, but position them in a line with the cut. I’m right handed, and place the left foot forward, with the toe exactly in line with the cut. The right foot is back. Why? So I can use the bigger leg muscles to power the work. Using the legs to rock back and forth is far less tiring than just the arms alone, and leads to better accuracy. In fact, when properly lined up, one could pin their elbows to their side and let the legs do all the work.

BIG problem source: Maintaining this stance from both sides of the cut is essential. Not keeping this stance on both sides of the cut was the biggest cause of my problems for a long time. There’s plenty of room to take this stance from the end of the bench. But walk around to the other side of the board and the bench is in the way. Modifying the stance to accommodate simply didn’t work.  So, that meant turning the work piece so I could always work from the end of the bench. Open the vise, turn, close the vise, saw, open the vise, turn, close the vise, saw. Yeah, it was too much trouble to turn the board as often as I should have. Instead of turning, I was spending too much time sawing from one side.

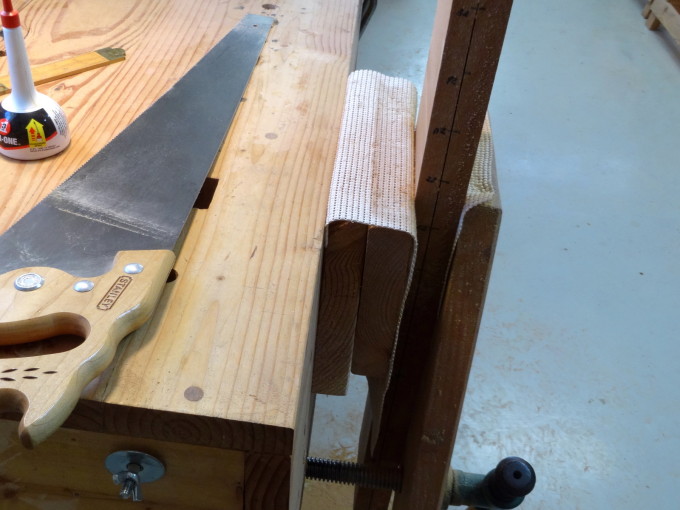
added blocks

Often, way too much from one side. Very slight wanderings were not being quickly corrected from the other side. They added up… until…

Fix: I solved that problem by adding blocks to offset the work piece from the bench. I started with one 2-by and added a second one later. (They have pegs fitted into holes in the face of the bench so they can easily be added to the vise space.) Bingo!!! That provided enough space to maintain the correct stance from either side of the board. No more need for turning the work piece. It stays in the vise and gets approached equally well from both sides. Now, it’s much easier to change directions frequently, as frequently as 25-30 saw strokes at a time. The only need to open the vise now is to raise the work piece as the cut progresses.

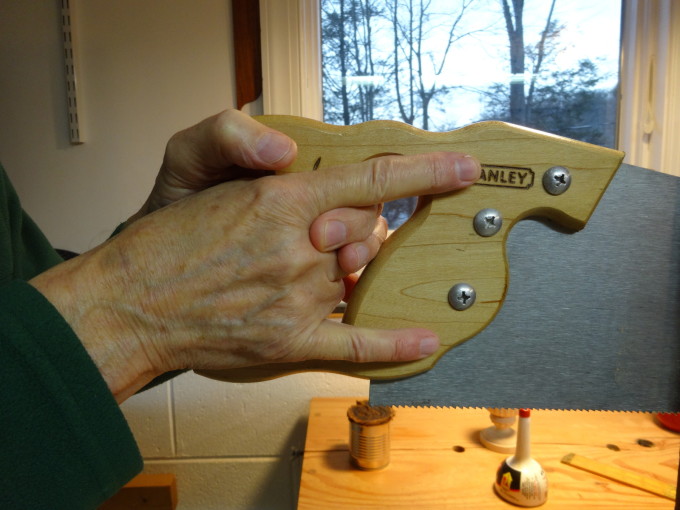
holding the saw

Holding the saw: How to hold the saw is almost as important as stance. The operative word is “loose!” I hold the saw loosely enough that only the webs of my thumbs push forward and the inner parts of my fingers pull back. The saw handle is free to move within my grip. Why? That method provides the least “guidance” to the saw. It let’s those kerfs do their work. Holding the saw too tightly leads one to “manhandling” the saw and diverting it’s path. Holding the saw loosely also makes it easier to feel friction increasing, to know about an oncoming bowed path before it’s too late. Over time, I’ve found a comfortable grip with only 2 fingers of each hand in the handle’s hole. Index fingers and pinkie fingers point toward the blade: same on each side. It is a grip that is very balanced, one that prevents favoring one side over the other and keeps the blade nicely centered in the kerf.

Changing directions: Cutting in “sets” of about 30 strokes from one side and then a set of about 30 from the other side has given me the most accuracy.

Cutting angles: I’ve tried many different approaches. The “cut toward the center from all corners” approach works well for pieces that are almost square. For long pieces, I cut with the saw’s tooth line running at 90° across the board … mostly. The majority of the strokes are straight across the board. But for 10 strokes of each “set,” I drop the handle stroke by stroke until the tooth line is at 45°, then another 10 to 12 at 30°. This deepens the kerf line gradually and accurately.

Keep the cut line high: By keeping the cut line about chest high, the arms are less inclined to do the hard work, and thereby less likely to push the cut astray. Keeping the cut high almost forces using the legs, and when done this way the arms can be kept even and the saw centered on the kerf more easily.

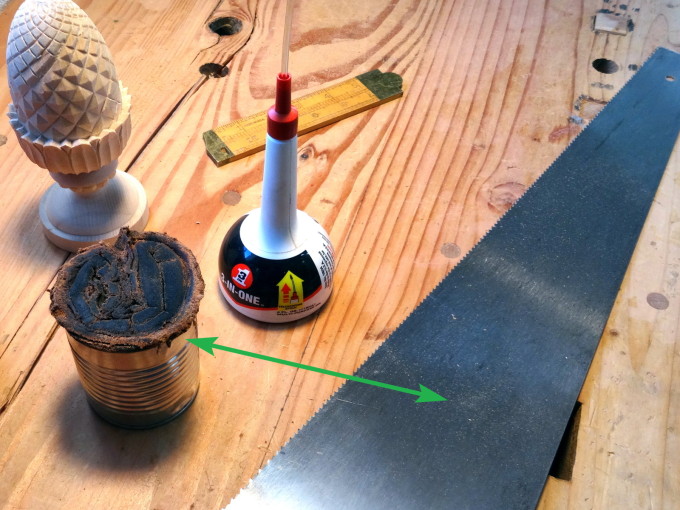
oil-can

Oil the saw: That’s a small tomato sauce can with a cloth rolled up inside it. It’s soaked with light synthetic oil (3-in-one). A couple of quick swipes on each side of the saw after every few direction changes keeps the saw smoothly gliding along.

Take a break: Sawing too long makes one tired. Tiredness leads to impatience. Impatience leads to manhandling. … and so on. Sawing for the length of an Oscar Peterson album, a Travis Tritt album, or a Beethoven piano concerto is about right. Then, take a break and come back refreshed.

…and what to do when it goes wrong? The easiest answer is to stop as soon as you detect the bowing and go saw from the other end of the board. ~carefully~ You’ll have to saw from the other end at some point anyway. Make it good.

Solutions

  1. Make sure your heart is healthy enough for resawing.
  2. Work all the way around the board with a kerfing saw.
  3. Mount the board in a vise in the manner that enables the same stance from both sides of the cut.
  4. Develop and maintain the same stance from both sides of the cut.
  5. Hold the saw loosely enough to allow the kerf to guide the saw, not your arms guiding the saw.
  6. Switch directions frequently. Work in small “sets:” 10 straight across strokes. followed by 10 strokes of increasing angle (about 45°), then 10 strokes at a more acute angle (about 30°).
  7. Let the kerfs guide the saw, not your arms.
  8. Switch directions frequently. (90°, 45°, 30°)
  9. Let the kerfs guide the saw, not your arms.
  10. Switch directions frequently.
  11. Raise the work piece in the vise often enough to keep the cut line about chest high.
  12. Oil the saw every few changes of direction.
  13. Take a break BEFORE you get tired, grumpy, or impatient.
  14. Switch directions frequently.
  15. For resawing that lasts longer than 4 hours, seek immediate medical advice.

Most of all, relax and enjoy!
Filed Under: frame saw, kerfing plane, resawing, Woodworking, workbench

Bob Builds Another BOB – the whole story

February 28, 2014 by Bob Easton 6 Comments

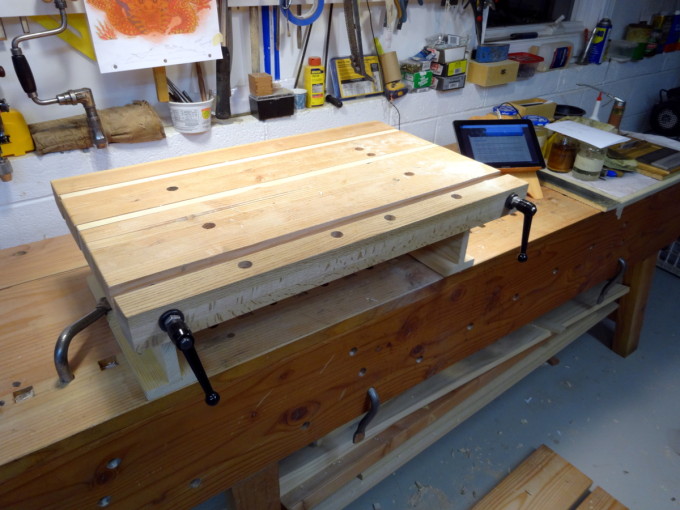
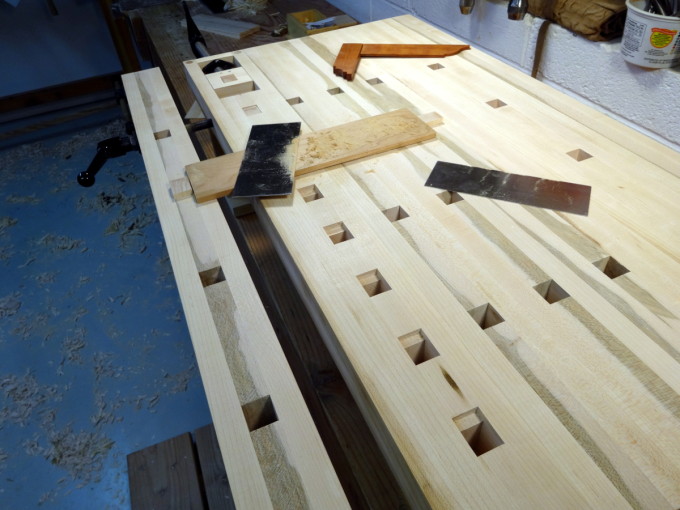
The first Bench On Bench worked well and taught me what improvements it needed.My first Bench On Bench was delightful. It brought carving and joinery tasks to a very comfortable height. Two and a half years later, I still appreciate it, but know of ways to improve it. The most wanted improvement is better work holding capability for carving work. Pinching stuff between dogs in the front vise and the “floating planing stops” just wasn’t working well enough. Shims of various sizes were almost always needed. The front vise itself grew to be a bit floppy, the result of installing the vise screw nuts loosely in softwood sockets. As they floated and wiggled around, they also wallowed the sockets. The best part about the bench was the vise screws, 1/2 inch veneer press screws that were available several years ago from Tools for Working Wood, but are not to be found anywhere today. The handles on those screws can be pulled out and rotated, very convenient for moving them when “tight” leaves them sticking up in the way. Those are keepers! Lastly, the excellent Gramercy holdfasts were rarely useful due to the smaller size of most of my work pieces.

Along comes Chris Schwarz with the “Milkman’s Workbench.” Intended as a portable bench, it has a few features I like and thought would be useful. In the end, I borrowed a few ideas from that bench. The first was lamination from maple instead of fir. This is the last workbench I’m going to build; I might as well use hardwood. The next feature was the wagon vise. However, I’ll use another veneer press screw instead of the wooden screws. I can’t justify the tooling cost for making just one of those wooden screws, and for what it costs to buy one ready made, I can buy a couple of top of the line carving gouges. The last feature was square dogs and their recessed self-storage. I’ll keep the full width front vise and the excellent screws with adjustable handles. I find that vise better suited for the way I work.

Start with 3 boards 1x6 by 8 feet. Rip each into thirds. Then, crosscut into thirds. The color streaks are from spalting.One of the nearby home centers actually carries maple. It’s “mystery maple” since the specific variety isn’t identified. There was some minor spalting in two of the three best boards. My right thumbnail Janka gauge determined the stuff was OK. That’s the discoloration seen in a few spots. Even though the specific type is unknown, it was straight, free of knots and a joy to work.

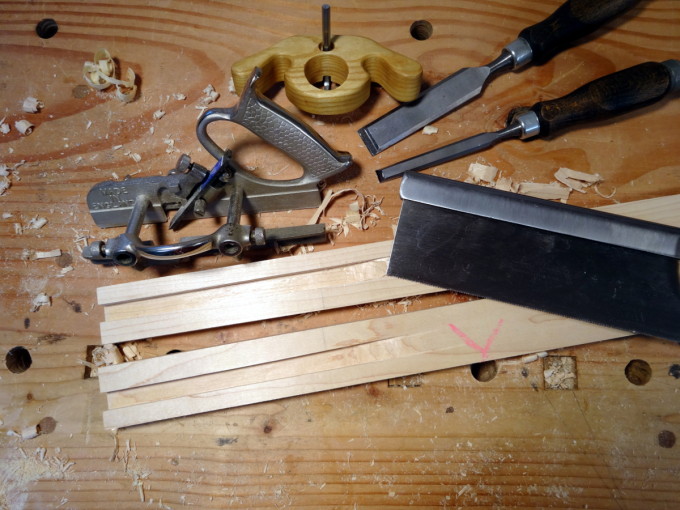
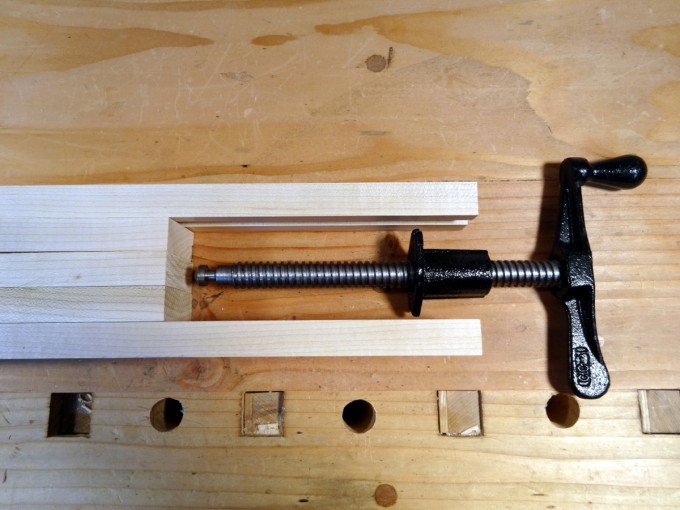
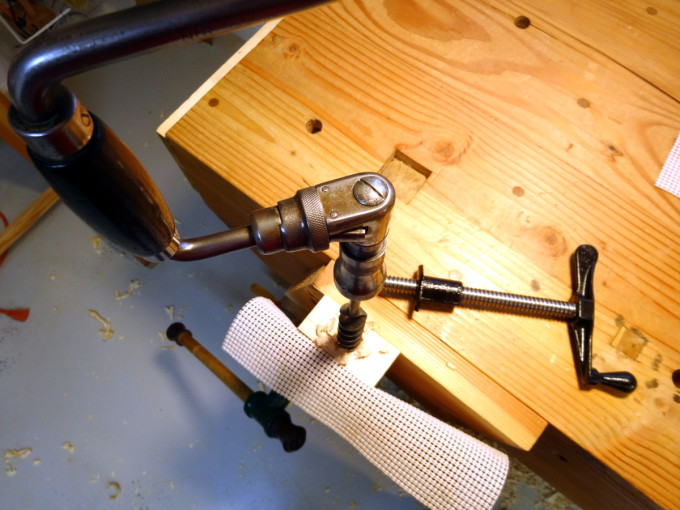
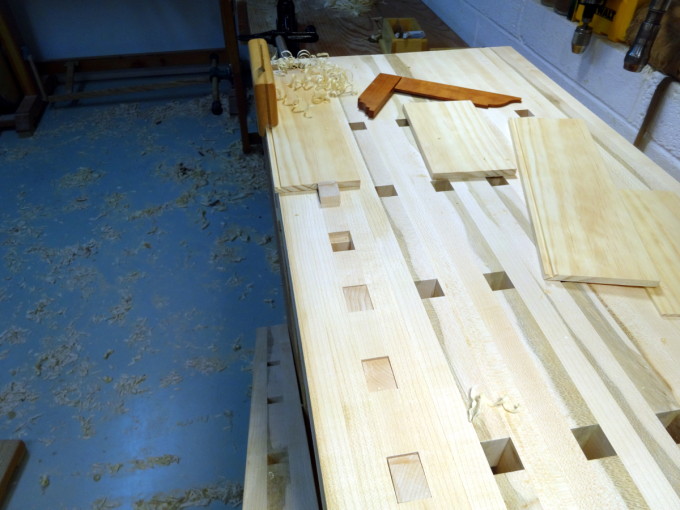
Plowing 1/2 inch grooves used more than one tool, and a good bit of patience. The 044 plow plane was good at removing waste, but only after the groove sides were cut ahead. Maple is hard.Yes, it is a lot harder than most stuff I work with, and yes the Record 044 didn’t want to plow a 1/2 inch groove without a bit of help, and yes, cranking a 1 inch auger through it with an 8 inch brace was a bit of work. Yet, it is remarkably predictable and finish planing leaves a glass like surface.

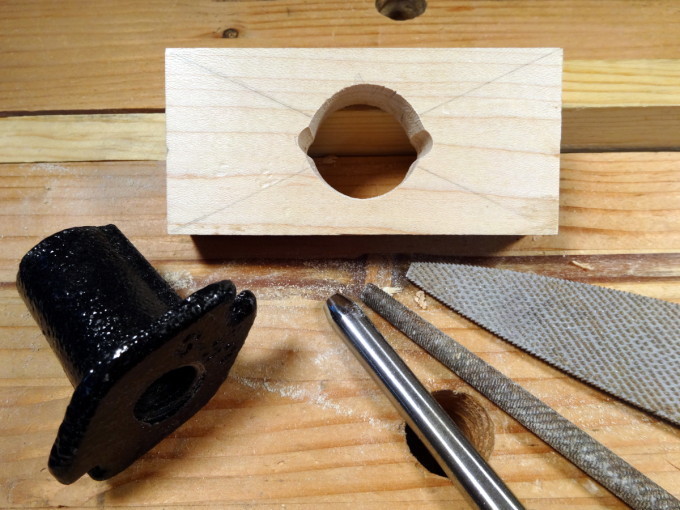
All parts catalogs say this is a 1 inch force fit. Yeah right! Asymmetrical, winged, and tapered. Lots of fussing... The Auriou rasp is superb!The new veneer press screw doesn’t deserve nearly as much praise. It is advertised at most all woodworking supply sources and out of stock in almost all. Once acquired, the threaded socket that is advertised as a “1 inch press fit” is found to be an elliptical shape with ribs on the side and must have been the seventieth son of the seventieth son to be so asymmetrical. There’s enough play in the threads to never have to worry about them seizing, but maybe that’s why they hold a setting so well. Fitting something like this is when one learns to really appreciate how well Michel Auriou’s rasps perform  (the one on the right, not the rat tail).

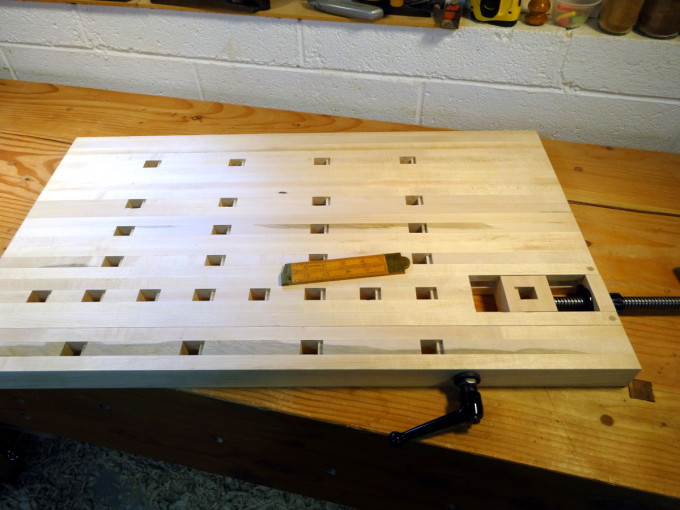
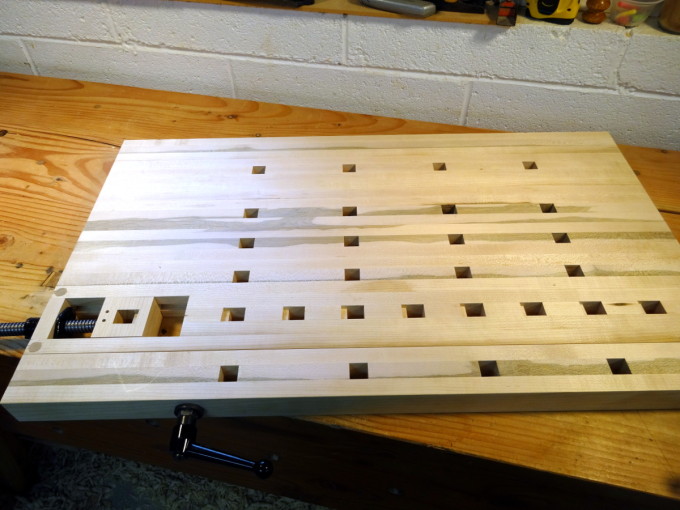
Plan A - Traditional, with wagon vise on the right.About 3/4 of the way through gluing up the pairs of strips that accommodate dog holes, I remembered that some of my working methods really want clear space on the right end of the bench. Actually, I find myself doing several operations that overhang the right side. Oooops, that vise screw is going to be in the way. OK — Plan B! Just flip it over … and smooth finish the bottom side … and make some more dog recesses.

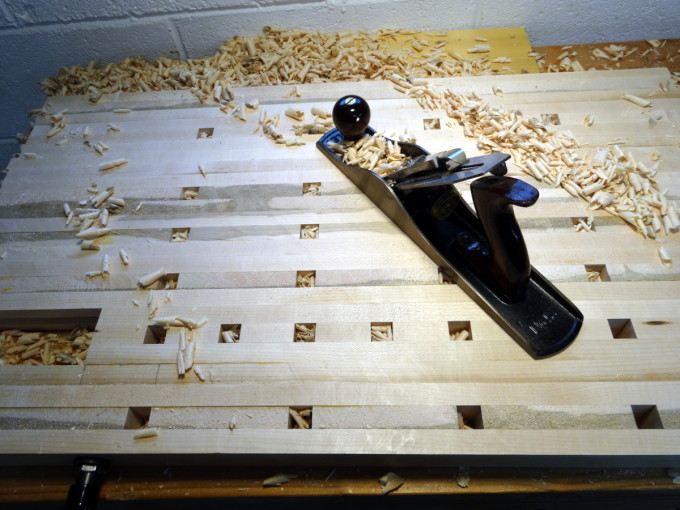
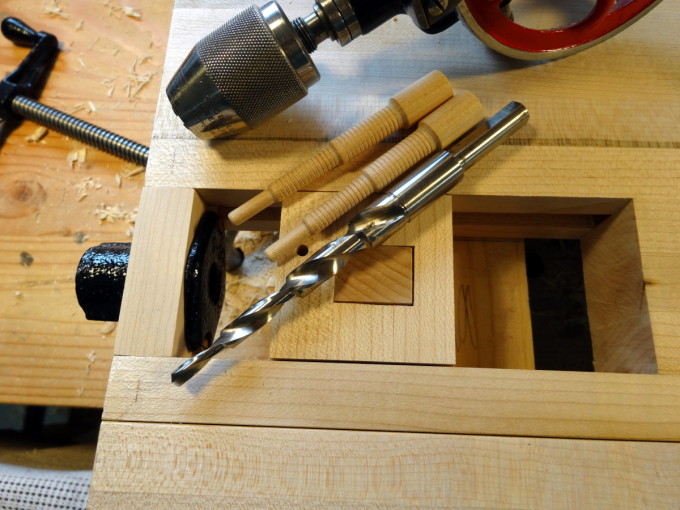
The rest is a matter of careful assembly, lots of gluing and clamping, lots of planing, a bit of drilling and fitting. By the way, the entire project was done with only hand tools. No electrons murdered. No sandpaper martyred. Very sharp plane blades, and well groomed card scrapers gave excellent results. There’s only one area not completely finished. I did not glue the end block for the vise. It is temporarily fixed with press fit Miller Dowels. It is the dry season now, about 25% humidity. In late summer humidity goes to 90%. I’ve left this area free of glue in case it needs to be disassembled and adjusted.

Update: I forgot to mention dimensions in the original post. The bench top measures 31.5 inches by 18.5 inches. The top surface is 8.5 inches above whatever it sits on. It weighs 32 pounds.

The work holding capability is better than I aimed for, and the fit and finish is a big step above the previous version. All of the methods I practice can now be done easier and more reliably with this bench.

Click any image to see a larger view as a slideshow.

The first Bench On Bench worked well and taught me what improvements it needed.
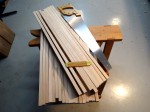
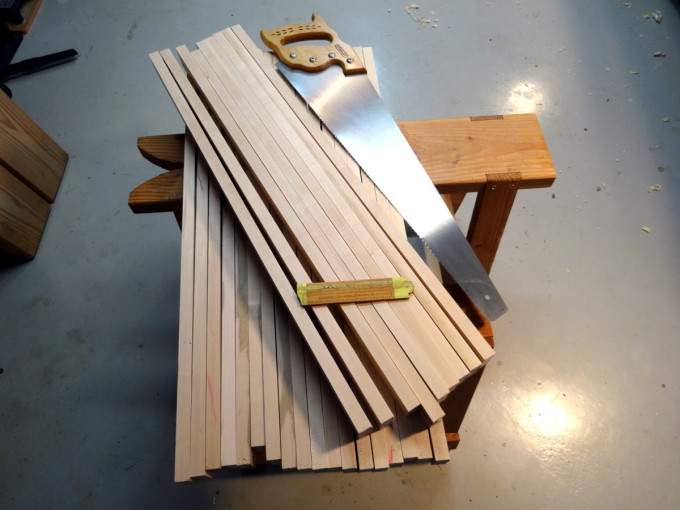
Start with 3 boards 1x6 by 8 feet. Rip each into thirds. Then, crosscut into thirds. The color streaks are from spalting.
Start with 3 boards 1×6 by 8 feet. Rip each into thirds. Then, crosscut into thirds. The color streaks are from spalting.
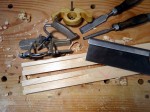
Plowing 1/2 inch grooves used more than one tool, and a good bit of patience. The 044 plow plane was good at removing waste, but only after the groove sides were cut ahead. Maple is hard.
Checking the layout. Yep, that'll work.
Checking the layout. Yep, that’ll work.
Turning a 1 inch auger, in maple, with an 8 inch brace is near insanity. My 10, 12, and 14 inch braces are still on the 'buy someday' list.
Turning a 1 inch auger, in maple, with an 8 inch brace is near insanity. My 10, 12, and 14 inch braces are still on the ‘buy someday’ list.
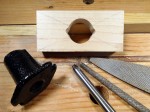
All parts catalogs say this is a 1 inch force fit. Yeah right! Asymmetrical, winged, and tapered. Lots of fussing... The Auriou rasp is superb!
All parts catalogs say this is a 1 inch force fit. Yeah right! Asymmetrical, winged, and tapered. Lots of fussing… The Auriou rasp is superb!
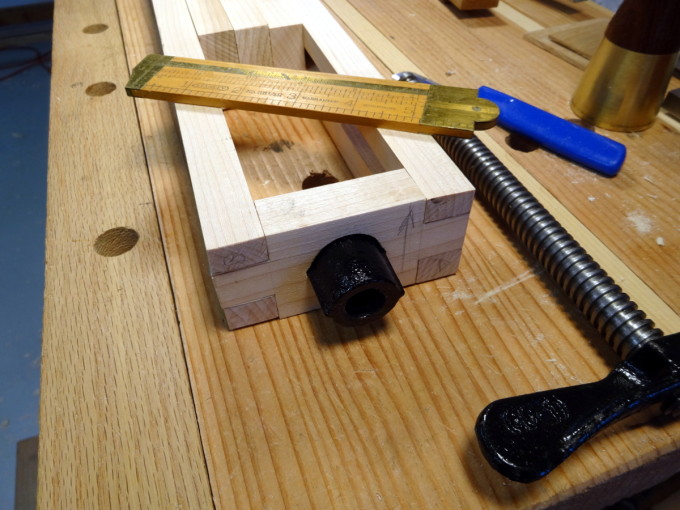
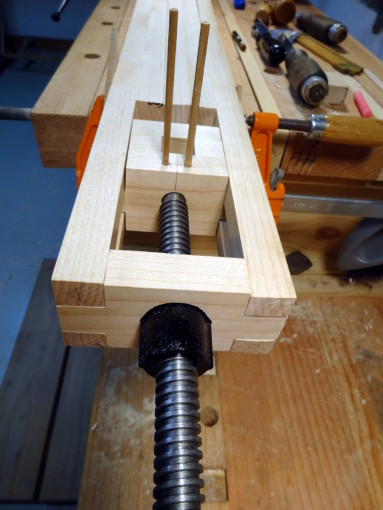
Vise dry fit #1
Vise dry fit #1
Ahhhh. Vise dry fit #2. Now, it looks like a vice. Those walnut pins are the garter, temporary for now.
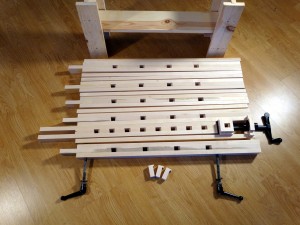
All the parts ready for assembly ... in 'Plan A' configuration.
All the parts ready for assembly … in ‘Plan A’ configuration.
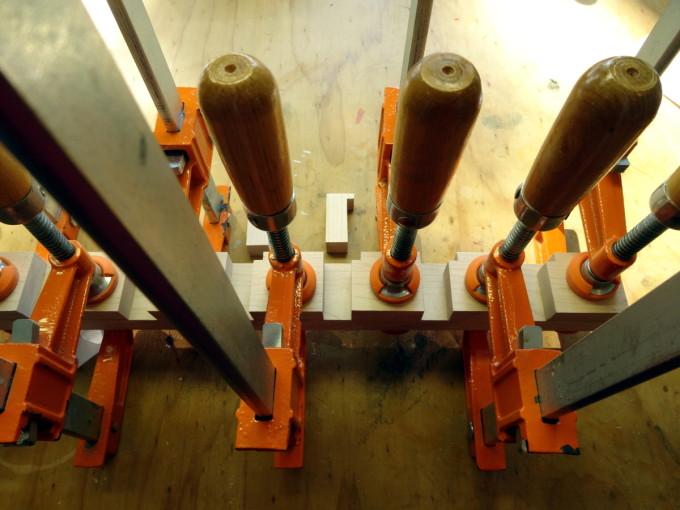
Do this 6 times over the next few days, or go buy 50 more clamps. :)
Do this 6 times over the next few days, or go buy 50 more clamps. 🙂
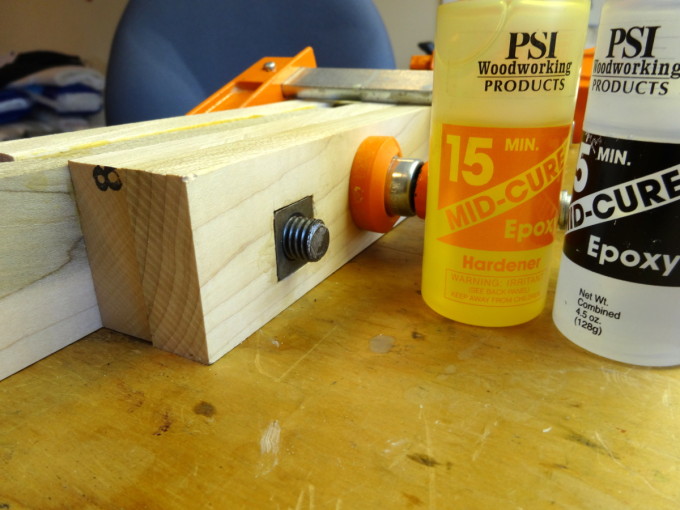
Nuts for the front vise screws are mortised in very snugly, and then epoxied to prevent any wiggle.
Plan A - Traditional, with wagon vise on the right.
Plan A – Traditional, with wagon vise on the right.
Plan B - Flip it over. Wagon vise on the left and better use of the right end of the bench.
Plan B – Flip it over. Wagon vise on the left and better use of the right end of the bench.
Scrub baby, scrub! I have an alternate curved iron for the #5. Maple is hard, but predictable, and finishes very nicely.
Miller dowels through the bridle joints make the vise strong enough. Nothing here was glued for now. It's the dry season and may need disassembly when the humid season arrives.
Miller dowels through the bridle joints make the vise strong enough. Nothing here was glued for now. It’s the dry season and may need disassembly when the humid season arrives.
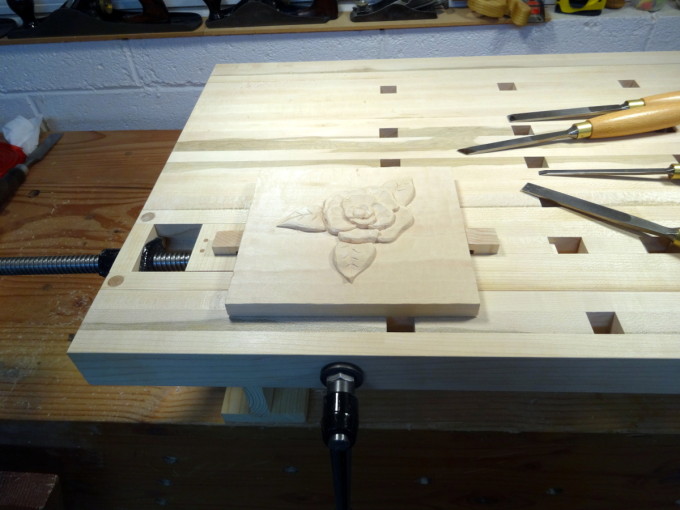
Work holding - a typical relief carving
Work holding – a typical relief carving
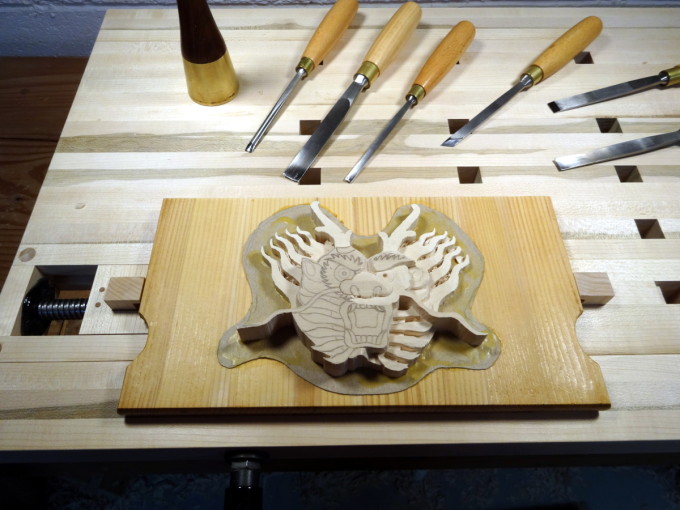
Work holding - a larger and scarier relief carving - space for much larger...
Work holding – a larger and scarier relief carving – space for much larger…
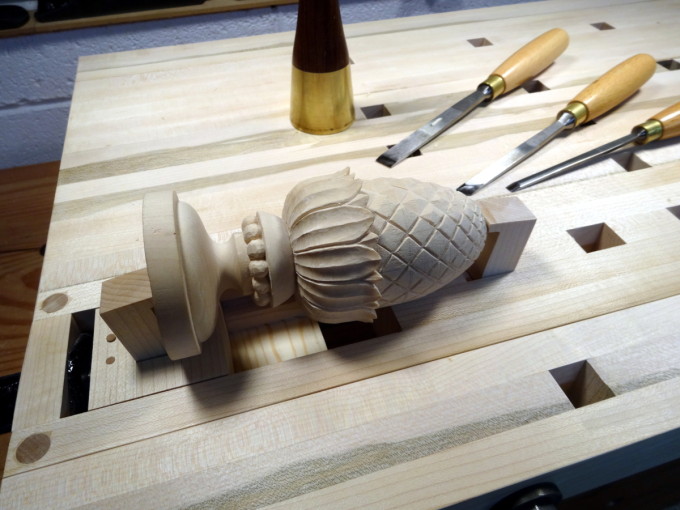
Work holding - This one is hard to hold well, but this works, a good test for moderate sized 'in the round' carvings.
Work holding – This one is hard to hold well, but this works, a good test for moderate sized ‘in the round’ carvings.
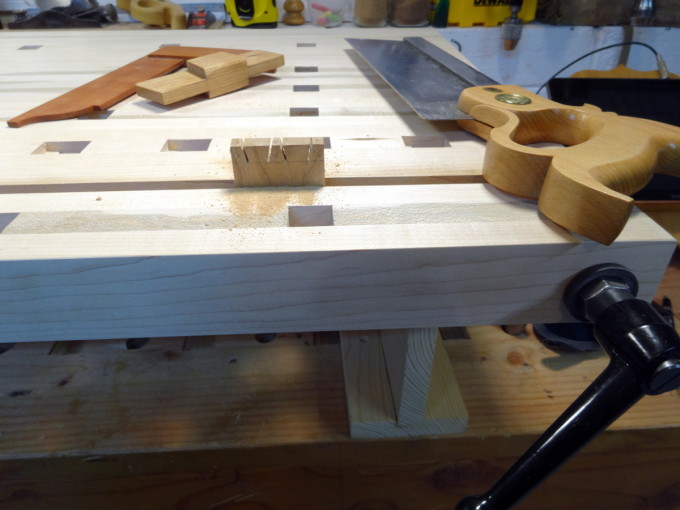
Work holding - typical joinery cutting - 22 inches between vise screws gives lots of capability.
Work holding – typical joinery cutting – 22 inches between vise screws gives lots of capability.
Work holding - on the bench surface - plenty of capability for my scale of box making
Work holding – on the bench surface – plenty of capability for my scale of box making
Work holding - Needed a slight overhang. Easy. Drop the left end of the front chop and use the wagon vise. Easiest grooving ever.
Work holding – Needed a slight overhang. Easy. Drop the left end of the front chop and use the wagon vise. Easiest grooving ever.


Filed Under: Boxmaking, Shopmade, Woodcarving, workbench

Bob Builds Another BOB

February 17, 2014 by Bob Easton Leave a Comment

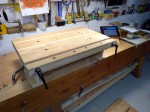
just one photo for now…

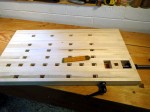
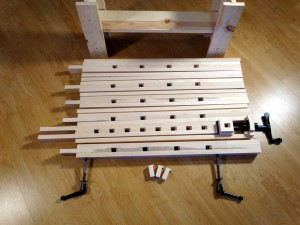
bob-2-parts

Filed Under: Boxmaking, Shopmade, Woodcarving, workbench

  • « Go to Previous Page
  • Page 1
  • Page 2
  • Page 3
  • Page 4
  • Page 5
  • Interim pages omitted …
  • Page 7
  • Go to Next Page »

Primary Sidebar

Footer

Recent Posts

  • New Frame Saw / Scroll Saw
  • Lamppost Sign
  • Goodbye PayPal – Goodbye Bob’s eBooks
  • Anarchist’s Workbench is Done
  • Why we keep offcuts…

Categories

  • About
  • Artwork
  • Boatbuilding
  • Boating
  • bowl carving
  • Boxmaking
  • Clocks
  • Drawings
  • eBook
  • etude
  • Eva Too
  • Eva Won
  • Fiddlehead
  • Fiddlehead model
  • Flying
  • frame saw
  • gilding
  • green woodworking
  • Grinling Gibbons
  • Guns
  • Hand tools
  • Humor
  • kerfing plane
  • Lettercarving
  • Mill Creek 13
  • Model building
  • Power tools
  • Rant
  • resawing
  • scroll saw
  • Shopmade
  • sign painting
  • Stonework
  • Swimming
  • Technology
  • The Wall
  • treadle lathe
  • Uncategorized
  • VSD
  • Woodcarving
  • Woodturning
  • Woodworking
  • workbench

Other stuff

  • About
  • Contact
  • Privacy Policy

Copyright ©2024 · Bob Easton · All Rights Reserved