• Skip to primary navigation
  • Skip to main content
  • Skip to primary sidebar
  • Skip to footer

Bob Easton

Chocolate powered woodworking

  • Home
  • Grinling Gibbons Tour

workbench

Bob Builds a BOB

May 30, 2011 by Bob Easton 4 Comments

“Bob” is an easy to remember name that’s spelled the same way coming and going. (Mama knew I’d need that.)

BOB can also mean Bench On Bench. There have been a lot of those featured on various blogs lately. We build great workbenches at low heights that are comfortable for planing, but not a lot of other work, then build Bench On Bench accessories to raise the work surface.

Some forms of relief carving have caught my interest and fueled some new ideas. For that work, I certainly need a BOB and the Steve Branam’s version recently caught my attention. While I’m not a furniture builder, don’t need to hold large panels vertically, and will never seek dovetail proficiency, his BOB does promise a good raised work surface and some great work holding possibilities. Steve did a wonderful job with his step-by step description. Follow his lead if you want lots of detail. THANKS Steve!

Here, I note a few differences in both materials and technique, and yet another kind of work holding.

  • Steve used nice clear poplar. I used semi-beautiful construction lumber, with the most attractive knots oriented to the bottom side of the bench top. The “butcher-block” laminated top lets one make a thicker top while giving a good bit of choice in hiding small knots. Saw around the big knots and let them drop to the floor.
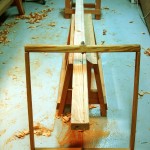
  • photo of frame saw, saw benches, and a long boardMy shopmade frame saw made ripping a job that didn’t require knee pads.
  • No mid-rip jointing for me. Those ripped edges become the top and bottom surfaces, and I deferred planing them until the top was completely together. Saved wear and tear on the bandanna.
  • Instead of veneer press screws, I substituted Joel Moskowitz’s excellent bench screws. The very nice thing about these screws is that the handles can be repositioned once tightened. This avoids the problem of having the handle sticking up in the way of putting chisels to the workpiece. Pull the spring loaded handle out from the screw and rotate it to a more convenient position. Very slick. THANKS Joel. They were easier to fit too; a square nut falls into a simple square mortise.
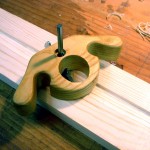
  • photo of a router plane in a grooveMy I-beams are solid wood, some sort of splintery pine from the on-hand lumber pile, instead of plywood. The dadoes in these offers a tooling problem. What kind of boat building shop is it that doesn’t have a nice narrow rabbet plane? Oh well, I cleared the bottoms of the dadoes with my shopmade router plane.
  • The top was laminated in three sections, for reasons we’ll see in a moment. I attached it to the beams before planing the top surface … once again deferring the work that requires a bandanna. Long ago, an oral surgeon charged with removing my 4 wisdom teeth (see why I needed the simple name) asked, “One at a time (4 different sessions and 4 different times for a sore mouth) or all at once?” I chose all at once.
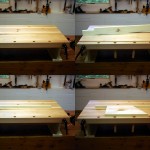
  • A series of 4 photos showing how to use the floating stop.A BIG THANKS to Bob Bob Rozaieski at The Logan Cabinet Shoppe for his recent post: The Workbench – 1 Year Later. One part of that post shows a “floating planing stop” that was a game changer for me. My intended use for this bench is for holding flat work on top of the bench. Pinching that work between one of these “floating stops” and a couple of dogs will be very very handy. Anticipating work of two general sizes, I incorporated two of these stops in the bench top. Normally, they rest loosely upon the i-beams. Flip one over, and an edge sticks up. Very neat and very easy. See the picture collage as a demo. [We’ll see how well the construction wood vice jaw holds up. It may need a hardwood replacement.]
  • Lastly, no scrapers were harmed. This is construction lumber and there’s NO way we’ll get it to look like Donald Trump’s boardroom conference table. Nor, did I use any Avocado (ooops, “Aged Olive”) paint.

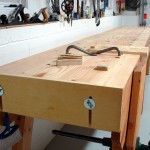
The completed bench measures 29″ wide, by 19″ deep and a little over 8″ high. It is tall enough to use the excellent Gramercy holdfasts, and the space between vice screws is just over 24″ (wide enough for holding cabinetry panels – just in case).
Filed Under: Shopmade, Woodcarving, workbench

Small Boatbuilding Hand Tools

September 9, 2009 by Bob Easton 5 Comments

Over at the WoodenBoat Forums, a newcomer asks about hand tools for small boat building. I don’t know exactly what he considers small, a dingy or canoe, or a small Trumpy. I do know, however, a lot about the tools I used to build the Fiddlehead canoe. This list worked for me and might work for other amateur boat builders. (I doubt professionals would easily give up using power tools, which they think do the work faster.)

Bench and bench accessories

benchIt’s the single most used tool in the shop. Mine is a 12 foot long “English Bench” taken from Chris Schwarz’s book Workbenches from Design & Theory to Construction & Use. The 12 foot length is comfortable for the size of the shop and is suitable for planing boat lumber up to 16 feet long (with some lumber shuffling of course). The bench dogs, full width planing stop on the end, and the bench hook are all shop made accessories. The Gramercy holdfasts are from Tools for Wood Working. The bench is further described in a series of blog entries.

Layout

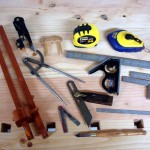
layout toolsMost work starts with some sort of layout. Starting at the left edge and proceeding roughly clockwise, we have:

  • A shop built marking gauge with two beams, one for pencil, the other for a scribe. It is made of cherry and roughly to a plan found here.
  • The black plastic bodied compass / divider is an AccuScribe, which can be found at a number of woodworking tool outlets.
  • The compass / divider I like more is the vintage 8 inch Bemis & Call steel compass found in an antiques shop in Liberty Maine. Cost = $10. It once belonged to someone named C L Beckett who stamped that name on each leg.
  • The oak thing is a shop built center marking gauge, handy for resawing.
  • A utilitarian 25 foot Stanley rule.
  • A chalk line is useful for marking long rip lines on lumber. Strictly for rough cutting.
  • A utilitarian try-square, a couple of small machinist squares, and a 6 inch rule.
  • Two bevel gauges, one an ancient Stanley #25 (from Sandy Moss I think), the other shop made from a hacksaw blade and a rivet.
  • Lastly, a very fine Pattern Pilot marking knife from Bob Zajicek at Czeck Edge Hand Tools. It is probably more useful for cabinet makers than for boat building, but is a gorgeous tool nonetheless.

Planes

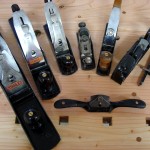
planesAll of my planes are refurbished vintage planes. Over the life of any sharp edge tool, one will sharpen it many many times. Sharpening is an essential skill and is not difficult to master. In my view, knowing all you can know about a tool, including how to refurbish it, is only an incremental step beyond sharpening. I like to refurbish tools, bringing them back to life and putting them back to work. I am careful in what I buy and where I buy it in order to make the most of what I refurbish. My planes include (left to right):

  • A Stanley (Bailey) #7 Jointer plane. Type 16 (1933-1941) with 1935 iron. From Jon Zimmer. $145. While in Maine, I roamed the antique tool stores and found dozens of these for prices in the $70-$80 range. Each and everyone had a flaw of some sort that ruled it out. I eventually found this one from Jon, and don’t regret paying him more for finding a better tool than I could find by wandering around.
  • A Stanley (Bailey)#5 Jack plane. Type 16 (1933-1941) with 1935 iron. From Jon Zimmer. $120.
  • A Stanley (Bailey) #3 Smooth plane. Type 15 (1931-1932). From Jon Zimmer. $80.
  • A Stanley #60 Low Angle Block plane. Circa 1900. From Sandy Moss. $50.
  • A Stanley #40 Scrub plane. Circa 1910. From Jon Zimmer. $80.
  • A Sargent #79 (copy of Stanley #78) Fillister and Rabbet plane and accessories. Circa 1925. From Sandy Moss. $35.
  • A Stanley #51 Spoke Shave.  Circa 1920. From Sandy Moss. $20.

I’m sure there are trustworthy vintage tool dealers on Ebay, but I haven’t found time to sort them out of the world’s largest yard sale.  Likewise, I haven’t found all of the trustworthy dealers on the internet. However, I do trust and have done business with each of these folks: Jon Zimmer, Patrick Leach, Sandy Moss, Walt Q, and Bob Kaune.

For those who have not refurbished an old plane, Bob Smalser’s excellent tutorial will get you started: “Rehabilitating Old Planes”

Chisels and shaping tools

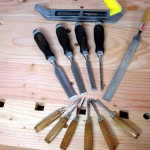
chiselsThere are surprisingly few. The bench chisels are Narex. They were surprisingly inexpensive (less that $30 for the set of 4), and surprisingly good. It’s all about good steel, and these are tough and hold their edges very well.

The little carving chisels were for carving the fiddleheads on the ends of the boat’s stems. They are not of high quality steel, so I won’t reveal their pedigree.

The only other shaping tools I use are a Stanley Surform and a half-round cabinet maker’s rasp.

Oh yeah, and sandpaper.

Saws

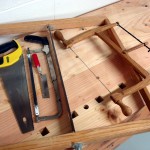
sawsSome are store bought. The yellow handled Stanley has carbide teeth and works OK. I use it only for rough cross cutting. There aren’t a lot of high-precision straight cuts in boat building. Hey, we’re making boats, not grand pianos. A simple hack saw does the metal stuff. The little razor saw is handy once in awhile.

My real workhorses are shop made. The big frame saw was cut down from an antique Disston D-8 rip saw, and made roughly to Josh Clark’s design. I use it for ripping long lumber, and for resawing. Resawing is so valuable for boat lumber; getting two (or more) boards for the price of one is wonderful. See my resawing tutorial for more. The bow saw is a delightful, lightweight, highly maneuverable saw made from plans found at Gramercy Tools. I use it constantly and can’t say enough good about it.

Good learning resources for rehabilitating and sharpening saws are:

  • Bob Smalser’s saw straightening and rehab tutorials on the Sawmill Creek forums
  • Peter Taran’s saw sharpening primer on the Vintage Saws site
  • Bob Rozaieski, of Logan Cabinet Shoppe, has a very good saw sharpening video.

Drilling

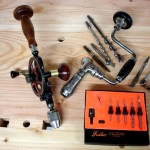
drilling toolsMy Goodell-Pratt #5 1/2 B , eggbeater sees constant use, for both drilling and screw tightening. It dates to about between 1886 and 1905. I found it at Liberty Tools in Liberty Maine, for $28. Liberty Tools is a real neat place, but you have to go there; no mail or Internet ordering. The drill was, as most are, missing the side knob, which I fabricated. It has two speeds, and a ratcheting mechanism that works in both directions. It’s almost as fast as other hand drills, is a lot more accurate (no overrun), and doesn’t ever have dead batteries.

The Stanley #923 brace does the heavier work. It wants to have square shank bits for the best work. It came from Walt Q for $25.

I find the Fuller bits indispensable. There are hundreds (sometimes thousands) of screws used in boat building. Most are silicon brass and are known to fracture easily if not fed into the right size hole. Every screw hole is prepared with one of these bits. Screws are also waxed before driving. I have had no breakage problems.

Other stuff

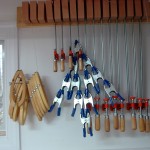
clampsA few dozen odds and ends include screwdrivers, pliers, and not nearly enough clamps. The orange and blue clamps are from “the Borg.” The lap clamps are shop made and did exactly what they were made for.

All in all, that’s not very many tools. A small collection can do a lot of work.

Oh yes, there was one electron murdering tool used for building the boat. Before I built my frame saw and bow saw, I used a Rigid 14 inch band saw to cut the inner stems and to resaw a few strips of cedar for the laminated bulkheads. Since those cuts, and after making the new hand saws, the only use I’ve had for the band saw is quickly cutting waste wood down to disposable size.

Filed Under: Boatbuilding, Hand tools, Woodworking, workbench

Building the Fiddlehead’s Bottom on the Long Bench

November 12, 2008 by Bob Easton 4 Comments

The best reason for this post is to rave about how well the long workbench works.

The Fiddlehead’s bottom is made of three pieces of edge joined cedar, finished to 9/16″ thick. The center board is 11 feet long. The edge boards are each 8 feet long, and everything fits easily on the long bench.

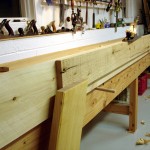
The front apron is especially helpful for jointing the edges. Each of the boards had one face surfaced as a flat reference surface. Then, they are clamped on the apron in the correct relationship and their edges jointed together. Jointing them together ensures their edge angles match. The quick set up on the apron makes it easy to release and flip the boards up onto the bench for test fitting, and then set back up for fine tuning. I found it surprisingly easy to get to a “sprung joint” that was tight on the ends and about 1/32″ open in the middle.  One clamp in the center was enough to produce evenly distributed squeeze-out during glue up. About as close to perfection as one can get, and it took surprisingly little effort. Yet, I did actually use more than one clamp, just to be certain. The primary thing holding the bottom of the boat together is these edge to edge glue joints.

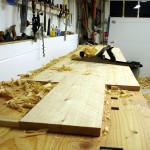
The shop temperature is near the minimum for West System epoxy, so I let it cure a full 24 hours before moving on to thickness planing.  Two dogs, two holdfasts, and a couple of turns on the tail vise gets the piece set up for planing in about 10 seconds. Plane one side for a while. Flip it, and plane the other side. Rinse, lather, repeat until we get to 9/16″. The big ole heavy #7 is rank set for a moderate cut; reasonably good material removal with no tearout.

Filed Under: Boatbuilding, Eva Won, Fiddlehead, workbench

  • « Go to Previous Page
  • Page 1
  • Page 2
  • Page 3
  • Page 4
  • Page 5
  • Page 6
  • Page 7
  • Go to Next Page »

Primary Sidebar

Footer

Recent Posts

  • New Frame Saw / Scroll Saw
  • Lamppost Sign
  • Goodbye PayPal – Goodbye Bob’s eBooks
  • Anarchist’s Workbench is Done
  • Why we keep offcuts…

Categories

  • About
  • Artwork
  • Boatbuilding
  • Boating
  • bowl carving
  • Boxmaking
  • Clocks
  • Drawings
  • eBook
  • etude
  • Eva Too
  • Eva Won
  • Fiddlehead
  • Fiddlehead model
  • Flying
  • frame saw
  • gilding
  • green woodworking
  • Grinling Gibbons
  • Guns
  • Hand tools
  • Humor
  • kerfing plane
  • Lettercarving
  • Mill Creek 13
  • Model building
  • Power tools
  • Rant
  • resawing
  • scroll saw
  • Shopmade
  • sign painting
  • Stonework
  • Swimming
  • Technology
  • The Wall
  • treadle lathe
  • Uncategorized
  • VSD
  • Woodcarving
  • Woodturning
  • Woodworking
  • workbench

Other stuff

  • About
  • Contact
  • Privacy Policy

Copyright ©2024 · Bob Easton · All Rights Reserved