Coamings are intended to reduce the amount of water that splashes into a boat. Done right, they also add a bit of aesthetic detail. Fitting the coamings is a fussy job. They’re such a point of visual interest that they need to be done carefully.
 The first step was planing the carlins with a bevel that causes the coaming to flare outward just a bit.
The next step was preparing the stock. These boards are just a bit thin of 3/16 inch, having been resawn from a very clear piece of white ash.
A double ended boat offers an additional fitting challenge. In many cases, the point where each coaming piece meets can be a simple miter joint. However fitting two precise miters, each meeting perfectly at each end of the cockpit, could be an exercise in frustration.
 The answer is simple, uses a few more steps, but is far less tedious than getting two compound miters, and the precise length between them, right.
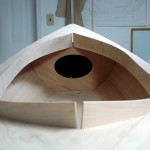
Start off by getting the boards to fit nicely in the cockpit. They get screwed, but not glued, in place. There’s no glue here to enable future repairs. The boards are be a bit short of full length, as shown in the first picture (click to enlarge). That’s OK.
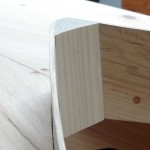
Then shape a filler block that fills the last inch of the join. The bevels were fun! Wood moves. Resawing and thicknessing was done over several days. Each day found the boards in a different state of cupping and warping. After screwing in place, the were mostly flat, but held just enough cupping to make beveling the filler blocks “interesting.”
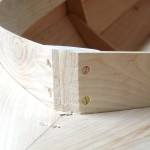
 Next, whack off the end of the combined boards and filler block.
Carefully!
Don’t scar the decks.
Yep, tedious.
Really sharp chisels and careful paring help at the bottom of the cut.
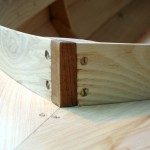
 The last bit is a piece to cover the blunt cut. Some mahogany does the job and adds a tiny bit of accent.
Fair the edges, screw and glue the bits to each other (and not to the deck – repairability), stand back and admire.
Then do it all over again at the other end.
Bob, what you are working on looks really interesting, but what is it? How about something up front to let us know what you are building. Looks like a canoe yawl or something but I can’t tell. I’ll look further later.
thomas
Welcome Thomas,
One can walk backwards in the “Fiddlehead” category to see the complete story, or jump to this post to see the start of the story.
Shorter answer: It’s a 12 foot canoe.