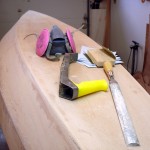
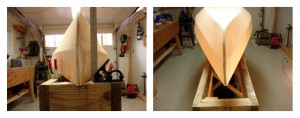
 (2nd of 3 postings today) How smooth should it be? This is my first stitch-n-glue, fiberglass encased, boat. I don’t know exactly how smooth the underlying wood needs to be to produce a good finish, but assume it should be as good as it would be if the wood were not covered. CLC, who sells sandpaper only in disk form, suggests going to 150 for painted hulls and more for bright surfaces. This hull will be painted and the decks will be bright.
I imagine that people using tailed sanders can do this work in about 6 minutes. Mine took longer because I vehemently dislike powered sanders, their raucous noise, and the clouds of dust they produce. (Don’t even try to tell me how great the premium/$$$ sanders are.) Actually, what took time was filling all of the now empty wire holes. Yes, they will probably get filled when the fiberglass gets applied … but I have this thing about holes in boat hulls.
 There was also a little “hitch in your get-along,” “wag in the tail,” or “kink in the stern” where I didn’t get pieces together precisely enough in the original glue-up. A couple of layers of epoxy putty made up to creamy peanut butter consistency was used to build up one side. Then, a lot of shaping and sanding, more than all the rest of the hull itself, brought the stern to an acceptable level of symmetry.
Just think what Michelangelo could have done if he’d had some of this epoxy putty!
Bob,
In the first photo, the tool with the yellow handle: Is that a Microplane, or something else like a handled rasp? The prepped surface looks very smooth, and the finished hull wonderful.
Al
Al,
That’s a Stanley “Surform.” It’s like a microplane, but larger. It is much coarser than a cabinetmaker’s rasp, and is good for very rough work, such as shaping that blob of epoxy I added to the side of the stern.