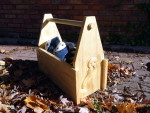
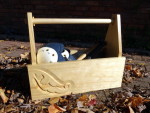
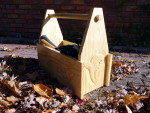
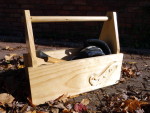
• Skip to primary navigation
  • Skip to main content
  • Skip to primary sidebar
  • Skip to footer

Bob Easton

Chocolate powered woodworking

  • Home
  • Grinling Gibbons Tour

Acanthus Carving on a WHAT?

October 15, 2013 by Bob Easton 9 Comments

Tool tote!

Yes, a tool tote. One project too many found me making numerous trips to the workshop, usually for a few tools per trip. It’s long past time to have a carry tote or tool tote for the projects away from the workshop. One of the very simple projects at Paul Sellers’ Woodworking Masterclass site is a “Carrying Tote.” The purpose of the 2 episode project is to teach the basic dado (housed dado in UK) joint. Hey, I had some lumber of appropriate size. Actually it was a bit wider and I wasn’t in the mood for ripping. So, I used the width I had and it worked out OK. Building the tote itself was easy.

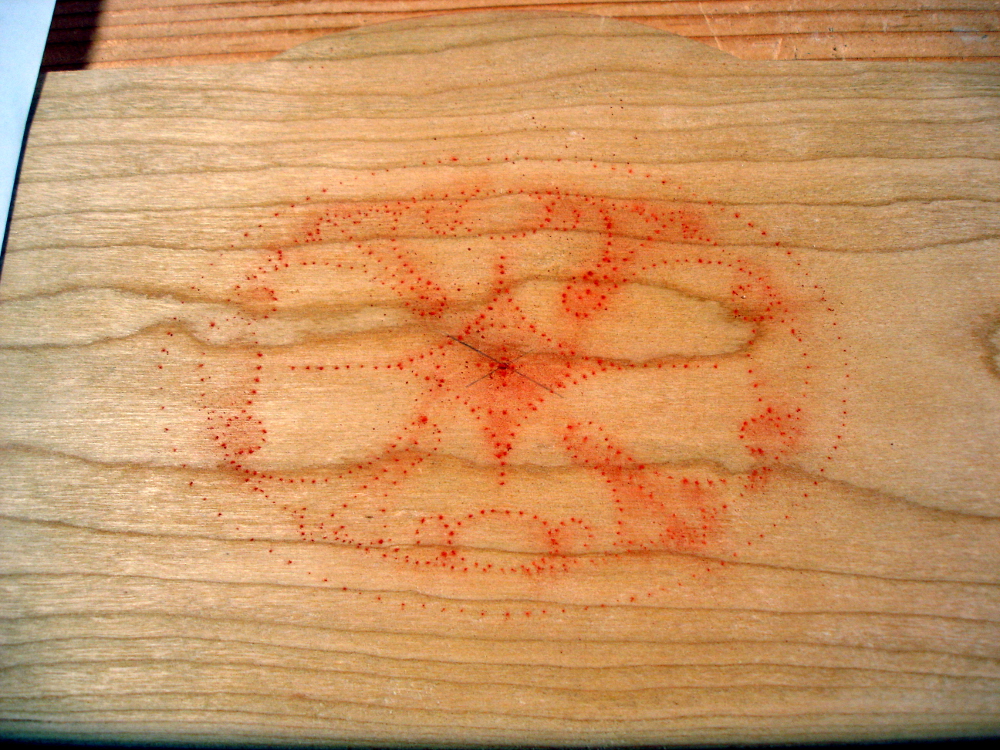
But, it was plain. Plain wood. Ahhhh, the problem was an absence of carvings! Have to fix that…

photo of tool tote - end 1
photo of tool tote - side 2
photo of tool tote - end 2
photo of tool tote - side 1

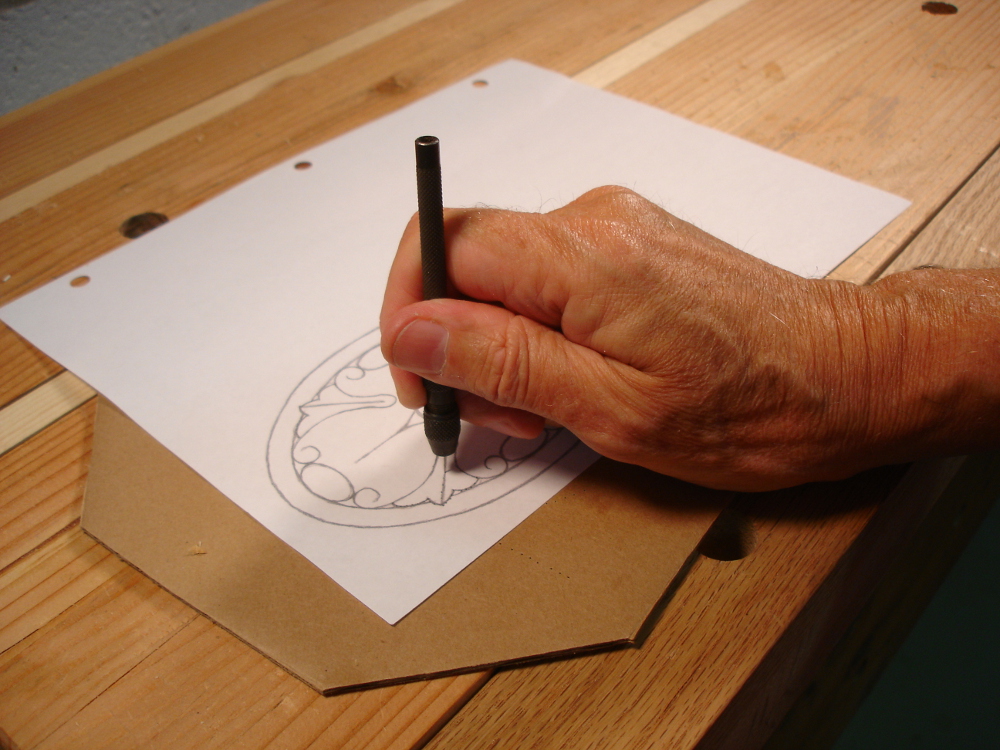
There was a time that we vacationed away from the shop, and I substituted a pencil and yellow notepad for gouges and wood … making lots of drawings of Acanthus leaves and scrolls.

I borrowed from that collection for these carvings. These are shapes that are actually better in high relief, on wood an inch thick or more. The challenge here was executing them in low relief while still giving the right sense of shape. At the same time, I wanted them incised instead of raised where every knock and bump would produce damage.

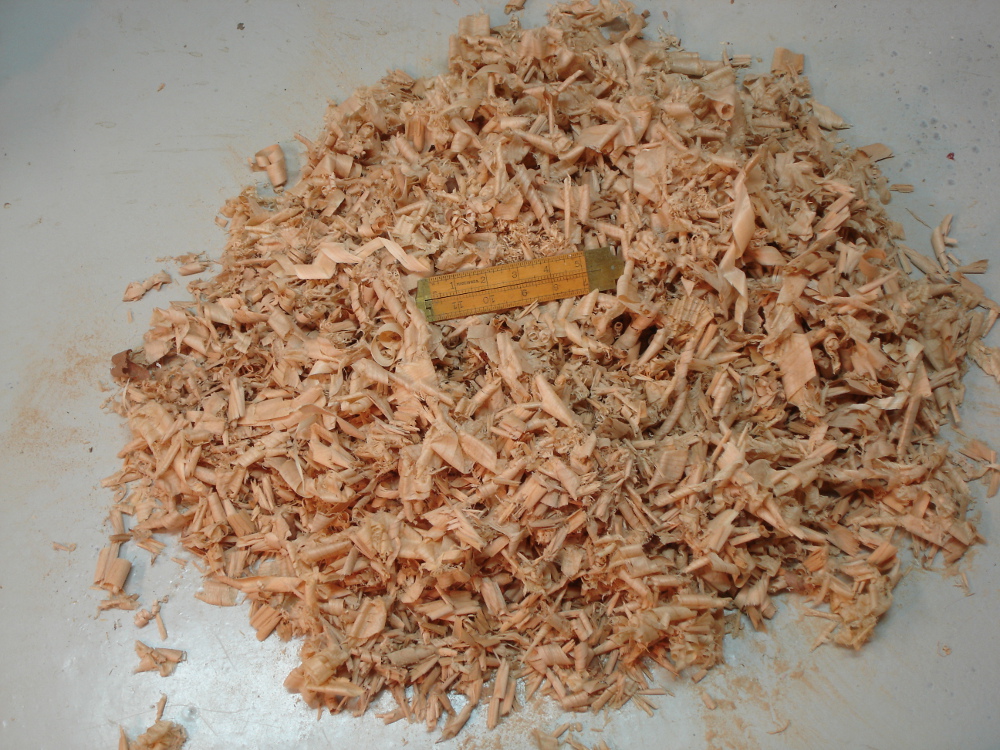
The box is made of Radiata Pine from New Zealand, the “white wood” carried by our big orange home center. When I started, I was skeptical about carving this stuff. It actually worked out well, a bit stringy in places, but not too bad. Finish is 3 coats of shellac. No rub out. No wax.


Filed Under: Boxmaking, Woodcarving, Woodworking

Oval Rose Carving on a Desk Box

October 11, 2013 by Bob Easton 6 Comments

Desk box, keepsake box, any other kind of box, what’s the difference?

photo of oval rose box highlighting the carvingThis one is convenient for desk use because the lid stays attached and tilts open easily into a stable position. Flip it open, grab a pen, and move the work along.

It’s another American Cherry box, all from heartwood. Like most cherry I’ve come across, there are a few dark stains here and there. Those are from bird pecks. Birds harvesting insects from the bark leave marks which end up as nearly black marks within the grain of the wood. If I were to look for peck free cherry, I would find little useful material.

photo of oval rose box with lid open - front viewThree things are distinctive with this box. One, is the mitered dovetails. They provide a very nice miter on the visible edges while retaining traditional dovetails. The miters are perfect hiding places for the grooves that retain the bottom. No more fussing with trying to plane a stopped groove! In another 2 or 3 boxes, I won’t be calling this feature distinctive, but the norm.

photo of oval rose box with lid open - back view 1The tilt top is a first for me. It’s simple, fitted on wood dowel hinges. The hinge pins are placed so as to keep the top edge flush with the tops of the sides and ends. A notch cut into the front of the box completes the flush fitting. The lid is lifted from a curved edge that protrudes about 1/8″. I made that curve match the oval of the carving. The placement of the hinge pins also allows the lid to rest at about 95 degrees in the open position. Nice!

photo of boards for sides and endsThe third distinction, not really new with this box, is what some call a “3 corner grain wrap.”  The grain flows around the box, matching at all corners except the last, and even there it’s not far off. How is that done? Carefully!  First, resaw a piece of wood that is as close as to the length of one side plus one end as possible. Open up the book matched pair. Mark carefully in either clockwise or counterclockwise rotation: end, side, end , side. The marked faces are the outside faces of the box. Keep the parts in the correct order when cutting the joinery and assembling. See; simple! (In the photo, each piece includes it’s A, B,C,D marking plus a script “f” for “f”ace.)

Note to self: that pink chalk finds its way into the grain and is hard to remove. Find another marking method.

The only other “design decision” was the size of the dovetails and which orientation for the pin boards. I made the choice on achieving a balance of end grain areas in relation to the size of then ends or sides. Dimensions: outside – 9″ x 6″ x 2 3/4″  inside – 8 1/2″ x 5 1/2″ x 2 1/2″.

The rest is the pleasure of assembling and especially carving. Finish is hand rubbed shellac and paste way, very satiny. The box is available on Etsy.

Here are pictures of the grain wrap….

photo of oval rose box - front and left end photo of oval rose box - front and right end photo of oval rose box - back and right end photo of oval rose box - back and left end

Filed Under: Boxmaking, Woodcarving

Lovin’ the Pink Panther and Red Chalk

September 17, 2013 by Bob Easton 2 Comments

A box I’m building has a flush fit lid. Holding the lid in temporary positions for various marking and fitting operations needed some temporary “posts” to prop it at the right heights.  How to prop it up? Wood? Sure, why not? I cut lots of wood.

photo of posts made of foam insulationHowever, is there something that can be shaped faster? Oh yeah. A package that arrived a few months ago used Owens Corning “Pink Panther” foam insulation as padding.

Perfect. It’s about an inch thick and easy to cut with a knife. Pink posts standing in the corners did the job nicely, and are quickly cut to new heights for final fitting.

Ponce on that!

Transferring carving patterns to the work piece is a challenge. Carbon paper used to be the normal process. Today, the stuff is becoming incredibly rare and expensive. Staple’s smallest package is 100 sheets for $16. I only need a few sheets, not 100. Beyond that, it’s also much drier than the old messy stuff we had long ago and does a really poor job of transferring.

Mary May offered a helpful tip in her latest newsletter, but it uses laser printer output, more modern than carbon paper but not as popular as ink-jet printers.

photo of making pin holes in a patternDad, in his sign painting days, used paper patterns riddled with tiny holes and a ponce bag to force colored chalk through the holes. You might have to go to both a fabric store and an art supplies store to get a ponce bag and the tool to make the holes (ponce wheel). Looking around, I found enough stuff already on hand to make my own tools.

Hole making: they’re just pin holes, use a pin. Chuck it in a pin vise (on hand from times when I made models) and go to it. photo of poncing pad, pattern, and box of chalk dustHint: put a piece of corrugated cardboard under the pattern.

Ponce pad: they’re simply fabric bags full of chalk. An old handkerchief, some chalk used for striking lines (hello carpenters), and a bit of string is all one needs.

It works! For simple patterns, the chalk marks are enough, and last long enough to do the carving. photo of ponced patternFor more complex patterns, I go over the design with a pencil.

Last hint: Keep your patterns and pattern making tools all on one place so you won’t have to play this song when you need a pattern again.

Not a box

photo of a pile of shavingsI sweep the shop floor once in a while. These are the shavings and dust that come from resawing and shaping the wood for the current box. I enjoy doing it all with handtools, and enjoy even more having outlaw country or soft jazz replace the noise of whining tools and dust collectors. Besides, these shavings have many more interesting shapes than the dust in those cyclone bags.

Filed Under: Boxmaking, Woodcarving

  • « Go to Previous Page
  • Page 1
  • Interim pages omitted …
  • Page 37
  • Page 38
  • Page 39
  • Page 40
  • Page 41
  • Interim pages omitted …
  • Page 128
  • Go to Next Page »

Primary Sidebar

Footer

Recent Posts

  • New Frame Saw / Scroll Saw
  • Lamppost Sign
  • Goodbye PayPal – Goodbye Bob’s eBooks
  • Anarchist’s Workbench is Done
  • Why we keep offcuts…

Categories

  • About
  • Artwork
  • Boatbuilding
  • Boating
  • bowl carving
  • Boxmaking
  • Clocks
  • Drawings
  • eBook
  • etude
  • Eva Too
  • Eva Won
  • Fiddlehead
  • Fiddlehead model
  • Flying
  • frame saw
  • gilding
  • green woodworking
  • Grinling Gibbons
  • Guns
  • Hand tools
  • Humor
  • kerfing plane
  • Lettercarving
  • Mill Creek 13
  • Model building
  • Power tools
  • Rant
  • resawing
  • scroll saw
  • Shopmade
  • sign painting
  • Stonework
  • Swimming
  • Technology
  • The Wall
  • treadle lathe
  • Uncategorized
  • VSD
  • Woodcarving
  • Woodturning
  • Woodworking
  • workbench

Other stuff

  • About
  • Contact
  • Privacy Policy

Copyright ©2024 · Bob Easton · All Rights Reserved