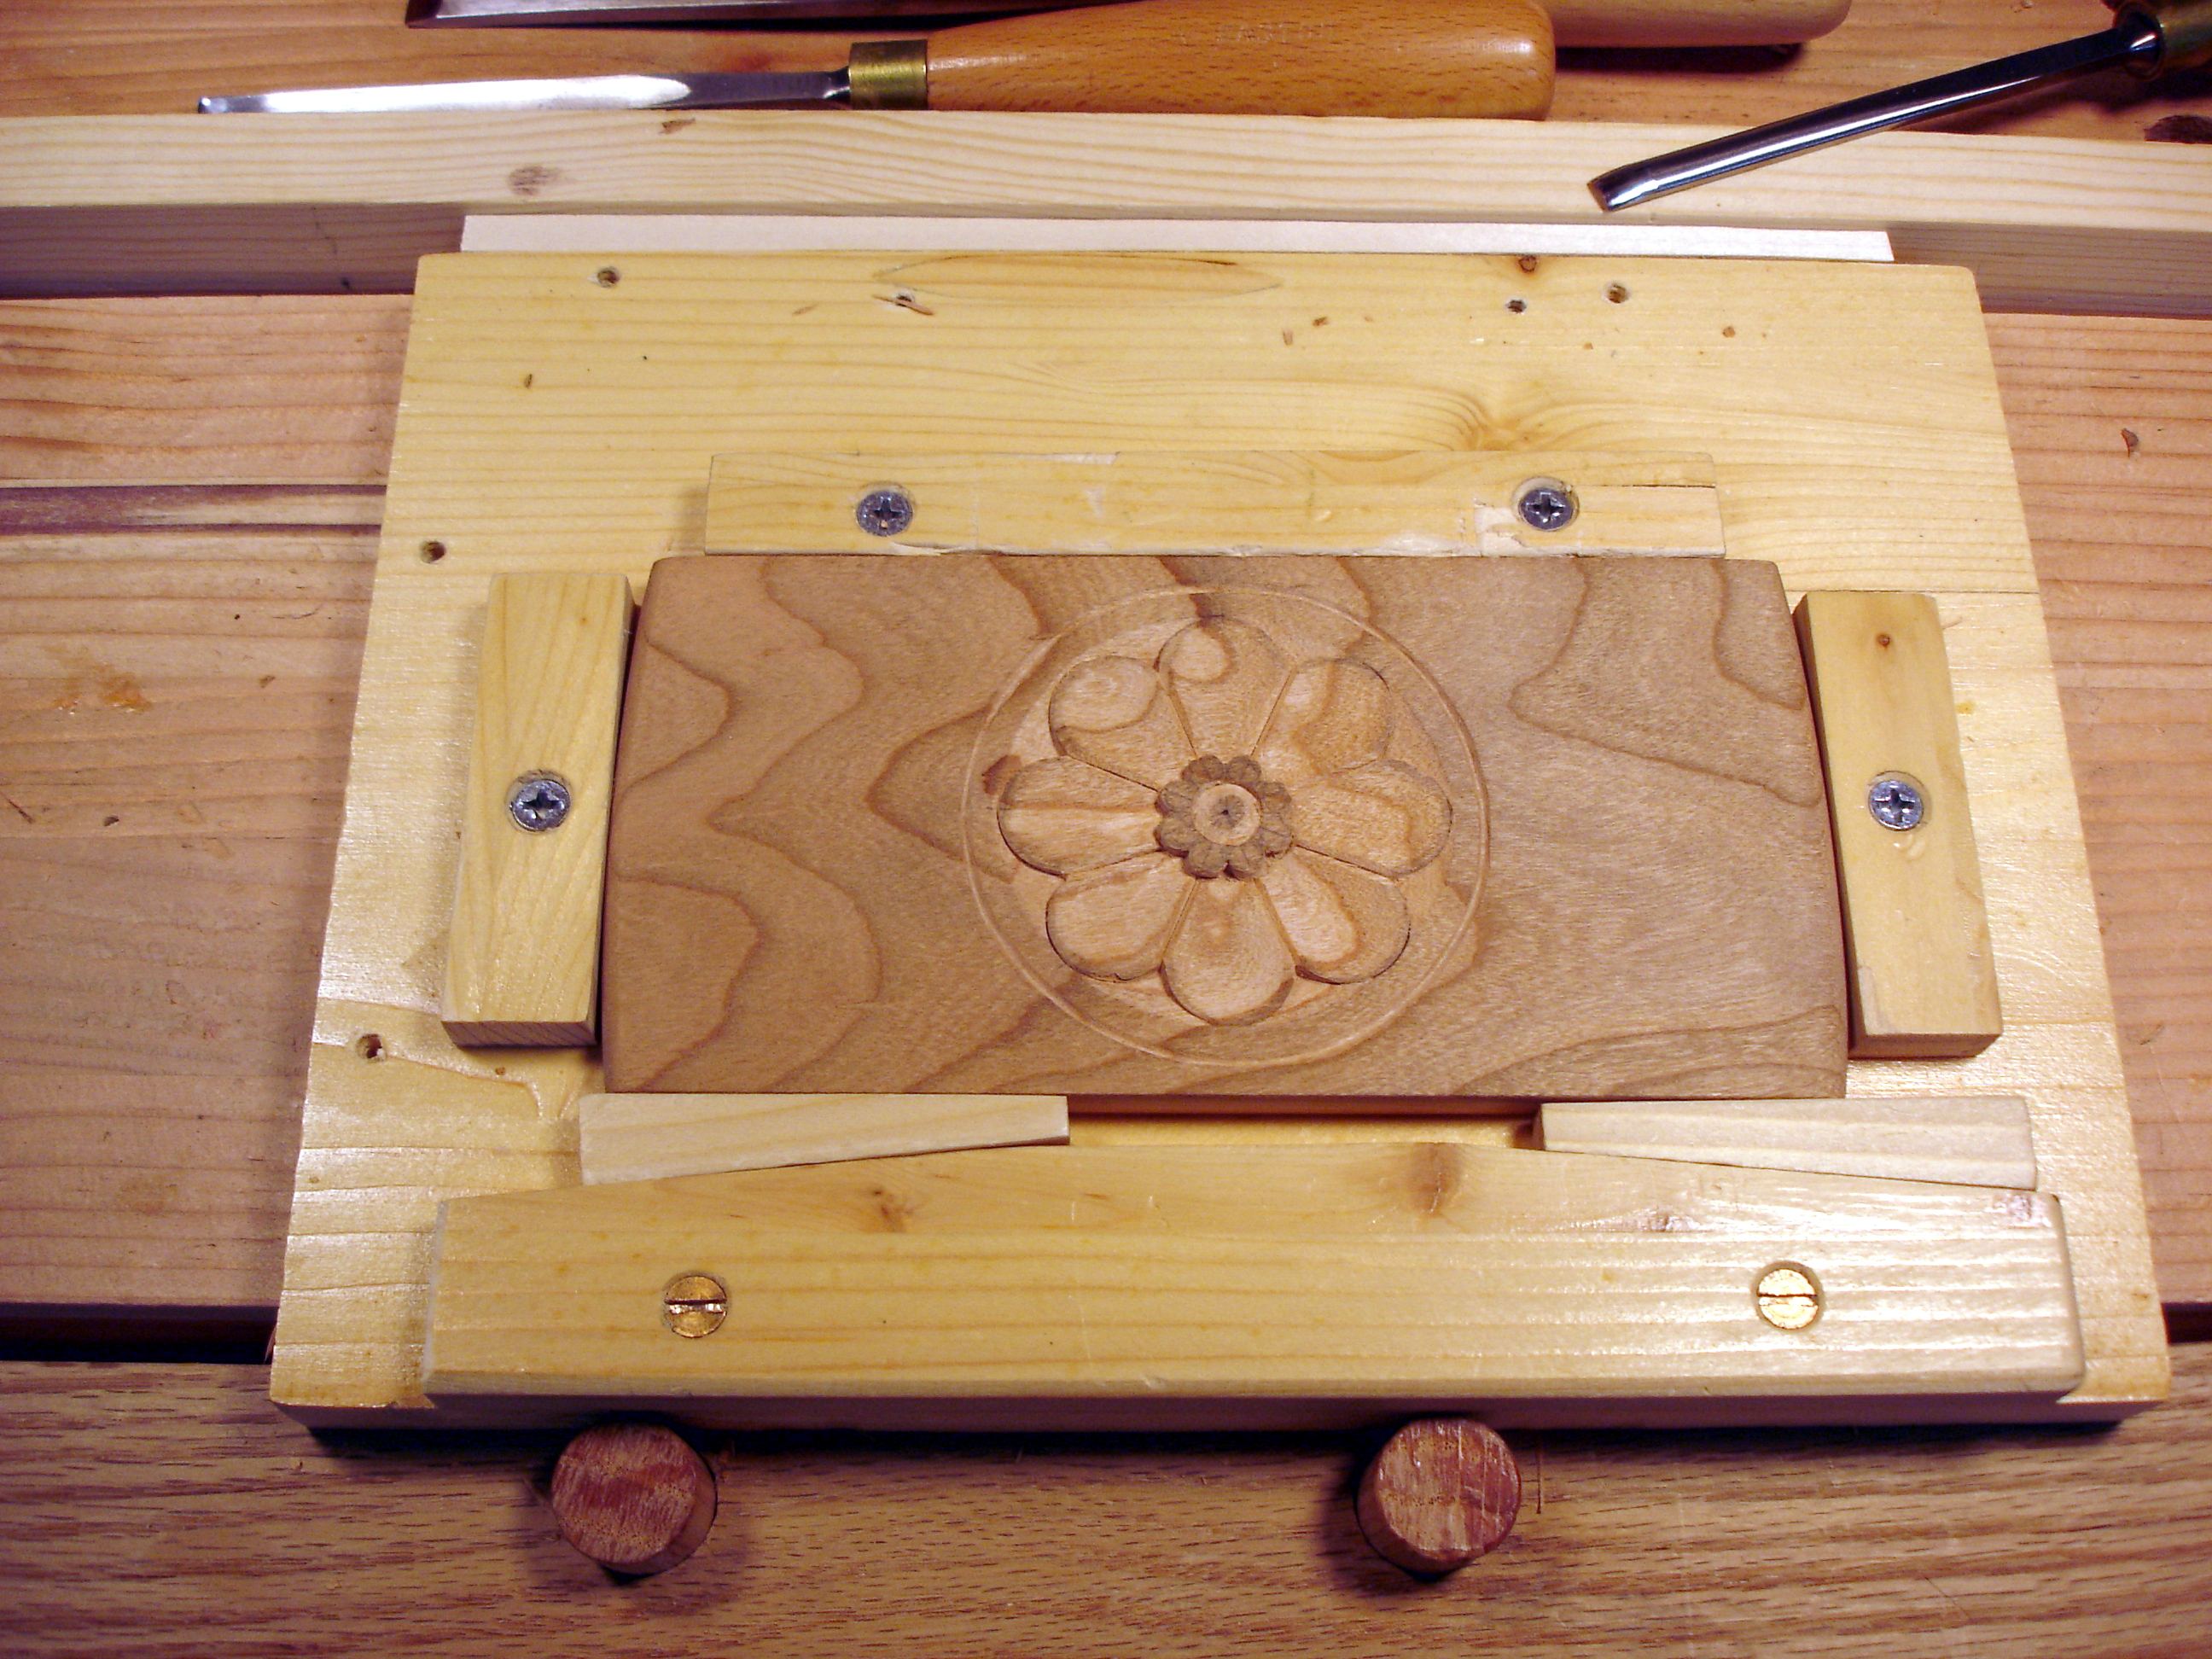
 Most of my woodcarving has been rather small stuff, 3 inches square, 4 inches square, 4 by 6, 5 by 7, nothing very large. It’s been my practice to hold it securely in a frame like device that has movable stops. If a stop doesn’t fit the work piece exactly, a couple of wedges tighten things up.
It works great. Nothing moves. Nothing slips. All cuts are secure. Yet, sometimes the directions of cutting is awkward. Oh yes, one needs to become ambidextrous in tool handling and that’s not very hard. However, there are times when the angles just don’t work out well for either hand.
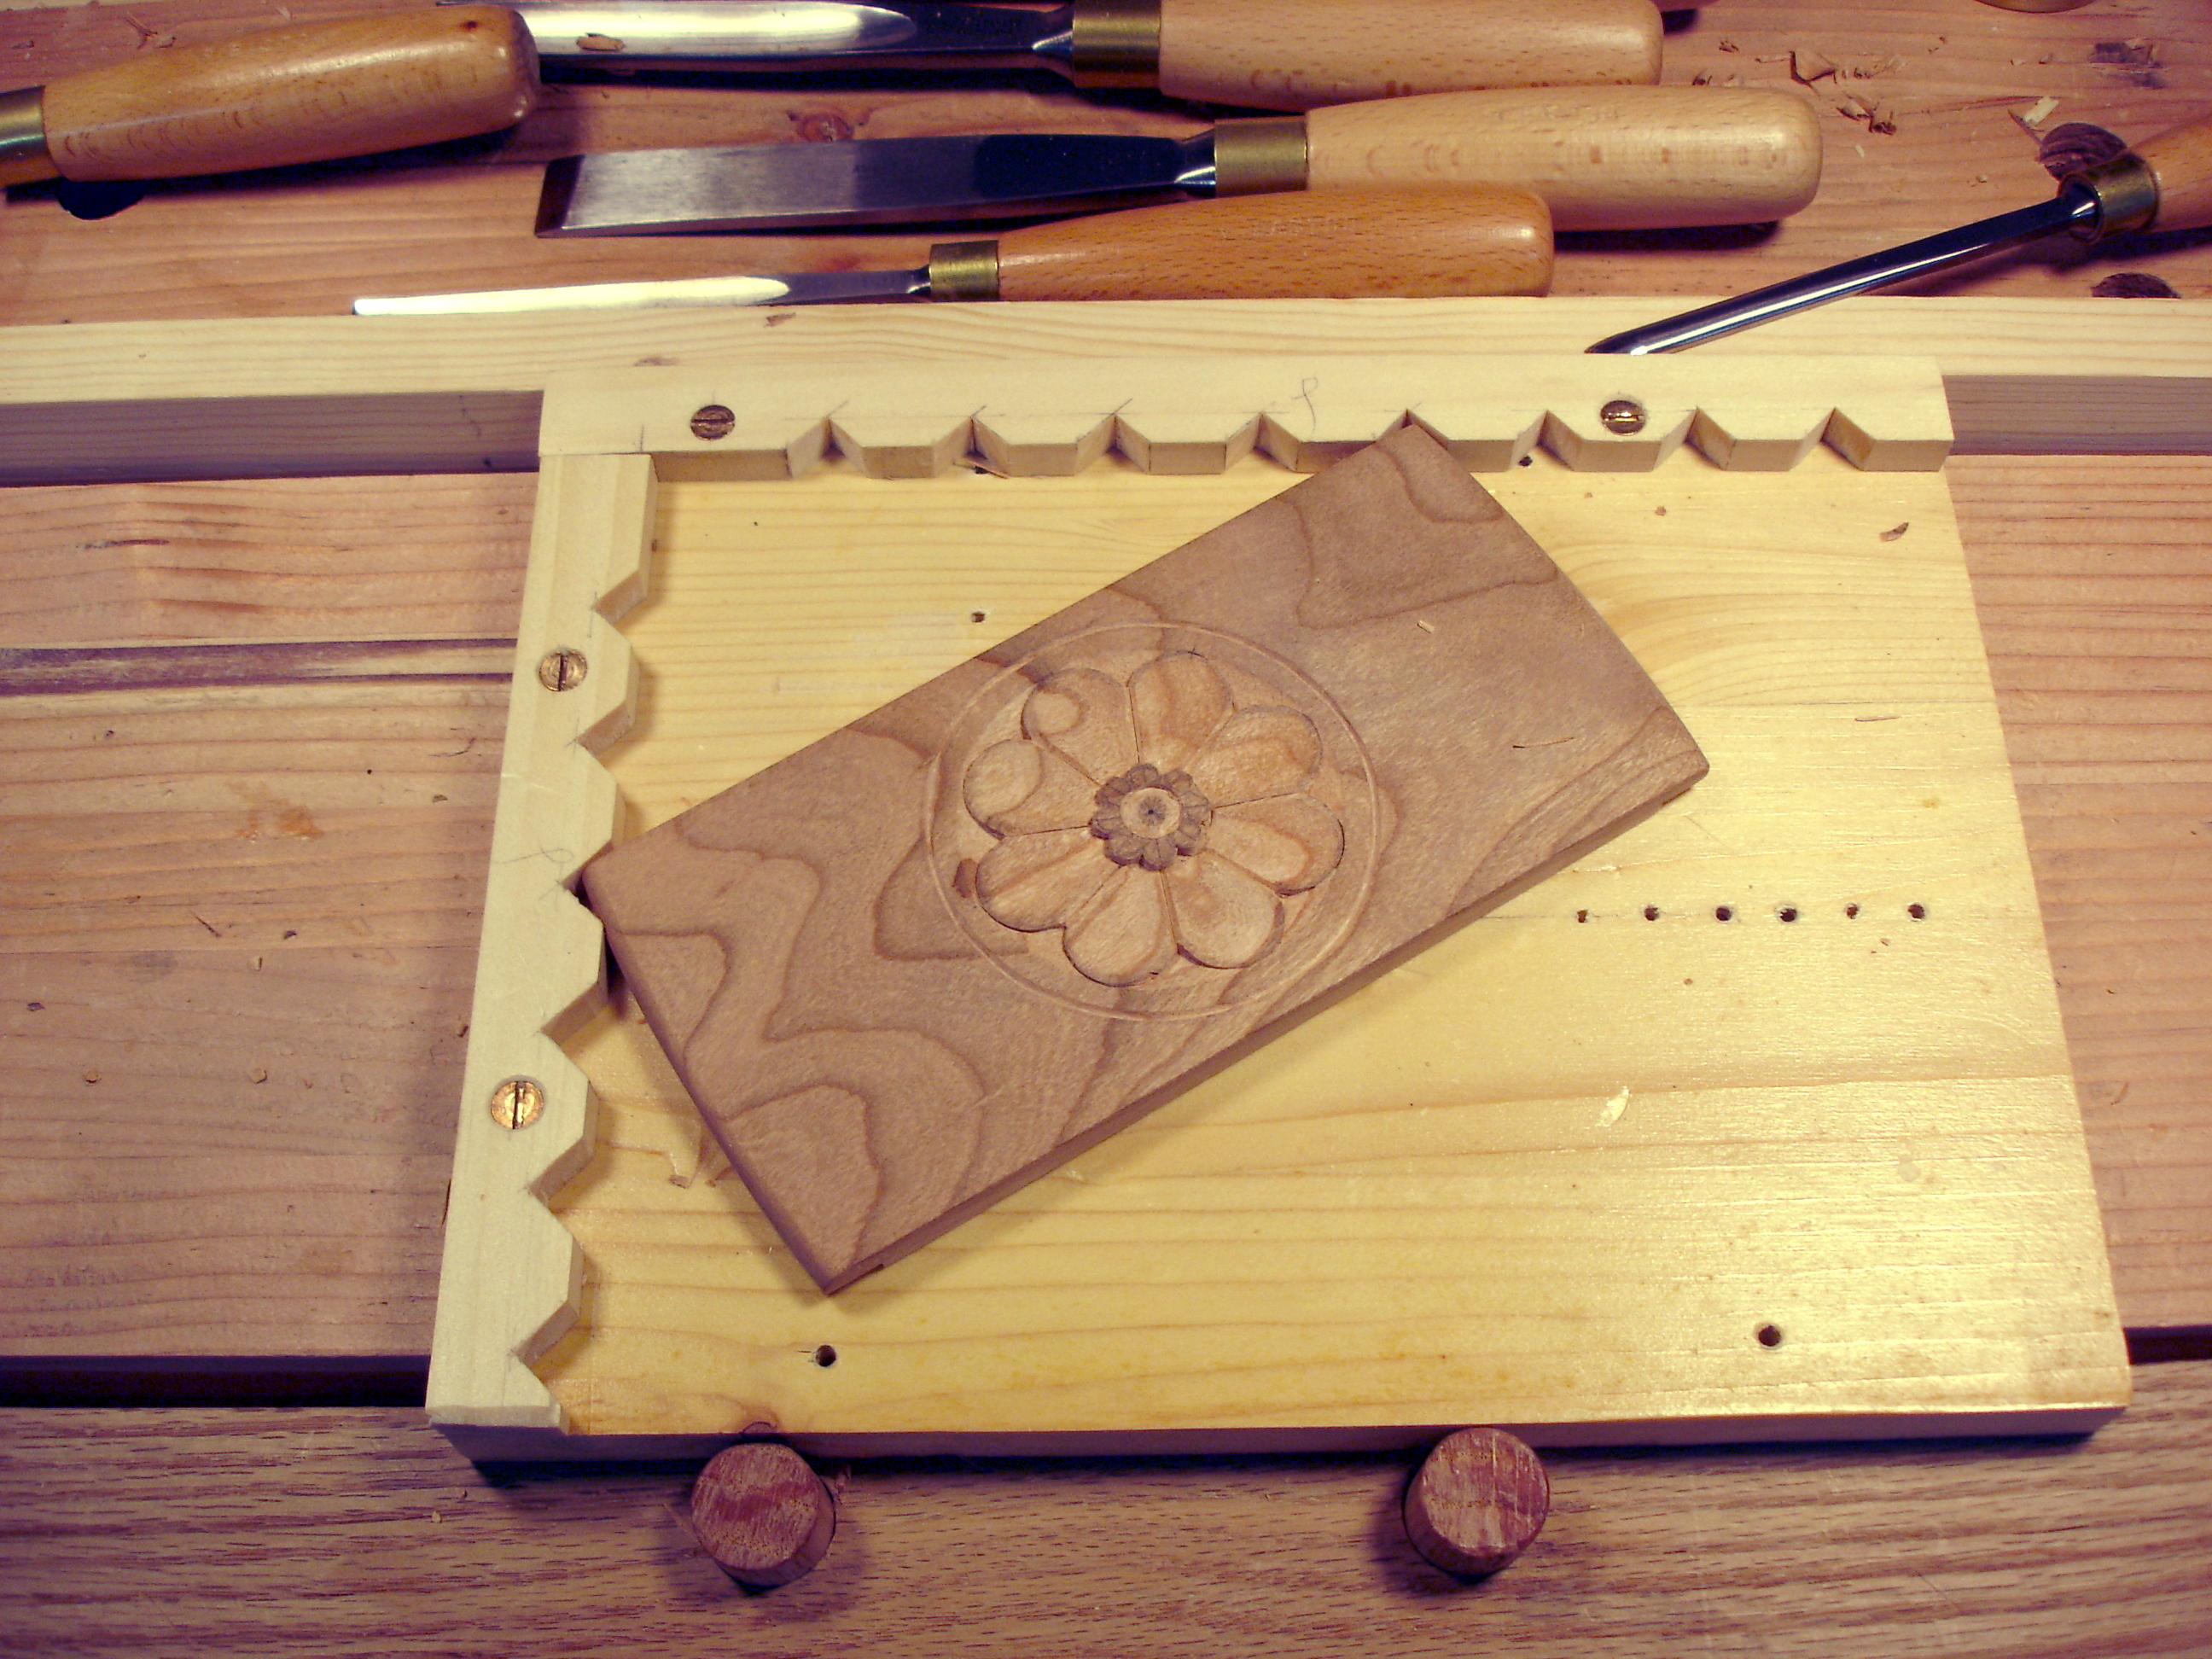 So, I tripped across someone using a different method (YouTube, you know). Actually, I’ve seen similar work several times. The work piece is loose, but jammed into a corner or into other stops to absorb the work force. Other than the moments that cuts are being made, the piece can be moved around easily and quickly. Some wood workers plane wood this way. One particular arrangement for “stops” looked interesting, so I fabricated the contraption. As you see, it’s simply a pair of wood strips with notches cut in them.
 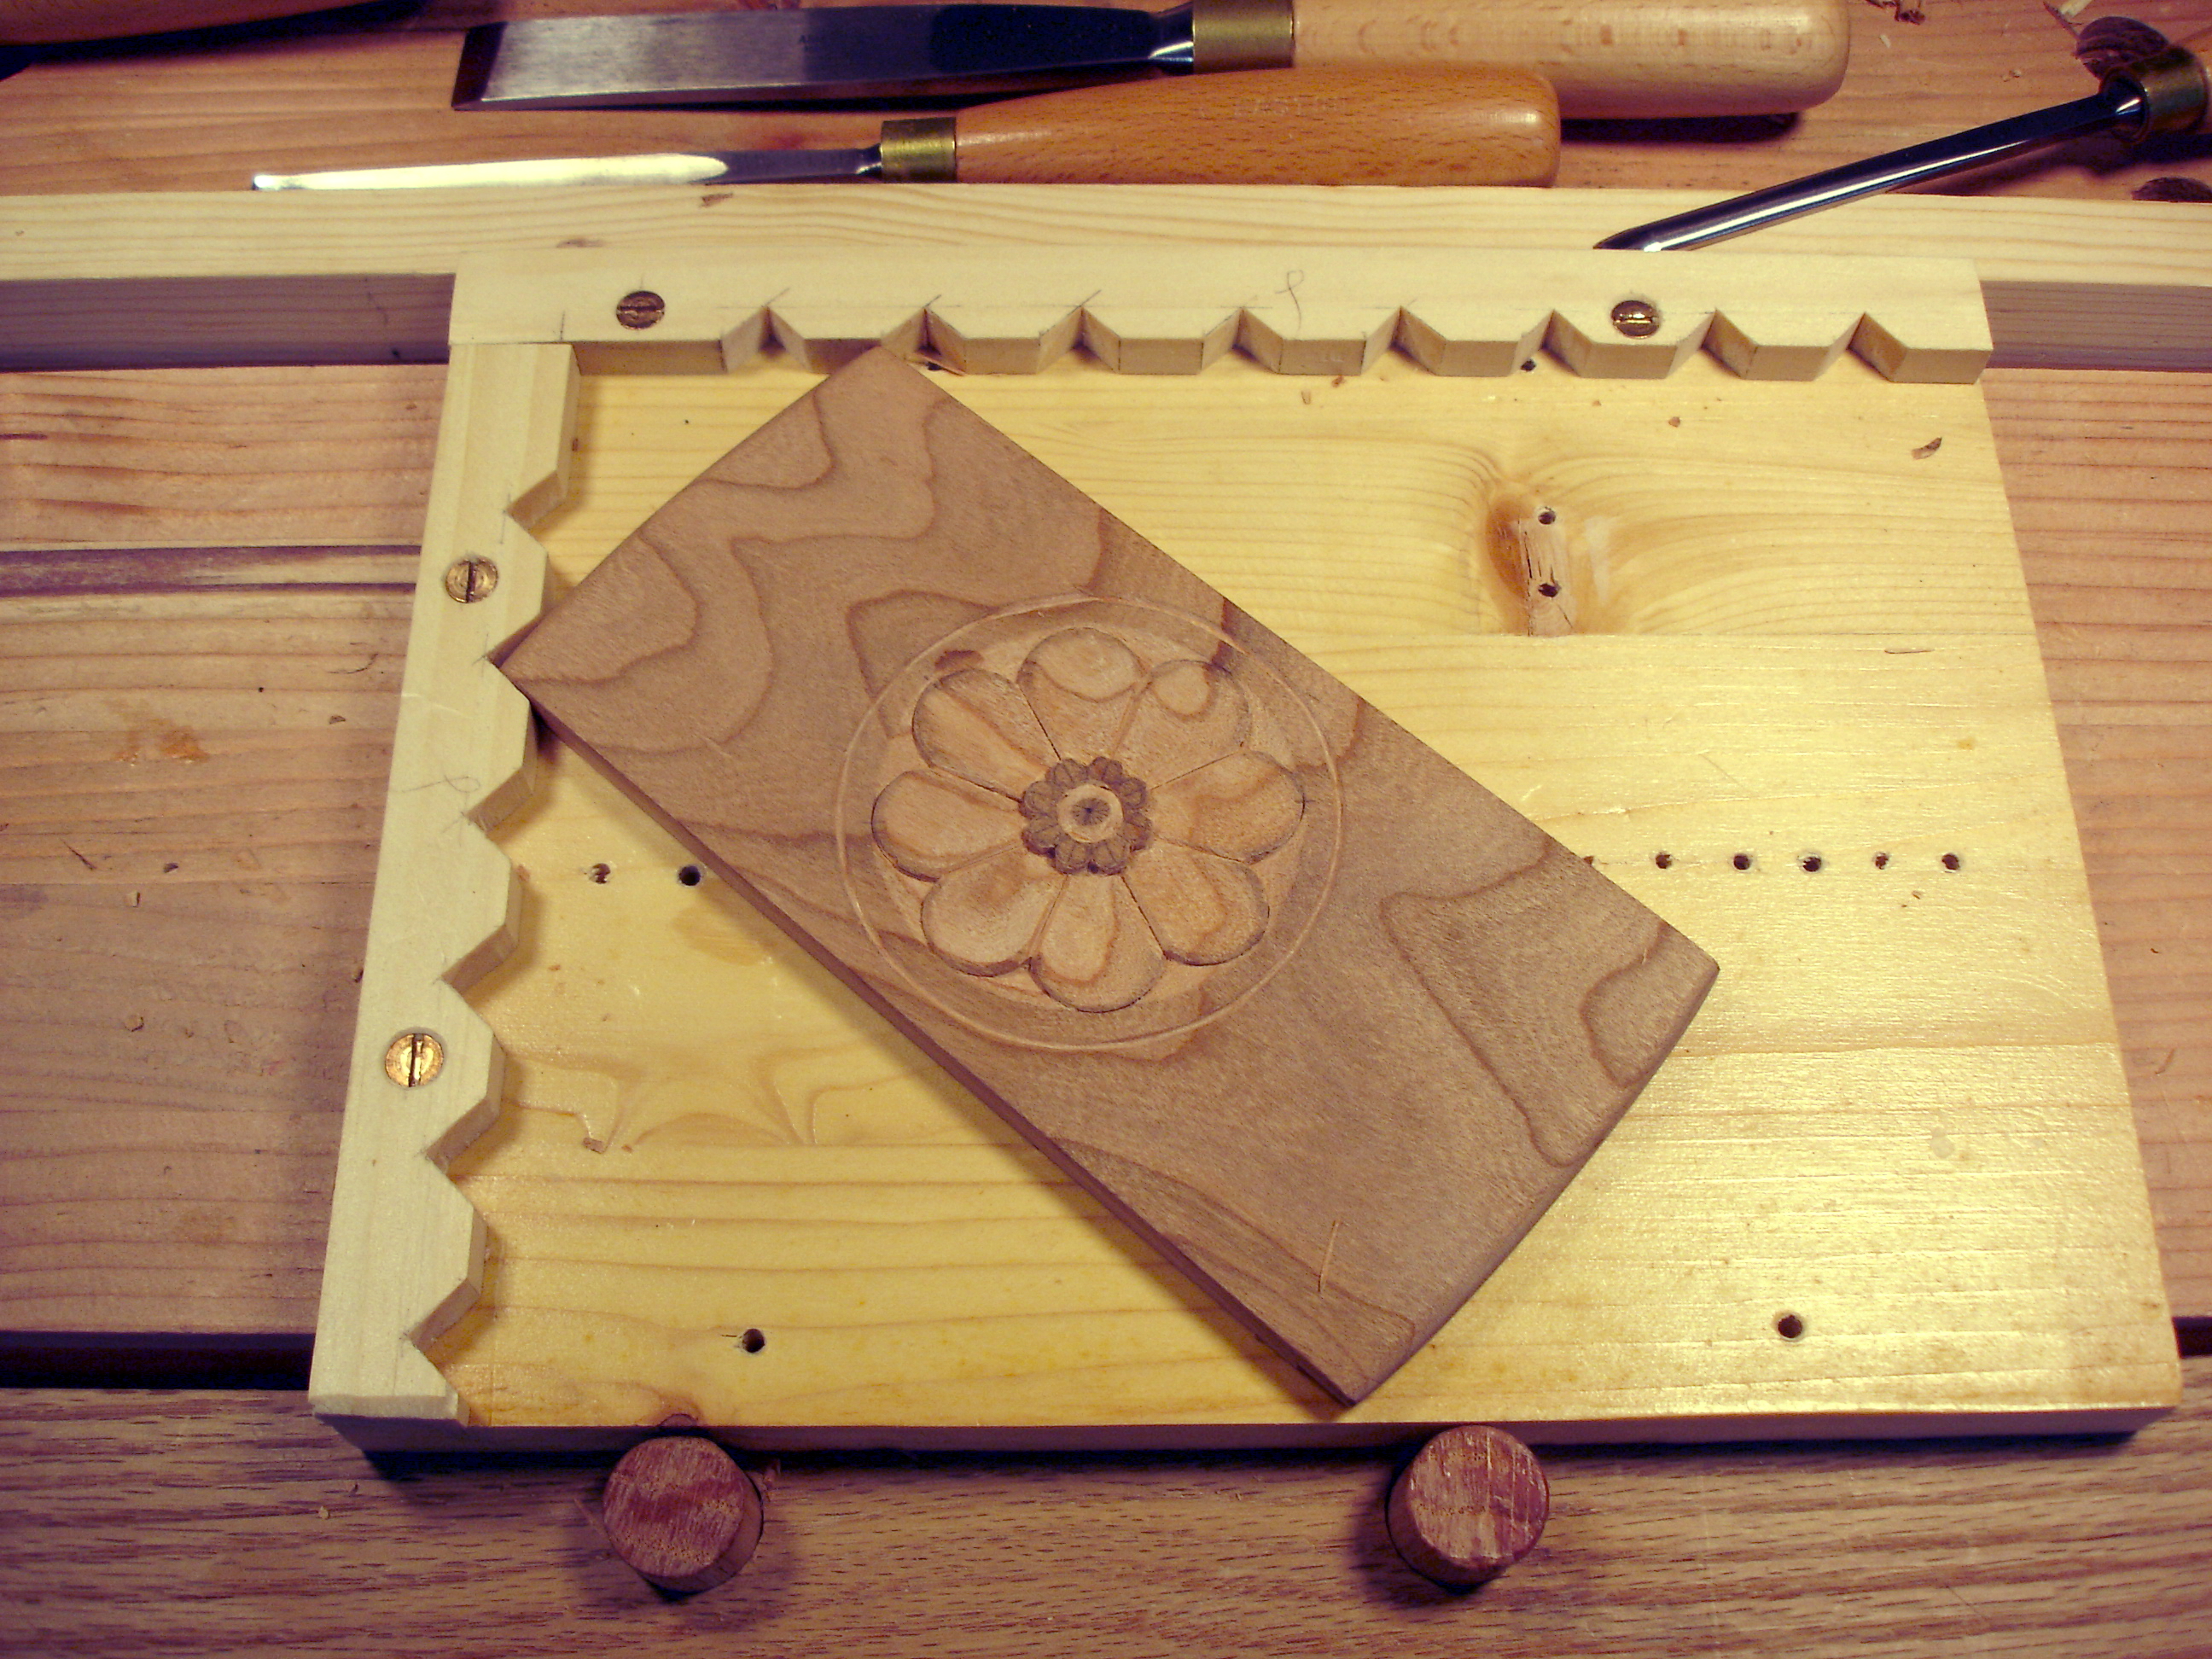 Since, I’m right handed, arranging them as shown is natural. The work piece can now be quickly oriented in almost any direction and always have two points of contact to keep is steady.
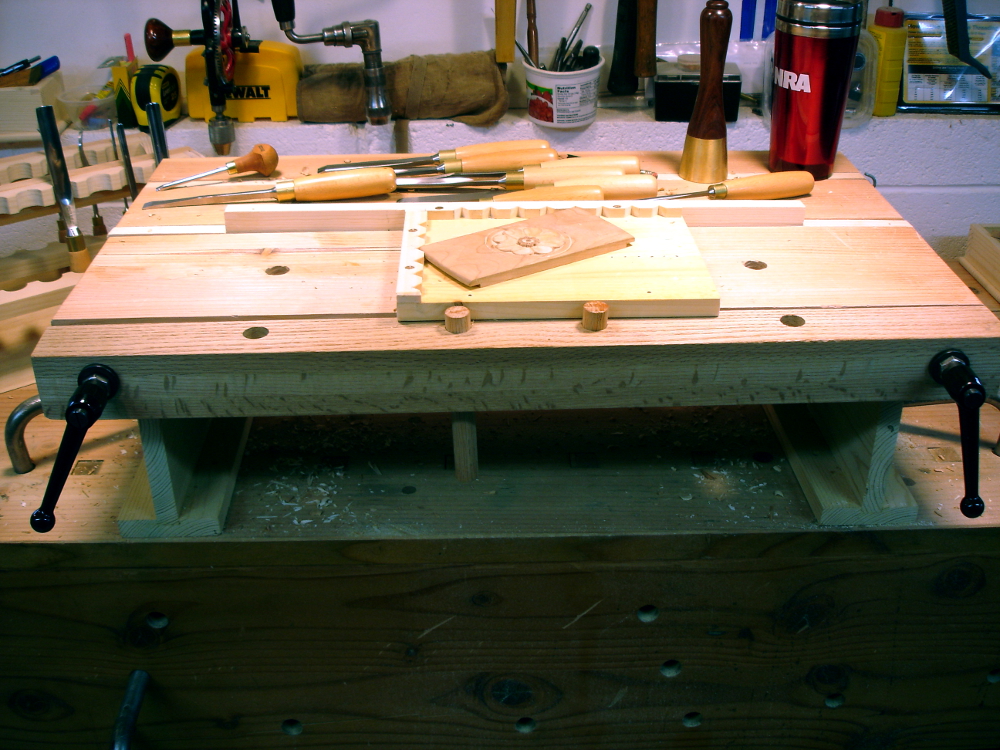
This box lid is about 3.5 inches by 6 inches and I’ve used this frame for both hand powered cuts and mallet assisted cuts. It’s worked well for this piece. And… all of the work is done atop my carving bench, or my BoB, bench on bench.
 BTW, the work in progress is the lid for a small cherry box you’ll see later.
Oh yeah, none of this works well unless the screw slots are “clocked.”
I have a similar bench on bench set up for my carving. That’s a pretty clever way of holding it at odd angles, I kind of like it.
I’ve been using a Veritas Wonder-Pup on my BoB, with a cleat at the end to press the work against. I made it with an undercut so the pressure of the Dog hold it’s very firmly in place no matter which angle I come at it from.
I’ve been getting more comfortable with my opposite hand, and only rarely have to re position the work. The Wonder Pup is quick and easy to re position, and if I need a new spot I can just drill a new hole.
I just finished a Tudor rose style carving similar to this actually, in some locally grown Madrone wood that came out pretty nicely. I like the figure on that board, very nice looking piece.
badger
The downside of the loose approach is that it’s too easy to always carve from the same hand and then lose the ambidexterity.
I’ve used a bit of Madrone. I find it an attractive color and I’m guessing it’s pleasant to carve. Your Hearldic roses in the Follansbee style look great.
Am I correct in that you are using the direction of force from the chisel to keep the work secure? Or is there a wedge system that I don’t see?
Yes Ralph, you’re correct. It’s only the force from the carving tools that keep the piece in position against the stops. No wedges when using the notched stops.
Perhaps you have seen woodworkers who plane wood by placing one end against a dog or planing stop? … and maybe another cleat for the back edge of a long board. Not everyone locks things down tight for planing.
It’s the same principle.
Other than the advantage of being able to rapidly reposition the work piece for best carving advantage, it also makes it easy to pick the piece up and move it around to inspect the surfaces under different lighting angles.
Thanks Bob. The “Guilloche” (or interlinked circles) is something I’ve been working on. The Tudor rose is for my mom, because she likes the motif.
The Madrone wood can be a bit hard at times, the piece I am working with has this red streak that runs through it that is rock hard. But it comes out crisp, and looks great when I’m done.
I’m excited to work with these planks of air dried Alder wood that I just picked up, a little softer, but nice tight grain and cuts beautifully.
badger
Just when I think I won’t see anything new, I see this notched “bench hook”. Cool idea and I am always partial to this method of loose working. It is how I do all my other chisel work so I may give this a try. The ambidextrous thing is a valid point however. I have found that if I secure the piece and work at my joinery bench which is high and a smaller top, I can work in a 180 degree arc and just switch hands as needed. I think as I get into more complex things though I’ll need to move the piece around a lot more. File this one away for the future.
Hi Bob
I recently acquired a Goodell-Pratt hand drill, with the two-speed gear change and also a ratcheting mechanism. I think it’s a #259. I’m stuck on the ratcheting mechanism, which doesn’t work. Did your have this, and do you know how it should be assembled?
Thanks. Searched patents, but didn’t find the correct one.
Hello Sydney,
I have several posts about my GP eggbeater. This one includes a group of 4 photos at the bottom which show the speed shifter disassembled. Hope it helps.
Saw your work holding idea. I do relief carving and this is a great idea. Allows turning at angle needed. I can’t wait to make one of my own.
Another option is a board with screw-down stops to hold the work with this board fastened to a narrower board below by a lazy Susan turntable bearing. The lower board is secured in a vise or to a bench and a pair of rubber door wedges knocked into the air gap between boards allow your work to be spun and locked to a chosen presentation. For a different size piece of work, simply relocate the stops. It also serves as a turntable for spray varnishing the finished work – 2d or 3d.
GOOD ideas Peter. Thanks!