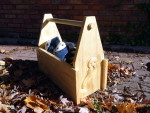
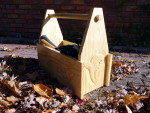
Tool tote!
Yes, a tool tote. One project too many found me making numerous trips to the workshop, usually for a few tools per trip. It’s long past time to have a carry tote or tool tote for the projects away from the workshop. One of the very simple projects at Paul Sellers’ Woodworking Masterclass site is a “Carrying Tote.” The purpose of the 2 episode project is to teach the basic dado (housed dado in UK) joint. Hey, I had some lumber of appropriate size. Actually it was a bit wider and I wasn’t in the mood for ripping. So, I used the width I had and it worked out OK. Building the tote itself was easy.
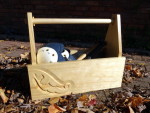
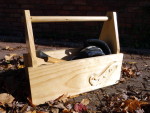
But, it was plain. Plain wood. Ahhhh, the problem was an absence of carvings! Have to fix that…
There was a time that we vacationed away from the shop, and I substituted a pencil and yellow notepad for gouges and wood … making lots of drawings of Acanthus leaves and scrolls.
I borrowed from that collection for these carvings. These are shapes that are actually better in high relief, on wood an inch thick or more. The challenge here was executing them in low relief while still giving the right sense of shape. At the same time, I wanted them incised instead of raised where every knock and bump would produce damage.
The box is made of Radiata Pine from New Zealand, the “white wood” carried by our big orange home center. When I started, I was skeptical about carving this stuff. It actually worked out well, a bit stringy in places, but not too bad. Finish is 3 coats of shellac. No rub out. No wax.


Nice carving. I have never carved anything so far but this makes me want to. Dare I request a tutorial?
Hi Phil,
I know a GREAT place for carving tutorials. I’ll bet you’re new here and haven’t seen my earlier references to Mary May.
My fabulous carving teacher is master woodcarver Mary May. In addition to teaching classes around the country, she has an online woodcarving school. It is a subscription based school, very reasonably priced at $10/mo with a new lesson every week. Where else can you find lessons on anything for $2.50 each?
Go give her school a look. There’s a “Free” level of membership which offers a dozen beginner level lessons. Go to: http://marymaycarving.com/carvingschool.
Disclosure: I am the “code monkey” maintaining Mary May’s several websites. My interest in promoting her work is based entirely on respect for her mastery. I receive no direct economic benefit from increased membership at her online school.
These days, I put decorative carving on nearly any flat surface I am building. I’m using it to build my skills and learn some of the techniques through doing. I have a tool tote with full strapwork carving in the 17th century style.
Hi Brander,
We think alike … build skills. Yes, I’ve seen that tote; very nice work. Peter F. would approve!
Hi Bob,
What a great idea! It looks like you have really been studying the Scandanavian acanthus leaf style – very nicely done!
Thanks Mary! I learned from a great teacher.
Yes, it’s the style of Yorburg and Sandhom.
This caught my eye the first time I looked at your blog. I’ve been working on carving myself and have some ideas on making plaques with simple carves on them. Your tool tote is a good place to do practice carves — may have to play around with that for my grandson and Christmas!
Hi John,
Any wooden surface is a good place to practice. 🙂 I’ll be watching for your carvings.
Keep havin’ fun.
This is the perfect project for my nephew who needs a new tool tote .I will check out
Paul Sellers site and hopefully it will work out a fairly easy project to a relative newbie. You have encouraged me to have a go at carving myself so I will make a few sketches and give it a go as it certainly does show craftsmanship and skill.