• Skip to primary navigation
  • Skip to main content
  • Skip to primary sidebar
  • Skip to footer

Bob Easton

Chocolate powered woodworking

  • Home
  • Grinling Gibbons Tour

Bob Easton

Regulator Clock – Completed Mouldings

October 23, 2017 by Bob Easton 8 Comments

photo of two moulding stacks, crown and base

Gratitude: Hide glue

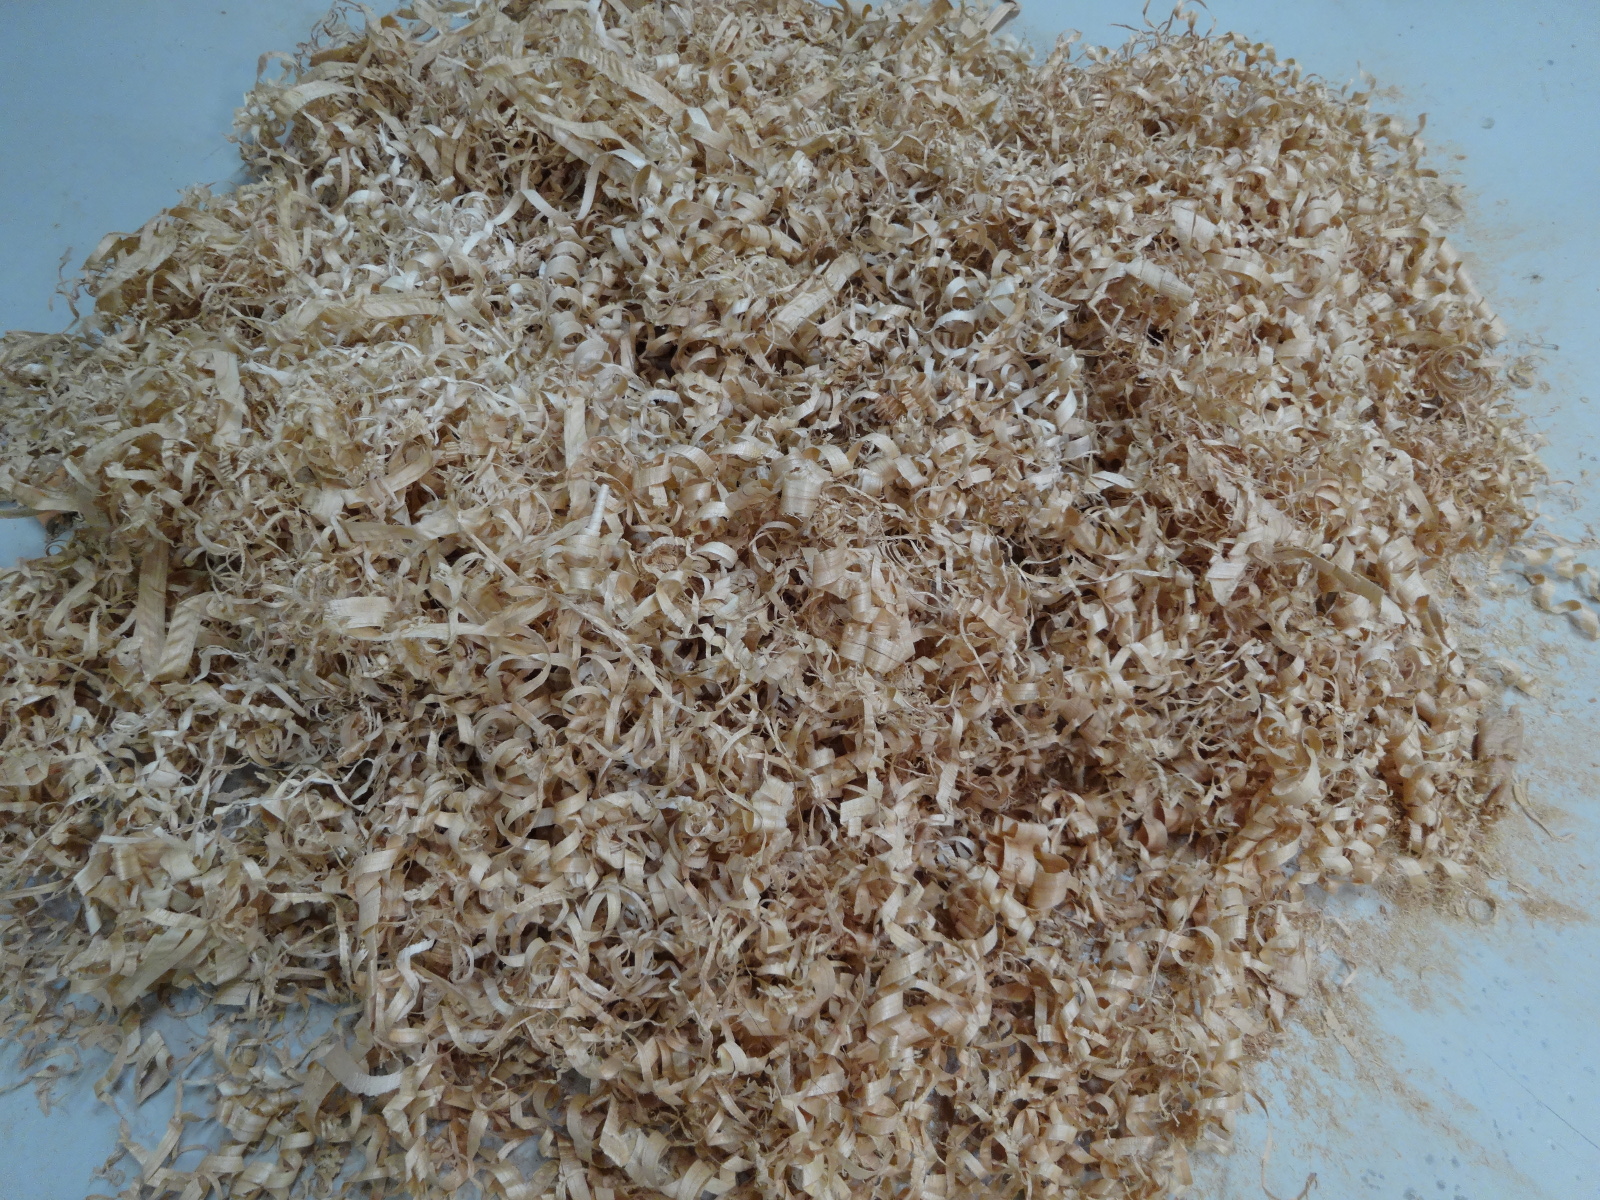
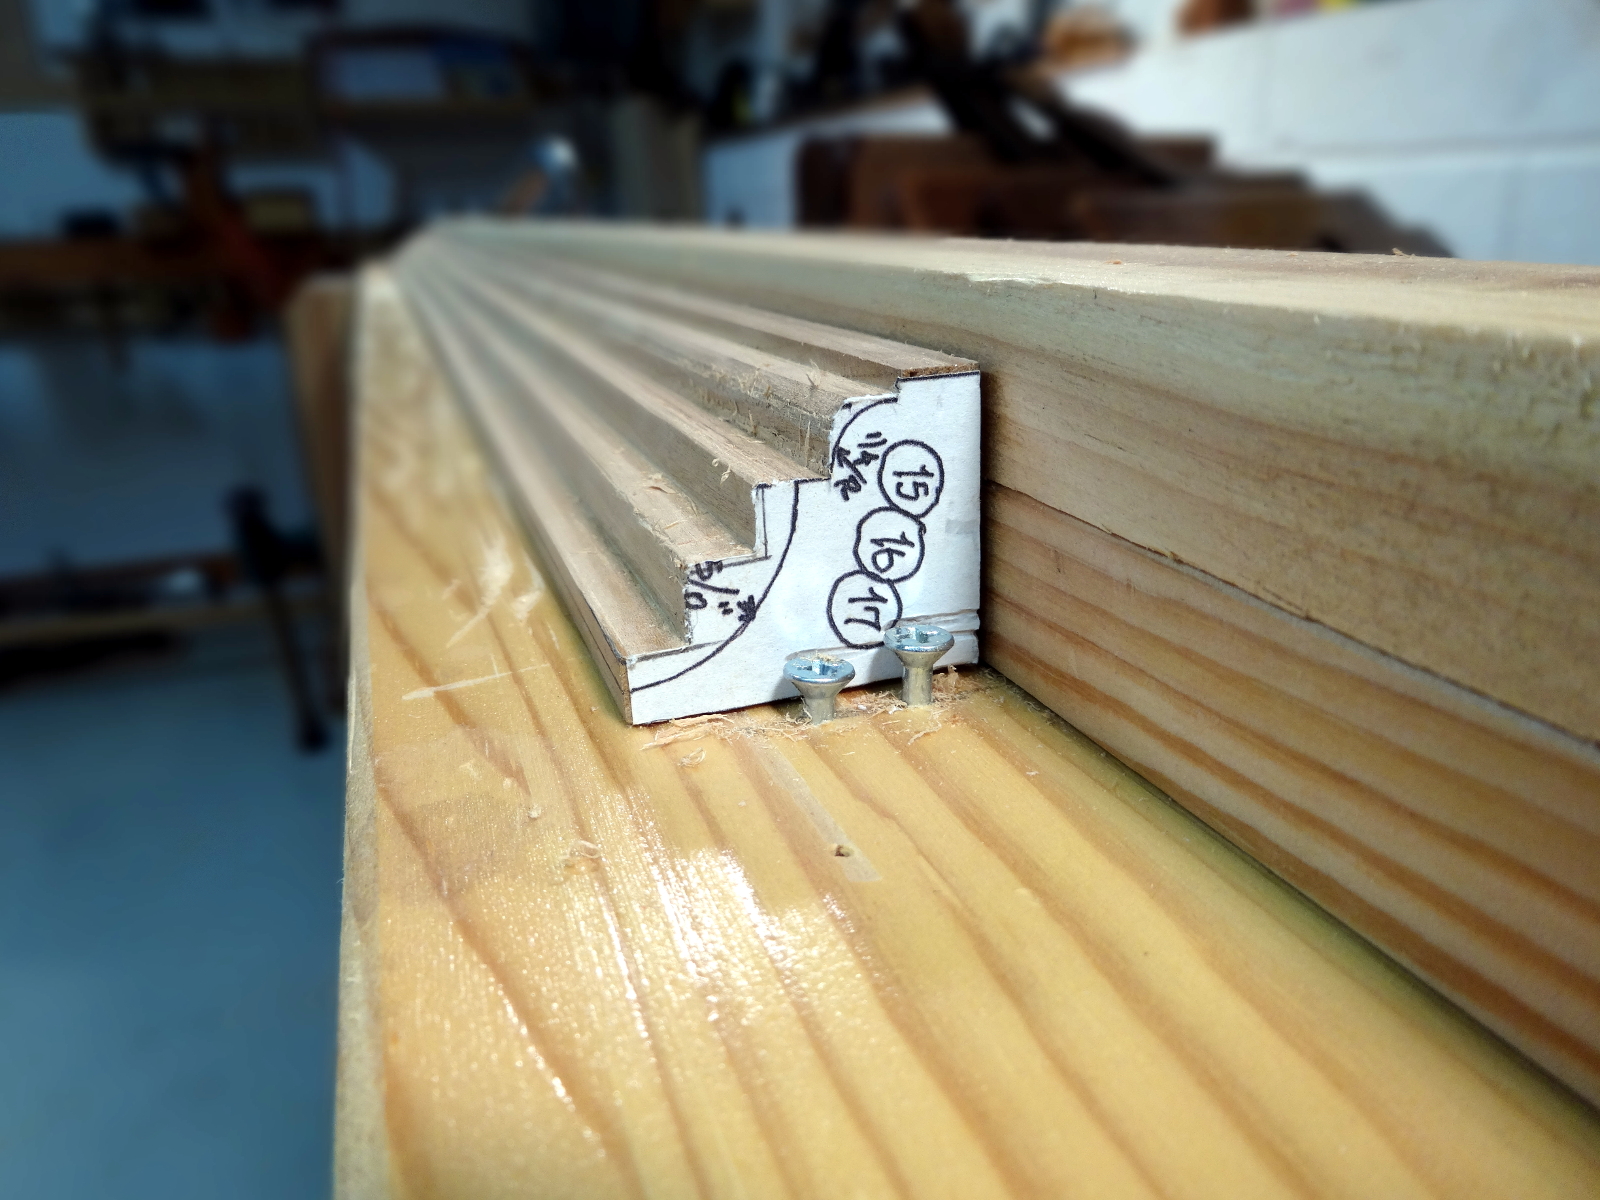
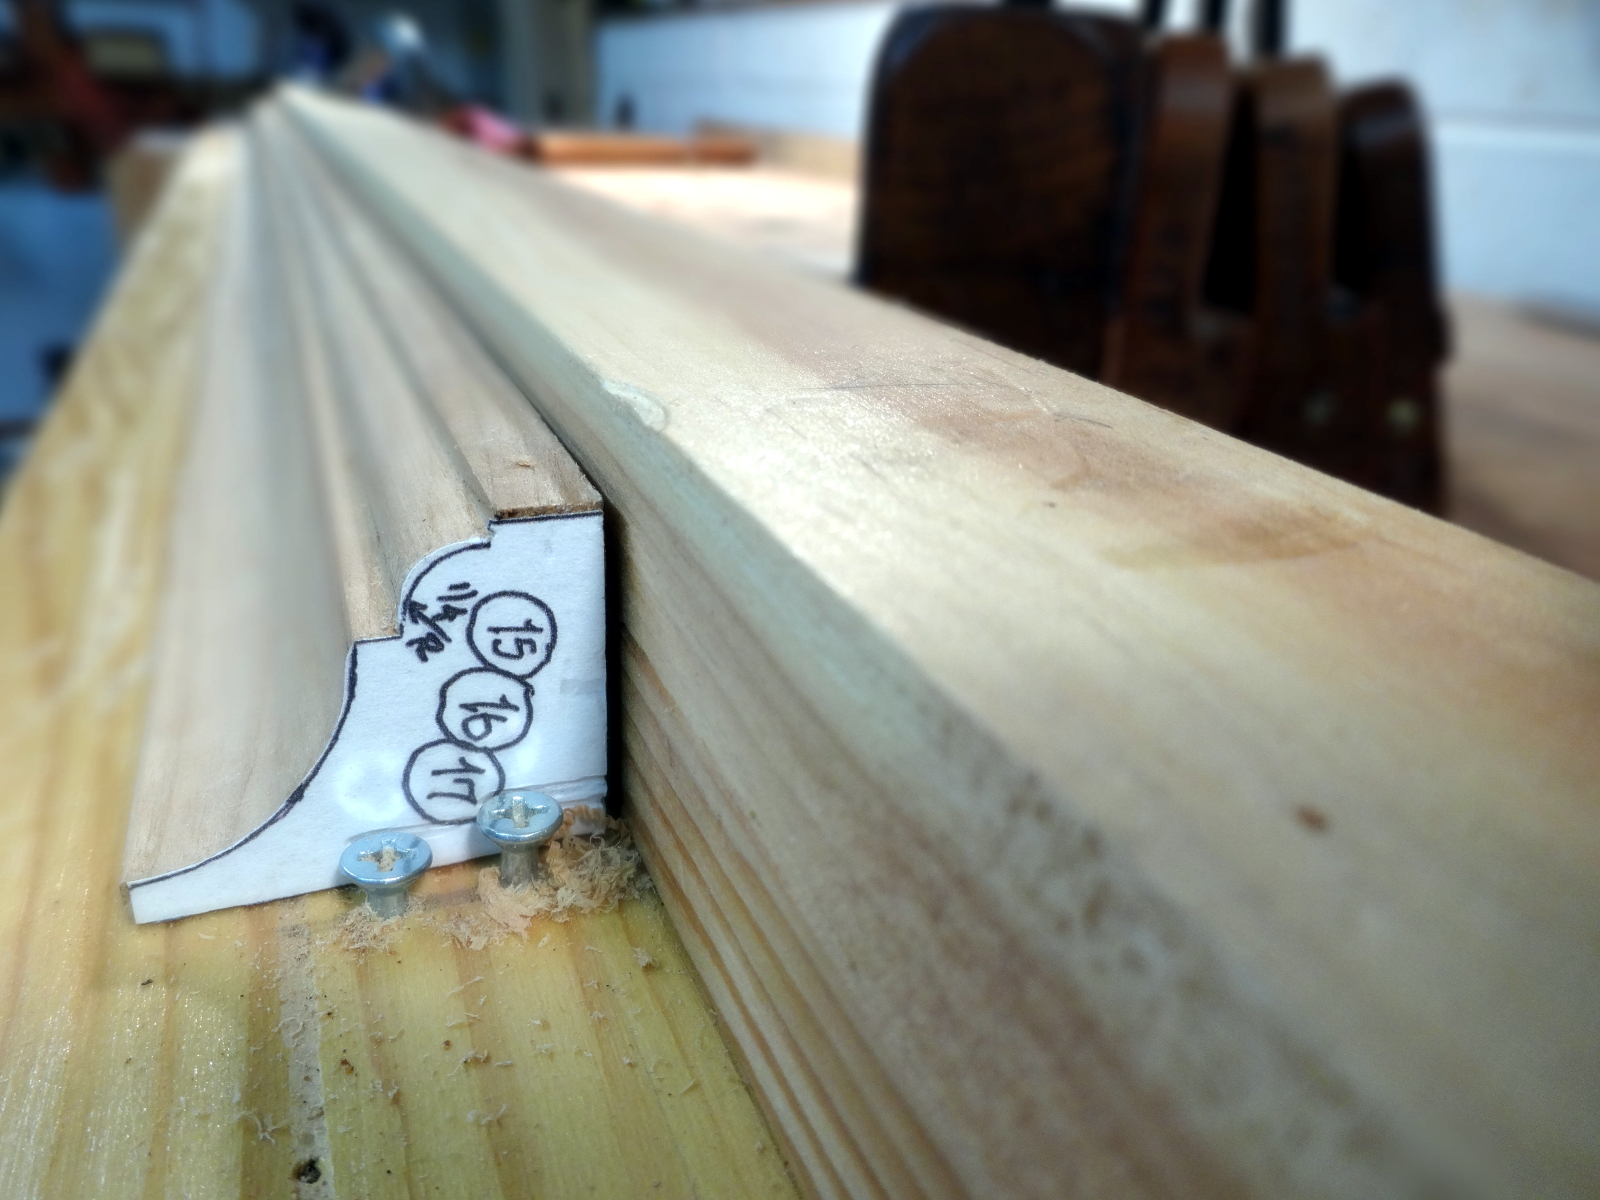
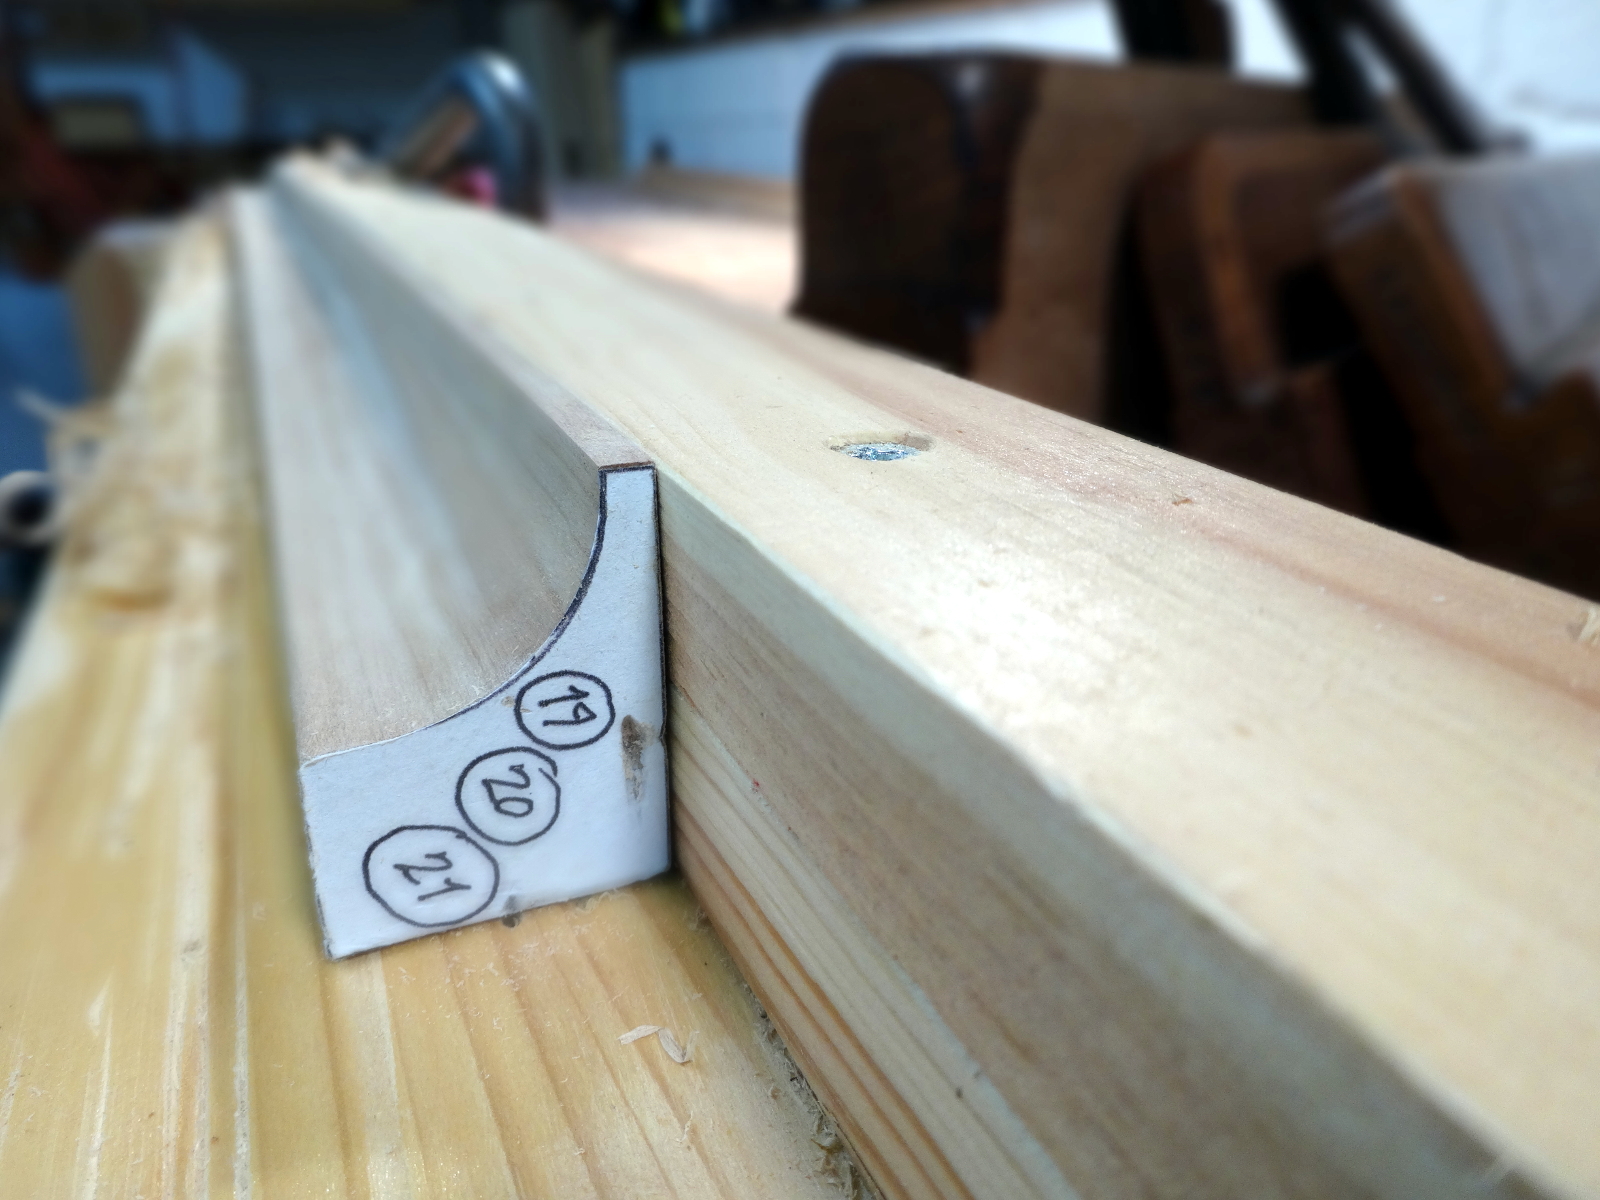
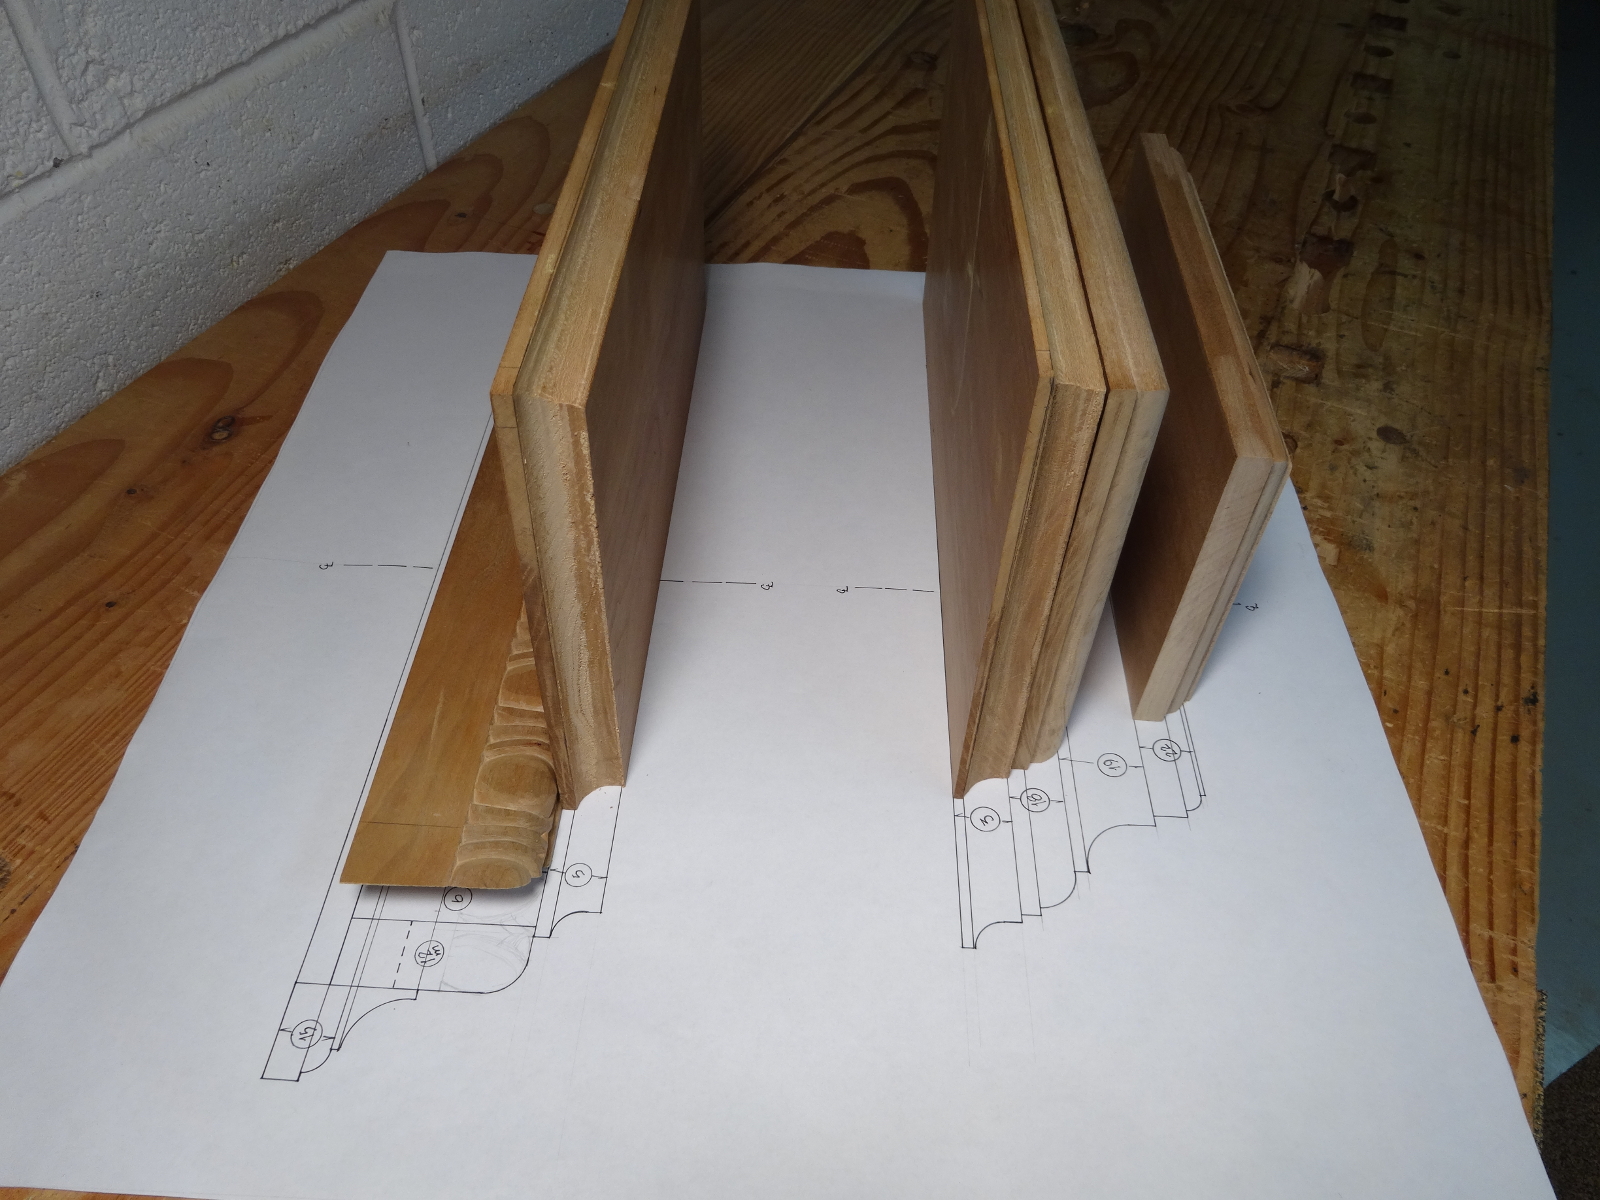
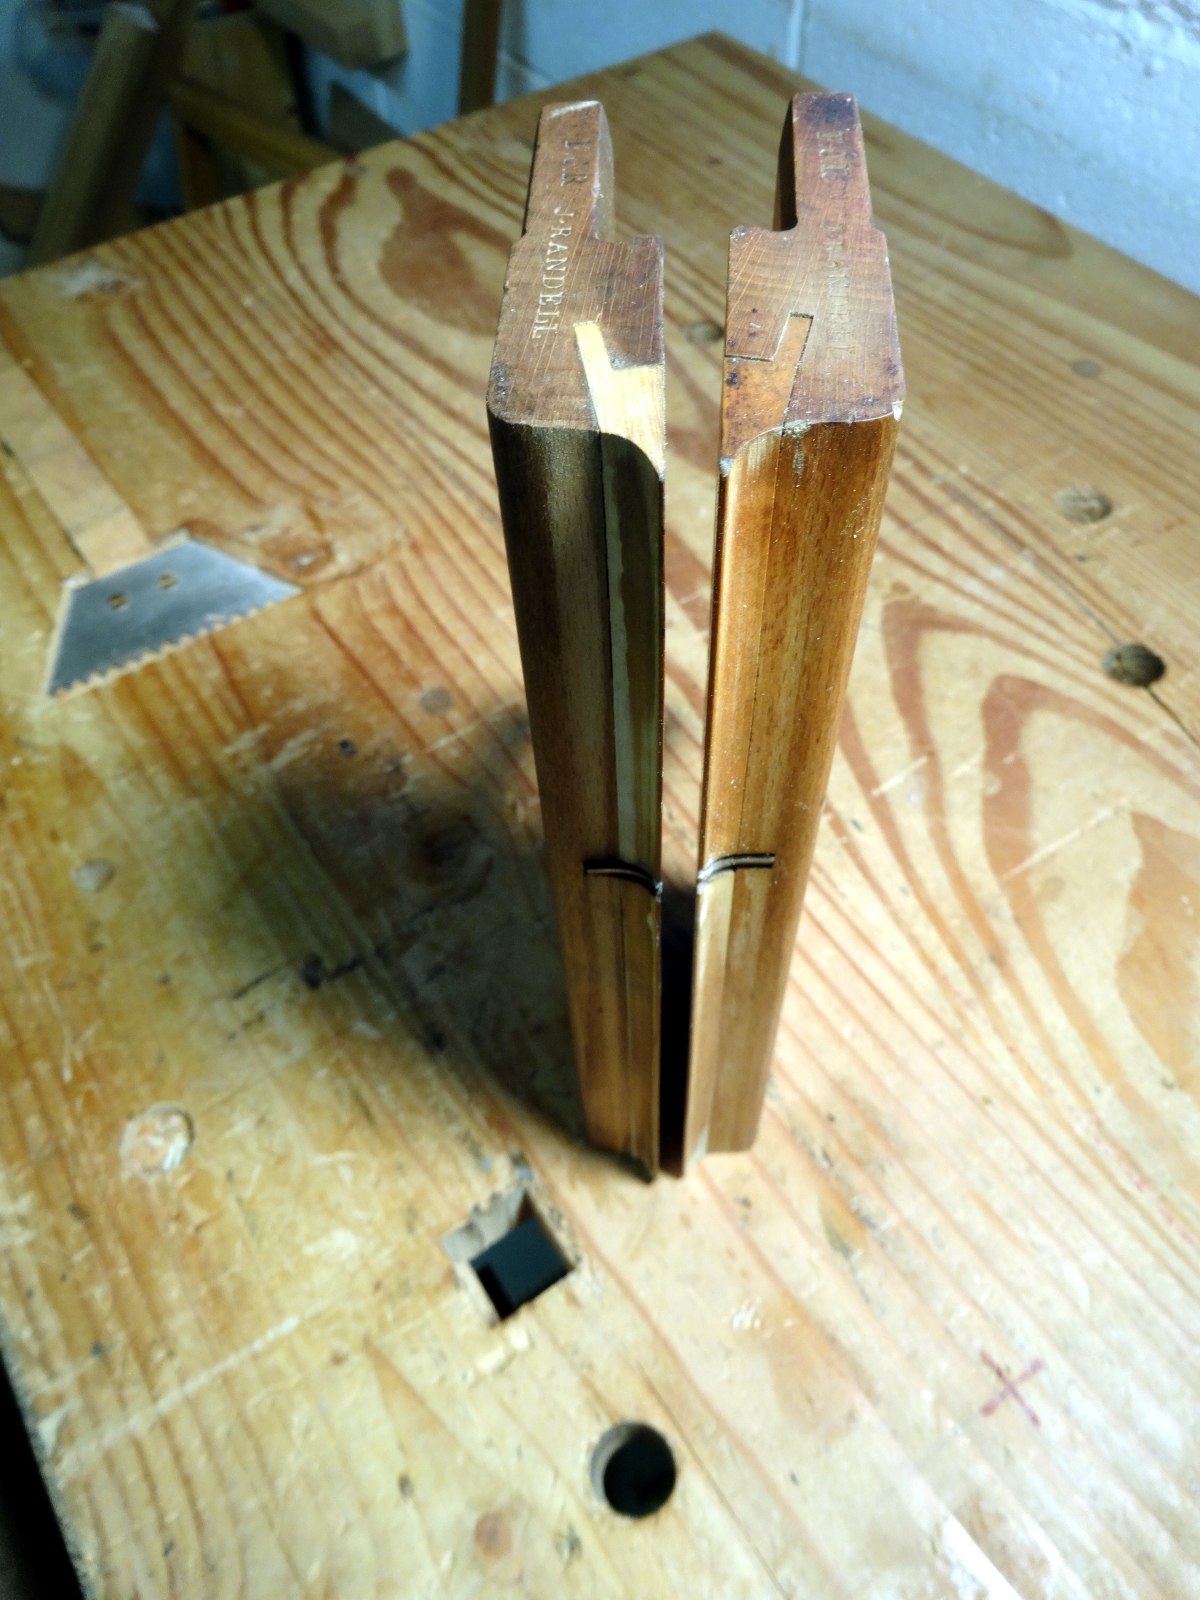
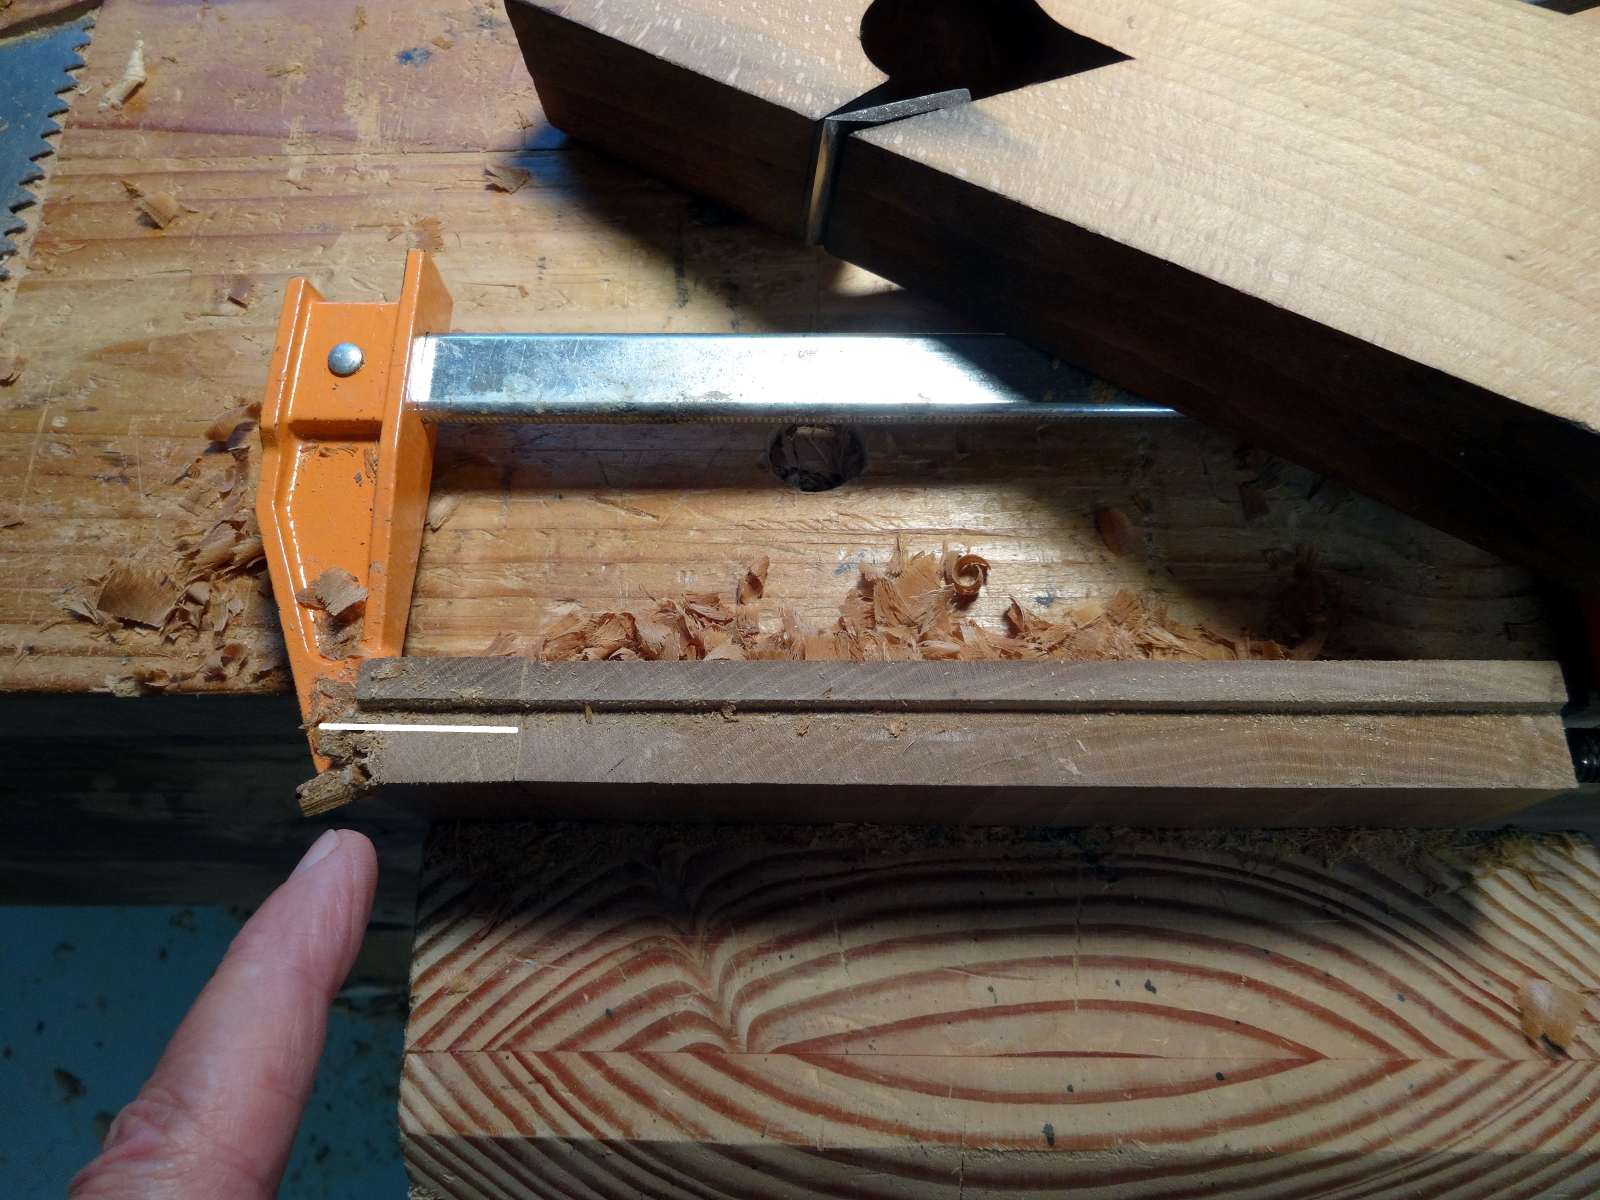
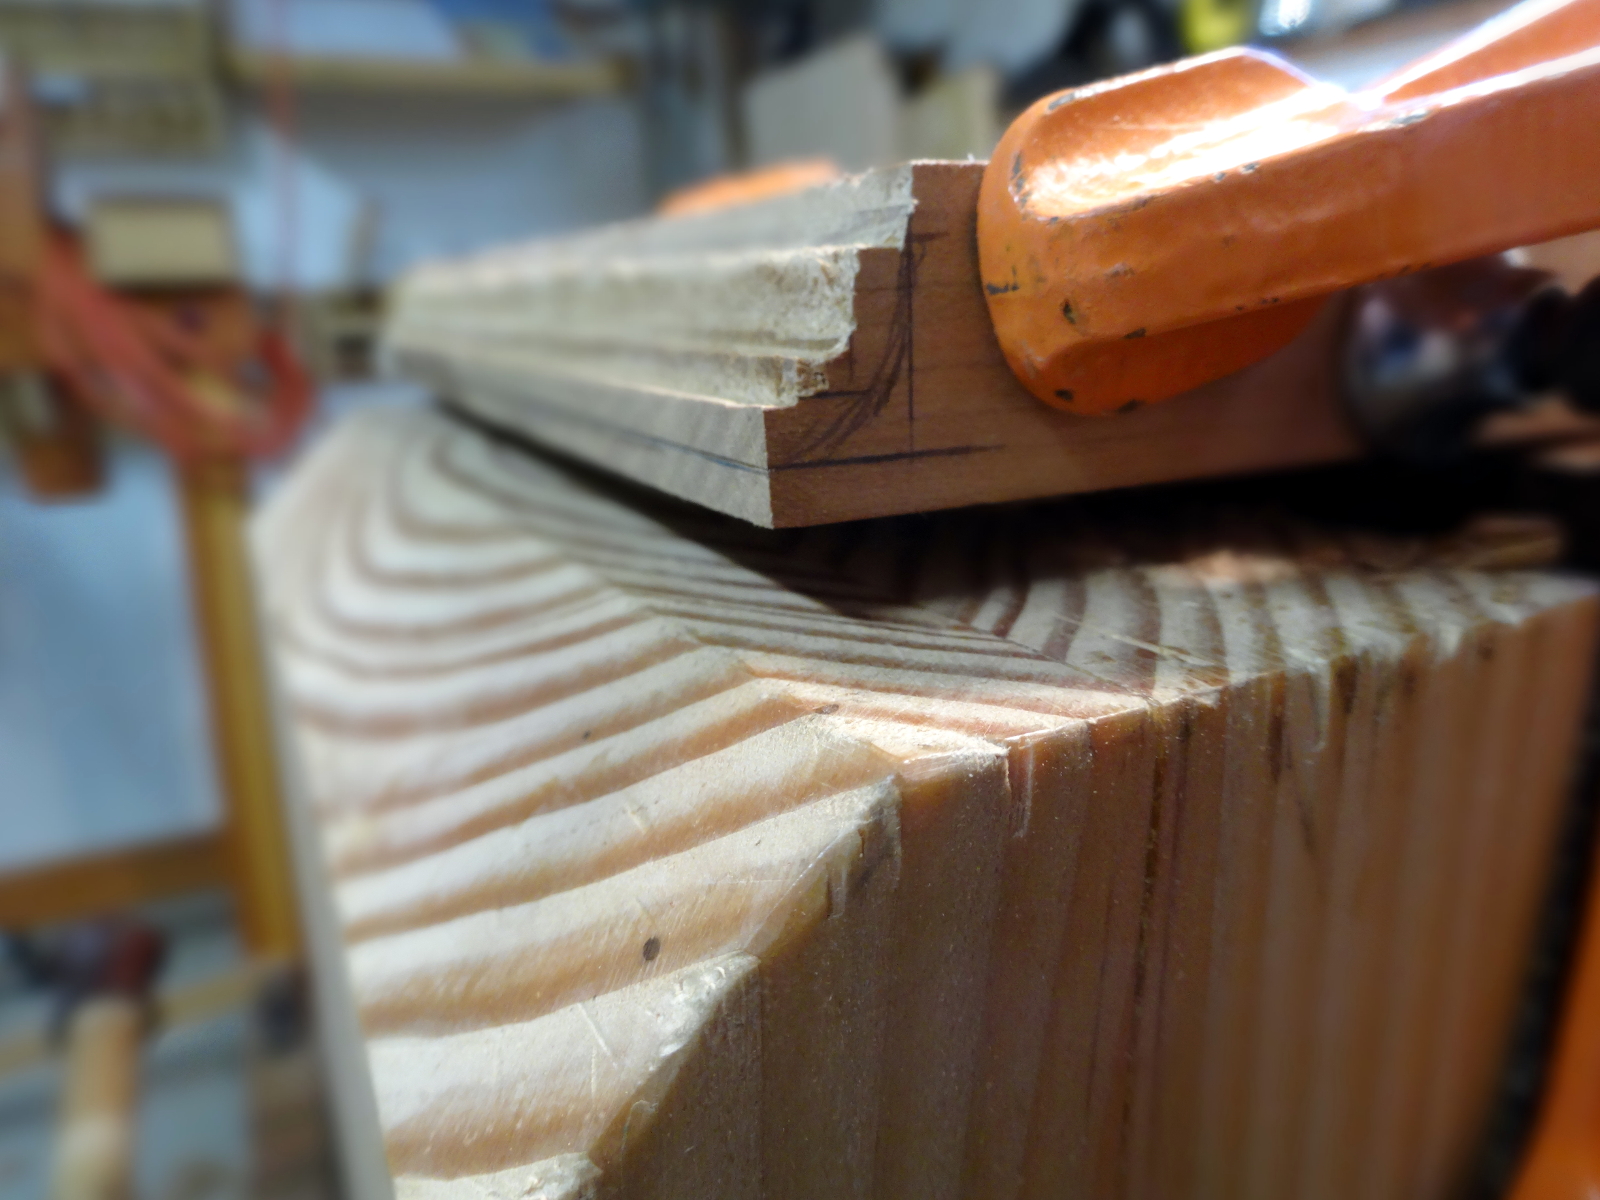
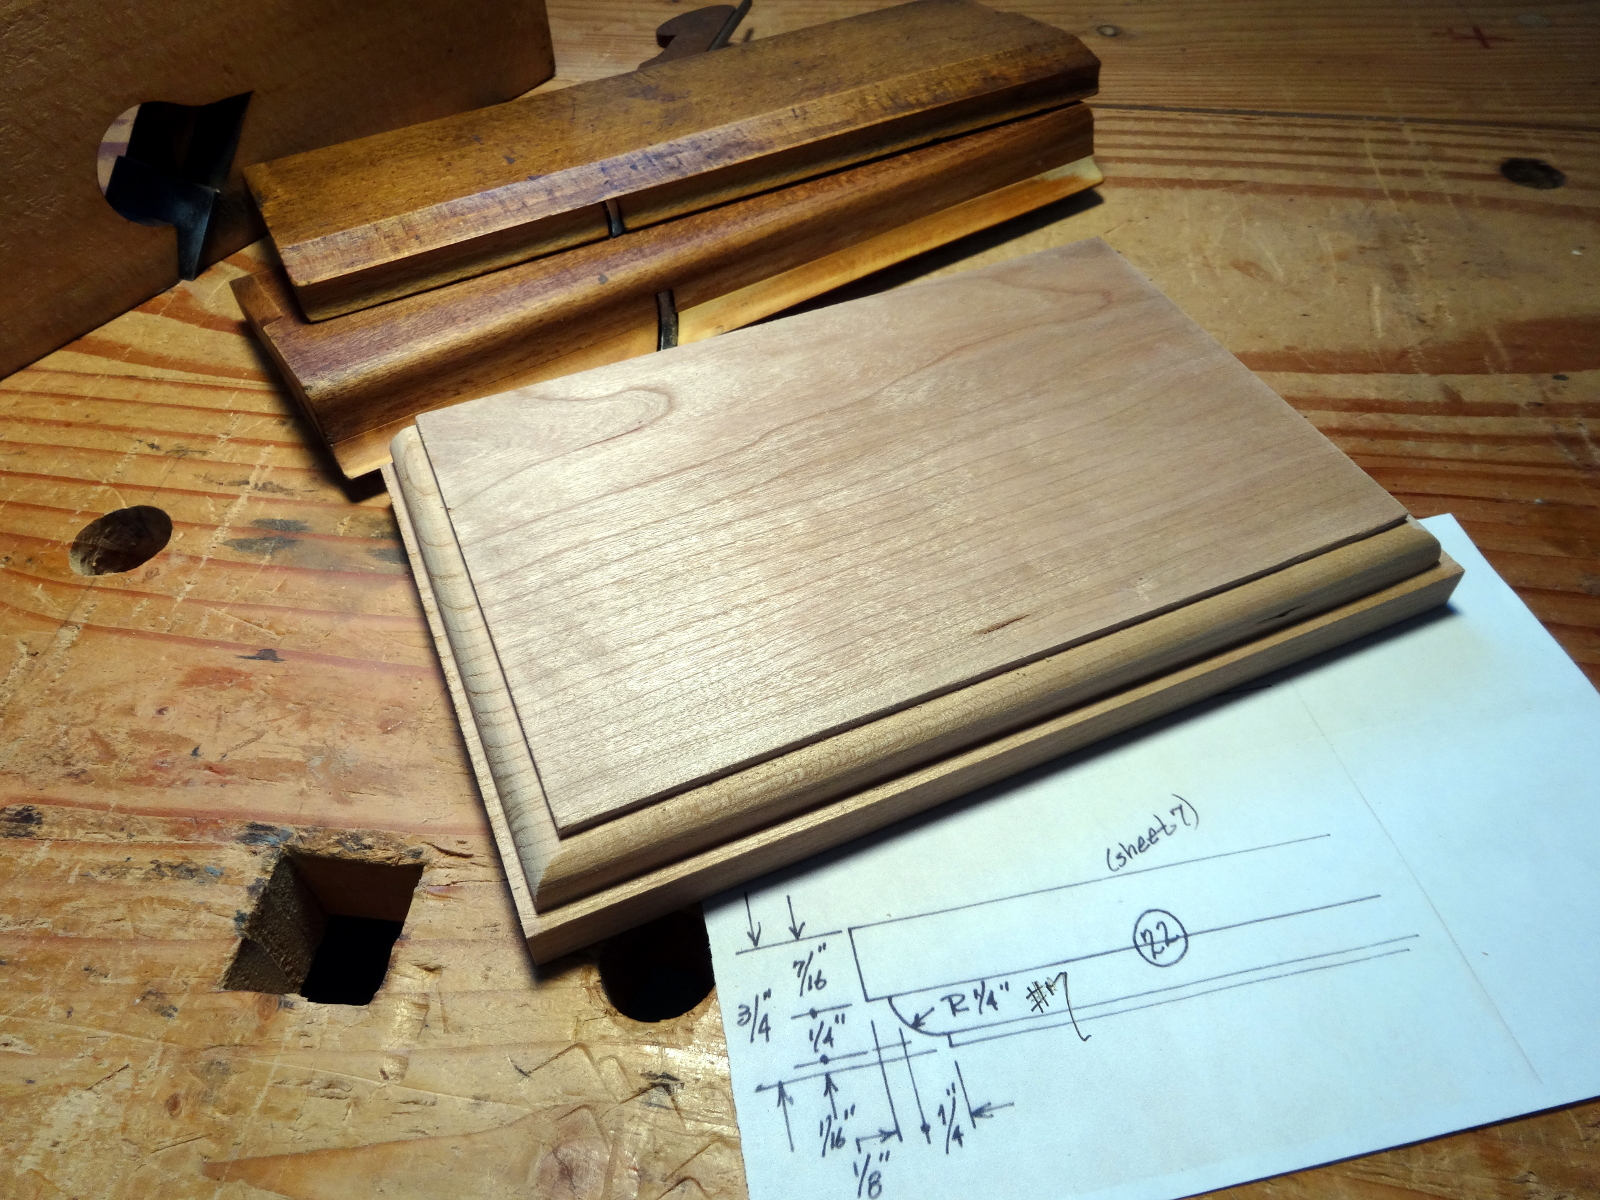
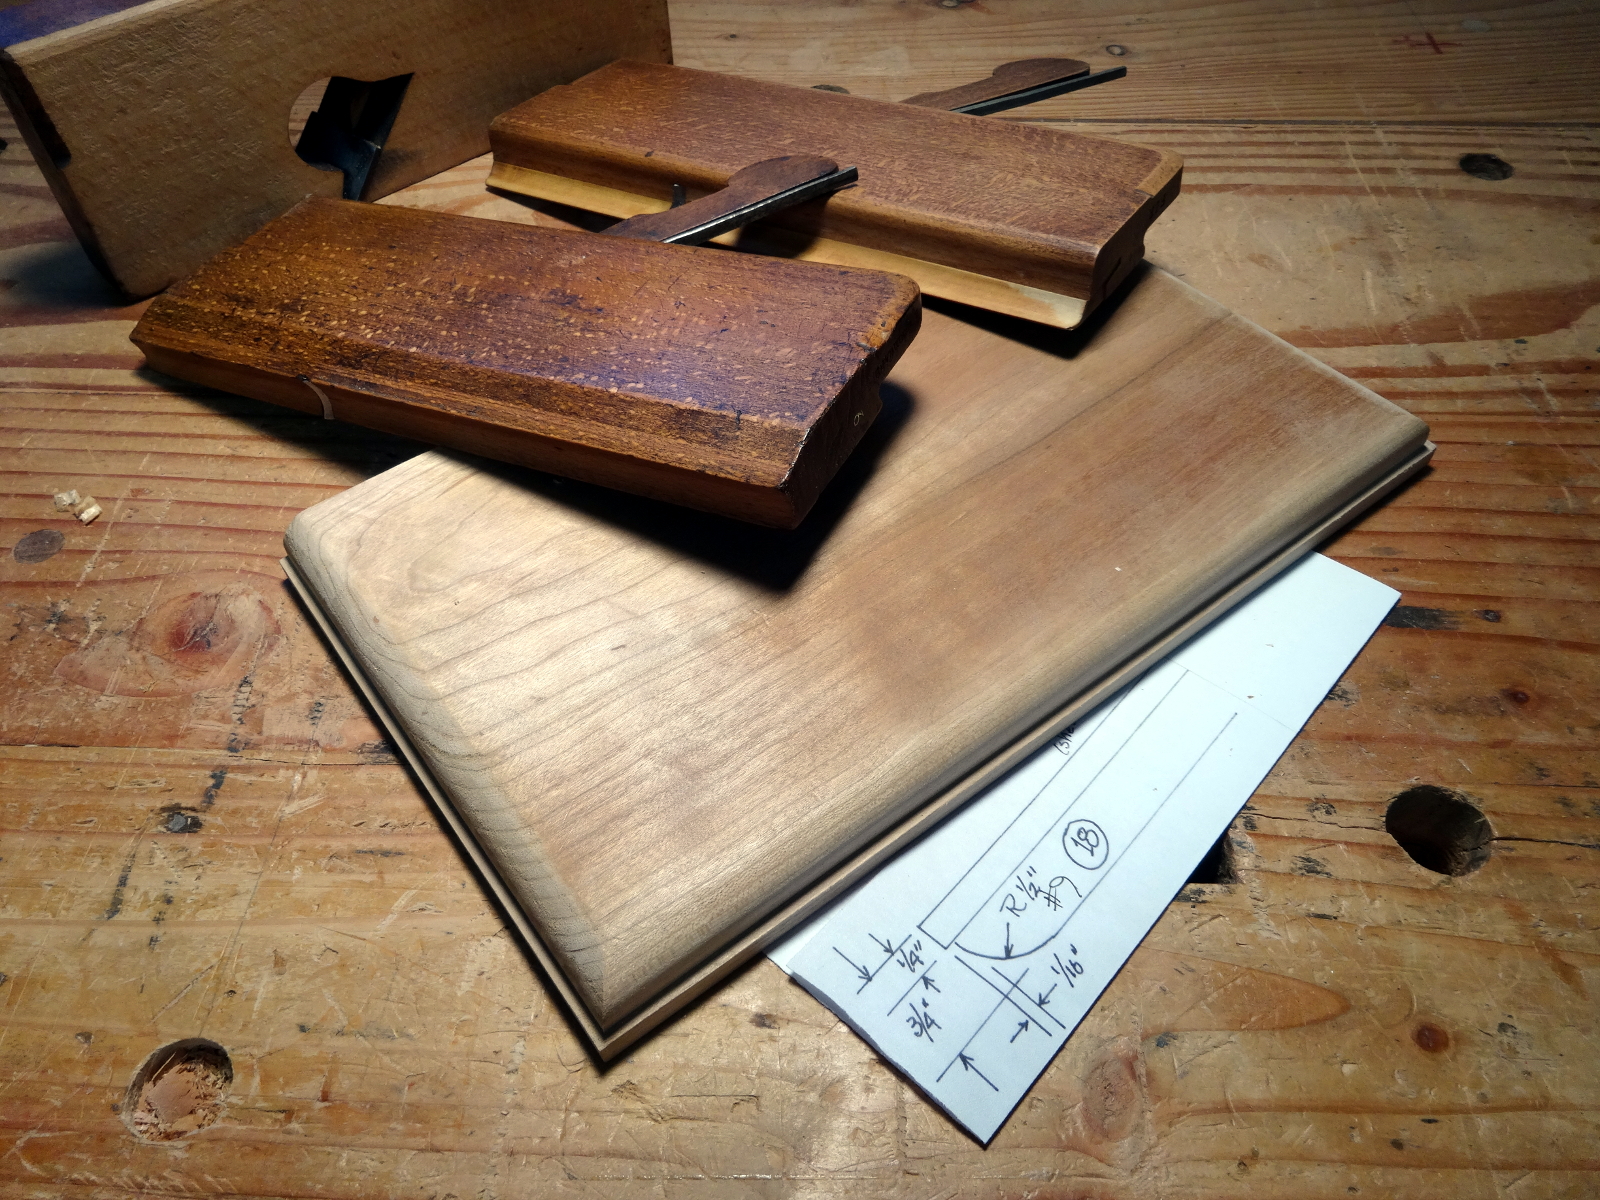
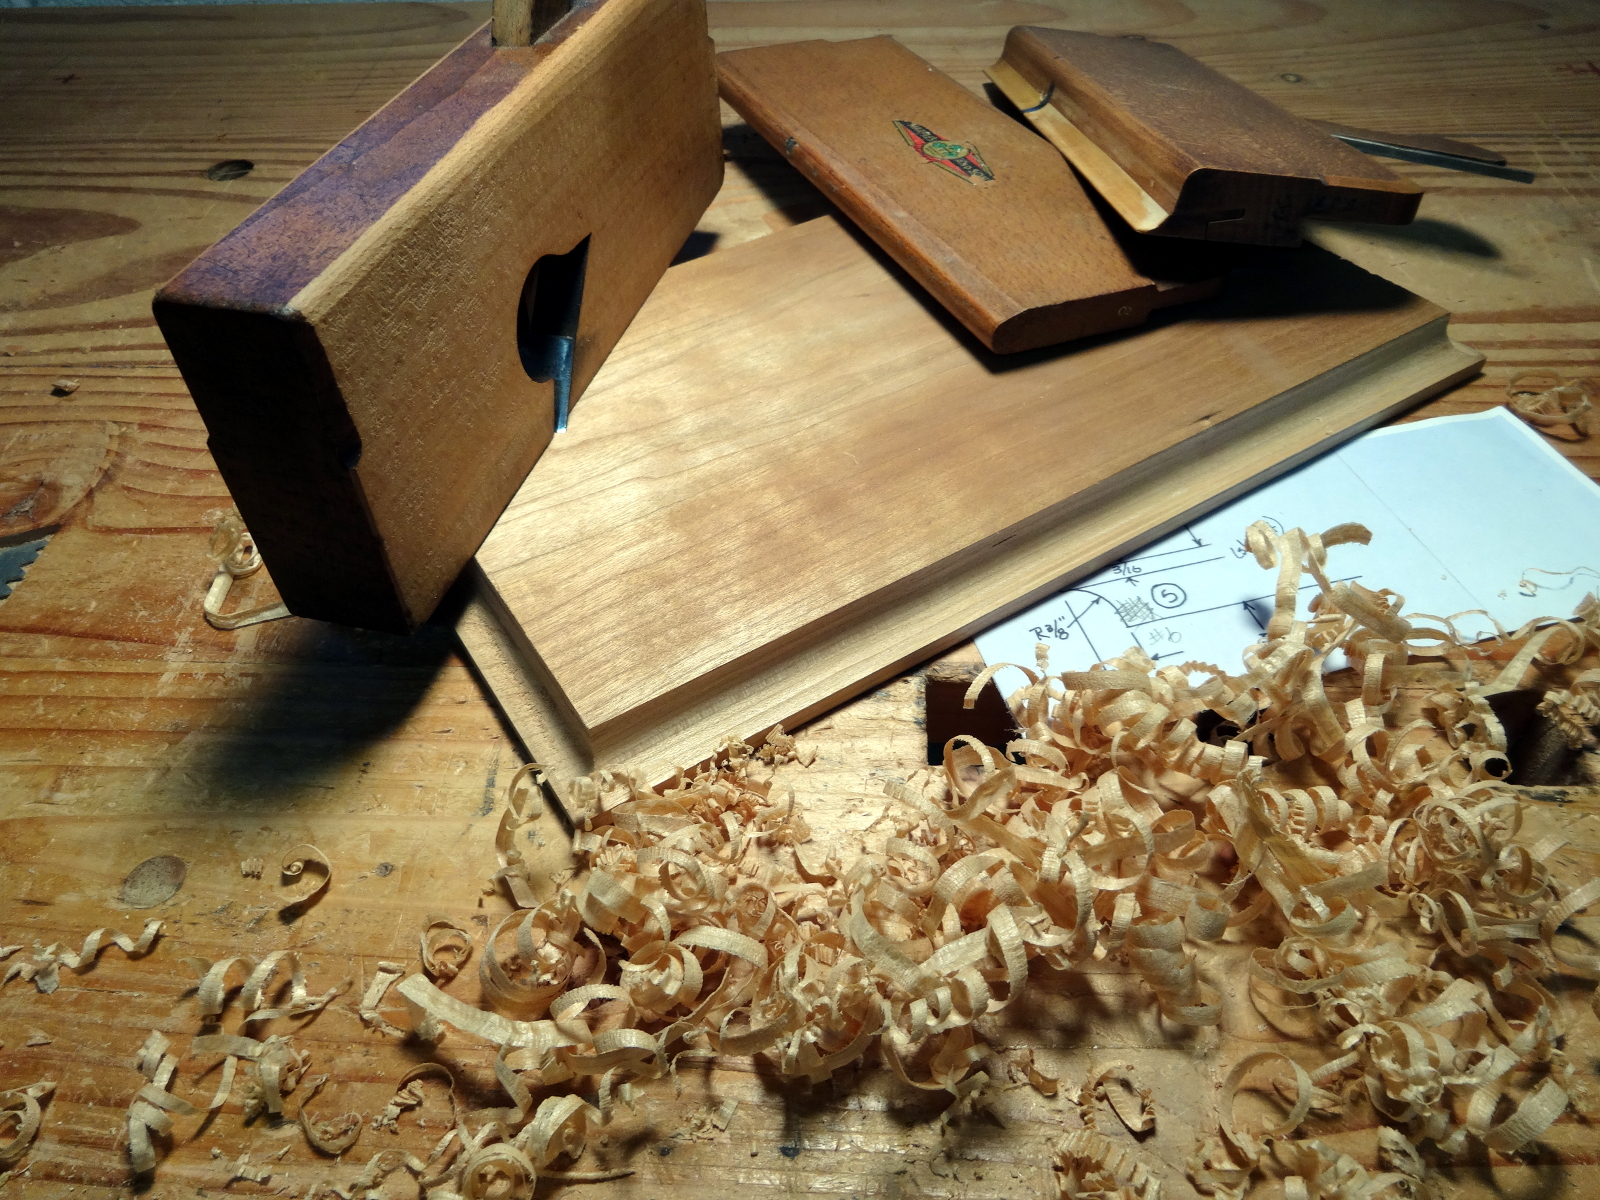
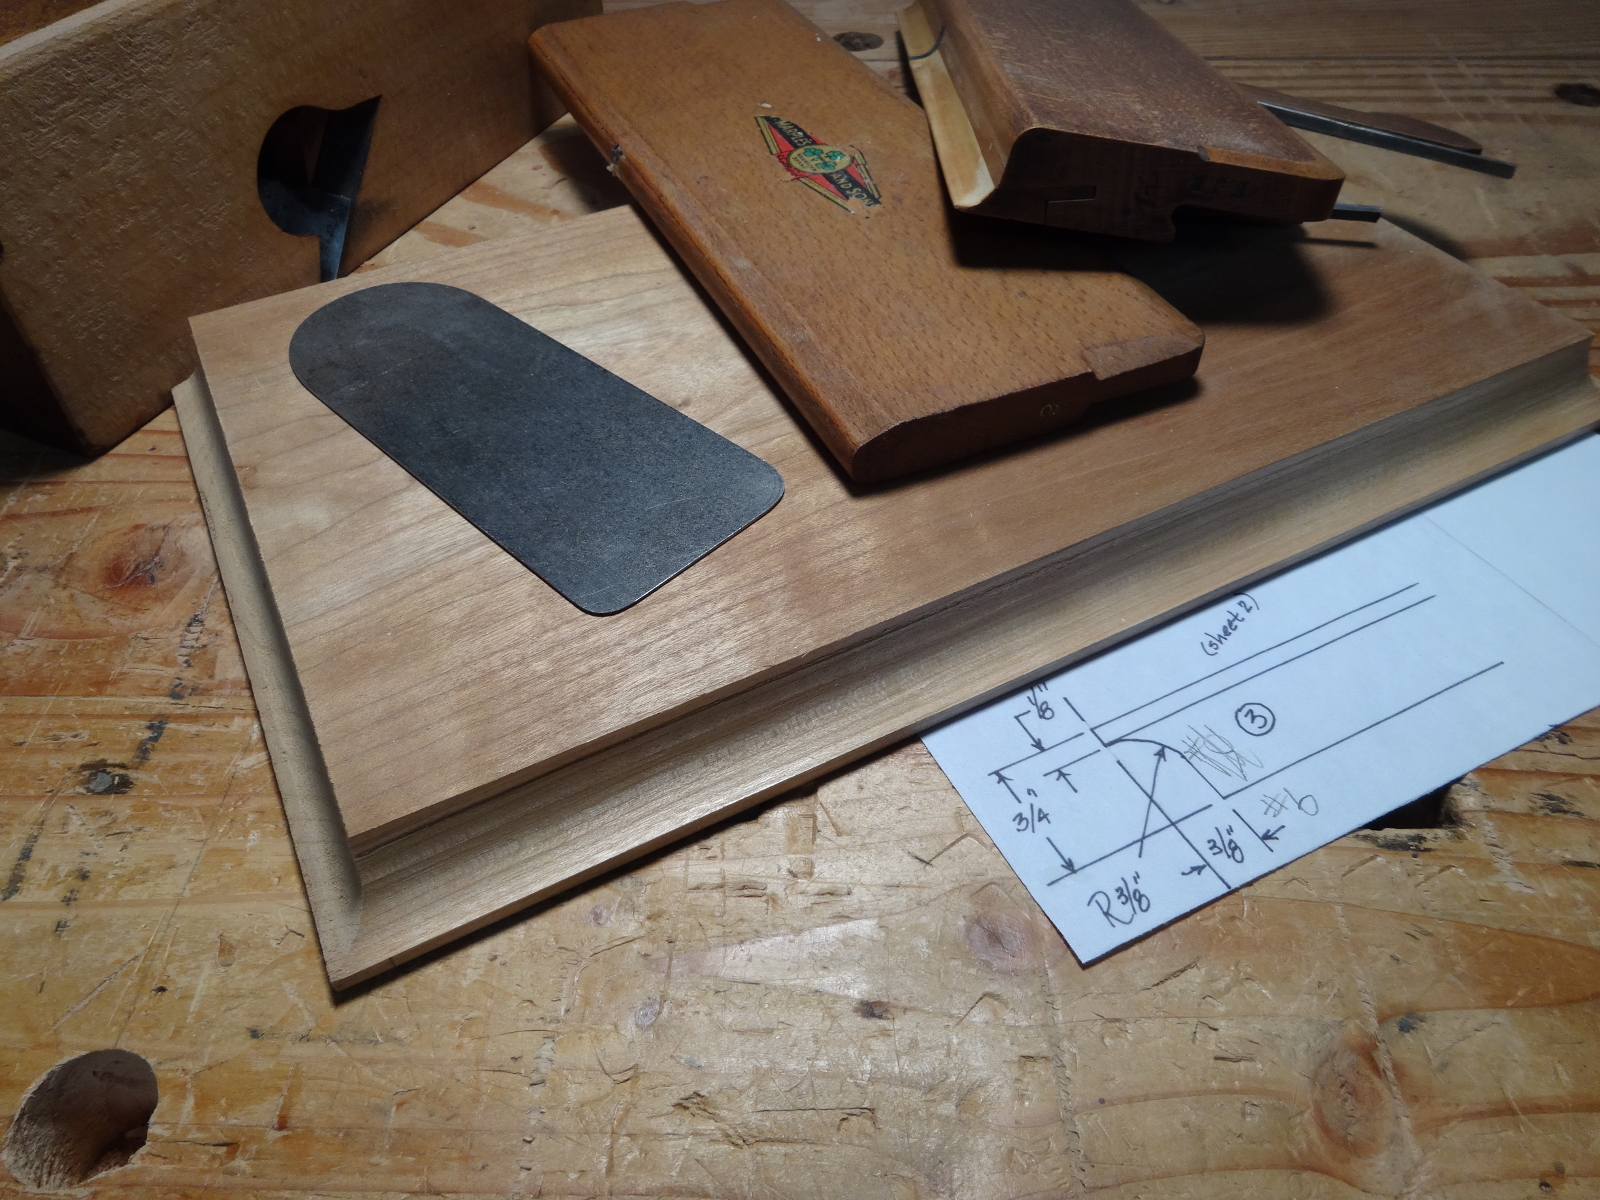
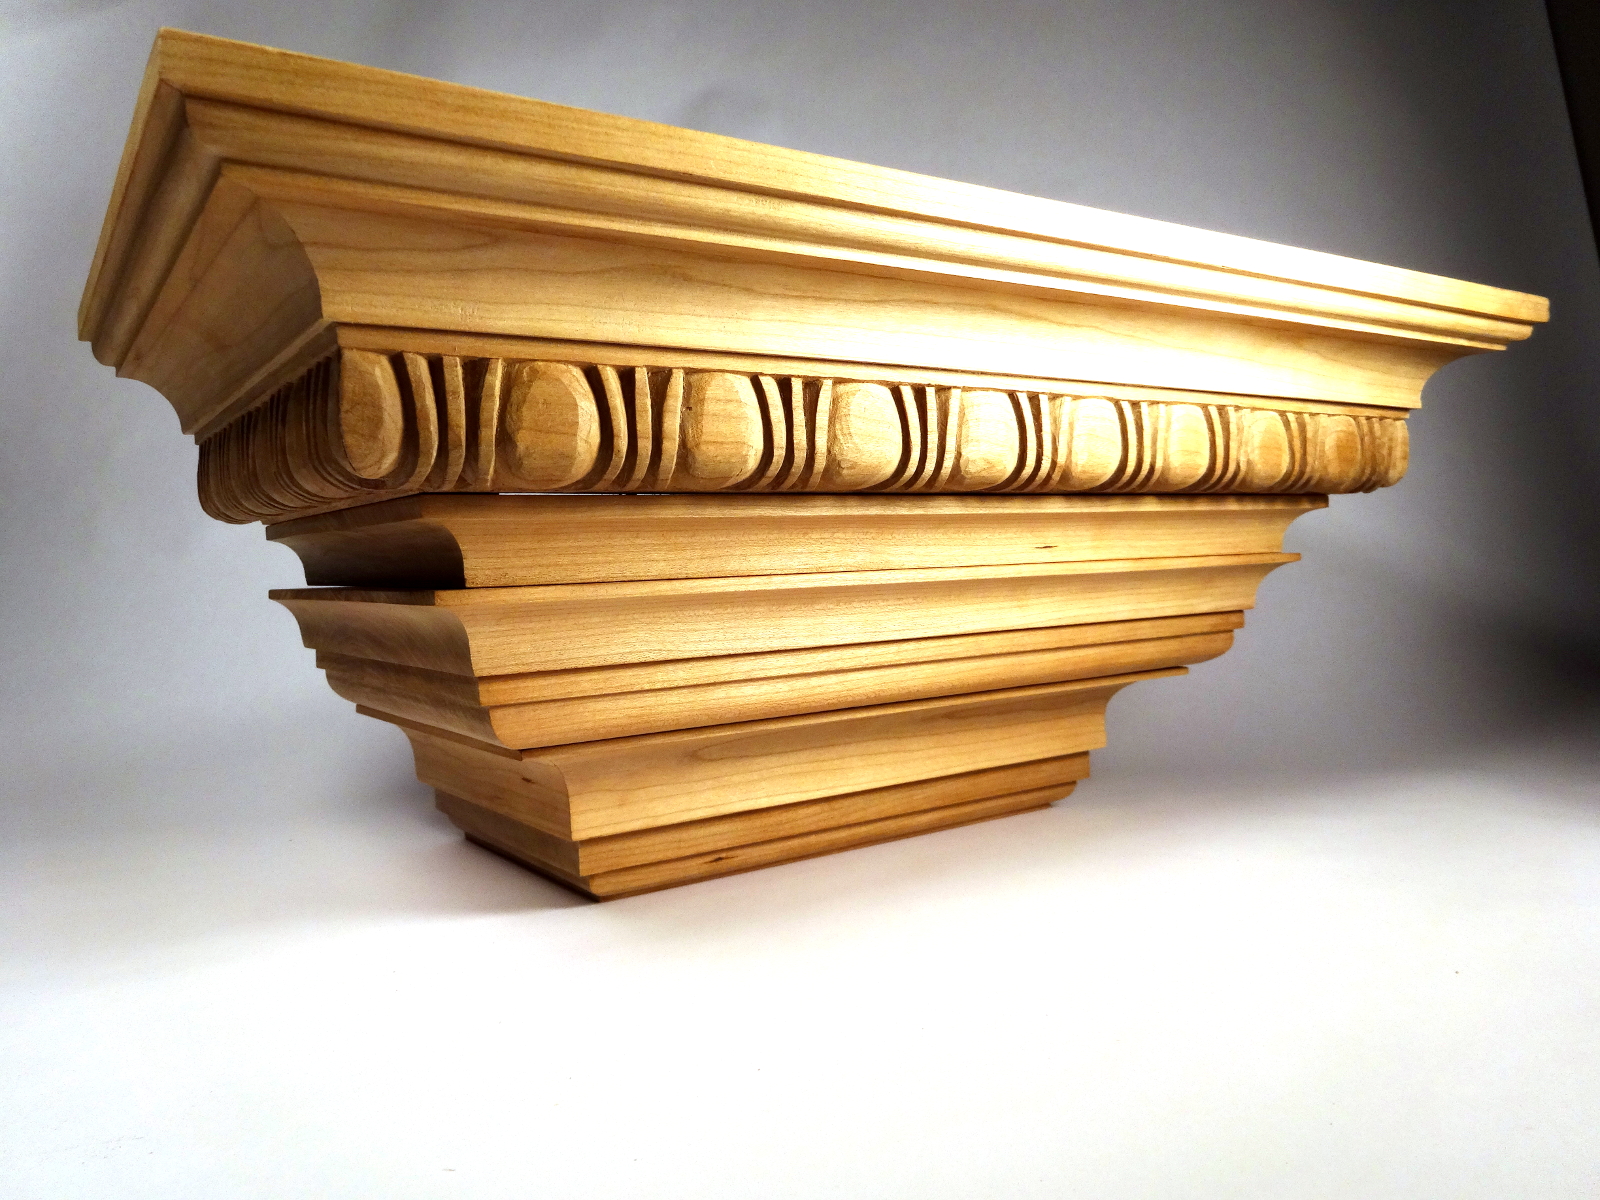
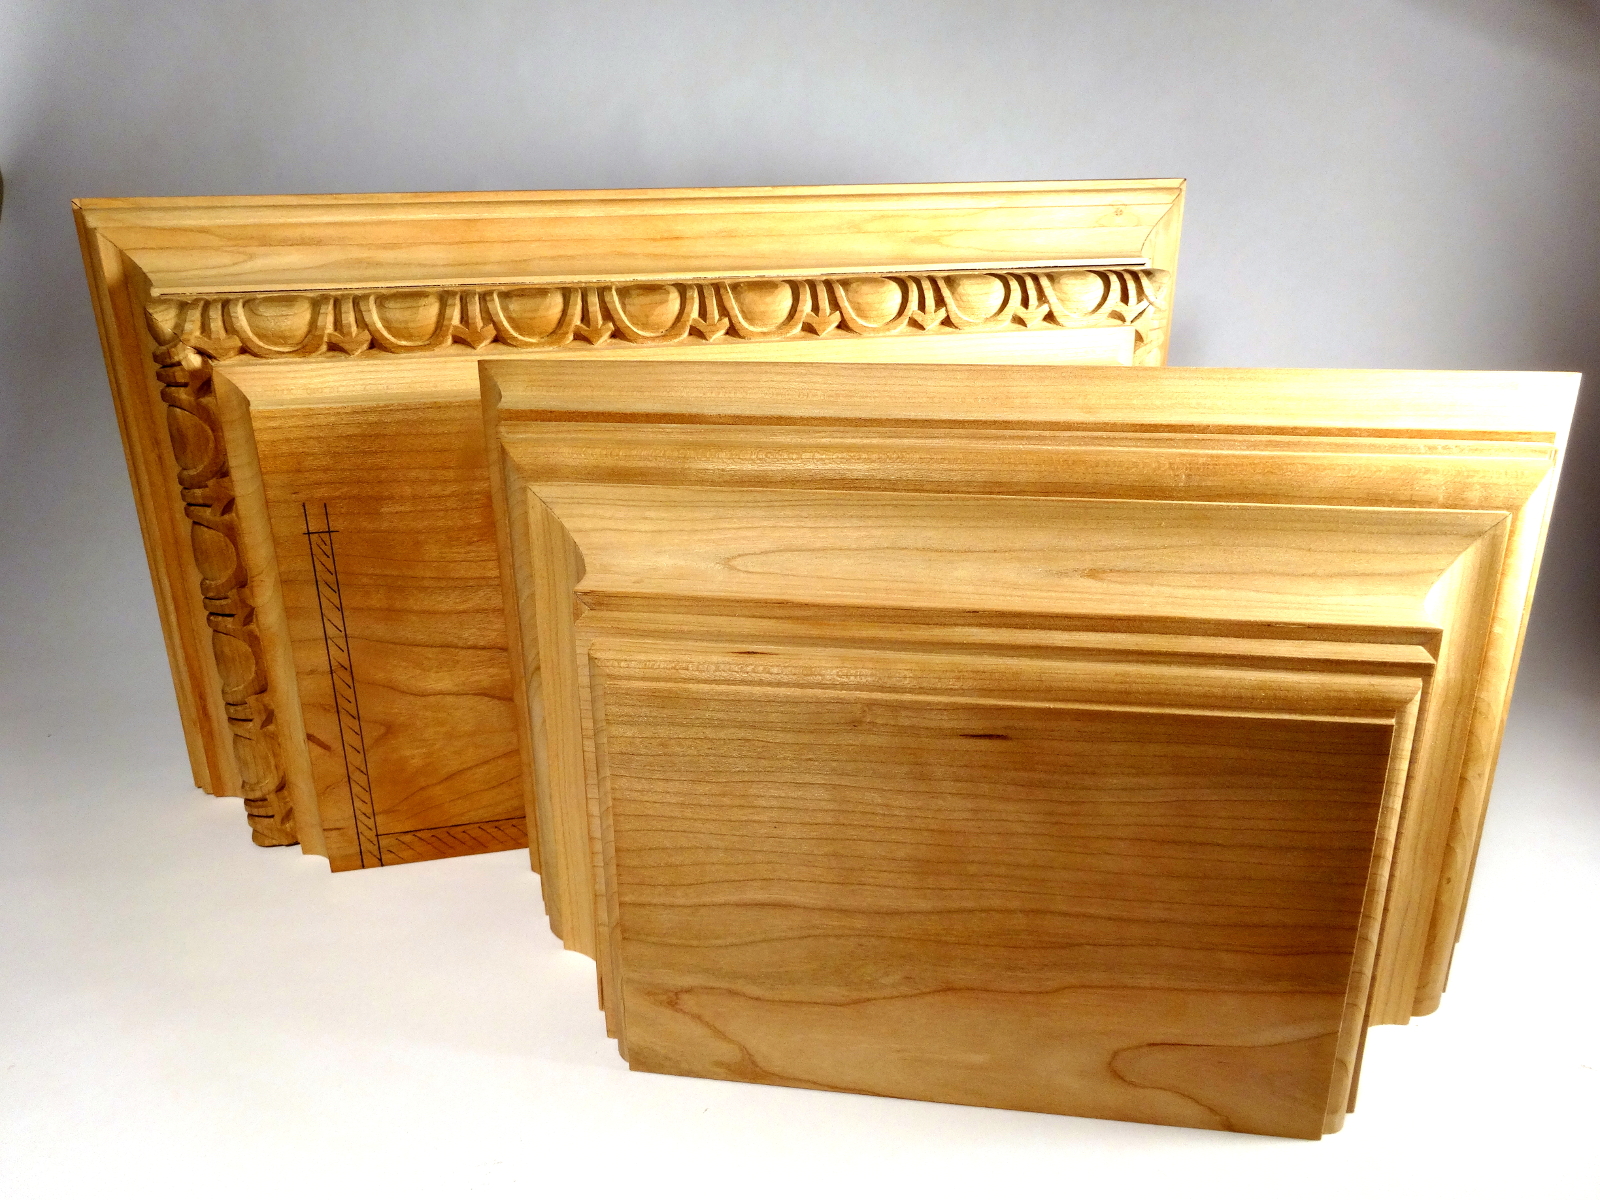
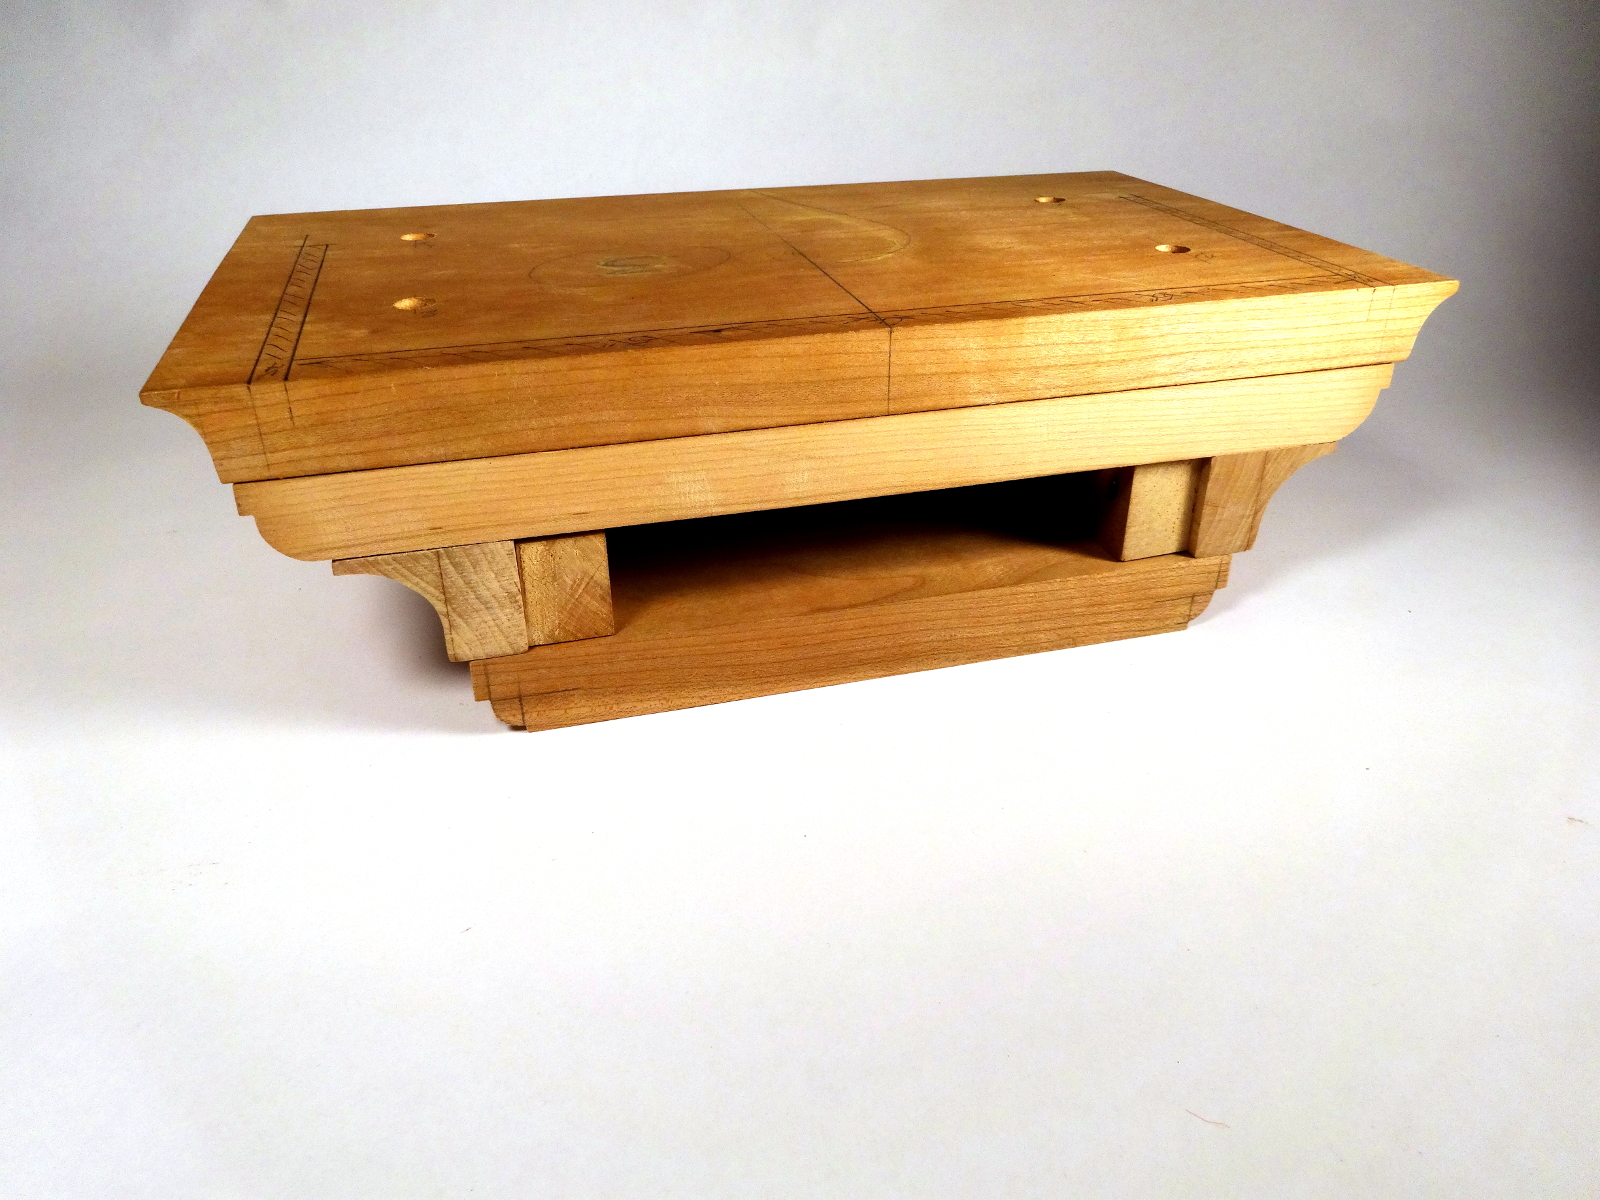
Milestone reached. The very enjoyable work of making mouldings is done, leaving two sets, a crown stack and a base stack. Imagine a clock in the middle.

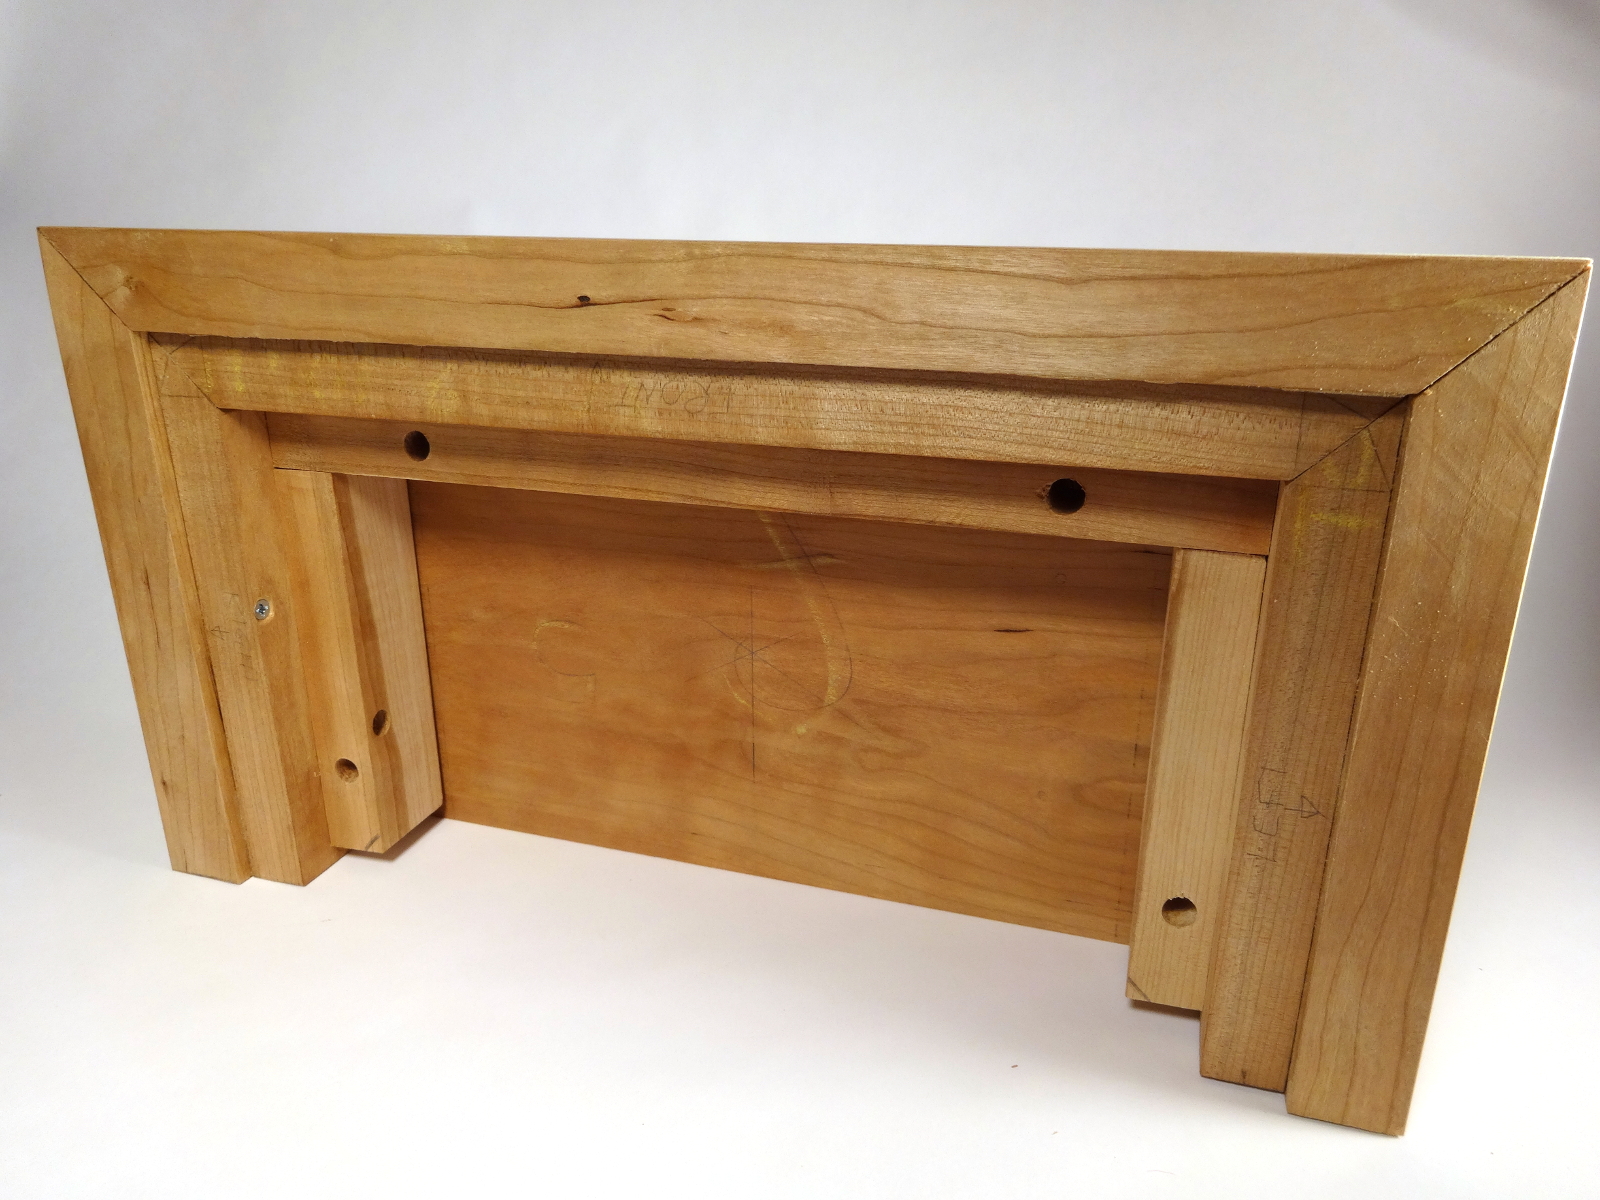
Next is the casework, which will use a piece from each of these moulding stacks as the case top and bottom.

In the meantime, I have been discovering that glass cutting craftsmen have been either retiring in droves or are being kidnapped and dragged away from their businesses. More on that next time.

  • another view of crown and base mouldings
  • inside the crown moulding stack
  • inside the base moulding stack

Other articles in this series…

  • Regulator Clock – Done
  • Regulator Clock – Woodworking completed
  • Regulator Clock – Scratching the frames
  • Regulator Clock – Door Hinged
  • Regulator Clock – Case Dry Fitted
  • Regulator Clock – Jelly Side Down
  • Regulator Clock – Case Frames – 2
  • Regulator Clock – Glass – 2
  • Regulator Clock – Case Frames – 1
  • Regulator Clock – The Works work
  • Regulator Clock – Glass
  • Regulator Clock – Tongue & Groove planes
  • Regulator Clock – Completed Mouldings
  • Regulator Clock – Stick Mouldings
  • Regulator Clock – Plate Mouldings
  • Regulator Clock – Egg and Dart Moulding
  • Regulator Clock – Eat Dessert First
  • Regulator Clock – original description
  • Regulator Clock – Stock Prep
  • Regulator Clock – Plans for Moldings
  • Taming the Rabbet

Filed Under: Clocks, Woodcarving, Woodworking

Regulator Clock – Stick Mouldings

October 9, 2017 by Bob Easton 5 Comments

Gratitude: Matthew Bickford’s book

photo of a pile of shavings

The last mouldings to be shaped are only two sticks. Neither is particularly difficult. Yet both have 90° coves. Matthew advocates the technique of using a rabbet to hog out waste and maybe more importantly provide some “guide rails” for easy control of the round plane. His suggestion is to make a rabbet with arrises about 5/8 the width of the plane. That works for coves up to about 60°. For coves larger than 60°, he suggests using two (or more) rabbets.

Taking a queue from the way Matthew illustrates the techniques, here are two illustrations showing the rabbet cutting schedule that removes most of the waste before reaching for a moulding plane. Brown shows the desired profile. The blues show the rabbets. There’s a turquoise pass that leaves a chamfer to guide a small hollow plane. White shows the work left for the moulding planes; not much; saves frequent sharpening.

  • patterns for cutting rabbets

It worked out very well. The simpler profile calls for a 3/4 inch radius, which in a perfect world would be shaped with a #12 round. The closest I have in my mongrel set is a #11, which worked out OK. The other profile wants a 5/8 inch radius cove, which would be a #10. My closest choice was a #9, and it too worked out well. The bead is 1/4 inch radius and I actually have a #4 hollow which did the job amazingly quick.

Planes used include a snipes-bill, which I  have really come to enjoy as a starter for the rabbets, my ancient wooden rabbet plane, a #9 round, #11 round, and #4 hollow. A few short minutes to sharpen the collection before starting made this work very enjoyable and left me a pile of gorgeous shavings.

Next is to cut these and assemble two beautiful stacks of mouldings.

  • photo of moulding with rabbets cut
  • photo of completed moulding
  • photo of completed moulding

Didn’t get much further because I stopped to build one of these:

… and to write a book review about Mary May’s new book.

Other articles in this series…

  • Regulator Clock – Done
  • Regulator Clock – Woodworking completed
  • Regulator Clock – Scratching the frames
  • Regulator Clock – Door Hinged
  • Regulator Clock – Case Dry Fitted
  • Regulator Clock – Jelly Side Down
  • Regulator Clock – Case Frames – 2
  • Regulator Clock – Glass – 2
  • Regulator Clock – Case Frames – 1
  • Regulator Clock – The Works work
  • Regulator Clock – Glass
  • Regulator Clock – Tongue & Groove planes
  • Regulator Clock – Completed Mouldings
  • Regulator Clock – Stick Mouldings
  • Regulator Clock – Plate Mouldings
  • Regulator Clock – Egg and Dart Moulding
  • Regulator Clock – Eat Dessert First
  • Regulator Clock – original description
  • Regulator Clock – Stock Prep
  • Regulator Clock – Plans for Moldings
  • Taming the Rabbet

Filed Under: Clocks, Woodcarving, Woodworking

Regulator Clock – Plate Mouldings

September 29, 2017 by Bob Easton 2 Comments

photo of moldings done so far

Gratitude: Snipes-bill panes.

Four “runs” of mouldings for this clock are on plates (boards), not sticks. Those four, and a stick of egg and dart, are shown here. Only two sticks of mouldings remain to be shaped.

Mouldings on these boards gives us the challenge of shaping mouldings on end grain edges. Counter to what some people think, hollows and rounds can indeed work cross grain and on end grain. They need only to be well sharpened.

The only precaution I took with cross grain planing was clamping a sacrificial strip to one edge for blowout prevention. Let the sacrificial piece be blown out, chewed up (picture in the gallery below).

Matthew Bickford in his book and DVD advocates using rebates to guide rounds, and chamfers to guide hollows. That technique does two important things. (1) most of the heavy waste removal is done by a rabbet plane which is much easier to sharpen than the hollows or rounds. That means less sharpening for the difficult irons. (2) The arrises of the rabbets and chamfers act as steering for the rounds and hollows.

photo of new old snipes-bill-planes

Starting rabbets is a challenge. My previous method was to make a line with a marking gauge, and as Bickford shows, use a tilted rabbet plane riding in that mark to start the rabbet. With subsequent passes rotate the rabbet plane upright for the correct cut. It works, but requires a very sharp arris on the right side of the rabbet plane and great amount of care for the first few passes.

I’ve found a better way. I haven’t yet had a use for snipes-bill planes and had not acquired any. … until I learned (again from Bickford) that the snipes-bill will easily follow a line from a marking gauge. Bingo! While I would love to have brand new planes from Bickford, my budget sent me off to my favorite tool monger, Patrick Leach. A few days later, a pair of very serviceable antique snipes-bill planes arrived. A little cleaning and sharpening, and they are working well. Not only can they follow a cut left by a marking gauge, they can, if one is careful, follow a knife line. About 3 passes to establish a quirk, then a couple of passes with the tilted rabbet plane, and then full speed ahead with the upright rabbet. Life is fine!

Using rabbets works well until a profile needs something more than 60 degrees of arc. If a single rabbet is used for the 90 degree coves on pieces #3 and #5, the rabbet’s arrises are too far apart to guide the appropriate round plane. The answer is to use two smaller rabbets and then work back and forth between them. Works great!

Pieces # 3 and #5 are the structural top and bottom of the clock case. They will each be given a pair of mortises and a rabbet in the back to accommodate the case sides and back. I’ll wait until after that work to refine the moulding shapes. For that work, I’ll use a scraper with curved corners that I made from a scrap of an old saw plate.

  • photo of rabbet being cut with blowout on a sacrificial piece
  • photo of extra rabbets

Other articles in this series…

  • Regulator Clock – Done
  • Regulator Clock – Woodworking completed
  • Regulator Clock – Scratching the frames
  • Regulator Clock – Door Hinged
  • Regulator Clock – Case Dry Fitted
  • Regulator Clock – Jelly Side Down
  • Regulator Clock – Case Frames – 2
  • Regulator Clock – Glass – 2
  • Regulator Clock – Case Frames – 1
  • Regulator Clock – The Works work
  • Regulator Clock – Glass
  • Regulator Clock – Tongue & Groove planes
  • Regulator Clock – Completed Mouldings
  • Regulator Clock – Stick Mouldings
  • Regulator Clock – Plate Mouldings
  • Regulator Clock – Egg and Dart Moulding
  • Regulator Clock – Eat Dessert First
  • Regulator Clock – original description
  • Regulator Clock – Stock Prep
  • Regulator Clock – Plans for Moldings
  • Taming the Rabbet

Filed Under: Clocks, Woodcarving, Woodworking

  • « Go to Previous Page
  • Page 1
  • Interim pages omitted …
  • Page 16
  • Page 17
  • Page 18
  • Page 19
  • Page 20
  • Interim pages omitted …
  • Page 128
  • Go to Next Page »

Primary Sidebar

Footer

Recent Posts

  • New Frame Saw / Scroll Saw
  • Lamppost Sign
  • Goodbye PayPal – Goodbye Bob’s eBooks
  • Anarchist’s Workbench is Done
  • Why we keep offcuts…

Categories

  • About
  • Artwork
  • Boatbuilding
  • Boating
  • bowl carving
  • Boxmaking
  • Clocks
  • Drawings
  • eBook
  • etude
  • Eva Too
  • Eva Won
  • Fiddlehead
  • Fiddlehead model
  • Flying
  • frame saw
  • gilding
  • green woodworking
  • Grinling Gibbons
  • Guns
  • Hand tools
  • Humor
  • kerfing plane
  • Lettercarving
  • Mill Creek 13
  • Model building
  • Power tools
  • Rant
  • resawing
  • scroll saw
  • Shopmade
  • sign painting
  • Stonework
  • Swimming
  • Technology
  • The Wall
  • treadle lathe
  • Uncategorized
  • VSD
  • Woodcarving
  • Woodturning
  • Woodworking
  • workbench

Other stuff

  • About
  • Contact
  • Privacy Policy

Copyright ©2024 · Bob Easton · All Rights Reserved