• Skip to primary navigation
  • Skip to main content
  • Skip to primary sidebar
  • Skip to footer

Bob Easton

Chocolate powered woodworking

  • Home
  • Grinling Gibbons Tour

Woodworking

Regulator Clock – Plate Mouldings

September 29, 2017 by Bob Easton 2 Comments

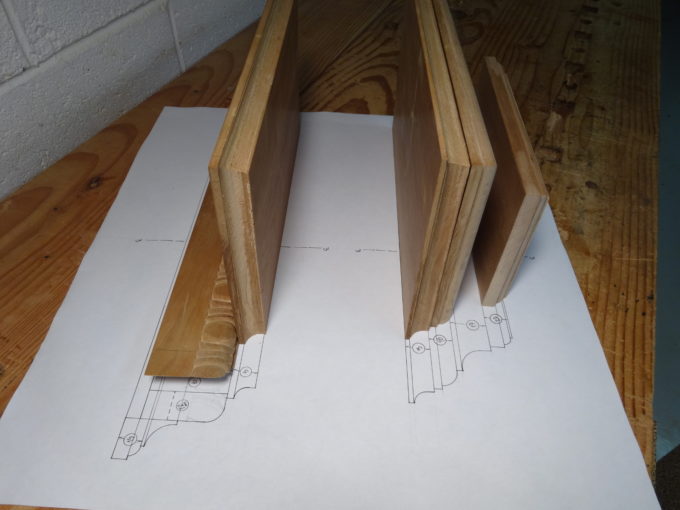
photo of moldings done so far

Gratitude: Snipes-bill panes.

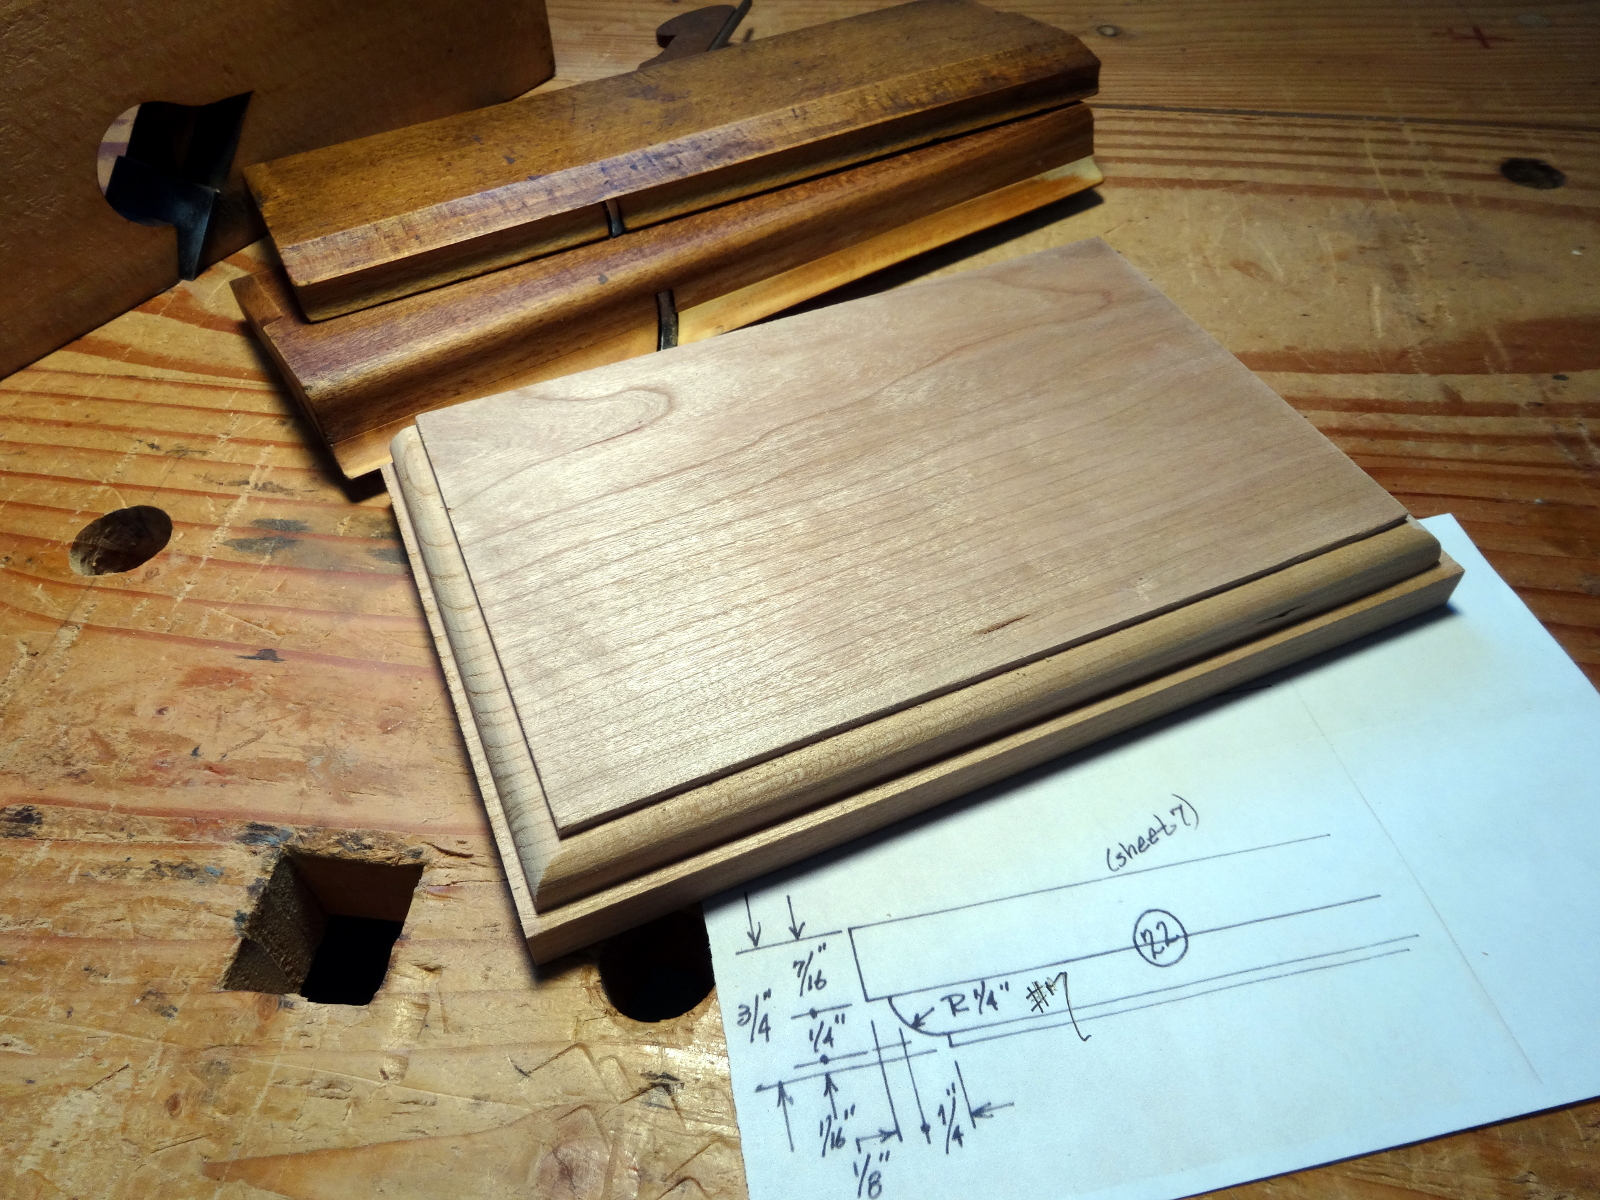
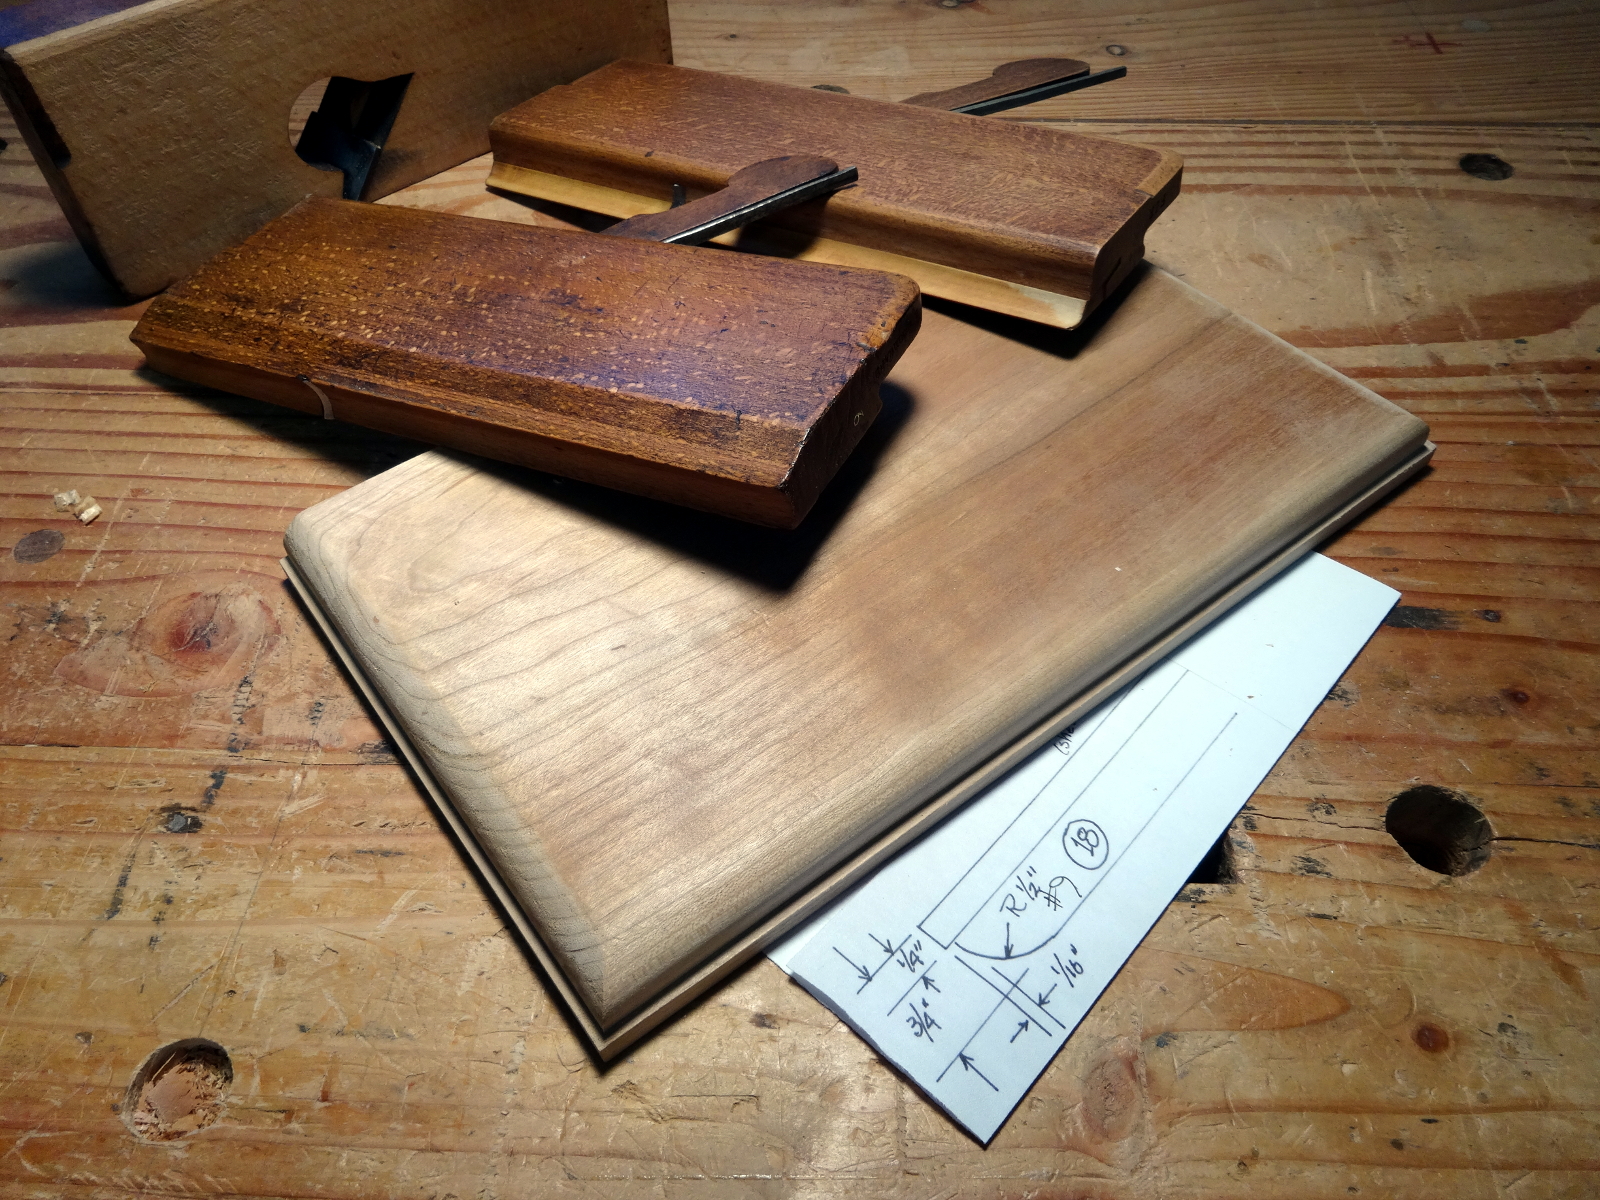
Four “runs” of mouldings for this clock are on plates (boards), not sticks. Those four, and a stick of egg and dart, are shown here. Only two sticks of mouldings remain to be shaped.

Mouldings on these boards gives us the challenge of shaping mouldings on end grain edges. Counter to what some people think, hollows and rounds can indeed work cross grain and on end grain. They need only to be well sharpened.

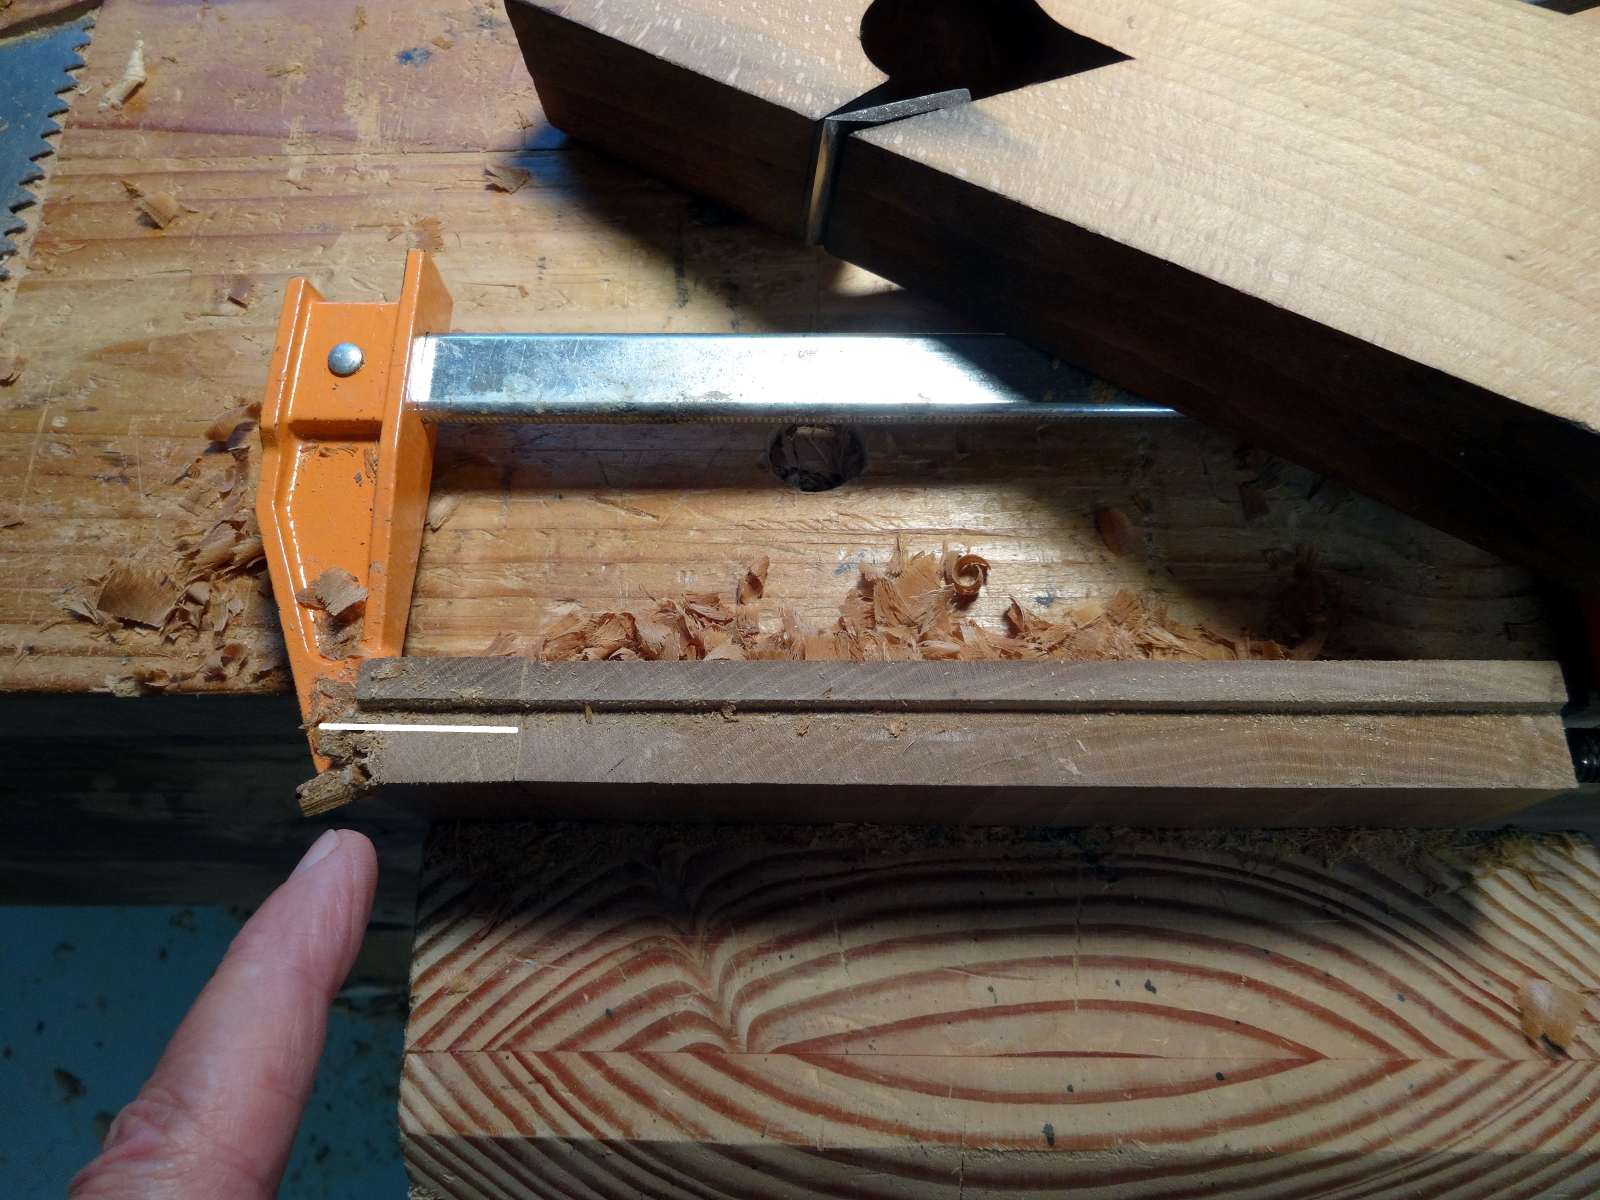
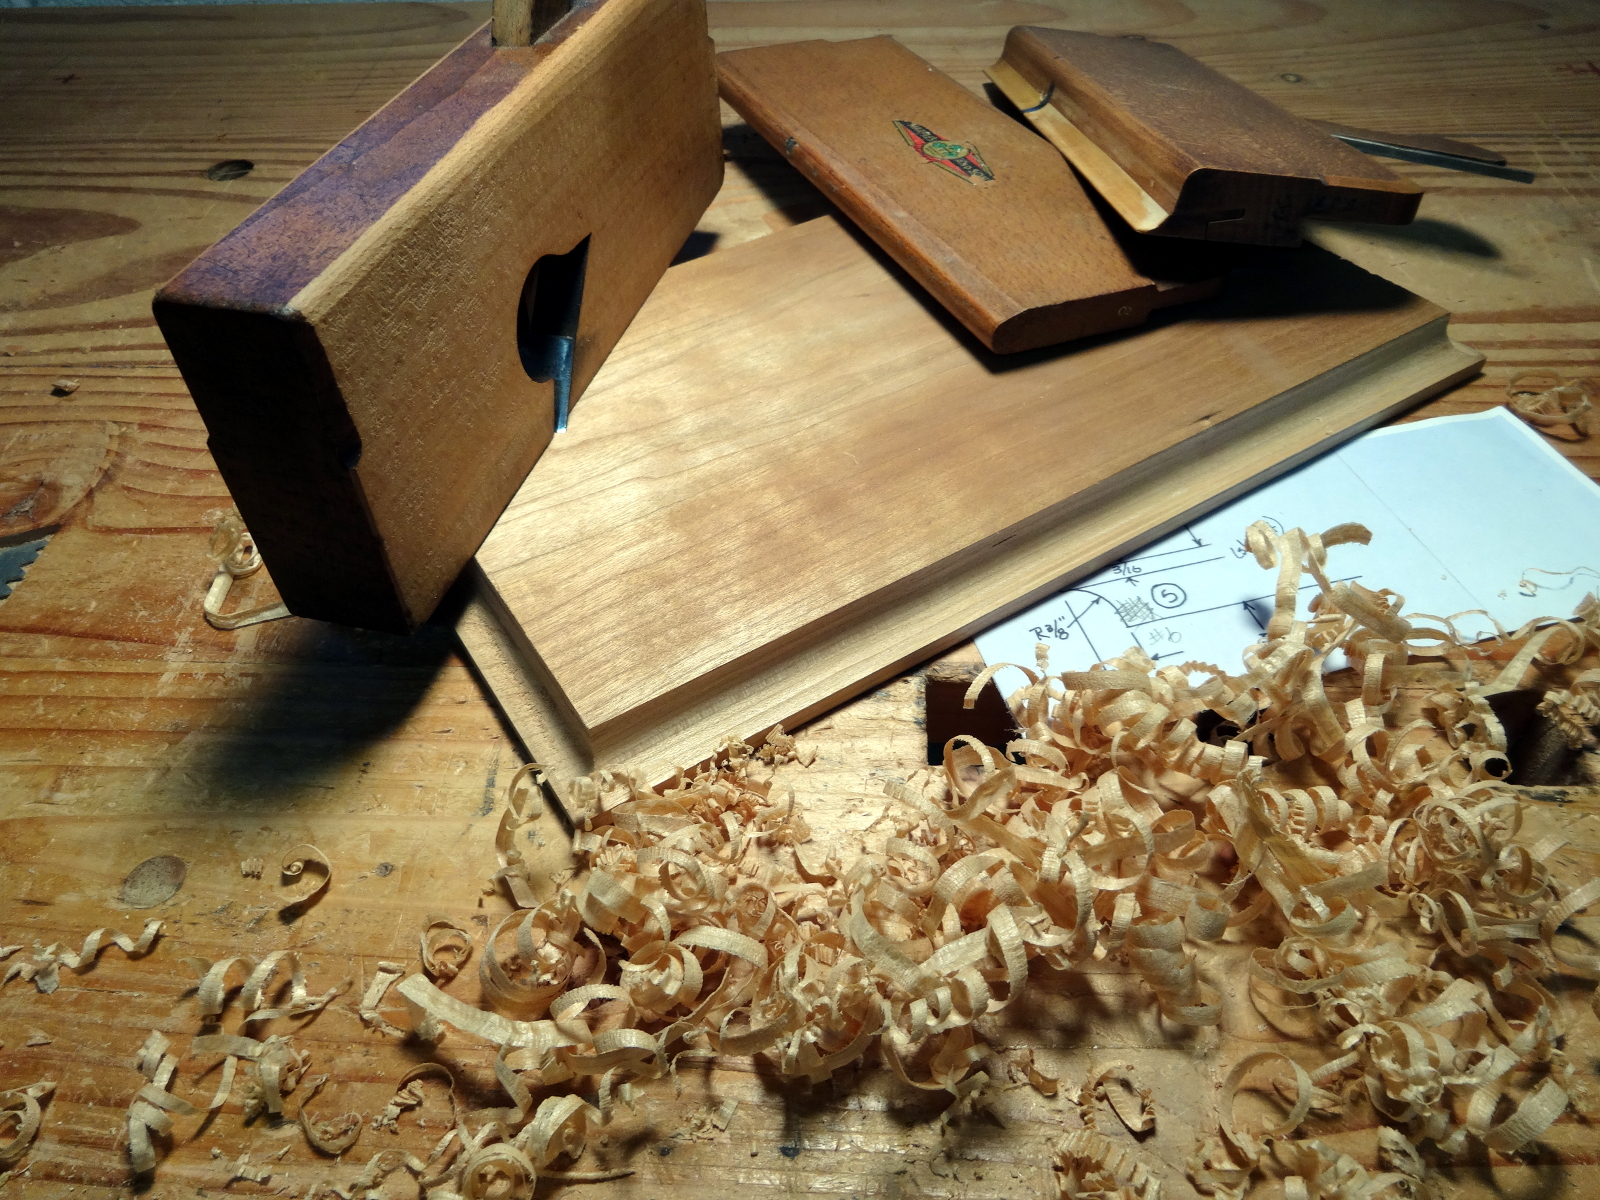
The only precaution I took with cross grain planing was clamping a sacrificial strip to one edge for blowout prevention. Let the sacrificial piece be blown out, chewed up (picture in the gallery below).

Matthew Bickford in his book and DVD advocates using rebates to guide rounds, and chamfers to guide hollows. That technique does two important things. (1) most of the heavy waste removal is done by a rabbet plane which is much easier to sharpen than the hollows or rounds. That means less sharpening for the difficult irons. (2) The arrises of the rabbets and chamfers act as steering for the rounds and hollows.

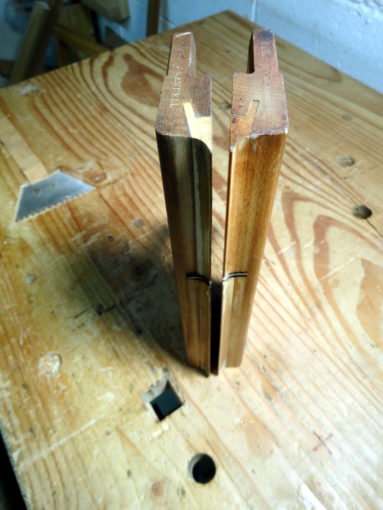
photo of new old snipes-bill-planes

Starting rabbets is a challenge. My previous method was to make a line with a marking gauge, and as Bickford shows, use a tilted rabbet plane riding in that mark to start the rabbet. With subsequent passes rotate the rabbet plane upright for the correct cut. It works, but requires a very sharp arris on the right side of the rabbet plane and great amount of care for the first few passes.

I’ve found a better way. I haven’t yet had a use for snipes-bill planes and had not acquired any. … until I learned (again from Bickford) that the snipes-bill will easily follow a line from a marking gauge. Bingo! While I would love to have brand new planes from Bickford, my budget sent me off to my favorite tool monger, Patrick Leach. A few days later, a pair of very serviceable antique snipes-bill planes arrived. A little cleaning and sharpening, and they are working well. Not only can they follow a cut left by a marking gauge, they can, if one is careful, follow a knife line. About 3 passes to establish a quirk, then a couple of passes with the tilted rabbet plane, and then full speed ahead with the upright rabbet. Life is fine!

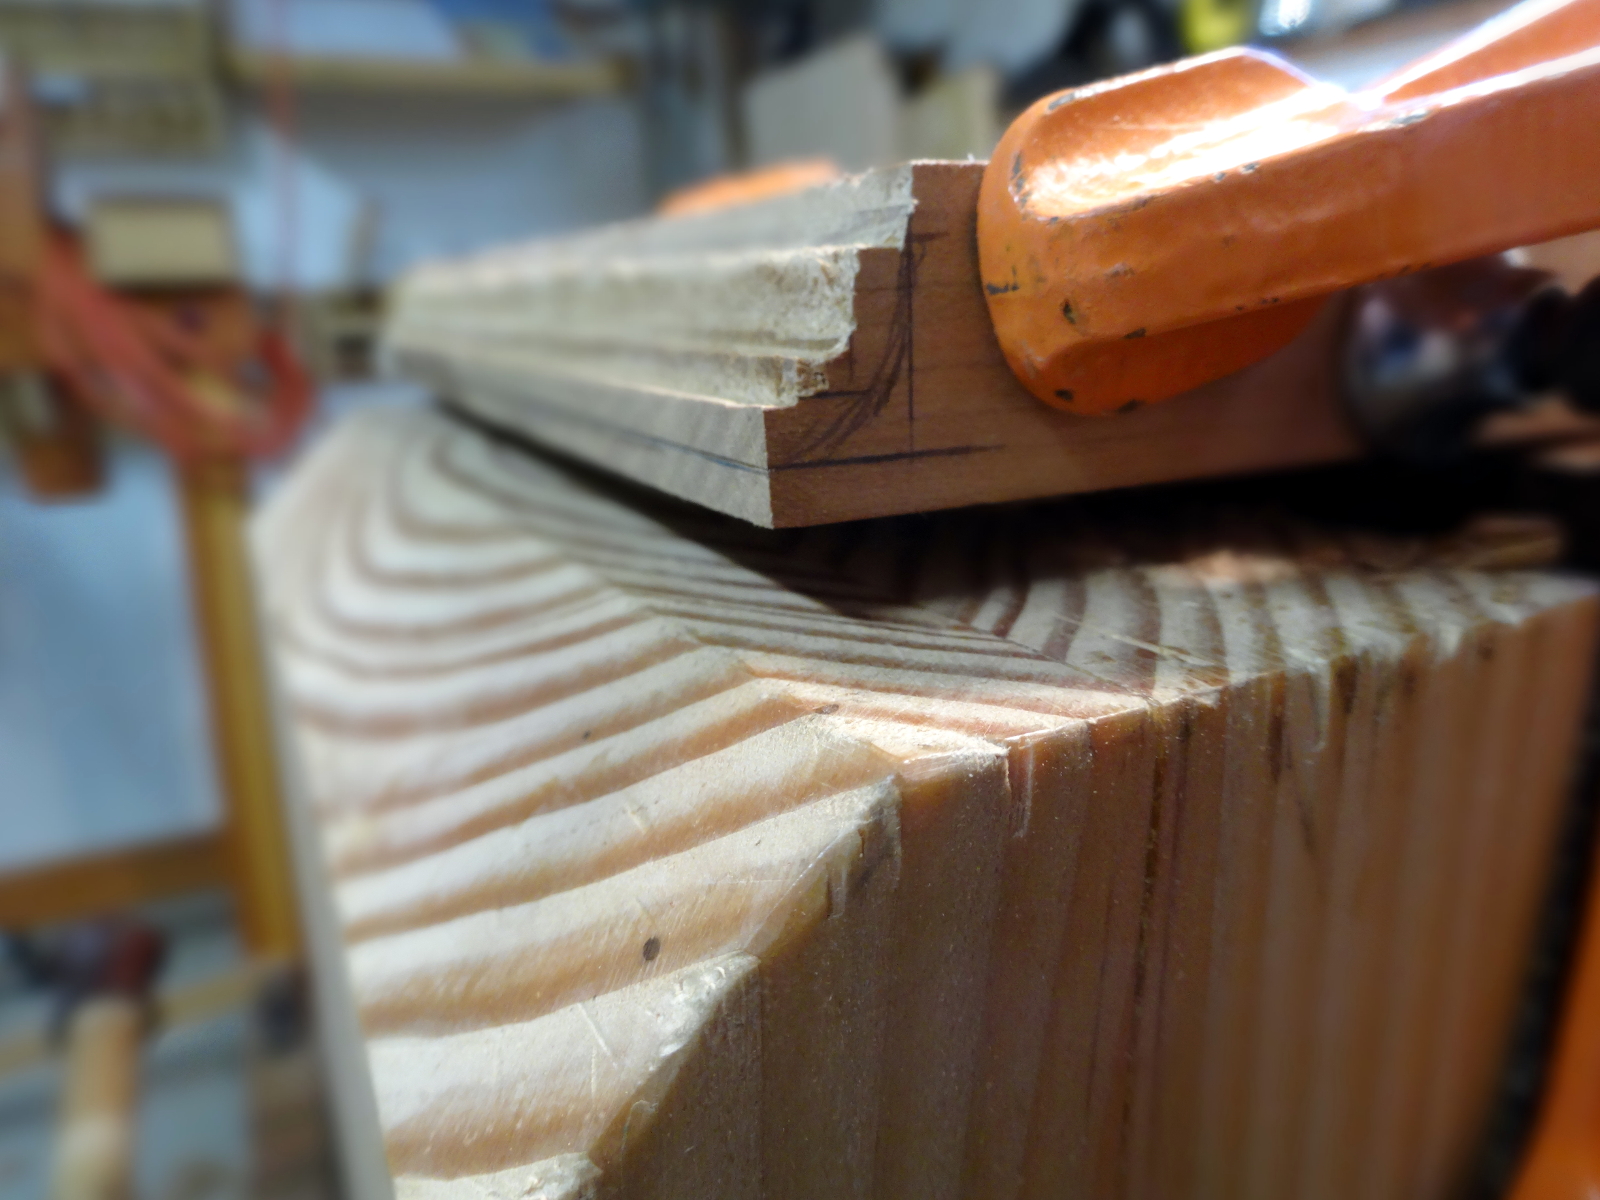
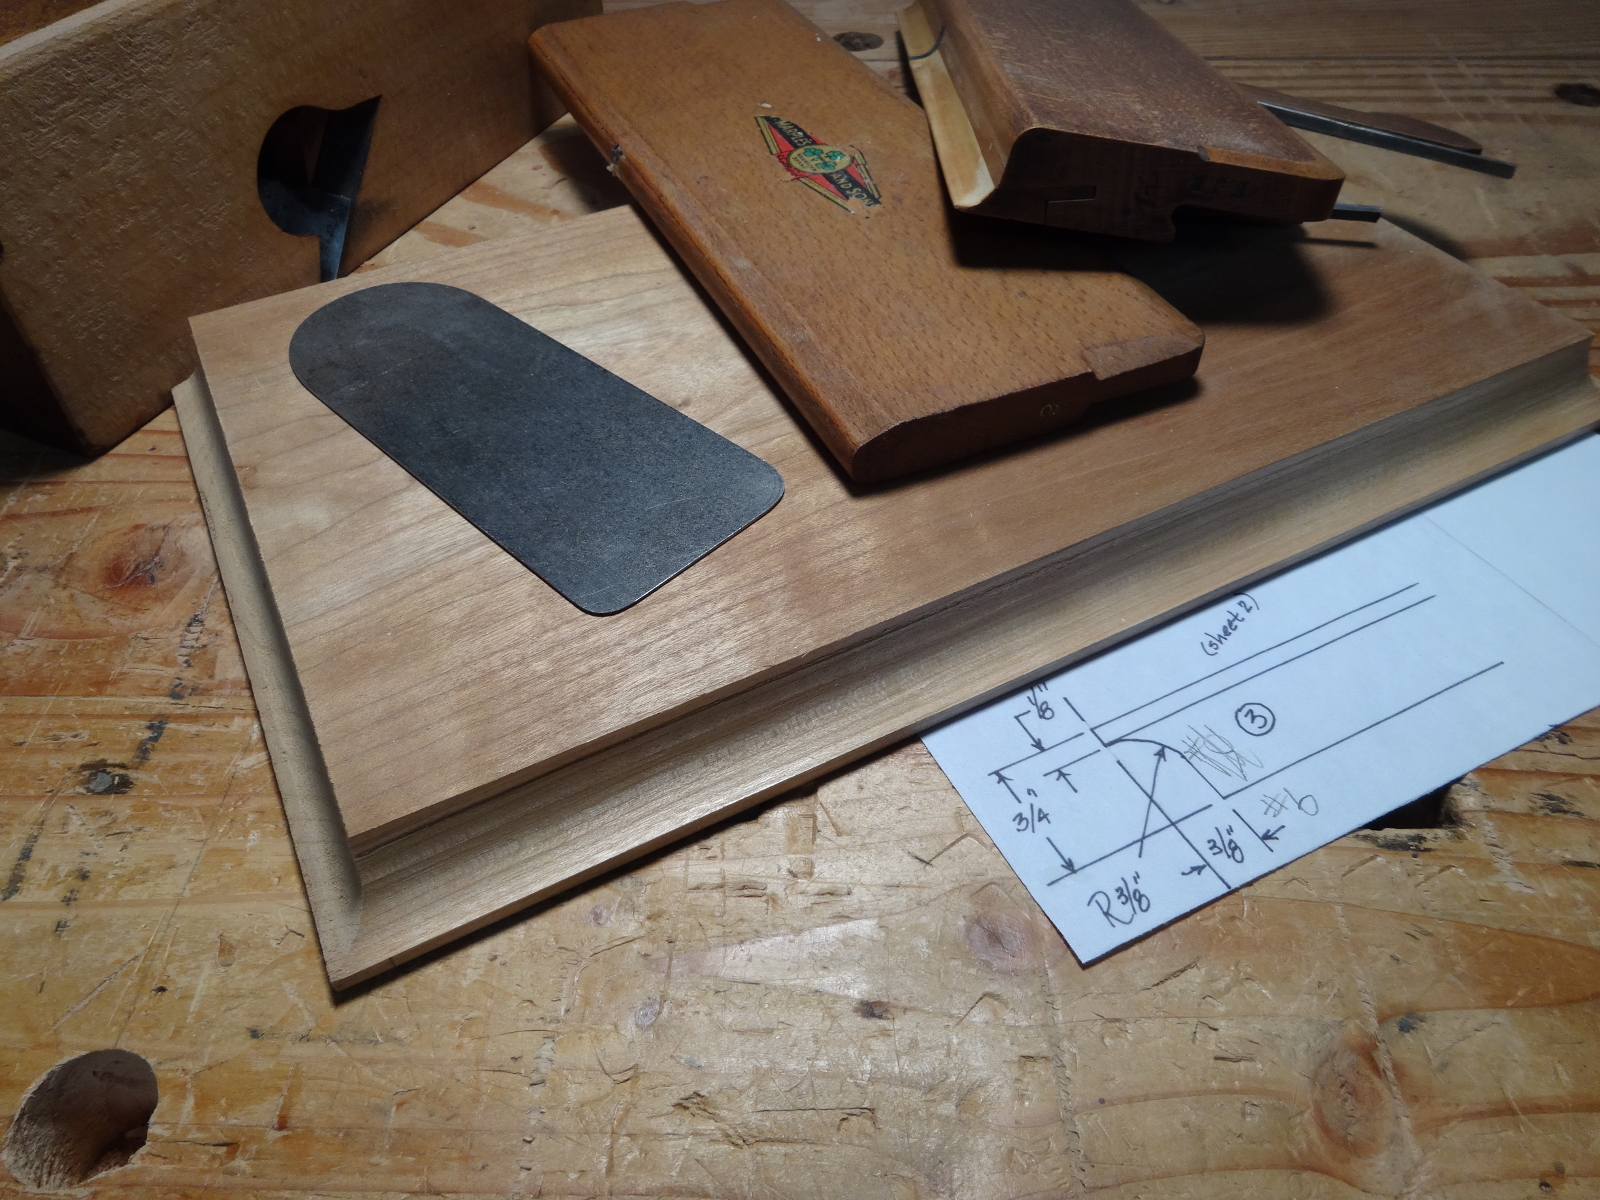
Using rabbets works well until a profile needs something more than 60 degrees of arc. If a single rabbet is used for the 90 degree coves on pieces #3 and #5, the rabbet’s arrises are too far apart to guide the appropriate round plane. The answer is to use two smaller rabbets and then work back and forth between them. Works great!

Pieces # 3 and #5 are the structural top and bottom of the clock case. They will each be given a pair of mortises and a rabbet in the back to accommodate the case sides and back. I’ll wait until after that work to refine the moulding shapes. For that work, I’ll use a scraper with curved corners that I made from a scrap of an old saw plate.

  • photo of rabbet being cut with blowout on a sacrificial piece
  • photo of extra rabbets

Other articles in this series…

  • Regulator Clock – Done
  • Regulator Clock – Woodworking completed
  • Regulator Clock – Scratching the frames
  • Regulator Clock – Door Hinged
  • Regulator Clock – Case Dry Fitted
  • Regulator Clock – Jelly Side Down
  • Regulator Clock – Case Frames – 2
  • Regulator Clock – Glass – 2
  • Regulator Clock – Case Frames – 1
  • Regulator Clock – The Works work
  • Regulator Clock – Glass
  • Regulator Clock – Tongue & Groove planes
  • Regulator Clock – Completed Mouldings
  • Regulator Clock – Stick Mouldings
  • Regulator Clock – Plate Mouldings
  • Regulator Clock – Egg and Dart Moulding
  • Regulator Clock – Eat Dessert First
  • Regulator Clock – original description
  • Regulator Clock – Stock Prep
  • Regulator Clock – Plans for Moldings
  • Taming the Rabbet

Filed Under: Clocks, Woodcarving, Woodworking

This Eagle Walks

February 10, 2017 by Bob Easton 6 Comments

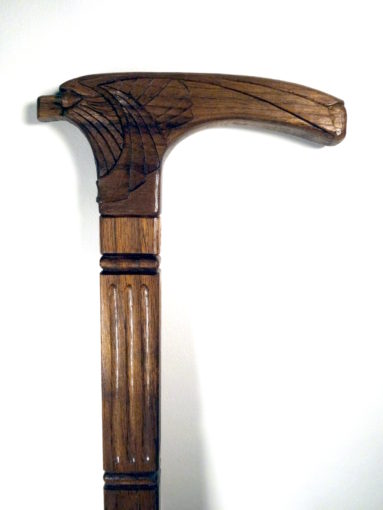
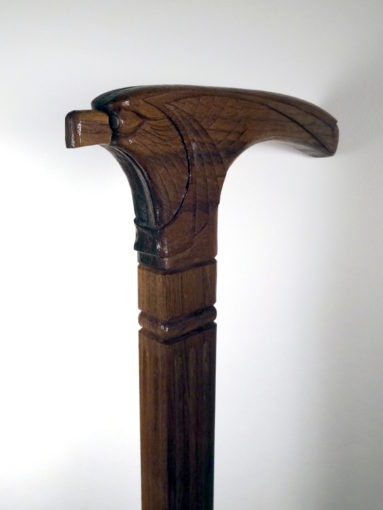
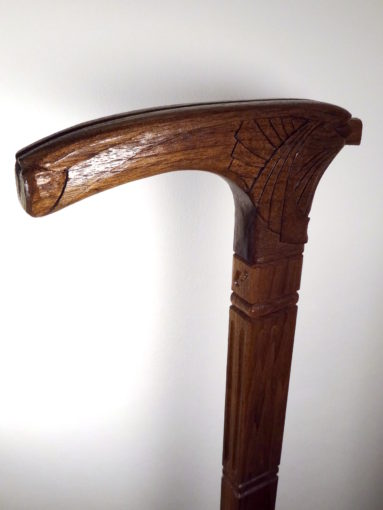
photo of eagle head walking caneHistory claims that mankind started in the nearly tropical Garden of Eden. Later, some men moved northward and ended up in places where there is sometimes ice upon the ground. {Why?} One man recently made an unplanned maneuver on the ice and ended up with spiral fractures in both the lower bones of one leg. That will be a long time mending. He’s still not allowed to put any weight on that leg, but at some point will be able to set aside the knee scooter and crutches in favor of a simple walking cane. Maybe this one will help.

The cane is made from American Walnut. The head and the shaft both came from the same 7/8″ thick piece of lumber. The shaft is 1-7/8″ at the top tapering to 7/8″ at the bottom.

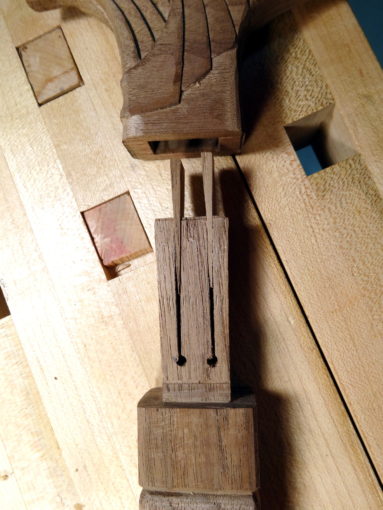
The primary concern for any walking cane is that it be safe enough to support a person without failing. The shaft on this one is easily strong enough for most adults. My biggest concern when making it was to ensure that the handle is so well affixed as to not come loose.  It is of tenon and mortise construction, but not a complete through tenon. I didn’t want a tenon sticking through the top of the eagle’s head.

photo of fox wedged tenon about to enter the mortiseThrough tenons are often tightened considerably using wedges. I tightened this tenon with “fox wedging.” No, I don’t know what a fox has to do with it, but that’s what it is called.

Wedges are inserted into slots in the tenon and driven home as the tenon enters the mortise. It’s a self-completing joint that had better be right when it is put together. I’ve never made one of these, but spent a lot of time ensuring enough room inside the mortise for expansion, but not so much as to make the wedging ineffective. (What is half of the wiggle room and how thick do those wedges need to be? Have I tapered the 3″ deep mortise enough? What is “plan B” if this thing gets stuck half way in? What’s “plan C” if it’s too loose, yet to tight to extract and refit?)

It worked on the first try.

The finish is several coats of “Tru-Oil gun stock finish.” That’s a very durable oil / varnish combination that brings out the natural walnut coloring. A coat of furniture wax and a rubber tip complete the cane.

I hope the recipient likes the Art-Deco style.

photo of eagle head walking cane

Filed Under: Woodcarving, Woodworking

Chinese Seal Box

October 31, 2016 by Bob Easton 8 Comments

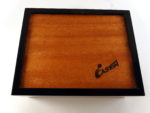
the mark of the Chinese sealA thin photo of Chinese seal box - closedsliver of red teases from the back edge of the lid, like the sole of a Christian Louboutin shoe.

Eva, my wife, is a linguist and language fanatic. One of her language partners, who lives near Beijing, bestowed on her an honorary Chinese name. It is the pseudonym of a premier Chinese poet he admires, Yi’an Jushi. A reasonable translation is “Amiable Calm.” He also sent a Chinese “seal,” a stamp that embodies the two characters of the name in a traditional form.

Something as nice as that Chinese seal deserves a nice box to live in. And of course, it wants to have a traditional black and red Chinese lacquer finish.

Cherry with mitered dovetails and flip lid,
“French fitted” interior,
Dimensions: 6 3/4 inches (L), 5 1/4 inches (W), 2 5/8 inch deep,
Bottom: 1/8 inch mahogany,
Finish: Red lacquer interior, Black lacquer exterior.

This box includes a “French fitted” interior to hold a seal and dish containing an ink pad.

The mitered dovetailed corner, as shown in an older post, offers the traditional dovetail join, but with miters on the ends which provide a much nicer finished appearance when seen from the top or bottom of the box. The miters also allow the groove for the floor to be routed straight through but also be concealed.

Unlike my other boxes, there’s no external carving on this box. The only thing that can be considered carving is hollowing out some spaces in an interior block to create the French fitting. By the way, the fabric for the fitting is simple red felt attached with rubber cement adhesive. The porcelain dish is an “upgrade” from the plastic box that originally held the stamp pad.

Beware! – Lacquer Lessons

It’s called “tuition.”

Finishing this box was an adventure. I really wanted a lacquer finish, and eventually got one. The first challenge was finding actual lacquer. Thanks (mostly) to California regulators, we no longer have true, hard, extremely durable lacquer made of nitrocellulose. There’s a close substitute in the auto industry, but I wasn’t ready to buy auto finish in gallon quantities, and I don’t have a professional spray booth to use it in. I settled for some rattle-can pseudo lacquers meant for model cars. The one trait these pseudo lacquers share with the real stuff is sensitivity to humidity … and New York summers have plenty of that. I was constantly checking weather charts to find afternoons with less than 50% humidity.

The bigger lessons weren’t about humidity, but…

  • As hard as lacquer seems, it is still susceptible until very well cured. I painted the inside, red, parts first and then the black outside. (Yes, I used the usual blue painter’s tape.)  After painting both, I let the parts sit for about a week. I parked the lid, which at most weigh no more than two ounces on a group of painters’ points, those nice little plastic pyramids. At the time, the red paint was probably a week old. Coming back at the end of week resting on the points, I found dimples in the red finish. Most would “rub out,” but there were other reasons for redoing the red. …
  • Somewhere way down the page about 3M’s blue painters’ tape is mention that the adhesive in that tape sometimes interacts with lacquer. I found out after removing blue tape masking and finding a residue that could not be removed. None of the magic potions I tried touched the stuff. Scraping was the only thing that worked, and of course did enough damage to require re-painting the red. 3M’s suggested prevention is to use their Green painters’ tape, product #2060, and to remove tape as quickly as possible. The #2060 product recommends 3 days max.

After those lessons, completing the finish was a matter of hand rubbing. I found that either of these processes worked equally well:

  • let the last coat cure until the distinctive lacquer smell disappears (about 1 week)
  • gently sand with 400 to remove nibs
  • work through the abrasive pads 500, 1000, 2000, 4000
  • wax and buff

OR…

  • let the last coat cure until the distinctive lacquer smell disappears (about 1 week)
  • gently sand with 400 to remove nibs
  • rub with a pumice slurry, down to an even satin sheen (abt 500 grit)
  • rub with rottenstone slurry until shiny (abt 2000 grit)
  • buff clean
  • wax and buff

Click any of these images for a larger view.

photo of Chinese seal box - closed photo of the Chinese seal box - lid open photo of the Chinese seal box - open and in use photo of inside of Chinese seal box photo of french fitting inside Chinese seal box bottom of Chinese seal box

This is Box #18

Filed Under: Boxmaking, Woodworking

  • « Go to Previous Page
  • Page 1
  • Interim pages omitted …
  • Page 8
  • Page 9
  • Page 10
  • Page 11
  • Page 12
  • Interim pages omitted …
  • Page 32
  • Go to Next Page »

Primary Sidebar

Footer

Recent Posts

  • New Frame Saw / Scroll Saw
  • Lamppost Sign
  • Goodbye PayPal – Goodbye Bob’s eBooks
  • Anarchist’s Workbench is Done
  • Why we keep offcuts…

Categories

  • About
  • Artwork
  • Boatbuilding
  • Boating
  • bowl carving
  • Boxmaking
  • Clocks
  • Drawings
  • eBook
  • etude
  • Eva Too
  • Eva Won
  • Fiddlehead
  • Fiddlehead model
  • Flying
  • frame saw
  • gilding
  • green woodworking
  • Grinling Gibbons
  • Guns
  • Hand tools
  • Humor
  • kerfing plane
  • Lettercarving
  • Mill Creek 13
  • Model building
  • Power tools
  • Rant
  • resawing
  • scroll saw
  • Shopmade
  • sign painting
  • Stonework
  • Swimming
  • Technology
  • The Wall
  • treadle lathe
  • Uncategorized
  • VSD
  • Woodcarving
  • Woodturning
  • Woodworking
  • workbench

Other stuff

  • About
  • Contact
  • Privacy Policy

Copyright ©2024 · Bob Easton · All Rights Reserved