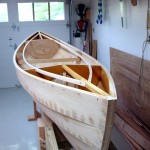
 The first round of deck framing consists of several carlins made of 5/8″ by 3/4″ spruce. These will support covering boards along the outside edges of the boat. A little fussy fitting, some careful positioning through the bulkheads, screws set at angles to avoid collisions, a little epoxy and it’s easily done.
Those areas at the ends of the boats become watertight flotation compartments. They are going to get closed up soon. So, while I can still get a brush in there, they’re getting painted with a couple of coats of Cetol.

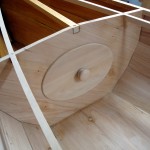
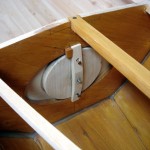
 One of the fussier parts of the construction are the oval hatch covers for the watertight compartments. One could handily purchase round, plastic, readily available, easily installed covers, but that would be far too easy. Instead, I followed Harry’s drawings for a semi-diabolical device that ends up looking a lot nicer than a round slab-o-plastic. All is in place except the gasket which the last part of the hatches.
In case you’re wondering how it operates, the small knob is free to turn and is used to pull the bar toward the knob. The bronze screws are not tightened down all the way because they allow the bar to move in and out as needed. Two small wood stops help with positioning. Insert the cover so the bar fits through the opening. Turn the whole cover clockwise until the bar registers against the stops. Then tighten the knob until the gasket seals the opening.
This question will likely reveal the fact that I am a novice boatbuilder but how did you keep the epoxy out of the threads of the nut?
Good question Aaron!
Lubricate the threads of a matching screw with candle wax. Just rub it on a candle; no melting needed. 🙂 Insert the screw into the nut before gluing, and go to it.
Just in case… you can be extra cautious and remove the screw after a few hours, at the time the epoxy has no longer runny, but not yet hard set.
It’s also good to remember that alcohol is a reasonable solvent for epoxy that is not fully set.
In any case, try to mess with unset epoxy as little as possible, and WEAR GLOVES. Other than that, have fun!