The first planks to be fitted to the boat are the garboard planks, the ones at the very bottom. They are also the planks that have the most curvature in outline and in the way they lay upon the boat. They are nearly vertical at the stems and splay out to about 30 degrees in the middle of the boat.
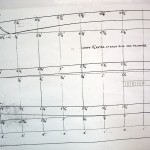
 Finding their shape can be an adventure. The principle methods are two: (1) Use the shape documented in the drawings (if available), or (2) find the shape from the boat itself. The designer provided plank shapes in the drawings. Not all designers do this, but these look to be quite useful. One would imagine that using the shape from the drawings would be OK. Yet, success with that method depends on the framework being constructed as precisely as the drawings. That’s not always the case, and while my measurements appear to be right on, I don’t know how much tolerance is built into the drawings. Taking the shape from the boat itself is called “spiling” and is an art form of its own. Spiling is two parts black magic and one part semi-Euclidiean geometry. The particular variant I used is the one that Greg Rössel uses.
Being of the belt AND suspenders persuasion, I used both methods. It turns out that my spiled shape fits within the shape defined on the drawings. Erring on the side of cutting the plank too large, I ended up using the shape from the drawings and sawed to that shape. Sawing was easy with the bow saw. There is a “lesson learned” with the first cut. I was focusing on staying near the line and didn’t appreciate the fact that the waste piece was hanging free going “whipity whipity” as I sawed. As the cut got longer the waste piece increased it whipity whipity whipity until it went “whipity whipity CRACK.” Oooops! Hey dummy, support the material and don’t let anything whip around. Fortunately, the splitting was on the waste side of the line, not into the plank.
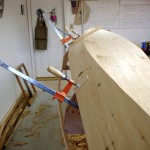
 Then it came to test fitting, trimming, and repeating until the plank fit the boat well. All of the attention was for the edge of the plank that will meet the next plank up. There’s little need to fuss with the part that extends beyond the bottom, as it will be simply planed off when the time comes. Test fitting is challenging because of the extreme bends in this plank. The dry boards cannot be completely bent into place. They will need steaming to be bent to final placement. So, test fitting is “best estimate” at this stage. Set three clamps and then gingerly “muscle” the ends toward the stems. Caution is advised since this species of cedar is known to be somewhat brittle.
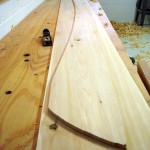
 These garboard planks turn out to be quite the bananas. Here is a fitted one atop the board that will become its partner. Now we see why we need a very wide board to start with.
Getting the planks attached to the boat is the next adventure. That job needs screws, clinch nails, goop, big cauldrons of boiling water, towels, plastic bags, time suspension, and maybe a helper.
Bob – Man that looks like fun! And you got the crack to go into the waste? Now that’s black magic…
Regarding spiling – I own that book, and have read it over a couple of times, but I still don’t think I “get” it. I think I will just have to figure it out hands-on style – whenever that will be… Maybe I’ll make it down to Brooklin like you did – I just read your post from June ’08 and I am VERY jealous 🙂
She’s looking great!
Hi Dan.
In the end, all you’re doing is making a story stick that transfers measurements from the boat to a board. There are lots of ways to do it.
John Gardner described a method using crossed compass lines in his book, “Building Classic Small Craft.” (I bet you have that book too.)
Another bit of explanation is found, this time using spiling blocks, about half way down in Tom Daniel’s blog entry about spiling for Cherokee.
Greg Rössel taught us the method using dividers because he prefers it as more accurate than any method using pencil lines. My partner for a couple of days of spiling work was a professional cabinet maker who was used to 1/128 inch precision. He was astounded by the accuracy of the spiling method we learned.
I know that you’ve learned many things from books, and can learn this too. So do I. Yet, I found great joy in the WBS course. Hope you can make it there.
Thanks, Bob,
I am researching for a book I’m writing about living in the wilderness of northern BC. Our first ex fishing boat had a side caulk going on in the garboard and we filled it and filled it and filled it. But that boat was 60 or 70 years old at the time and got the job done! Your work is beautiful!! I am writing about 30 years ago and this blog is helping to bring it back to memory.
Again, Thanks,
Maggie