Desk box, keepsake box, any other kind of box, what’s the difference?
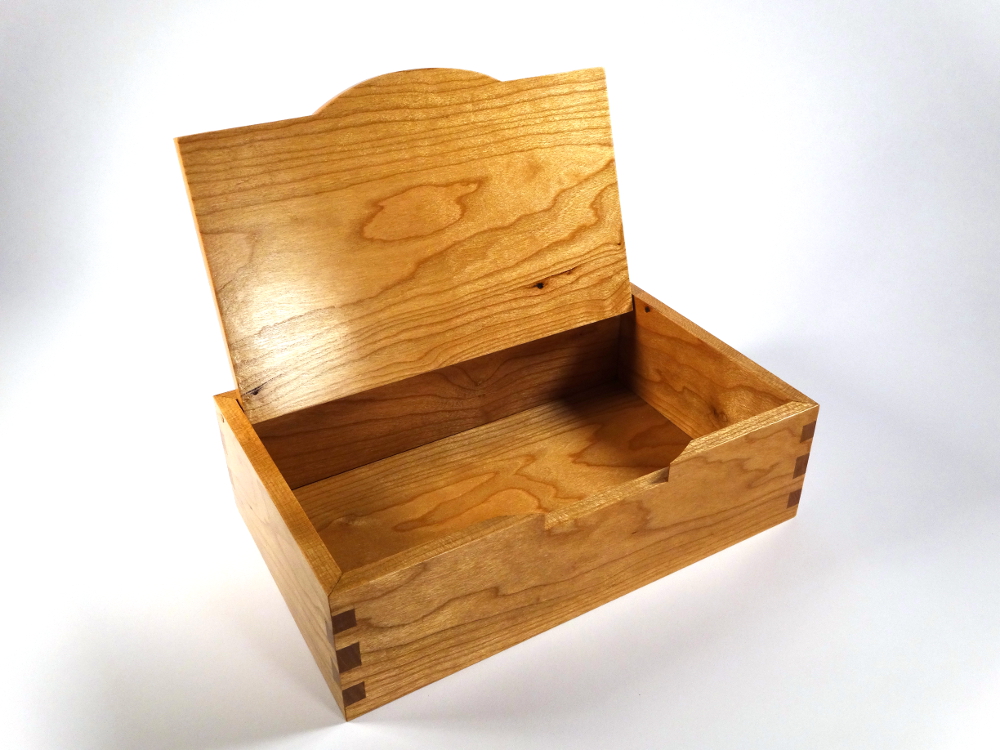
 This one is convenient for desk use because the lid stays attached and tilts open easily into a stable position. Flip it open, grab a pen, and move the work along.
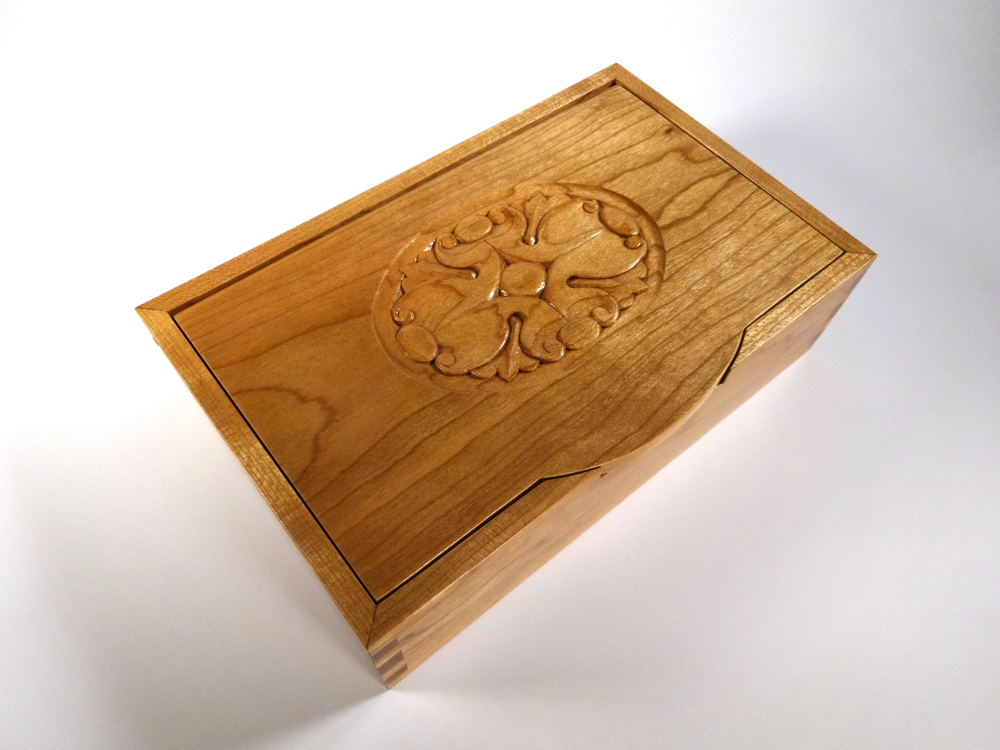
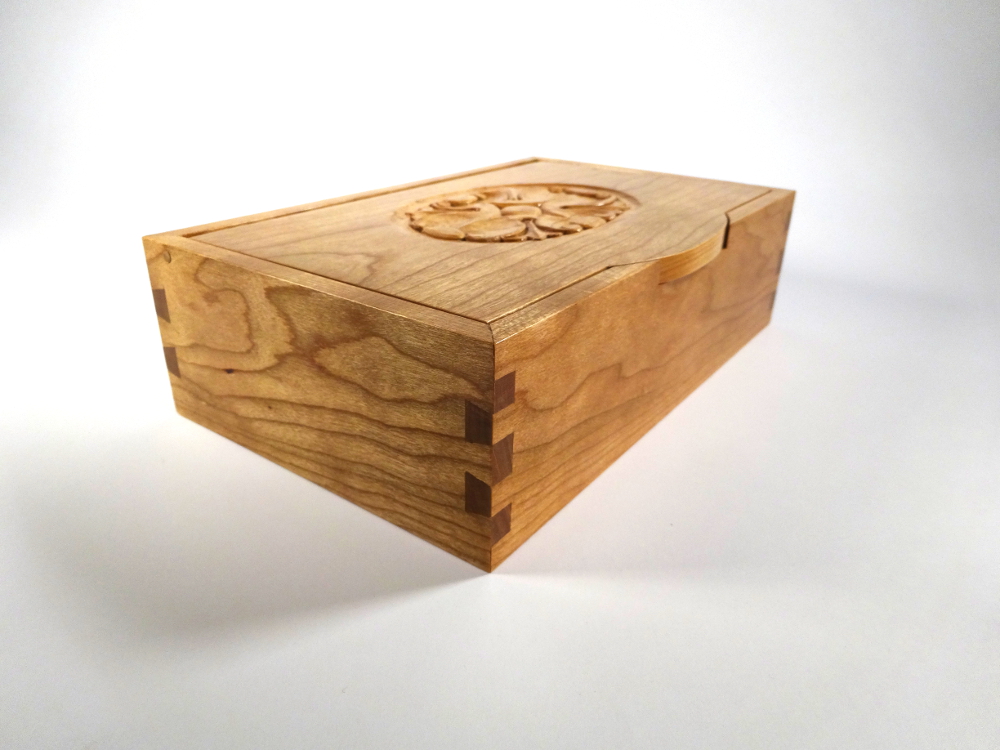
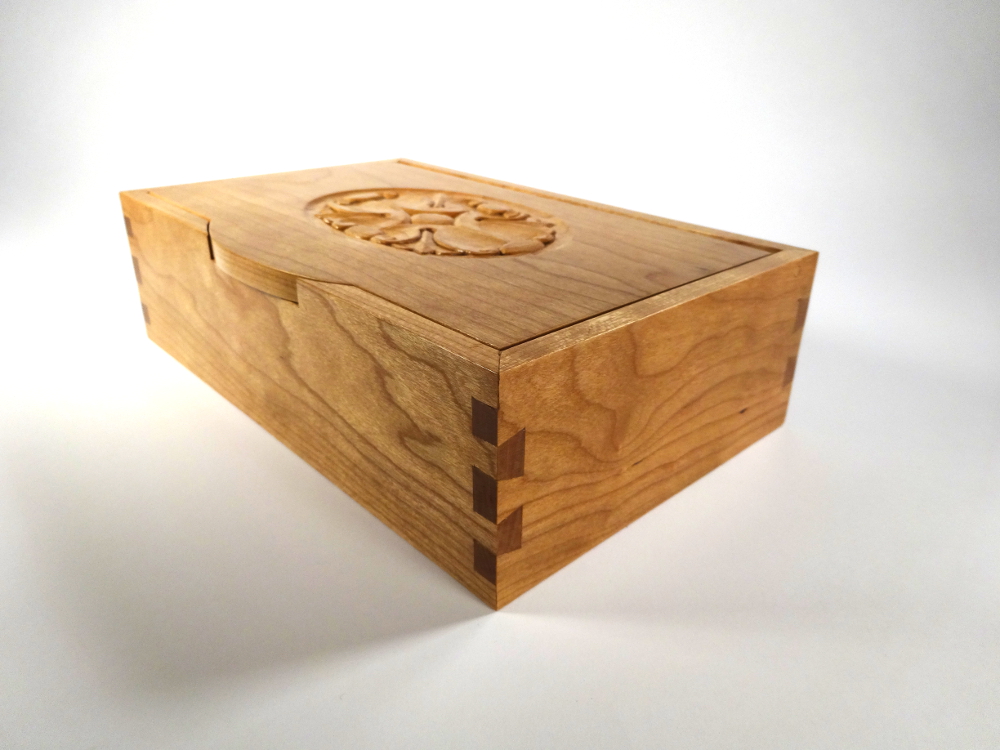
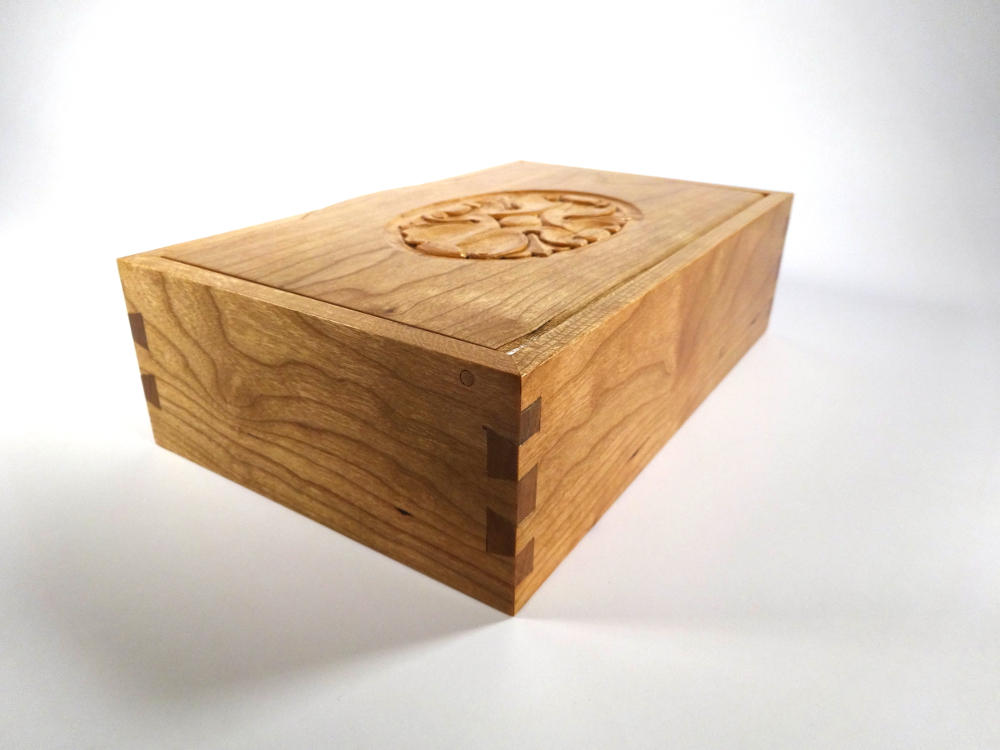
It’s another American Cherry box, all from heartwood. Like most cherry I’ve come across, there are a few dark stains here and there. Those are from bird pecks. Birds harvesting insects from the bark leave marks which end up as nearly black marks within the grain of the wood. If I were to look for peck free cherry, I would find little useful material.
 Three things are distinctive with this box. One, is the mitered dovetails. They provide a very nice miter on the visible edges while retaining traditional dovetails. The miters are perfect hiding places for the grooves that retain the bottom. No more fussing with trying to plane a stopped groove! In another 2 or 3 boxes, I won’t be calling this feature distinctive, but the norm.
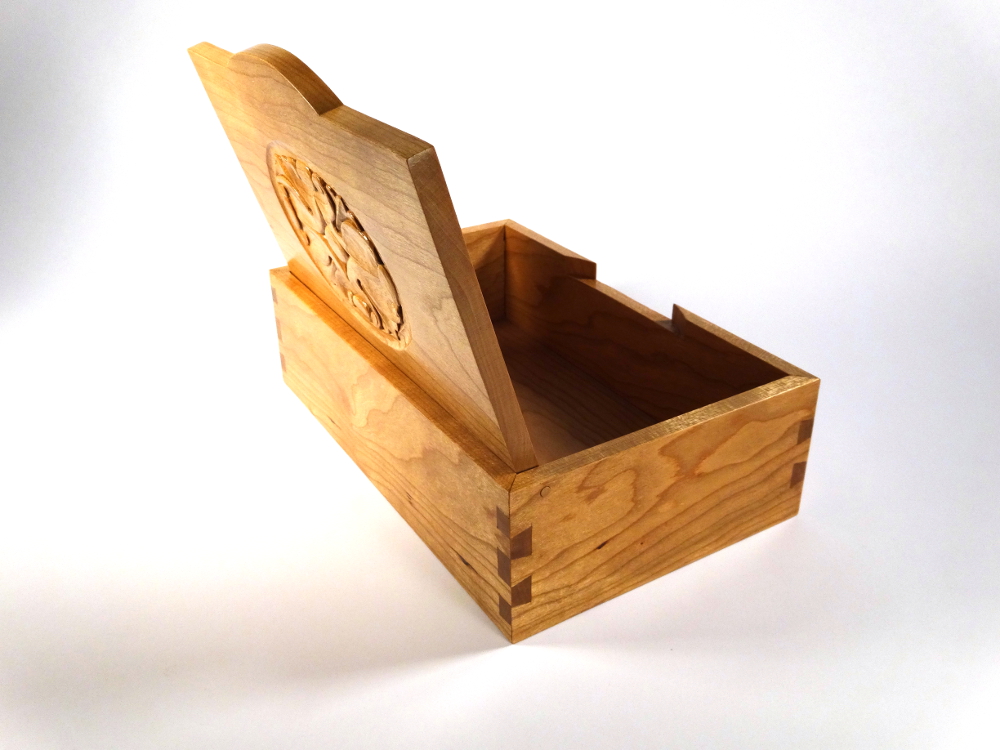 The tilt top is a first for me. It’s simple, fitted on wood dowel hinges. The hinge pins are placed so as to keep the top edge flush with the tops of the sides and ends. A notch cut into the front of the box completes the flush fitting. The lid is lifted from a curved edge that protrudes about 1/8″. I made that curve match the oval of the carving. The placement of the hinge pins also allows the lid to rest at about 95 degrees in the open position. Nice!
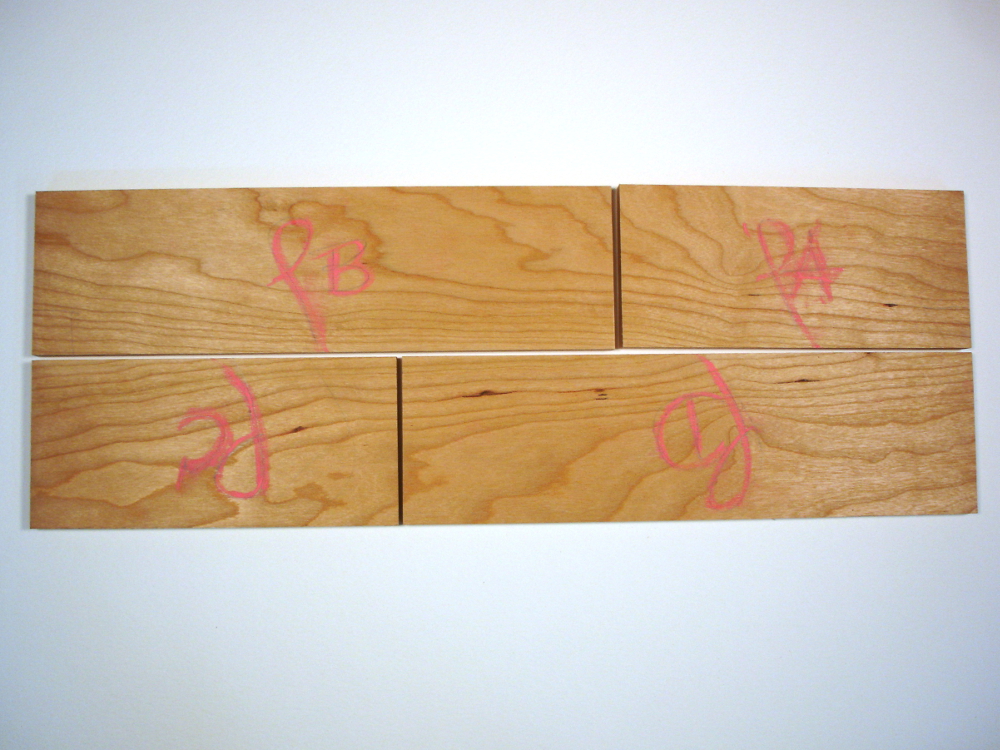 The third distinction, not really new with this box, is what some call a “3 corner grain wrap.” The grain flows around the box, matching at all corners except the last, and even there it’s not far off. How is that done? Carefully! First, resaw a piece of wood that is as close as to the length of one side plus one end as possible. Open up the book matched pair. Mark carefully in either clockwise or counterclockwise rotation: end, side, end , side. The marked faces are the outside faces of the box. Keep the parts in the correct order when cutting the joinery and assembling. See; simple! (In the photo, each piece includes it’s A, B,C,D marking plus a script “f” for “f”ace.)
Note to self: that pink chalk finds its way into the grain and is hard to remove. Find another marking method.
The only other “design decision” was the size of the dovetails and which orientation for the pin boards. I made the choice on achieving a balance of end grain areas in relation to the size of then ends or sides. Dimensions: outside – 9″ x 6″ x 2 3/4″ inside – 8 1/2″ x 5 1/2″ x 2 1/2″.
The rest is the pleasure of assembling and especially carving. Finish is hand rubbed shellac and paste way, very satiny. The box is available on Etsy.
Here are pictures of the grain wrap….

Hi Bob,
I like the mitered dovetail detail, especially for the reason you wrote of. If the box doesn’t fit on your desk it’ll probably fit on mine.
Thanks Ralph,
The miter is a lot more work, but makes the groove cutting easier and offers a beautiful result.
I’m sure you can make one for your desk. 🙂
——–
Ralph forgot to link to his own blog, the Accidental Woodworker.
Hey Bob. Looks beautiful. I really like the lid coming through the front for a hand hold. Nice touch. What was the finish you used?
Hi Joshua,
The finish is 3 coats of shellac, rubbed out with 0000 steel wool, then completed with paste wax. I rub-out until the gloss is dulled, then wax. The result is silky smooth.
Brooklin, huh? I visited those parts several years ago – Wooden Boat School. I really enjoyed the area … and esp being close to Liberty Tools.
keep havin’ fun.
Gorgeous piece of work, Bob – I may just have to copy it! I find myself doing that with pieces on your blog – you do such great work!
David Taylor
THANKS David,
Copy away! You’ll find more pictures of the oval rose on page 15 in Frederick Wilbur’s Carving Classical Styles in Wood.
Enjoy!