• Skip to primary navigation
  • Skip to main content
  • Skip to primary sidebar
  • Skip to footer

Bob Easton

Chocolate powered woodworking

  • Home
  • Grinling Gibbons Tour

Workbench: Flattening the Top

October 30, 2008 by Bob Easton 1 Comment

rough flatteningbig pile of shavings
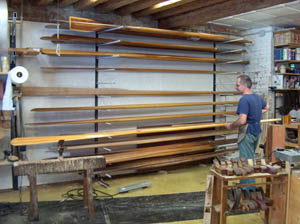
The last two boards are on, bringing the width to 24 inches. Flattening is simple; just takes time and 2.3 Snicker bars worth of energy. The big ole No. 7 jointer was set up rank and swept diagonally until all boards were brought to the same thickness. I then set it for fine work and used along the length of the boards to remove the diagonal marks. The heft of the jointer, along with a razor sharp iron and a constantly waxed sole (candle wax), makes it a very effective and enjoyable tool.

whispy shavingsThe No. 3 smoother feels petite in comparison, and was set up for petite, lace like, finish work.

The keen observer might find some strange holes in those last two boards. No, they’re not for holdfasts. Those boards each had a few dead knots in them, the kinds surrounded with a black ring of bark where the tree grew up around dead branches. Those kinds of knots tend to be loose, and in boatbuilding they must be removed and plugged lest they become unplanned drain holes. Here, I just knocked them out and left them unplugged. Made planing easier.

It turns out to be exactly what I expected. Al Navas would want better, but this is perfect for its intended use and a good bit better than what I’ve seen in many boat shops.

Filed Under: Woodworking, workbench

Workbench: Going to the Dogs

October 21, 2008 by Bob Easton 4 Comments

bench-dogsEvery respectable woodworking bench has dogs and a vise for clamping work against the dogs. There are several styles of dogs commercially available. Most of them are metal, and I prefer keeping metal as far away from my plane irons as possible. I decided to make, rather than buy, my dogs and settled on 1 inch square dogs made from ramin hardwood square sticks that are readily available at the home center.  The spring leaf for each dog is 1/8 inch thick cedar, leftovers from a little resawing project. A notch is cut for the leaf along one side of a dog, and then a cabinet maker’s rasp cuts a short angle at the end. A brass screw attaches the leaf. I borrowed the design from Stephen Sheppard.

OK. Next we need holes for the dogs, and a vise. Two boards were use to form the holes, one to hold all 25 dog holes, and the other to close them. Since this bench has a thin top, the depth of the dog holes is doubled by gluing another board below, making the bench twice as thick along the row of dog holes. All holes were hand sawn and chiseled. They are remarkably similar in size.

The vise is a very simple Lee Valley front vise that I’m using as a tail vise. The face block for it holds the moveable dog.

two boards, dogs, and viseThe usual procedure for building a bench is to glue up the entire top all at once. I have strayed from that path for two reasons. First, I don’t have a reliably flat reference surface 12 feet long that I can use for the glue up. Second, I imagine that the accumulated weight and length would make the complete top heavier than I can manage alone. So, I’m adding a board at a time directly to the bench frame. Attachment is a combination of glue and Miller dowels.

There are a lot of rough edges at this point: the top surface of the boards are not even with each other, the boards are slightly over length, and the vise face needs trimming both on the top and on the side that ajoins the apron. All will be resolved when the top is complete. Way down at the other end is a 2 inch by 2 inch planing stop, made of the same ramin as the dogs.

Filed Under: Woodworking, workbench

A Greenland Paddle

October 14, 2008 by Bob Easton Leave a Comment

Happy Birthday Evan!

Evan is a kayaker. When he learned that I was getting serious about boatbuilding and building a collection of woodworking tools, he said something like, “It sure would be nice to have a Greenland paddle. Now that you have tools…”

I’ve never used one, but I have learned that Greenland paddles are very lightweight paddles and are very efficient when properly used. Never one to jump into something without sufficient research, I found many resources on the internet about making these paddles. Perhaps the best, and most often referenced, is Chuck Holst’s “Making a West Greenland Paddle” (PDF file). I also used a step-by-step book, “Greenland Paddles,” by Brian Nystrom. Redundancy: belts and suspenders. It turns out that both are very similar and either will do just fine.

Chuck Holst suggests making your first paddle from inexpensive construction lumber. He must be located in a place where spruce construction lumber is readily available. Not here! We have Douglas Fir which is 50% heavier and a 1000% uglier. I looked for Sitka spruce while on a lumber shopping trip recently, but they did not have stock that was thick enough. I settled for Western Red Cedar which is one of the woods that Brian Nystrom suggests. It is indeed lightweight, somewhat lighter than spruce and half the weight of the ugly doug fir. Along with the lightness comes softness, a tradeoff in durability. The stuff takes dents and dings very easily.

Shaping the paddle is quick and easy work. In fact, it took about as much time to layout the lines as it did to work the wood. Being the first time I’ve made one of these, I very carefully laid out all the lines before picking up any shaping tools. I think it an essential exercise in fully realizing the shape of the thing. For example, it’s not immediately obvious that the oval of the loom is orthogonal to the oval of the blades. Get this wrong and the paddle will probably feel very strange in the hands.

So, immediately after very precisely marking a jillion lines, the first few passes of a spokeshave removes about half of them! That’s OK. The important thing is to hang onto the center lines. Everything else can be reconstructed from them.

The tool I used most for shaping is a Stanley #51 spokeshave that’s been around since about 1920. I selected this piece of cedar for the straightness and evenness of its grain. Working it was absolutely delightful. Smooth and easy. It was so easy to work that I needed very little sanding.

The only difficulty, and a relatively minor one at that, was figuring out how to keep the workpiece immovable without undue clamping pressure leaving marks. A lot of the work was done with the loom (relatively flat surface) clamped to my bench and the ends hanging free. In July this year, I spent about half an hour in the doorway of Saverio Pastor’s workshop watching him shape a remo (oar). Saverio is Venice’s master remer. He is an artisan who crafts remi (oars, plural of remo) and forcole (plural of forcola) the multi-faceted multi-pivot post used for rowing Venetian boats. If I were in the business of making more oars and paddles, I would use Saverio’s work holding techniques. He uses a vice which looks like the leg vise of a cabinet maker’s workbench to hold one end of the workpiece. It looks a bit strange to see this vice simply planted in a hole in his workshop floor, seen just under his right elbow in this photo. The other end of the workpiece floats loosely in a tree like extension from a horse that can be easily moved about, seen in the left of the previous photo and more closely in this photo. While peculiar to his art, these are very efficient ways to hold and manipulate the workpiece.

I made a couple of decisions along the way. Here’s where experience with this sort of paddle would help. Having none, I went with what I thought reasonable.

  • Blade thickness, measured at the tip, is a balance between performance and durability. I ran the tips down to about 3/8″ before final smoothing. This is the thickness Holst recommends, but is thinner than what Nystrom suggests for a first paddle. Others suggest even thinner, but I can imagine anything thinner getting pretty easily beat up, especially if you use the paddle to push off in rocky areas.
  • I left distinct facets on the loom. The loom is eight sided, and each is distinct on this paddle. It could be smoothed into a constantly smoothed oval, but I opted for leaving the edges of each face as an aid to orienting the paddle in the hands. The same with the blade shoulders. They are faired a bit, but not as much as they could be. This is a starting point and intended as an aid to someone beginning to use this kind of paddle. Maybe an experienced Greenland paddler would prefer more organic shapes. If so, it can still be done. Start with some 80 grit sandpaper and reshape it.

To help durability a little, I coated the last few inches of the blade ends with two coats of West System epoxy. That should provide a little bit of wear resistance without adding significant weight. The remainder of the finishing used pure Tung oil, pure stuff, not the imitations found in the home center stores. The first two coats were thinned with mineral spirits. Then, 3 more coats were hand rubbed and allowed to dry completely between each coat. This finish won’t make the paddle impervious to water, but will make it somewhat resistant and keep the wood from soaking up and getting heavier. Annual renewal of the coating is a good thing to consider.

It was a very enjoyable project. Maybe Evan will tell us how the paddle works out. (The lakes in Minnesota haven’t frozen yet.)

Filed Under: Boatbuilding, Woodworking

  • « Go to Previous Page
  • Page 1
  • Interim pages omitted …
  • Page 102
  • Page 103
  • Page 104
  • Page 105
  • Page 106
  • Interim pages omitted …
  • Page 128
  • Go to Next Page »

Primary Sidebar

Footer

Recent Posts

  • New Frame Saw / Scroll Saw
  • Lamppost Sign
  • Goodbye PayPal – Goodbye Bob’s eBooks
  • Anarchist’s Workbench is Done
  • Why we keep offcuts…

Categories

  • About
  • Artwork
  • Boatbuilding
  • Boating
  • bowl carving
  • Boxmaking
  • Clocks
  • Drawings
  • eBook
  • etude
  • Eva Too
  • Eva Won
  • Fiddlehead
  • Fiddlehead model
  • Flying
  • frame saw
  • gilding
  • green woodworking
  • Grinling Gibbons
  • Guns
  • Hand tools
  • Humor
  • kerfing plane
  • Lettercarving
  • Mill Creek 13
  • Model building
  • Power tools
  • Rant
  • resawing
  • scroll saw
  • Shopmade
  • sign painting
  • Stonework
  • Swimming
  • Technology
  • The Wall
  • treadle lathe
  • Uncategorized
  • VSD
  • Woodcarving
  • Woodturning
  • Woodworking
  • workbench

Other stuff

  • About
  • Contact
  • Privacy Policy

Copyright ©2024 · Bob Easton · All Rights Reserved