• Skip to primary navigation
  • Skip to main content
  • Skip to primary sidebar
  • Skip to footer

Bob Easton

Chocolate powered woodworking

  • Home
  • Grinling Gibbons Tour

Lathe Tool Chest – WIP and Helpers

May 17, 2018 by Bob Easton 2 Comments

Stuff accumulates! … and when not organized, gets lost.
Then, we have to play Beethoven’s “Rage over a Lost Penny” while looking for the lost thing. This happened once again recently while looking for a misplaced lathe tool. So, let’s corral the things into a more confined space.

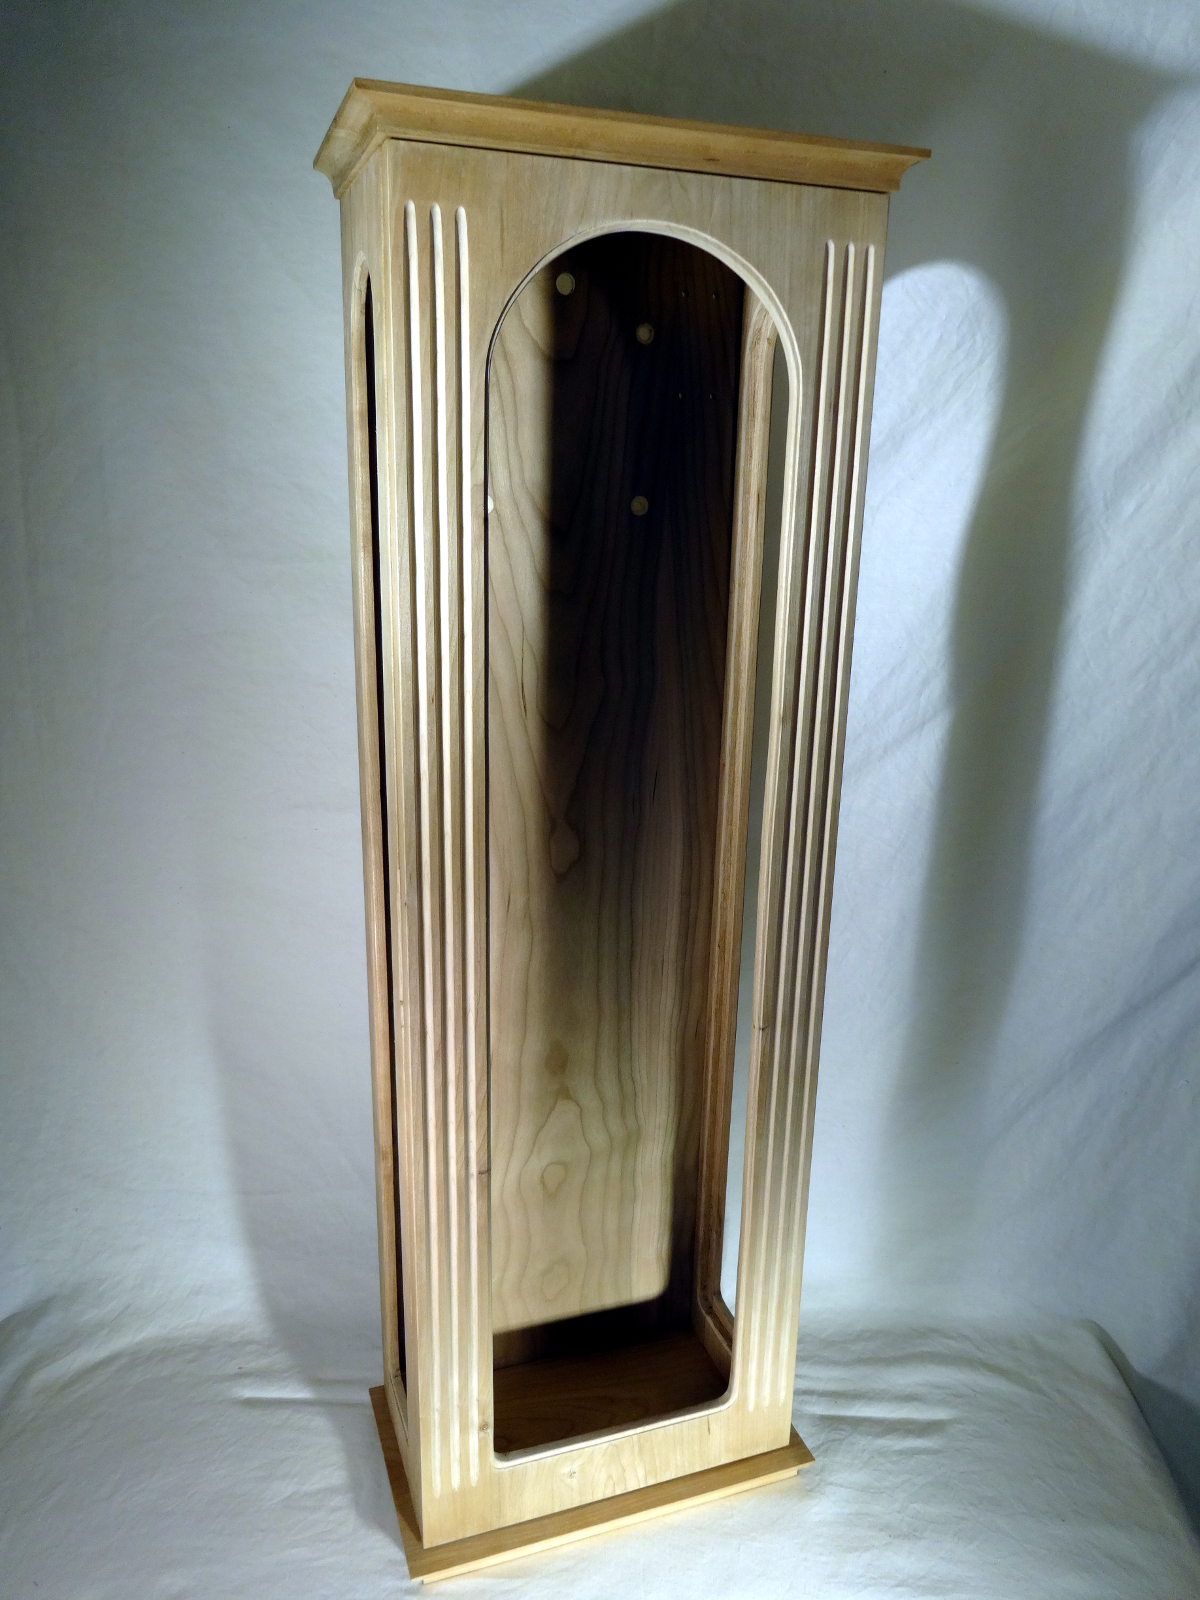
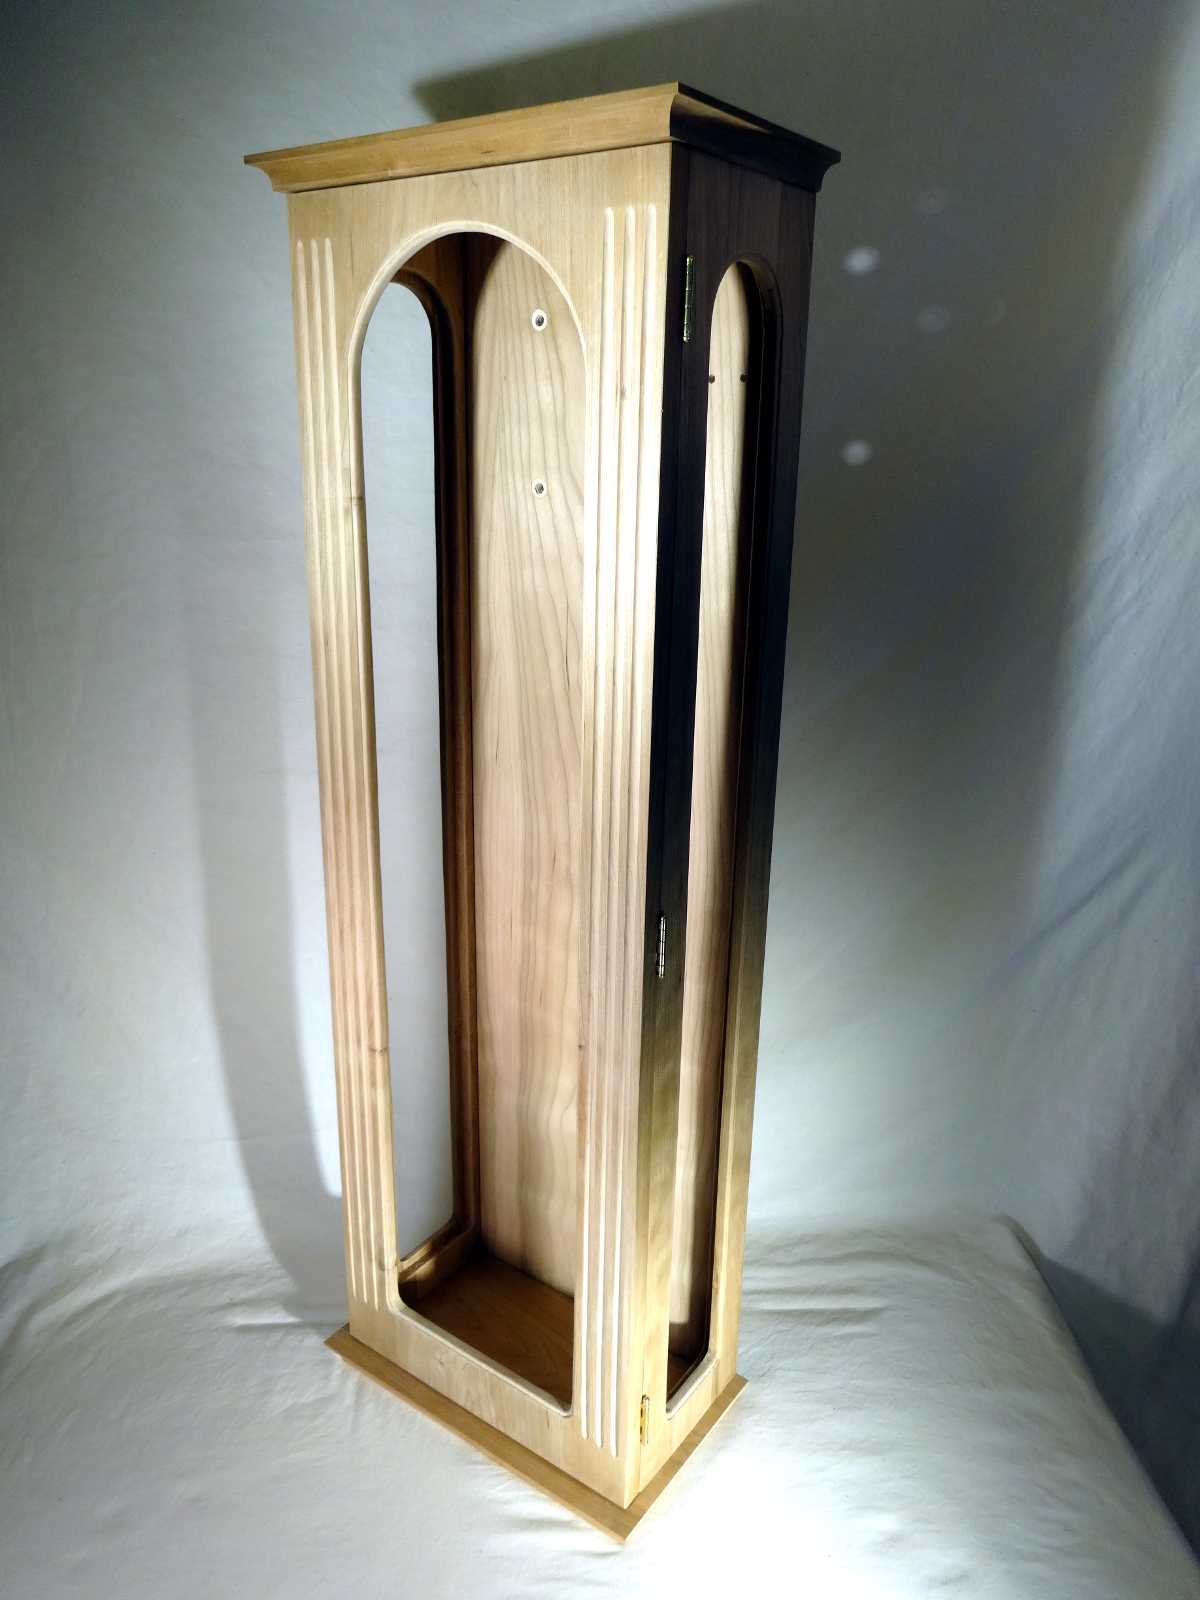
No, not the turning tools; I made a rack similar to my carving tools racks for the turning tools. It’s all the rest of the stuff, the chucks, drives, tailpieces, plates, mandrels, etc. that has scattered itself all around the shop. After rounding up all the pieces and laying them out in “these things are like those things” manner, I decided I wanted a three drawer tool chest, or maybe one with two drawers and a flip-up lid.

photo - lathe tool chest carcass
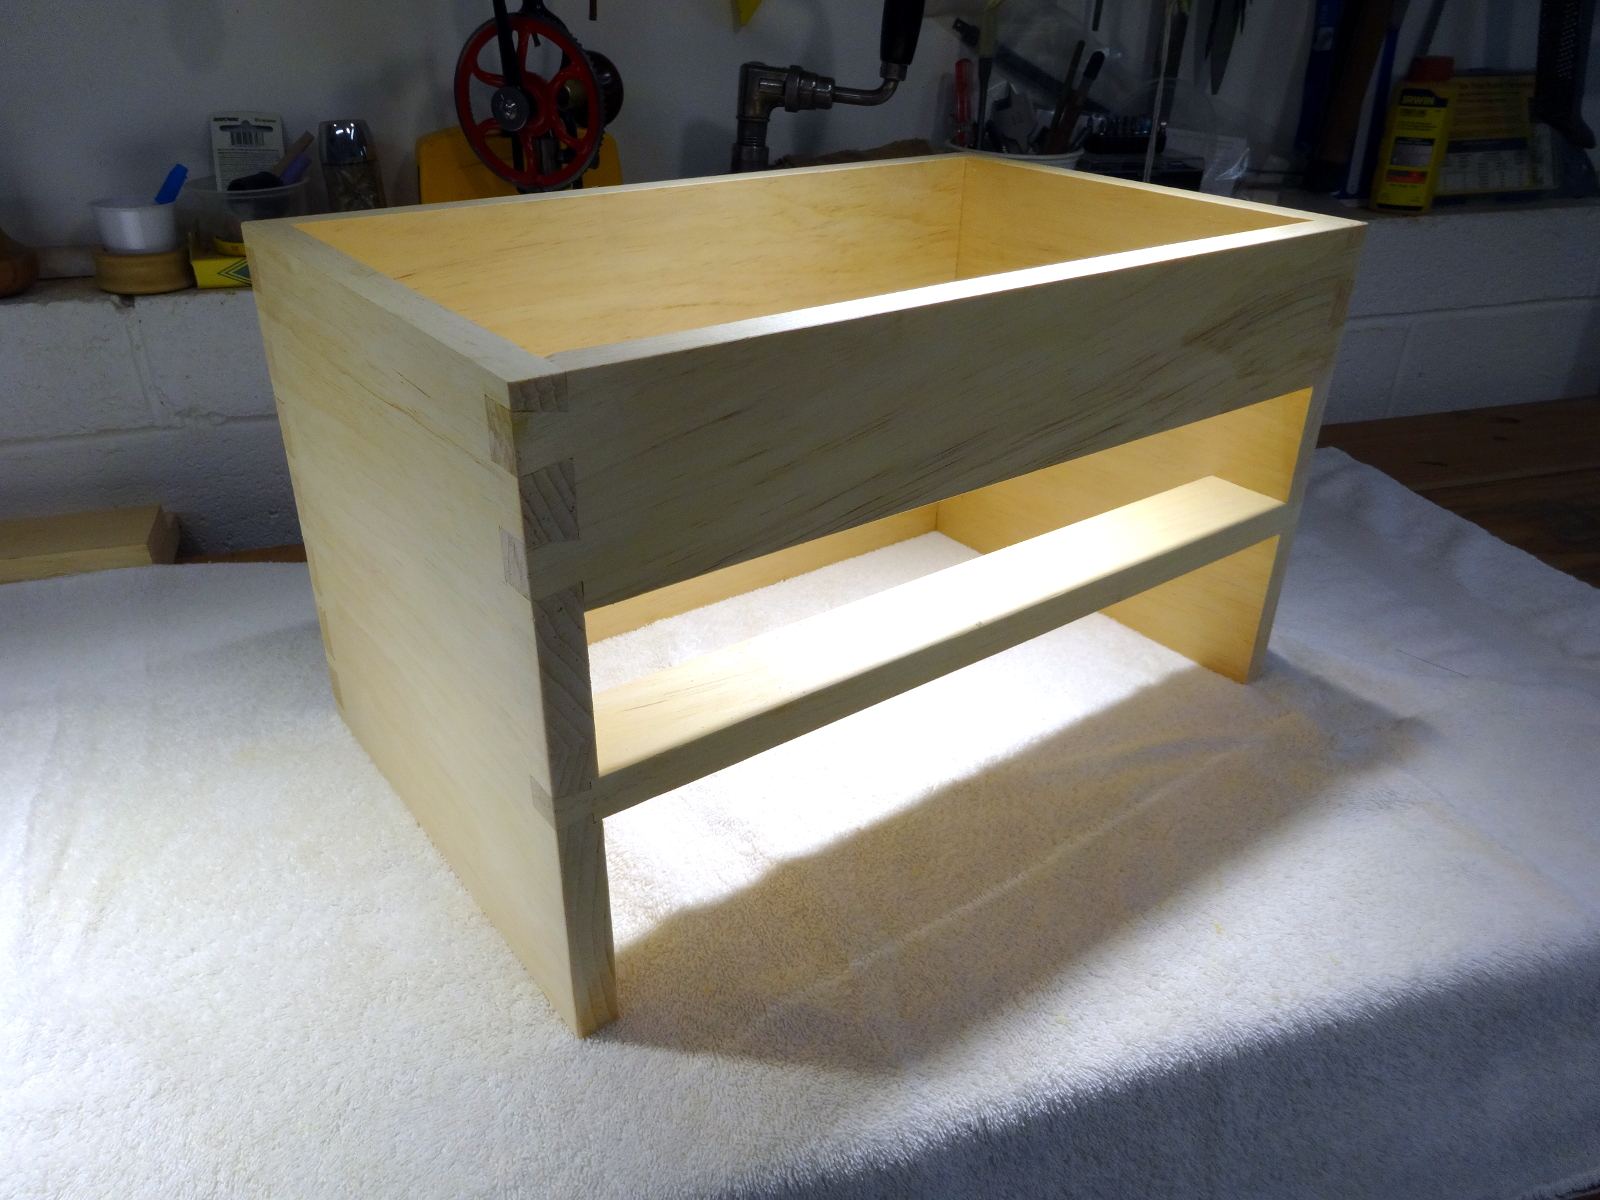
The Paul Sellers tool chest looked like a good choice, so that’s my current Work in Progress (WIP). Mine is a version sized to what I want, a bit smaller than the Sellers version, but constructed the same. So far, the raw carcass is done and I’m working on the top and bottom panels.

Helpers

Furniture building is not my strength. Rarely do I do case work or drawers. For infrequent operations, I’ll gladly use “helpers,” some might say “training wheels,” to get a better result than what comes from random hacking. Here are three helpers that I learned about from following Paul Sellers.
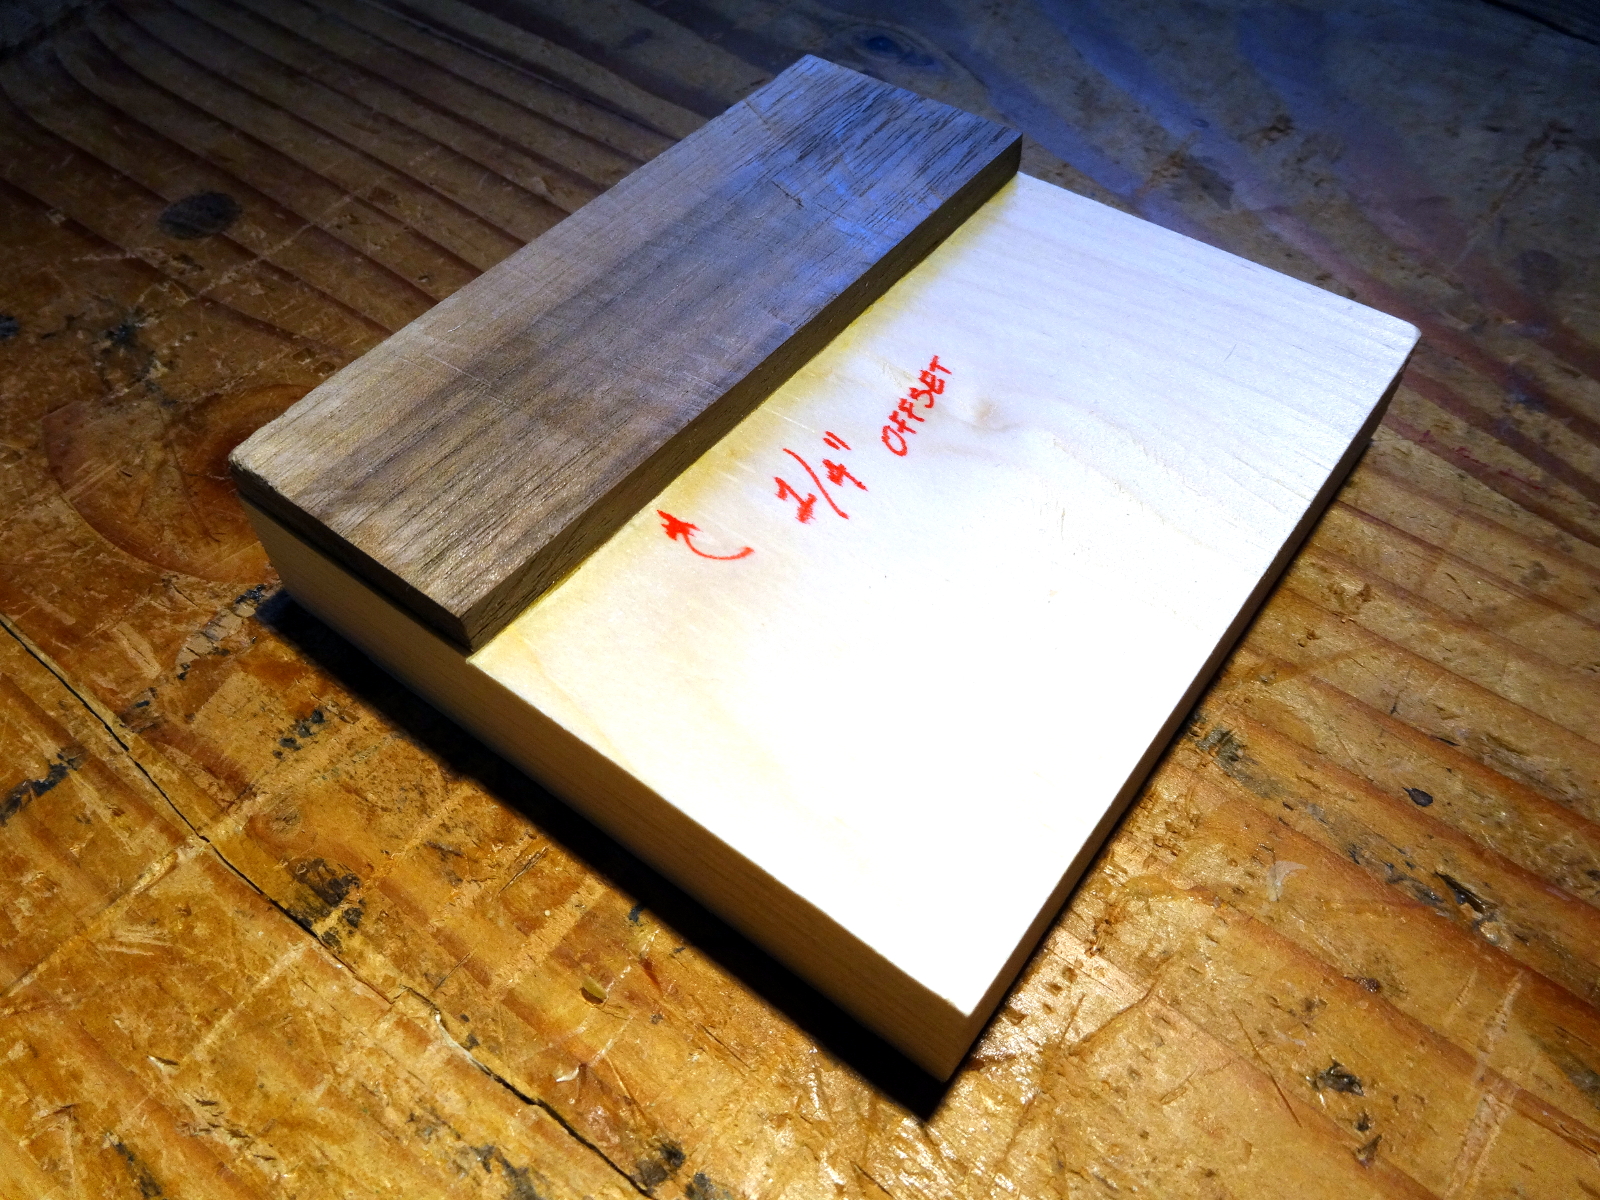
Dovetail helper

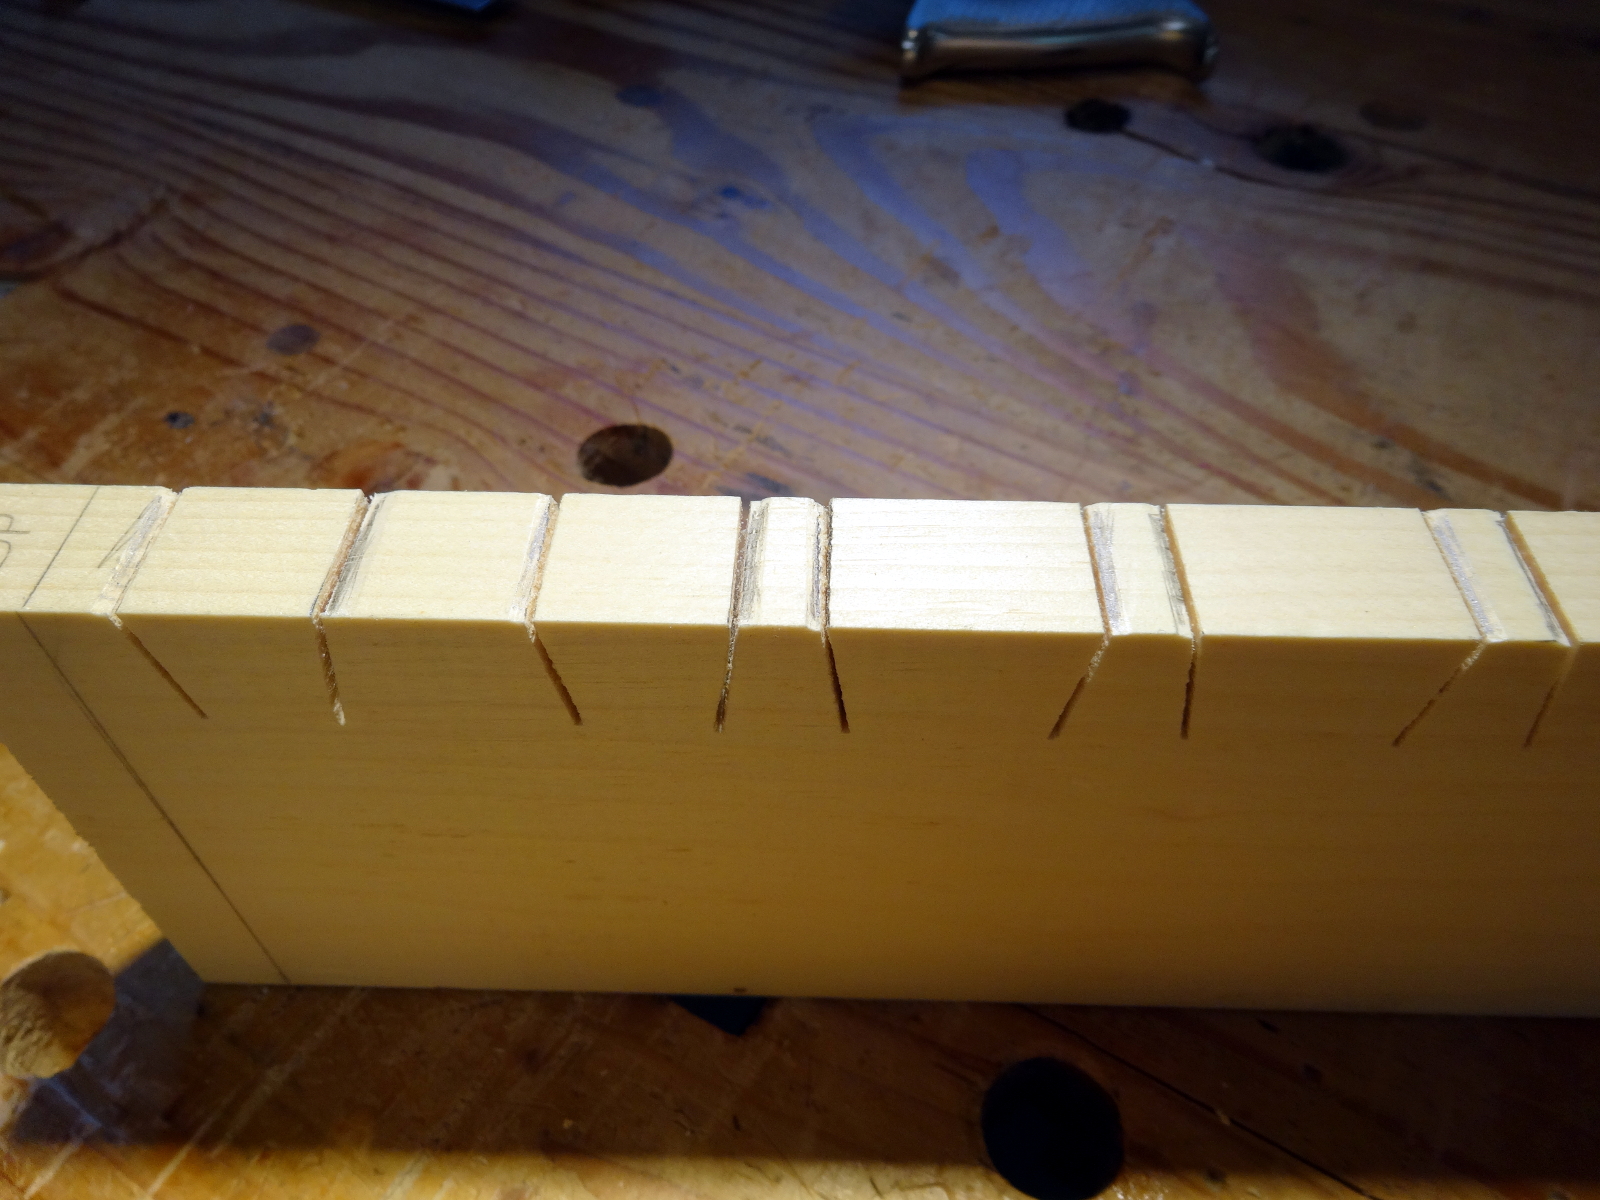
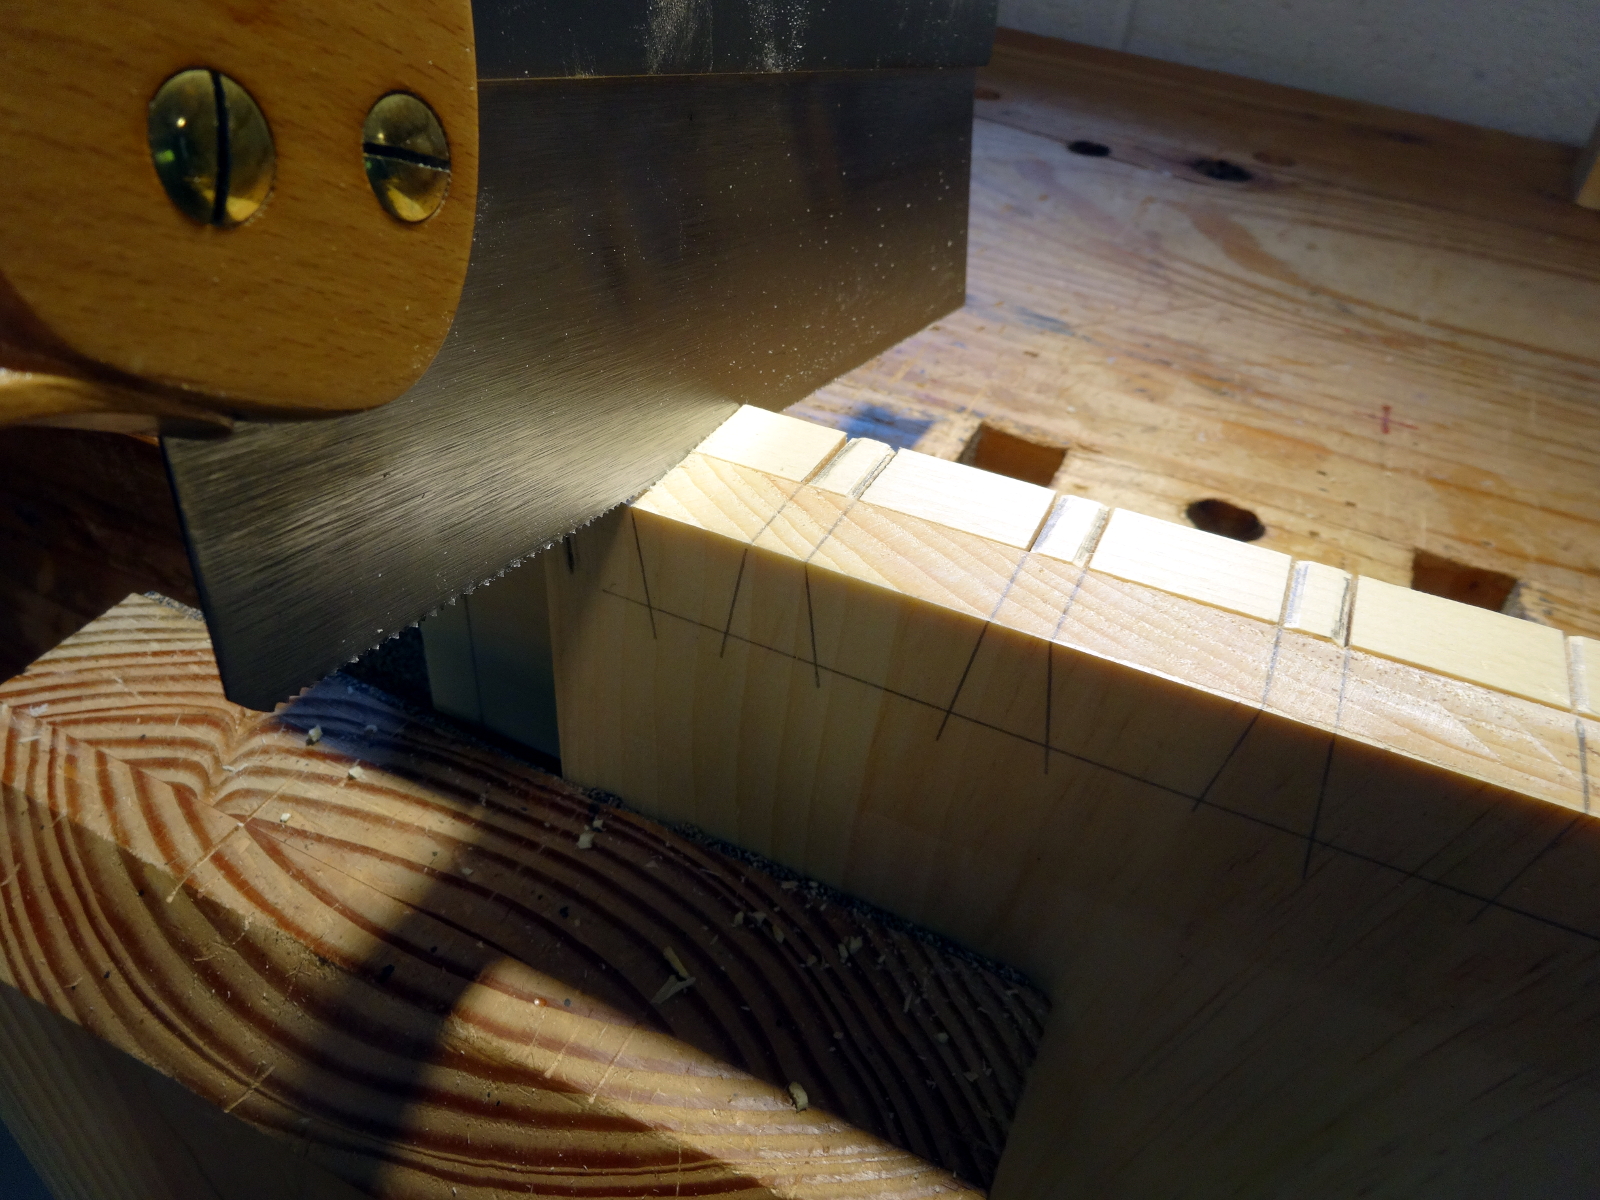
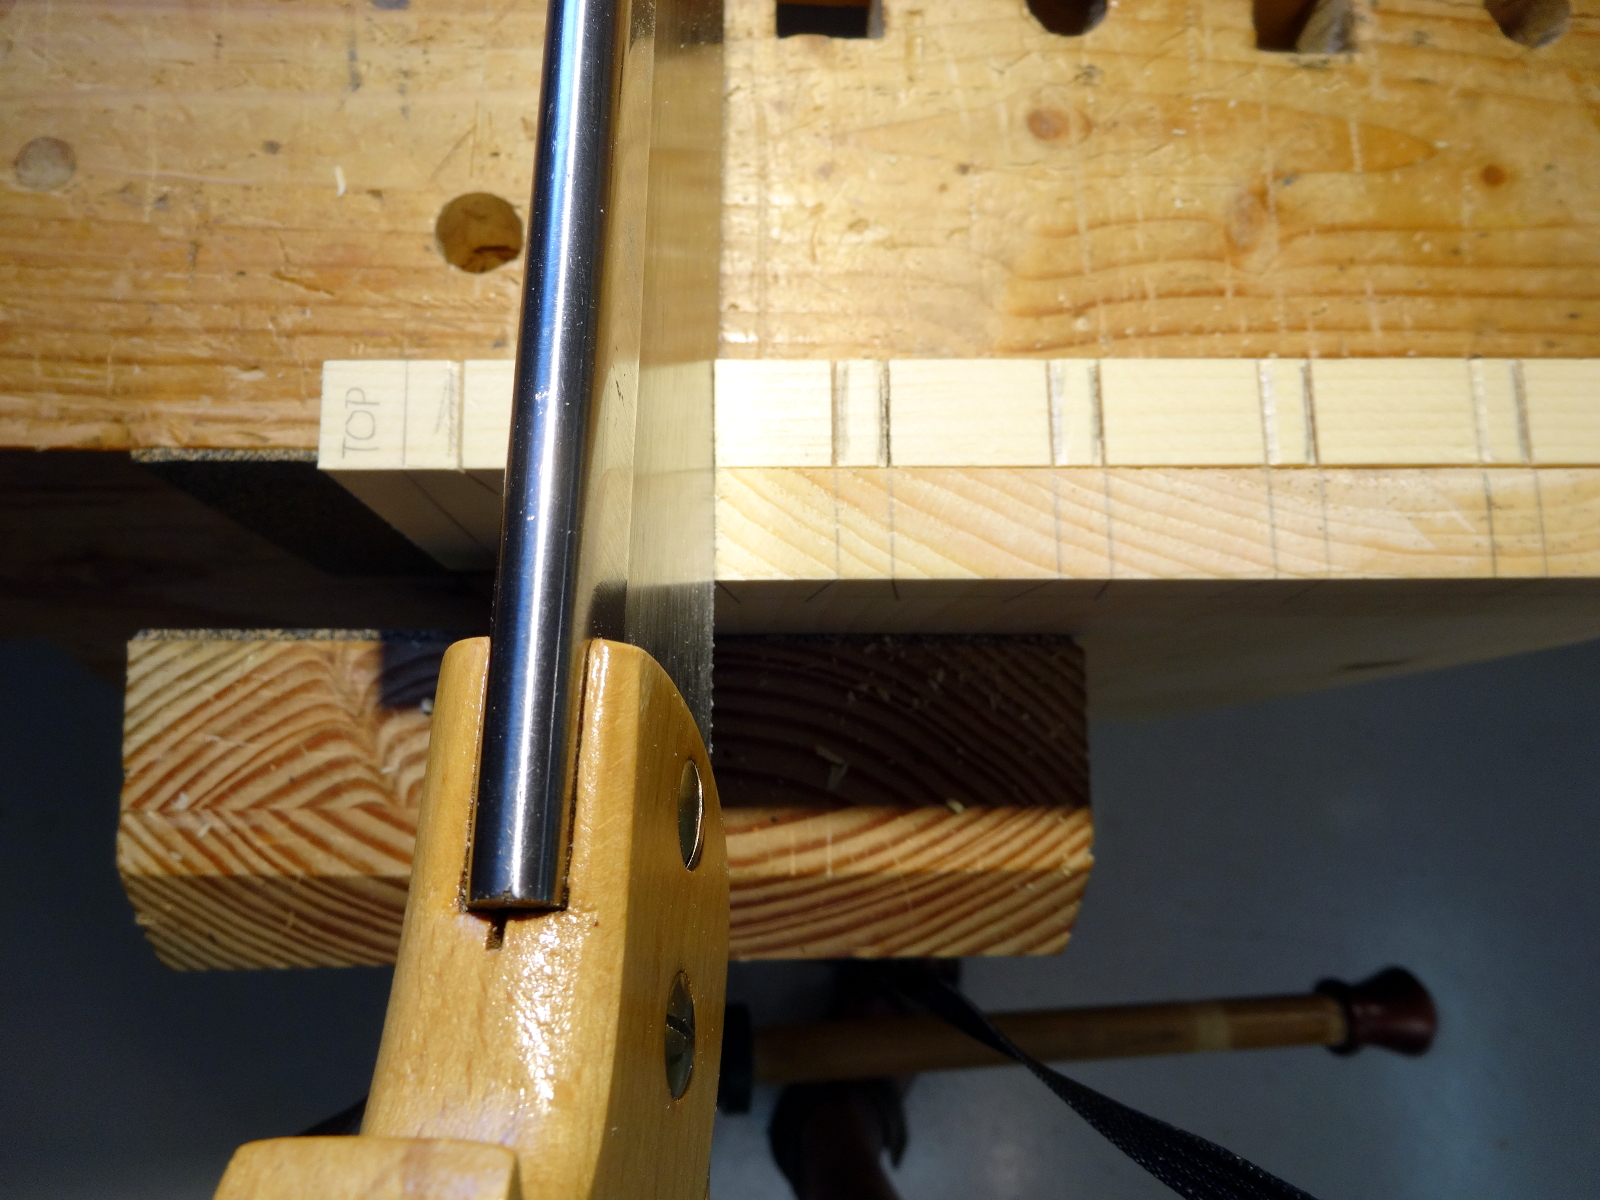
Cutting dovetails is not a daily occurrence for me. I’ve done enough to feel confident and become almost accurate enough. Yet, they are still infrequent, and if a simple guide helps, I’ll readily use it. Yes, all the accuracy is in making dead-square cuts. Here’s a very simple guide. Doubling the thickness of the cut makes it easier to cut square. Adding some guide cuts for nudging the saw in the right direction adds even more accuracy. This carcass has more dovetails than I’ve yet done on a single piece. Using this guide, I got my “best yet” dovetail results.
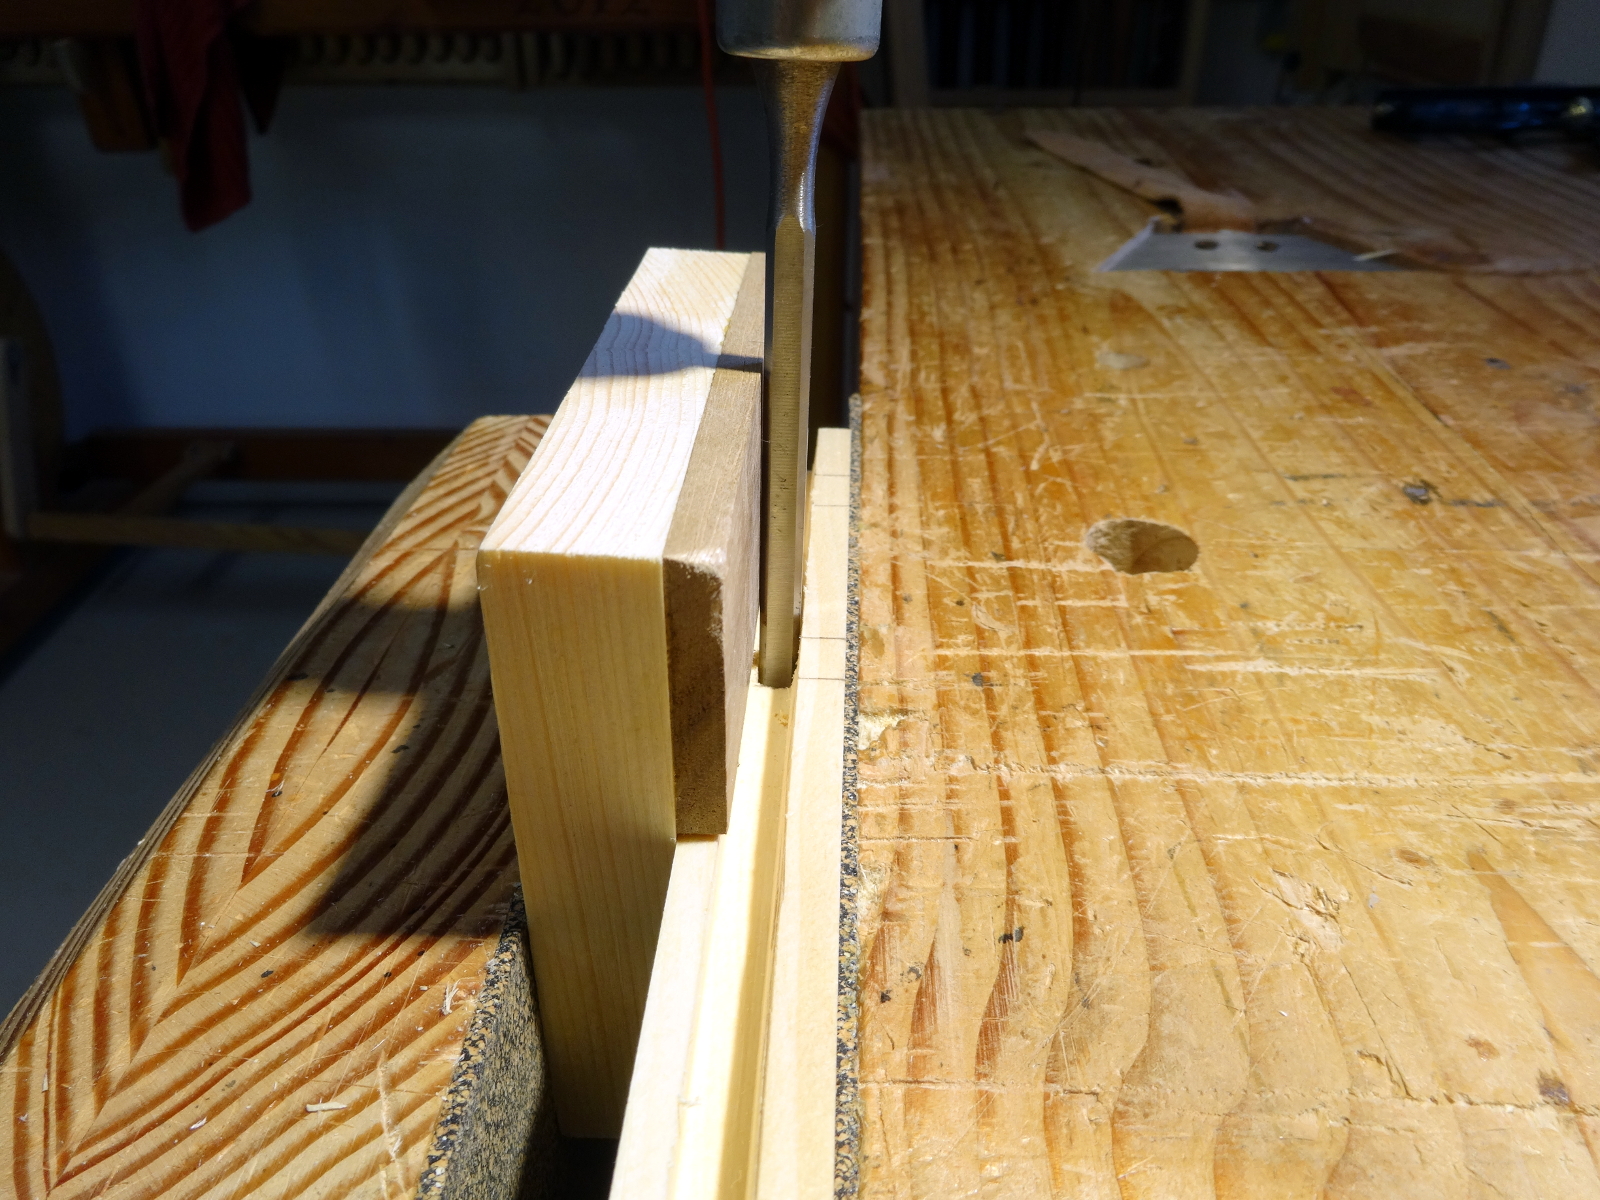
photo - a dovetail guide
photo - using the dovetail guide
photo - using the dove tail guide

Mortise helper

The top and bottom of the chest uses famed panel construction. The rails for the frame are grooved (1/4 inch groove, 3/8 inch deep). Then they are joined with mortise and tenon joinery. M&T is yet another infrequent activity for me. So far, all of my M&T joinery is still together, although if someone were to rip it apart, the innards would be found ugly. Here is a very simple mortise guide that assures the mortise walls remain parallel with the work piece, essentially removing unwanted twist from an assembled panel.

photo - a mortise guide
photo - using the mortise guide

Tenon helper

photo of cutting a tenon
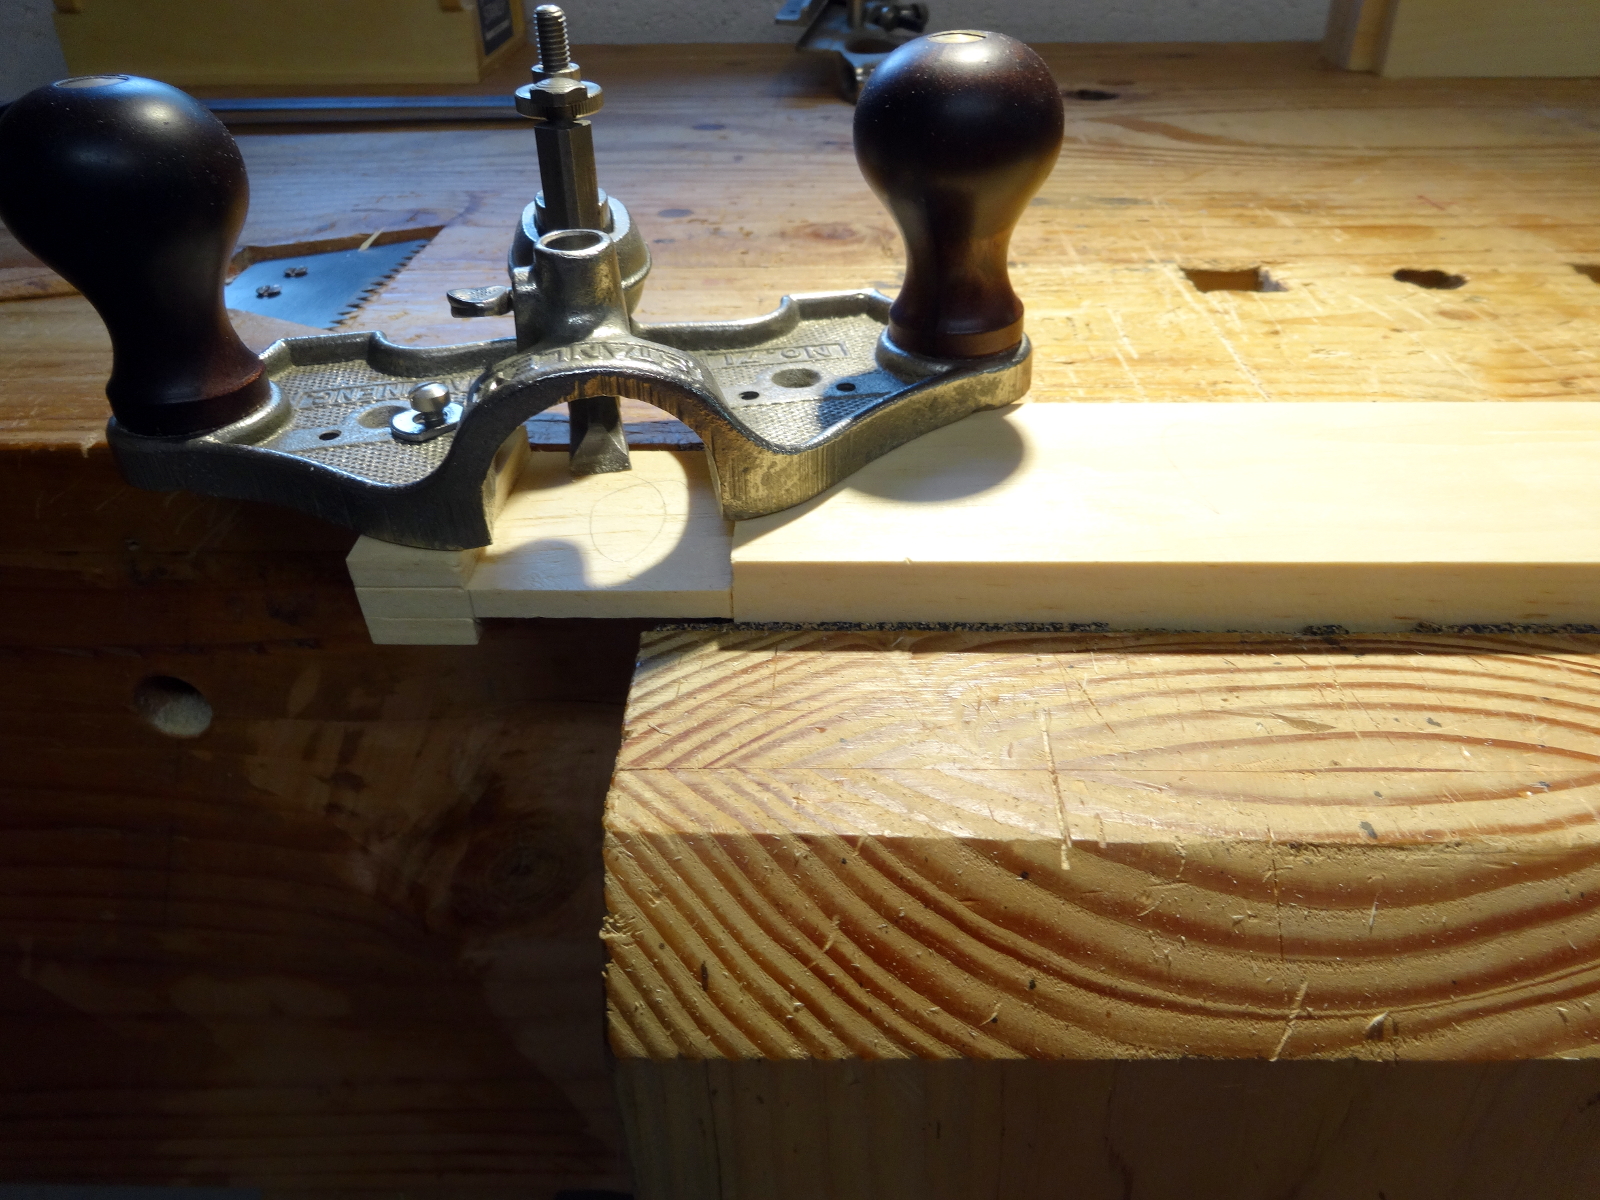
Long ago, I learned to use a router plane as the last step in making well cut tenons. Yet, there’s always the possibility of having  the far end of the tenon be cut too small from having the router hanging off in space while cutting. This helper technique eliminates that problem. Use an over-long piece of wood and leave a “tail” as a platform for the other side of the router. Bingo! A nicely uniform tenon. Then, cut off the tail when cutting the tenon to exact length.

For a refined version of these M&T helpers, Paul combines them in his latest video series. If you’re a subscriber, see episode 8 of the Blanket Chest. In constructing the lid, frame and panel construction, Paul cuts tenons on one frame piece using the tenon helper technique. On that same piece, he cuts an extension, which when cut off becomes the perfectly matched mortise guide. This approach cleverly gets the joinery sized so nicely that the frame comes together with no twist and smoothly joined surfaces. (Frame and panel pictures next time.)

Filed Under: treadle lathe, Woodworking

Regulator Clock – Done

April 2, 2018 by Bob Easton 15 Comments

Ding Dong the Clock is Done!

  • photo of the regulator clock from left side
  • photo of the regulator clock from front
  • photo of the regulator clock from right side

Movement: Hermle Westminster Chime – 351-830 – 8 day – 66 cm pendulum
Overall height: 41 inches
Case height: 34 inches
Case width: 11 1/4 inches
Case depth: 6 1/2 inches
Crown width: 16 inches
Crown depth: 8 3/4 inches
Weight: 38 pounds
Wood: American Cerry
Finish: Shellac and furniture wax

Making this clock has been a long journey. I purchased the plans, movement and lumber years ago. A variety of moulding planes and other tools accumulated over time, until I decided last fall to tackle this “bucket list” project. I have very much enjoyed every minute of the project, even the adventure of acquiring the glass. The result now hangs on the wall between a couple of large bookcases.

photo of glass retention using framing points

The last steps before final assembly were installing the glass. I used framing points to hold the glass in place, and supplemented those with a thin bead of clear silicone caulk to ensure the glass stays where I want it within the openings, and to dampen any tendency to rattle.

Wall mounting uses two screws. The top screw is one intended for plasterboard application and rated for 80 pounds. A single “hang hole” in the back board hangs the clock on that screw. A lower screw protrudes from the wall only far enough to fit into a snug slot on the back of the back board. This screw keeps the clock firmly positioned vertically. Mechanical clock movements are sensitive to the vertical axis for keeping the pendulum swinging smoothly.

Total weight is 38 pounds. Those two brass cylinders contain lead weights. Combined they weigh 12 pounds and provide very constant motive power for the time keeping part of the clock. Two chime movements, one for the Westminster quarter-hour melodies, and the other for the hour strikes, are powered by springs.

On being a “Regulator”

We all know mechanical movements are no longer the most accurate time keepers. Electronic crystal regulators surpassed mechanics long ago.

BTW, very few mechanical clocks or watches and the vast majority of electronic crystal regulated timepieces are still not accurate enough to be considered chronometers. Chronometer accuracy is critical to determining longitude at sea and is better than -4 to +6 seconds per day.

Accuracy is a relative thing. In the era where mechanical clocks were the only clocks, the Regulator was one of the more accurate. Every jeweler and clock maker kept at least one regulator which they used as the reference for setting all other clocks and watches they touched. The key to the regulator’s accuracy is the use of a weight driven timekeeping movement. Springs, the normal motive power for mechanical clocks, offer too much variance in behavior: strong when wound tight, weaker as they unwind. Gravity is far more uniform. The gravitational force on the weights provide a uniformity that springs can’t match. That uniformity gives the clock much of its accuracy.

Even with that uniformity of motion, this clock is not as accurate as a chronometer, no where close to being one. Yet this clock is currently running  to +/- a dozen seconds per day. Regulation is by a small nut that lengthens or shortens the pendulum.

Gratitude: hearing the chimes of a mechanical clock – video

Other articles in this series…

  • Regulator Clock – Done
  • Regulator Clock – Woodworking completed
  • Regulator Clock – Scratching the frames
  • Regulator Clock – Door Hinged
  • Regulator Clock – Case Dry Fitted
  • Regulator Clock – Jelly Side Down
  • Regulator Clock – Case Frames – 2
  • Regulator Clock – Glass – 2
  • Regulator Clock – Case Frames – 1
  • Regulator Clock – The Works work
  • Regulator Clock – Glass
  • Regulator Clock – Tongue & Groove planes
  • Regulator Clock – Completed Mouldings
  • Regulator Clock – Stick Mouldings
  • Regulator Clock – Plate Mouldings
  • Regulator Clock – Egg and Dart Moulding
  • Regulator Clock – Eat Dessert First
  • Regulator Clock – original description
  • Regulator Clock – Stock Prep
  • Regulator Clock – Plans for Moldings
  • Taming the Rabbet

Filed Under: Clocks, Woodcarving, Woodworking

Regulator Clock – Woodworking completed

March 20, 2018 by Bob Easton Leave a Comment

Almost … one more hole to be drilled.

Carving the edges of the glass openings and carving the flutes were the penultimate woodworking steps. Next, I installed a pair of magnet latches, one at the top and one at the bottom of the door. After those steps, I went carefully went over the “show” surfaces with a card scraper for final cleanup, bringing the frames to completion. They’re ready for finish. Yes, I am going to apply finish before installing the glass and before final case assembly. Cleaning windows is never a lot of fun, especially removing shellac or wax.

One last dry-fit confirms the basic case fits well together well, and allowed fine tuning the latches. Those are so simple that I didn’t take pictures. A magnet screwed to the side frame, and a steel plate screwed to the door, both placed to ensure the door stays closed but not so tightly as to be difficult to open. Speaking of opening the door, there’s no door handle or knob. Instead, I carved a fingernail notch into the side of the case … and finished it with a couple of lamb’s tongues.

  • photo of dry fitted case
  • photo of dry fitted case from hinge side
photo of back panel - branded

When I get this close to finishing, it’s time to brand the piece. Branded with a hot iron on the back of the back panel.

Gratitude – the shop is almost warm enough to apply shellac.

Other articles in this series…

  • Regulator Clock – Done
  • Regulator Clock – Woodworking completed
  • Regulator Clock – Scratching the frames
  • Regulator Clock – Door Hinged
  • Regulator Clock – Case Dry Fitted
  • Regulator Clock – Jelly Side Down
  • Regulator Clock – Case Frames – 2
  • Regulator Clock – Glass – 2
  • Regulator Clock – Case Frames – 1
  • Regulator Clock – The Works work
  • Regulator Clock – Glass
  • Regulator Clock – Tongue & Groove planes
  • Regulator Clock – Completed Mouldings
  • Regulator Clock – Stick Mouldings
  • Regulator Clock – Plate Mouldings
  • Regulator Clock – Egg and Dart Moulding
  • Regulator Clock – Eat Dessert First
  • Regulator Clock – original description
  • Regulator Clock – Stock Prep
  • Regulator Clock – Plans for Moldings
  • Taming the Rabbet

Filed Under: Clocks, Woodworking

  • « Go to Previous Page
  • Page 1
  • Interim pages omitted …
  • Page 11
  • Page 12
  • Page 13
  • Page 14
  • Page 15
  • Interim pages omitted …
  • Page 128
  • Go to Next Page »

Primary Sidebar

Footer

Recent Posts

  • New Frame Saw / Scroll Saw
  • Lamppost Sign
  • Goodbye PayPal – Goodbye Bob’s eBooks
  • Anarchist’s Workbench is Done
  • Why we keep offcuts…

Categories

  • About
  • Artwork
  • Boatbuilding
  • Boating
  • bowl carving
  • Boxmaking
  • Clocks
  • Drawings
  • eBook
  • etude
  • Eva Too
  • Eva Won
  • Fiddlehead
  • Fiddlehead model
  • Flying
  • frame saw
  • gilding
  • green woodworking
  • Grinling Gibbons
  • Guns
  • Hand tools
  • Humor
  • kerfing plane
  • Lettercarving
  • Mill Creek 13
  • Model building
  • Power tools
  • Rant
  • resawing
  • scroll saw
  • Shopmade
  • sign painting
  • Stonework
  • Swimming
  • Technology
  • The Wall
  • treadle lathe
  • Uncategorized
  • VSD
  • Woodcarving
  • Woodturning
  • Woodworking
  • workbench

Other stuff

  • About
  • Contact
  • Privacy Policy

Copyright ©2024 · Bob Easton · All Rights Reserved