My work with rabbets has always been haphazard with lousy results. Few projects required rabbets, so I never learned to do them well. Now, for the clock project I want to learn to do moldings well and the method I am following uses a lot of rabbets … accurate rabbets.
In his book, “Mouldings in Practice,” Matthew Bickford teaches how to steer rounds on the corners of a rabbet and how to steer hollows on the corners of a chamfer. So, I must first learn to make rabbets accurately and reliably.
A few hours of practice and plane fetteling have resulted in notable progress.
First, the planes. For some reason I don’t remember, I purchased an ancient wooden rabbet plane that has a skewed iron (nice) and is 1.5 inches wide. FWIW, it dates to the late 1890s and is marked “D. Malloch & Son, Perth.” In this case, Perth is in Scotland, not Australia. The iron carries the same mark. The plane body is beech.
When it arrived, I discovered the iron was ground to a very low angle, about 12 degrees, and the most important corner fractured off (no pictures). I’m almost certain the fracture was due the shallow angle. Other things were more interesting at the time, and I set the plane aside, neglecting it for a couple of years.
Wanting to use it now, I reground the iron and sharpened it. It’s still a bit off, with the trailing edge protruding a few thousandths more than the leading edge, but functional enough for me to gain some practice with the plane. … It was enough practice to realize that the bottom sides of the plane body, right at the edge with the sole, have worn quite a bit. The long edges that are critical to tracking are rounded quite a bit. Once again, I set the plane aside.
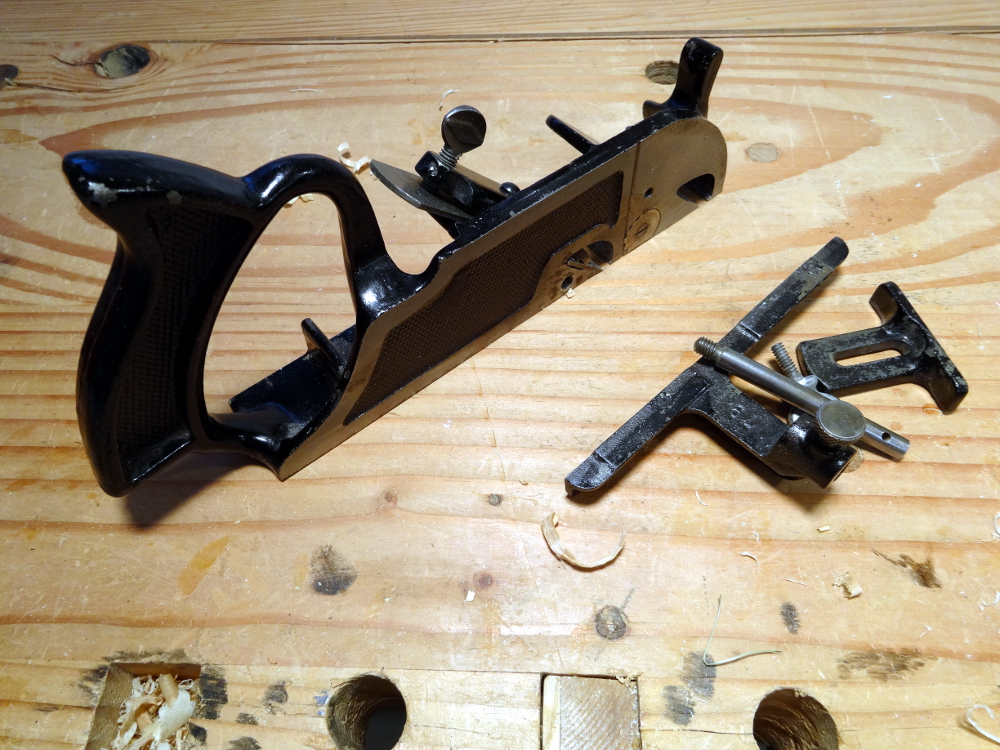
I turned next to a Sergeant #79, another rehabilitated plane. It is a metal “moving filletster and rabbeting” plane. When I have attempted using it with the side fence and the depth fence, the results have been almost usable. OK, actually lousy if we want to be truthful. I removed the fences from the #79 and used it as simple rabbeting plane following the techniques Matthew describes in his book, pp 42-47.
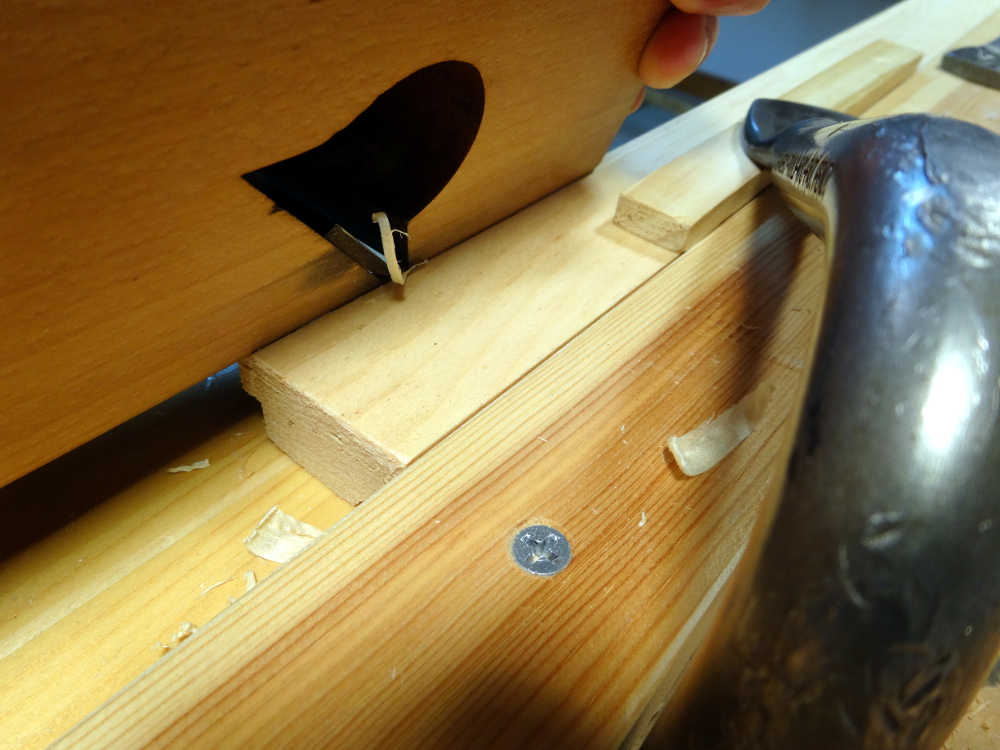
He shows taking two passes with the plane tilted into toward the scribe line at 45 degrees. These passes provides the logical equivalent of the “knife wall” that Paul Sellers teaches for accurate sawing. This little “v” groove establishes the reference for accurate rabbeting. From there, the plane can be put back perpendicular and within 2 passes be tracking neatly along the line. Voila! Such a little point that makes such a big difference. THANKS Matthew!
My practice led me to three important points. (2 of the 3 mentioned in Matthew’s book)
- The edge of the iron needs to protrude ever so slightly from the plane body to ensure cutting a perpendicular wall.
- The edge of the iron must not cut, or it will cut into and move the wall. I rounded over the edges of the iron, above the bevel, to minimize this problem.
- Scribe the line with a marking gauge. (I use gauges with pins, not knives.) The tilted metal plane will track to the scribe line. It won’t track to a pencil line. 🙂 This is where I discovered the wooden plane is too worn for this technique. The vertical wall does move inward a very slight amount, to the other edge of the “v” produced by the scribe pin. Keep this in mind and compensate if needed.
Half a dozen practice rabbets showed improvement with each attempt.
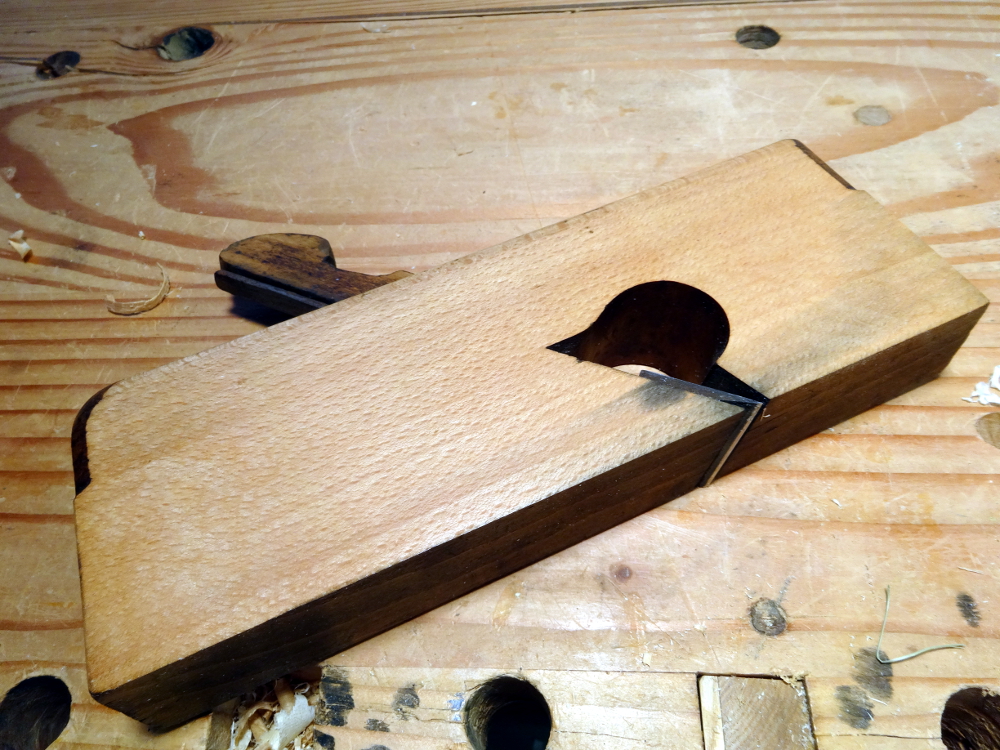
With that success, I looked at the wooden plane again. It is sooooooo much easier on the hands than the #79. In the vise it went! I planed down each side until I got very crisp and square corners at the sole. Yes, that sacrificed a fraction of an inch of width, but most rabbets are going to be much narrower anyway. The alteration also made the iron a bit easier to adjust. Before removing material from the body the iron was right at the point of barely reaching the right edge. That might be due to the tang being a bit mangled; it has seen some use. Now, it can be adjusted for that extra thousandth, or so, as mentioned in point 1 above.
Using the wooden plane, I can make a rebate of exactly the same quality (still not perfect, but very much better) as with the #79 and it’s a lot more comfortable on the hands.
I’m now a much happier rabbeteer!
Other articles in this series…
- Regulator Clock – Done
- Regulator Clock – Woodworking completed
- Regulator Clock – Scratching the frames
- Regulator Clock – Door Hinged
- Regulator Clock – Case Dry Fitted
- Regulator Clock – Jelly Side Down
- Regulator Clock – Case Frames – 2
- Regulator Clock – Glass – 2
- Regulator Clock – Case Frames – 1
- Regulator Clock – The Works work
- Regulator Clock – Glass
- Regulator Clock – Tongue & Groove planes
- Regulator Clock – Completed Mouldings
- Regulator Clock – Stick Mouldings
- Regulator Clock – Plate Mouldings
- Regulator Clock – Egg and Dart Moulding
- Regulator Clock – Eat Dessert First
- Regulator Clock – original description
- Regulator Clock – Stock Prep
- Regulator Clock – Plans for Moldings
- Taming the Rabbet