• Skip to primary navigation
  • Skip to main content
  • Skip to primary sidebar
  • Skip to footer

Bob Easton

Chocolate powered woodworking

  • Home
  • Grinling Gibbons Tour

“Square Rose” Carving on a Small Box

September 6, 2013 by Bob Easton 2 Comments

My primary interest in boxes, whether joined or turned, is to have a base for carving. Carving is the real interest. Boxes are the “canvas.” Yet, that doesn’t mean the boxes have to be simple or plain, or some kind of outsourced junk. I make every box, by hand, using only hand tools.
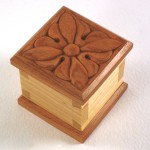
photo of completed ring boxThis cute little box is the result of a salvage effort. The evening before leaving for an excursion a few months ago, I resawed a Cherry board, reducing it from the standard 7/8 inch thickness to two boards slightly over 3/8″ each. I left the two boards on the bench. On returning a few weeks later, I found both boards cupped. Even though the original board had been in my shop for several months, I guess it wasn’t fully acclimated and my forgetting to sticker the resawn boards photo #1 of open ring boxaggravated the tendency to cup.
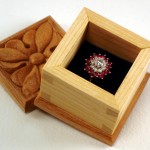
I tried a few “remedies” advised from various internet sources with no delight. So, I cut the boards to narrower widths and flattened them. The result was boards now 1/4″ thick, very nice for a couple of small boxes. This is one of them.  By the way, the color contrasts on this box result form using Cherry heartwood for the bottom and lid, and Cherry sapwood for the sides.
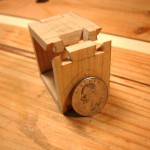
photo of ring box joineryJoinery: It’s simply described as mitered dovetails. The intention is to provide good looking miters, instead of plain, semi-beautiful, butt joints, on visible areas like top edges. Actually making them is a bit more work than the simple description implies. Getting the miter perfect is an acquired art.

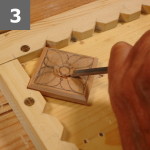
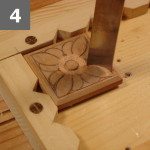
Carving: That’s the real reason for the box. I don’t pretend this to be thorough instruction, but an illustration of some of the steps. This sweet little flower is a classic design that shows up in a lot of architectural carvings. It’s made like this:

  1. (no photo) Define the straight outlined edges using a 1″ chisel canted about 30 degrees.
  2. (no photo) Define the edges of the center bud. — #6 6mm gouge
  3. Remove material all around the center bud. — #3 6mm gouge
  4. Define the  outer part of the four diagonal pedals. — #4 14mm gouge
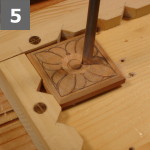
  5. Define the inner part of the four diagonal pedals. — #3 6mm gouge
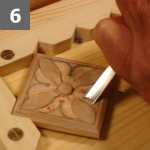
  6. Carve the leaves.  — #3 6mm gouge
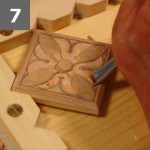
  7. Continue carving the leaves. — #3 6mm gouge & #6 6mm
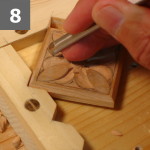
  8. Define the edges of the leaves. — #6 6mm gouge
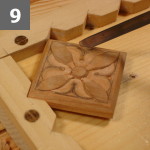
  9. Remove material between edges of leaves and the frame edge. — #3 6mm, or flat skew chisel
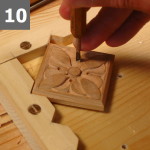
  10. Pierce the eyes in the leaves. — #11 3mm micro gouge
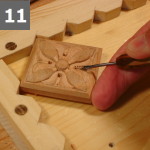
  11. Complete the eyes in the leaves. — #11 2mm micro gouge
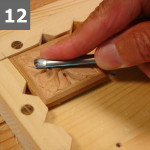
  12. Round over the pedals. — #3 6mm gouge
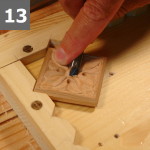
  13. Round over the center bud. — #3 6mm gouge

Photo of step 3 Photo of step 4 Photo of step 5 Photo of step 6 Photo of step 7 Photo of step 8 Photo of step 9 Photo of step 10 Photo of step 11 Photo of step 12 Photo of step 13

Finish is shellac and high grade wax, hand rubbed to a satin surface.

The box measures 1 3/4″ x 1 3/4″ x 1 3/4″ (4.4cm x 4.4 cm x 4.4 cm) outside, and 1 3/16″ x 1 3/16″ x 1 3/16″ (2.8cm x 2.8cm x 2.8cm) inside.

Lastly, I added a slotted and fabric covered “cushion” so the box can be used as a ring box. It’s currently available on Etsy, if anyone is interested.

Really lastly …. the size of the box is mostly irrelevant. This little one requires as many steps as a larger one, and is exactly as much fun to make.
Filed Under: Boxmaking, Woodcarving

Summer interlude

September 6, 2013 by Bob Easton 4 Comments

The shop sulks empty during the summer travel and swimming season. A little wood butchering happens from time to time, and when I come back to write about it, I find the blog a mess. Hmmmm, I wonder if the NSA has a mailing list that can let me know when this happens?

hackedA hacker, with IP addresses in Brooklyn, and no ethics, infiltrated the blog (and a few other WordPress sites I keep for my own use) with malware.  These guys seek out all sorts of security weaknesses to squeeze into blogs and do their nastiness. I usually keep my blogs locked down pretty tight, and I ~~~think~~~ this guy slipped in through a very tiny weakness in (of all things) that really thorough security plug-in I use. What irony! They’ve closed that hole and life goes on.

These hacks are not new to me. I’ve removed several in the past. While removing them, I nose around a bit to see how they work. All hacks find their way in (into WordPress blogs, at any rate) through various methods. Sometimes, sheer carelessness of using a common administrator ID, “admin,” and a easily broken password is enough. Other times, they need to work harder. This guy had to work pretty hard.

Once in, they start with a simple script (PHP module) that drags in all the rest of the stuff they need. That stuff is almost always a variety of PHP files with names that look right at home within a WordPress installation (options.php, templates.php, etc.) The stuff is also scattered among various directories so it isn’t easily obvious, and to thwart easy removal.

This particular infection has the goal of delivering what I call “malware bombs.” If you have ever suffered one of these, you know what I mean. They infect hapless users, display a very authentic looking “you’re infected” anti-virus screen, and then proceed to lock up everything you attempt until you buy their cure for (usually) about $75. The “cure” clears the problem, erases the evidence, and you’re on your way again, poorer by $75 … and no more secure than before, ripe for yet another picking.

How does that bomb get to the hapless user? The other part of the blog infection is one that places about 1000 redirects to “advertising” pages on the blog. Each of those is to big brand names in all sorts of industries, fashion, autos, real estate, financing, etc. Each of those advertising pages will load a “malware bomb” appropriate to the end victim’s PC.

The last part of how it works is “volume.” The hacker infects as many blogs as possible, sometimes thousands. Immediately after each blog is infected, a simple transaction notifies search engines that there’s new material (those advertising pages) to index. The same sort of  redirects on thousands of blogs serve to reinforce the search engine ranking and the likelihood that they will serve those results. Once indexed, hapless users trip across the loaded pages and “Ka-Bam!”

Cleanup on my end consists of completely erasing EVERYTHING, installing fresh new software (clean and virus checked), and refreshing the content by restoring a pre-infection backup of the database, and reloading all the other content related (clean and virus checked) files. If my time is worth 13 cents an hour, this part of the mess cost about $0.91.  🙂

Yes, I spent far too long analyzing logs, peering into the methods, and cleaning up the mess. One of the most interesting things I found in the logs was the hacker worked from two IP addresses in Brooklyn and checked at least twice a day to see if his (assumption) handiwork was still in place. Interestingly, the checking was done from an iPhone, and any nasty detail work by a Windows PC. After all was removed, he still came back, this day checking every half hour for a few hours until he had enough 404s to drive him away.

I wish I could have sent more than 404s! I offered logs to my service provider, as evidence if they wanted to pursue him. Sadly, all they care about is getting the #### off their servers.

Next…. what I really intended to write about, a nice little box with a carved lid.

Filed Under: About

A Pair of Shopmade Grooving Planes

July 17, 2013 by Bob Easton 11 Comments

So, what happened to the wood that sparked a party?

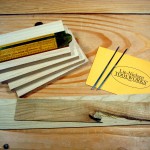
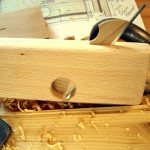
photo of grooving plane parts

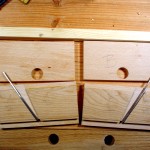
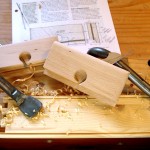
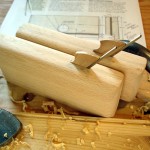
Time in the shop is sparse in the summertime. Yet, I have found time to make a pair of grooving planes. These are destined for making grooves that hold the bottom panels of boxes. Those grooves are always the same width and the same distance from the edge of their boards. Making two planes, provides one for each grain direction.

photo of planes in progress

The idea and plans came from Fine Woodworking’s Matt Kenny. FW has the article online here. Lie-Nielsen also offers an article with plans (PDF) at no charge. That’s because Lie-Nielsen makes and sells irons for these planes. Whoa there, back up and hit that link. The only negative thing I’ve ever had to say about Lie-Nielsen is their web site has no search function. Shopping for something specific in their online catalog is like Where’s Waldo. The irons arrive fully sharpened and ready to use. But, I polished them some more.

photo of finished pair of grooving planes

The plane is made as a 3 layer sandwich, Krenov style. The outer layers of my planes are beech from Woodworkers Source, the people who threw a party when they packed and shipped my $32 order. I ordered sample blocks (3″ x 6″ x 1/2″) because they were very close to the sizes needed. They took only a little resawing and sizing to match the plans. I used some Cherry I already had for the 1/8″ thick inner layer and wedges. That inner layer serves as the skate and projects to the desired groove depth of 1/8″.

UPDATE – Jan 8, 2021: As Sergey noted in the comments below, Lie-Nielsen no longer sells these 1/8″ wide irons. There must not be enough demand for them. The only alternative I see is to use one of their 1/2″ irons, grind it down (ugh, what a lot of work) and re-temper it.

Matt Kenny’s Fine Woodworking article has also moved. It is in the May/June 2011 hardcopy version of the magazine. The digital version is behind a paywall for Fine Woodworking subscribers at “Make a Pair of Grooving Planes.” A downloadable version of that article, again for Fine Woodworking subscribers, is at this PDF link.

closeup photo of a grooving plane

I didn’t take step-by-step photos, but you can get those from the article. Unlike Kenny’s, all of my construction was with hand tools and not at all difficult. If you make a pair, don’t fret too much with extreme accuracy.  Make the rebate for the fence very accurate and the rest works itself out. After assembly, you’ll be paring or sanding the skate for smooth, but not sloppy, travel in the groove.  My planes are marked “A” and “B” only to pair the respective wedges with their intended plane. Made by hand, the throats vary enough that the wedges aren’t interchangeable. Such a little nit.

photo of the grooving plane twins

What a joy to use. Pick ’em up. register and push. Smooth! And these irons cut much cleaner than those in my vintage Record 044.

Lastly, there’s also a lot of joy in dealing with a company like Woodworkers Source. Yes, the humorous shipping notice is a clever marketing ploy from a firm that has a great sense of humor. It doesn’t end there either. A follow up email from the company owner, “Craig Haggarton and The 107 Good Looking Lumber Pickers,” asks if everything arrived, was OK, post a review, etc.  Yes, I’m a geek who does a lot of web development work and I know these things are a SMOP, but not every firm behaves this way. Good for them!

SMOP – Simple Matter Of Programming

Filed Under: Boxmaking, Hand tools, Shopmade

  • « Go to Previous Page
  • Page 1
  • Interim pages omitted …
  • Page 38
  • Page 39
  • Page 40
  • Page 41
  • Page 42
  • Interim pages omitted …
  • Page 128
  • Go to Next Page »

Primary Sidebar

Footer

Recent Posts

  • New Frame Saw / Scroll Saw
  • Lamppost Sign
  • Goodbye PayPal – Goodbye Bob’s eBooks
  • Anarchist’s Workbench is Done
  • Why we keep offcuts…

Categories

  • About
  • Artwork
  • Boatbuilding
  • Boating
  • bowl carving
  • Boxmaking
  • Clocks
  • Drawings
  • eBook
  • etude
  • Eva Too
  • Eva Won
  • Fiddlehead
  • Fiddlehead model
  • Flying
  • frame saw
  • gilding
  • green woodworking
  • Grinling Gibbons
  • Guns
  • Hand tools
  • Humor
  • kerfing plane
  • Lettercarving
  • Mill Creek 13
  • Model building
  • Power tools
  • Rant
  • resawing
  • scroll saw
  • Shopmade
  • sign painting
  • Stonework
  • Swimming
  • Technology
  • The Wall
  • treadle lathe
  • Uncategorized
  • VSD
  • Woodcarving
  • Woodturning
  • Woodworking
  • workbench

Other stuff

  • About
  • Contact
  • Privacy Policy

Copyright ©2024 · Bob Easton · All Rights Reserved