• Skip to primary navigation
  • Skip to main content
  • Skip to primary sidebar
  • Skip to footer

Bob Easton

Chocolate powered woodworking

  • Home
  • Grinling Gibbons Tour

Eva Too – Glue Tabs and Salad Dressing

March 17, 2010 by Bob Easton 2 Comments

Would you like to see a picture of the stitches in my arm? No, I didn’t think so. Actually, they are almost gone, the self-dissolving kind left from a very minor surgery some time ago.

Some stitch-n-glue builders leave the stitches in the boat. They cover the seams with a thick fillet of epoxy, then epoxy soaked fiberglass cloth, all in one pass. One might follow this approach for either of two reasons, to get a good solid seam by applying everything at once, or to build the boat quickly (Build a boat in a week!). Once the epoxy sets around the wires, they’re there to stay. All that can be done is to snip the tails off on the outside, and deal with the detritus in all the rest of the finishing steps.
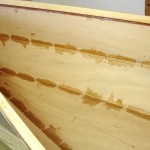
photo of intermittent seam gluingThe more persnickety builders do the seams in two steps. The first is “tabbing,” securing the spaces between the wires with thin epoxy fillets. Then the wires can be removed and the full length of the seams reinforced. Guess which camp I’m in. Right! Persickety. You win today’s prize.

Even this, I did in two stages. I mixed epoxy straight out of the pumps with no fillers. I brushed this onto the seams to allow the raw edges to soak up some glue. Then, I mixed in “wood flour” to thicken the epoxy to a consistency midway between mustard (Dijon, not yellow) and peanut butter.  I pressed that into the seams fairing them with a rounded stick (think tongue depressor). I was persnickety about making these extra clean so they won’t need sanding before the cloth layer.

Denatured alcohol (not the drinkable kind) is a good clean up agent for removing epoxy from places it does not belong, such as the handles of my pliers and clamps. Recent reading suggested trying simple white vinegar. Dang! It works better than alcohol. It’s pretty amazing that the stuff we splash on our veggies can remove rust from tools and cut this industrial adhesive. Or, maybe it’s amazing that our digestive pipes handle the solvent?

Well, I won’t be completing this boat in a week, but it will end up prettier than my arm.
Filed Under: Boatbuilding, Eva Too, Mill Creek 13

Eva Too – Stem Fillers

March 16, 2010 by Bob Easton Leave a Comment

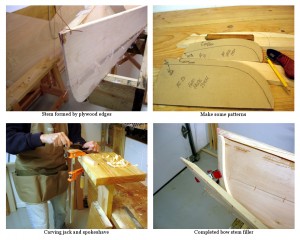
The stems of most boats are designed to take the abuse of collision, accidental of course, and are often made of hardwood, oak, ash, or something similar. The ends of these stitch-n-glue boats are not hardwood, but simply the join of two 3/16″ thick pieces of plywood. They are made stronger by the addition of fiberglass cloth and by an “end pour” of epoxy resin. The “end pour” can be done by standing boat on end and pouring a puddle of epoxy resin about an inch deep into the end of the boat. a photo collage shows a bare stem, some cardboard patterns, shaping the parts with a spokeshave, and one of the fillers in placeWhile I know that hundreds of these boats have been built that way, it does not appeal to me. I would rather reinforce that area with the traditional material, wood. Well fitted, it will be just as durable, maybe more shock absorbent, and certainly much lighter.

My wooden stem fillers are made from spruce retrieved from the (good lumber) cutoffs pile. Shaping them now before the hull is glued closed makes it easy to get them right. They’ll be glued in place after initial hull glue-up.

As always, click on the photo for a larger version.

Filed Under: Boatbuilding, Eva Too, Mill Creek 13

Treadle Lathe – Feet

March 14, 2010 by Bob Easton 2 Comments

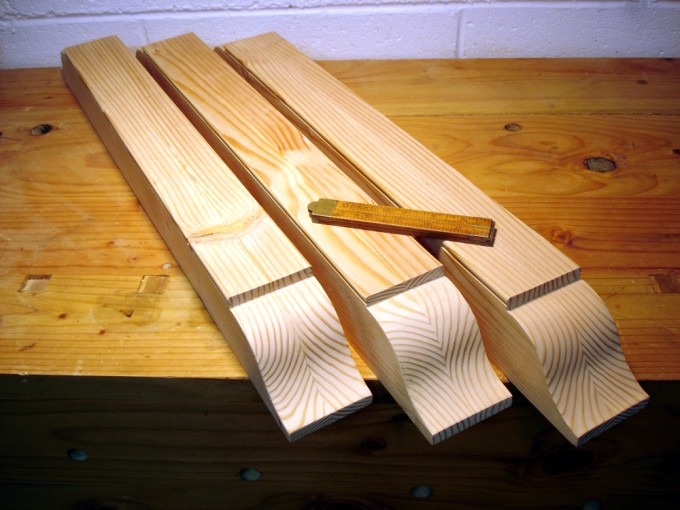
photo of three foot pieces

Work on something else while epoxy cures on the boat, or while waiting for the shop to be warm enough for epoxy work.

Bookmatched laminated Douglas Fir construction lumber can be made to look reasonably decent. The bookmatching here is the result of ripping a 2×8 directly along a center line and folding it in upon itself to laminate. The top surfaces of these feet are the new edges exposed by the rip.

Yes, same curves on the other ends.

Filed Under: Shopmade, treadle lathe

  • « Go to Previous Page
  • Page 1
  • Interim pages omitted …
  • Page 76
  • Page 77
  • Page 78
  • Page 79
  • Page 80
  • Interim pages omitted …
  • Page 128
  • Go to Next Page »

Primary Sidebar

Footer

Recent Posts

  • New Frame Saw / Scroll Saw
  • Lamppost Sign
  • Goodbye PayPal – Goodbye Bob’s eBooks
  • Anarchist’s Workbench is Done
  • Why we keep offcuts…

Categories

  • About
  • Artwork
  • Boatbuilding
  • Boating
  • bowl carving
  • Boxmaking
  • Clocks
  • Drawings
  • eBook
  • etude
  • Eva Too
  • Eva Won
  • Fiddlehead
  • Fiddlehead model
  • Flying
  • frame saw
  • gilding
  • green woodworking
  • Grinling Gibbons
  • Guns
  • Hand tools
  • Humor
  • kerfing plane
  • Lettercarving
  • Mill Creek 13
  • Model building
  • Power tools
  • Rant
  • resawing
  • scroll saw
  • Shopmade
  • sign painting
  • Stonework
  • Swimming
  • Technology
  • The Wall
  • treadle lathe
  • Uncategorized
  • VSD
  • Woodcarving
  • Woodturning
  • Woodworking
  • workbench

Other stuff

  • About
  • Contact
  • Privacy Policy

Copyright ©2024 · Bob Easton · All Rights Reserved