• Skip to primary navigation
  • Skip to main content
  • Skip to primary sidebar
  • Skip to footer

Bob Easton

Chocolate powered woodworking

  • Home
  • Grinling Gibbons Tour

Boating Safety and the Guys who Teach It

September 14, 2009 by Bob Easton 2 Comments

AUX_M_sty_200pxA year ago April, I attended a “Boating Sills and Seamanship” series of classes. You see, I live in a “nanny state” that requires the operator of any power boat to take at least 16 hours of boating safety instruction. (Now, if they would only do that for auto drivers #$%! They drive like idiots here. No, I don’t live in Massachusetts.) Back to boating safety… In reality, it’s not a bad idea and the courses likely save lives. I found it surprising to learn that most boating deaths occur to people who know how to swim, who meet their end in calm waters (not huge storms at sea), and who are not wearing life vests.
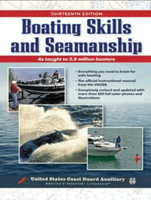
gr_boating_skills_and_seamanshipI have no intentions of operating a power boat in this state, and the safety course isn’t required for boats that are rowed or sailed. Yet, I took it because I’m a novice boating enthusiast and thought it might be interesting. The course filled my head with a lot of things I’ll likely never need for operating a canoe on a rather small inland lake, such as “red light returning” and all the details of navigation markers, and how to use NOAA charts and plot courses. I found it interesting to learn about many aspects of boat handling, on the water navigation, “Colregs” and the rest of the rules of the road, erm, water. In the end, the two bits of information I use most today is how to tie a bowline knot (blindfolded and behind my back) and that when in doubt about right-of-way, the bigger boat usually wins, right or not.

AVG_M_170x060pxThe real point of this posting is to talk a bit about the guys who teach these courses. They are Coast Guard Auxiliary members. The Auxiliary is made up of unpaid volunteers, people who do this work because they love it. The fellow who taught most of  my course was, if I recall correctly, an electronics specialist at some industry around here by day (or, was it a home building contractor?), and a CG Auxiliary patrol officer on weekends. The CG Auxiliary patrols coastal waters and inland waterways that span states. A large lake not far from here lies partly in this nanny state and partly in the nanny state to the south of us. It is large enough to need CG patrols. Those guys are out there, not for any form of law enforcement, but for recreational boating safety and distress assistance. The CG Auxiliary guys are unpaid. They buy their own uniforms and gear. If they use their own boats for patrol work, their only compensation is fuel. They cover all the rest of the costs. That, my friend is enthusiasm, passion, and commitment. These guys do it because they love it; it’s not just a job. By the way, I say guys (plural) because over the course of several weeks there were three different people handling various segments of the course. They were uniformly interested, and interesting.

If you have ever wondered about taking a boating safety course, I advise you to jump in and go. It will cost you very little money and only a few evenings time. Courses are often held at high schools which offer adult education, and the fees are minimal. If you need one of these courses and want it in a hurry, there are one day 8 hour versions that satisfy some of the nanny states. I found it time well spent. Highly recommended. To locate a class near you, use the CG’s Class Finder.

Oh yeah, and why do I write about it today, 17 months later? Well, when we parted back in April of 08, Jeff said “Your completion certificates will be slow in coming. They go through a couple of different agencies which are operated by full time salaried bureaucrats, not by volunteers.” My certificate (plastic wallet card) arrived today. I had a good chuckle as I found it in the mail and remembered Jeff’s warning. To celebrate, I took it with me for this afternoon’s paddle on Lake Sebago. … where there were no boating accidents today.
Filed Under: Boating

Small Boatbuilding Hand Tools

September 9, 2009 by Bob Easton 5 Comments

Over at the WoodenBoat Forums, a newcomer asks about hand tools for small boat building. I don’t know exactly what he considers small, a dingy or canoe, or a small Trumpy. I do know, however, a lot about the tools I used to build the Fiddlehead canoe. This list worked for me and might work for other amateur boat builders. (I doubt professionals would easily give up using power tools, which they think do the work faster.)

Bench and bench accessories

benchIt’s the single most used tool in the shop. Mine is a 12 foot long “English Bench” taken from Chris Schwarz’s book Workbenches from Design & Theory to Construction & Use. The 12 foot length is comfortable for the size of the shop and is suitable for planing boat lumber up to 16 feet long (with some lumber shuffling of course). The bench dogs, full width planing stop on the end, and the bench hook are all shop made accessories. The Gramercy holdfasts are from Tools for Wood Working. The bench is further described in a series of blog entries.

Layout

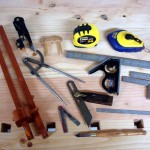
layout toolsMost work starts with some sort of layout. Starting at the left edge and proceeding roughly clockwise, we have:

  • A shop built marking gauge with two beams, one for pencil, the other for a scribe. It is made of cherry and roughly to a plan found here.
  • The black plastic bodied compass / divider is an AccuScribe, which can be found at a number of woodworking tool outlets.
  • The compass / divider I like more is the vintage 8 inch Bemis & Call steel compass found in an antiques shop in Liberty Maine. Cost = $10. It once belonged to someone named C L Beckett who stamped that name on each leg.
  • The oak thing is a shop built center marking gauge, handy for resawing.
  • A utilitarian 25 foot Stanley rule.
  • A chalk line is useful for marking long rip lines on lumber. Strictly for rough cutting.
  • A utilitarian try-square, a couple of small machinist squares, and a 6 inch rule.
  • Two bevel gauges, one an ancient Stanley #25 (from Sandy Moss I think), the other shop made from a hacksaw blade and a rivet.
  • Lastly, a very fine Pattern Pilot marking knife from Bob Zajicek at Czeck Edge Hand Tools. It is probably more useful for cabinet makers than for boat building, but is a gorgeous tool nonetheless.

Planes

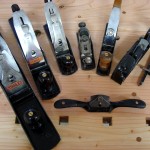
planesAll of my planes are refurbished vintage planes. Over the life of any sharp edge tool, one will sharpen it many many times. Sharpening is an essential skill and is not difficult to master. In my view, knowing all you can know about a tool, including how to refurbish it, is only an incremental step beyond sharpening. I like to refurbish tools, bringing them back to life and putting them back to work. I am careful in what I buy and where I buy it in order to make the most of what I refurbish. My planes include (left to right):

  • A Stanley (Bailey) #7 Jointer plane. Type 16 (1933-1941) with 1935 iron. From Jon Zimmer. $145. While in Maine, I roamed the antique tool stores and found dozens of these for prices in the $70-$80 range. Each and everyone had a flaw of some sort that ruled it out. I eventually found this one from Jon, and don’t regret paying him more for finding a better tool than I could find by wandering around.
  • A Stanley (Bailey)#5 Jack plane. Type 16 (1933-1941) with 1935 iron. From Jon Zimmer. $120.
  • A Stanley (Bailey) #3 Smooth plane. Type 15 (1931-1932). From Jon Zimmer. $80.
  • A Stanley #60 Low Angle Block plane. Circa 1900. From Sandy Moss. $50.
  • A Stanley #40 Scrub plane. Circa 1910. From Jon Zimmer. $80.
  • A Sargent #79 (copy of Stanley #78) Fillister and Rabbet plane and accessories. Circa 1925. From Sandy Moss. $35.
  • A Stanley #51 Spoke Shave.  Circa 1920. From Sandy Moss. $20.

I’m sure there are trustworthy vintage tool dealers on Ebay, but I haven’t found time to sort them out of the world’s largest yard sale.  Likewise, I haven’t found all of the trustworthy dealers on the internet. However, I do trust and have done business with each of these folks: Jon Zimmer, Patrick Leach, Sandy Moss, Walt Q, and Bob Kaune.

For those who have not refurbished an old plane, Bob Smalser’s excellent tutorial will get you started: “Rehabilitating Old Planes”

Chisels and shaping tools

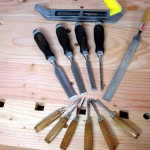
chiselsThere are surprisingly few. The bench chisels are Narex. They were surprisingly inexpensive (less that $30 for the set of 4), and surprisingly good. It’s all about good steel, and these are tough and hold their edges very well.

The little carving chisels were for carving the fiddleheads on the ends of the boat’s stems. They are not of high quality steel, so I won’t reveal their pedigree.

The only other shaping tools I use are a Stanley Surform and a half-round cabinet maker’s rasp.

Oh yeah, and sandpaper.

Saws

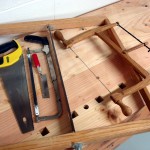
sawsSome are store bought. The yellow handled Stanley has carbide teeth and works OK. I use it only for rough cross cutting. There aren’t a lot of high-precision straight cuts in boat building. Hey, we’re making boats, not grand pianos. A simple hack saw does the metal stuff. The little razor saw is handy once in awhile.

My real workhorses are shop made. The big frame saw was cut down from an antique Disston D-8 rip saw, and made roughly to Josh Clark’s design. I use it for ripping long lumber, and for resawing. Resawing is so valuable for boat lumber; getting two (or more) boards for the price of one is wonderful. See my resawing tutorial for more. The bow saw is a delightful, lightweight, highly maneuverable saw made from plans found at Gramercy Tools. I use it constantly and can’t say enough good about it.

Good learning resources for rehabilitating and sharpening saws are:

  • Bob Smalser’s saw straightening and rehab tutorials on the Sawmill Creek forums
  • Peter Taran’s saw sharpening primer on the Vintage Saws site
  • Bob Rozaieski, of Logan Cabinet Shoppe, has a very good saw sharpening video.

Drilling

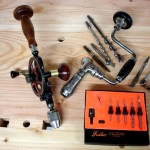
drilling toolsMy Goodell-Pratt #5 1/2 B , eggbeater sees constant use, for both drilling and screw tightening. It dates to about between 1886 and 1905. I found it at Liberty Tools in Liberty Maine, for $28. Liberty Tools is a real neat place, but you have to go there; no mail or Internet ordering. The drill was, as most are, missing the side knob, which I fabricated. It has two speeds, and a ratcheting mechanism that works in both directions. It’s almost as fast as other hand drills, is a lot more accurate (no overrun), and doesn’t ever have dead batteries.

The Stanley #923 brace does the heavier work. It wants to have square shank bits for the best work. It came from Walt Q for $25.

I find the Fuller bits indispensable. There are hundreds (sometimes thousands) of screws used in boat building. Most are silicon brass and are known to fracture easily if not fed into the right size hole. Every screw hole is prepared with one of these bits. Screws are also waxed before driving. I have had no breakage problems.

Other stuff

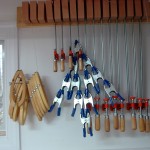
clampsA few dozen odds and ends include screwdrivers, pliers, and not nearly enough clamps. The orange and blue clamps are from “the Borg.” The lap clamps are shop made and did exactly what they were made for.

All in all, that’s not very many tools. A small collection can do a lot of work.

Oh yes, there was one electron murdering tool used for building the boat. Before I built my frame saw and bow saw, I used a Rigid 14 inch band saw to cut the inner stems and to resaw a few strips of cedar for the laminated bulkheads. Since those cuts, and after making the new hand saws, the only use I’ve had for the band saw is quickly cutting waste wood down to disposable size.

Filed Under: Boatbuilding, Hand tools, Woodworking, workbench

Eva Won is Launched

September 7, 2009 by Bob Easton 9 Comments

Eva, my best friend and partner of 45+ years, won the naming contest. I was, of course, planning to name the boat after her. Since I am planning on building two boats, one for each of us, in my traditionalist fuddy duddy way I intended to name them “Eva I” and “Eva II.” She’s a linguist, perpetual language student, and language teacher. She did a little word play to turn those into “Eva Won” and “Eva Too.”

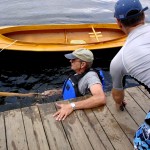
Today’s launch was at a Lake Sebago, in the Palisades Interstate Park near where we live. The lake is too small for power boats and just right for canoes and occasional competitive rowing and sailing events. Transport to the lake is atop the lumber rack on my truck. It’s a short walk / carry to the small launch dock. Putting in was a piece of cake. Getting underway was a different story. You ought to hear Eva laugh at the sequence of these next two pictures.

happy boatbuilder launched boatbuilder

I was so busy talking (about the boat, of course) to the guy with the blue hat that I wasn’t careful enough in entering the boat. Swim around to a shallow area, climb out, and try again. The next time went better, after we pumped out about a gallon of water. THANKS to another bystander who had a nifty hand pump. (Gotta get one of those.)

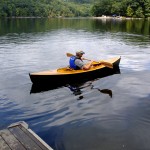
paddling 1Yes, the boat is tippy, but no more so than a white water kayak. Actually, probably a little bit less. Once situated, I felt no uneasiness at all. The boat rows easily. It was not at all difficult to put on some comfortable speed. It tracks well. Perhaps it could turn more easily, but that could also be due to my novice rowing technique. It seems to be quite watertight, except when you submerge one side when trying to enter. Water in the boat came from two sources, submerging the port side on the first entry attempt, and from the paddle. The drip rings on the paddle helped, but need to be improved. After returning home, I checked the watertight compartments and found them bone dry.

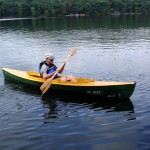
paddling 2The paddle worked well too. The paddle itself taught me how to use it. Once I found a good technique, the paddle became absolutely silent in the catch and almost silent in the exit. The paddle’s length (90.5 inches, 230 cm) was determined by the length of lumber I purchased. I think it could stand to be 6 to 8 inches longer. I found myself reaching outside that imaginary box formed by shoulders and elbows to get enough paddle  immersion.

It was a very fine launch day, and a good time was had by all … especially the spectators at the dock. Now, I know why many advise “never paddle alone.” You need someone, not to hold the boat while you enter, but to laugh at the harmless mishaps (and to help carry – THANKS Eva!).

paddling 3Ready to float, the boat weighs 51 pounds. It’s an easy weight to load and carry and only 5 pounds heavier than the designer’s estimate. A fellow who had just carried his Coleman 15.5 canoe (listed at 76 pounds) lifted mine and smiled at how light it is. I think mine is heaver than what Harry specified because I avoided making the scantlings too scant. I erred on the fat side when thickness planing the planking material. The one area where I erred on the thinner side was the coamings. If you look closely at the second picture, you can see that the port side coaming became a casualty to my clumsy first entry. It cracked when brushing the side of the dock as that side submerged. It will be easily repaired.

Back to the boat’s name. There are no name banners on the boat yet. I tried creating waterslide decals, but found that inkjet inks just aren’t opaque enough for this application. (I wanted yellow lettering on the green hull.) We’ll try another approach soon.

Eva’s still laughing at the first two pictures.

Filed Under: Boatbuilding, Eva Won, Fiddlehead

  • « Go to Previous Page
  • Page 1
  • Interim pages omitted …
  • Page 86
  • Page 87
  • Page 88
  • Page 89
  • Page 90
  • Interim pages omitted …
  • Page 128
  • Go to Next Page »

Primary Sidebar

Footer

Recent Posts

  • New Frame Saw / Scroll Saw
  • Lamppost Sign
  • Goodbye PayPal – Goodbye Bob’s eBooks
  • Anarchist’s Workbench is Done
  • Why we keep offcuts…

Categories

  • About
  • Artwork
  • Boatbuilding
  • Boating
  • bowl carving
  • Boxmaking
  • Clocks
  • Drawings
  • eBook
  • etude
  • Eva Too
  • Eva Won
  • Fiddlehead
  • Fiddlehead model
  • Flying
  • frame saw
  • gilding
  • green woodworking
  • Grinling Gibbons
  • Guns
  • Hand tools
  • Humor
  • kerfing plane
  • Lettercarving
  • Mill Creek 13
  • Model building
  • Power tools
  • Rant
  • resawing
  • scroll saw
  • Shopmade
  • sign painting
  • Stonework
  • Swimming
  • Technology
  • The Wall
  • treadle lathe
  • Uncategorized
  • VSD
  • Woodcarving
  • Woodturning
  • Woodworking
  • workbench

Other stuff

  • About
  • Contact
  • Privacy Policy

Copyright ©2024 · Bob Easton · All Rights Reserved