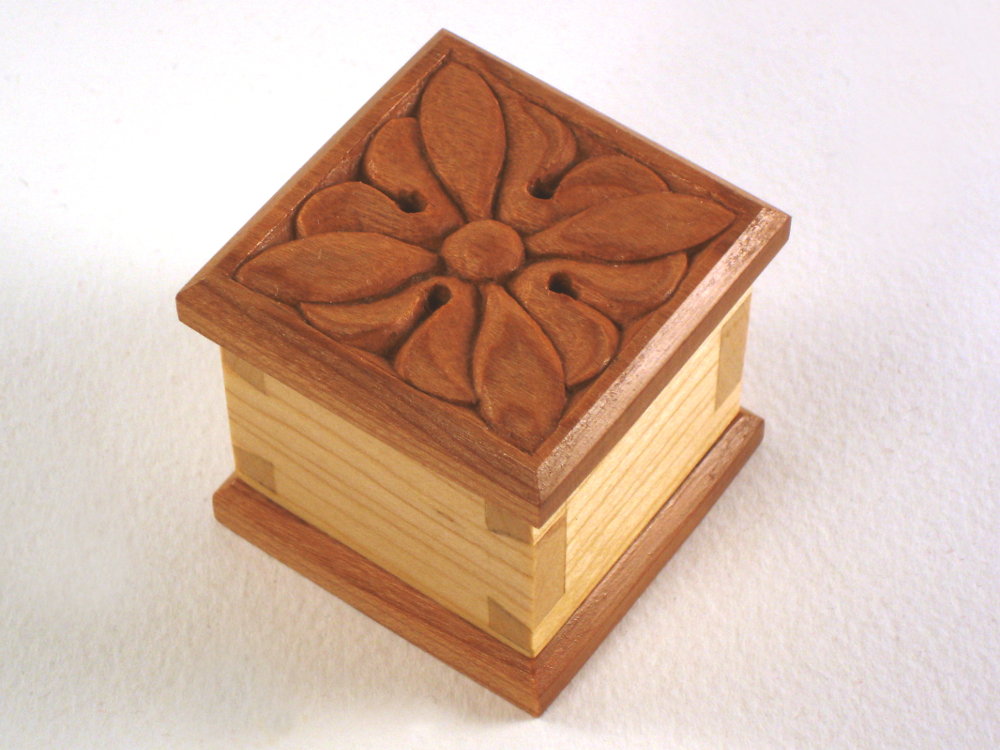
My primary interest in boxes, whether joined or turned, is to have a base for carving. Carving is the real interest. Boxes are the “canvas.” Yet, that doesn’t mean the boxes have to be simple or plain, or some kind of outsourced junk. I make every box, by hand, using only hand tools.
 This cute little box is the result of a salvage effort. The evening before leaving for an excursion a few months ago, I resawed a Cherry board, reducing it from the standard 7/8 inch thickness to two boards slightly over 3/8″ each. I left the two boards on the bench. On returning a few weeks later, I found both boards cupped. Even though the original board had been in my shop for several months, I guess it wasn’t fully acclimated and my forgetting to sticker the resawn boards
 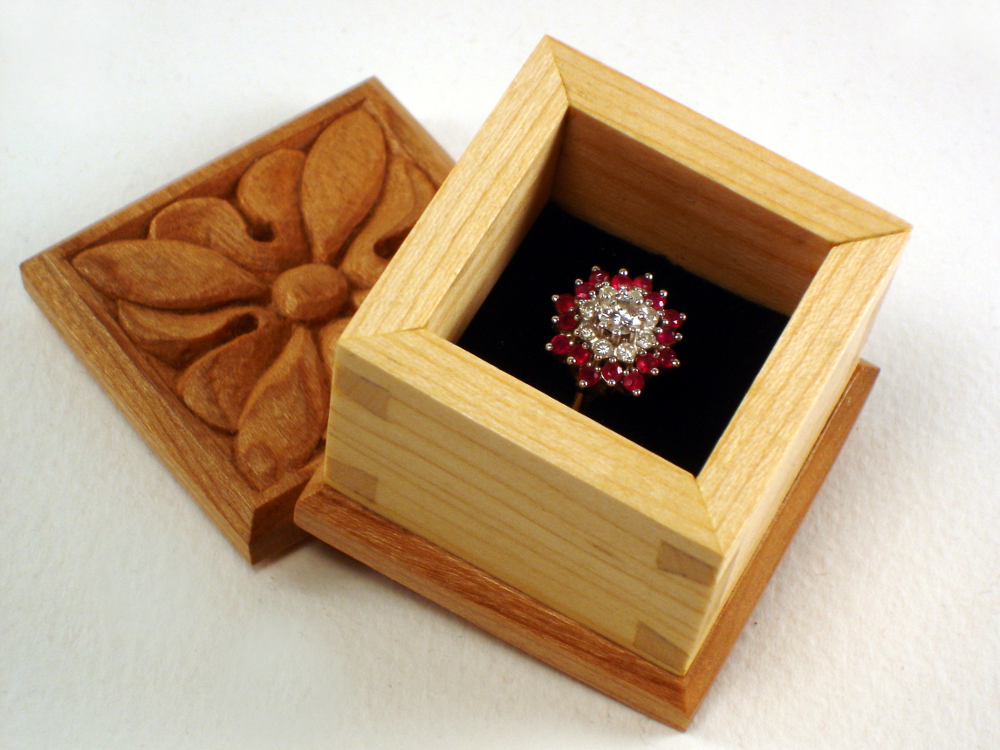 aggravated the tendency to cup.
I tried a few “remedies” advised from various internet sources with no delight. So, I cut the boards to narrower widths and flattened them. The result was boards now 1/4″ thick, very nice for a couple of small boxes. This is one of them. By the way, the color contrasts on this box result form using Cherry heartwood for the bottom and lid, and Cherry sapwood for the sides.
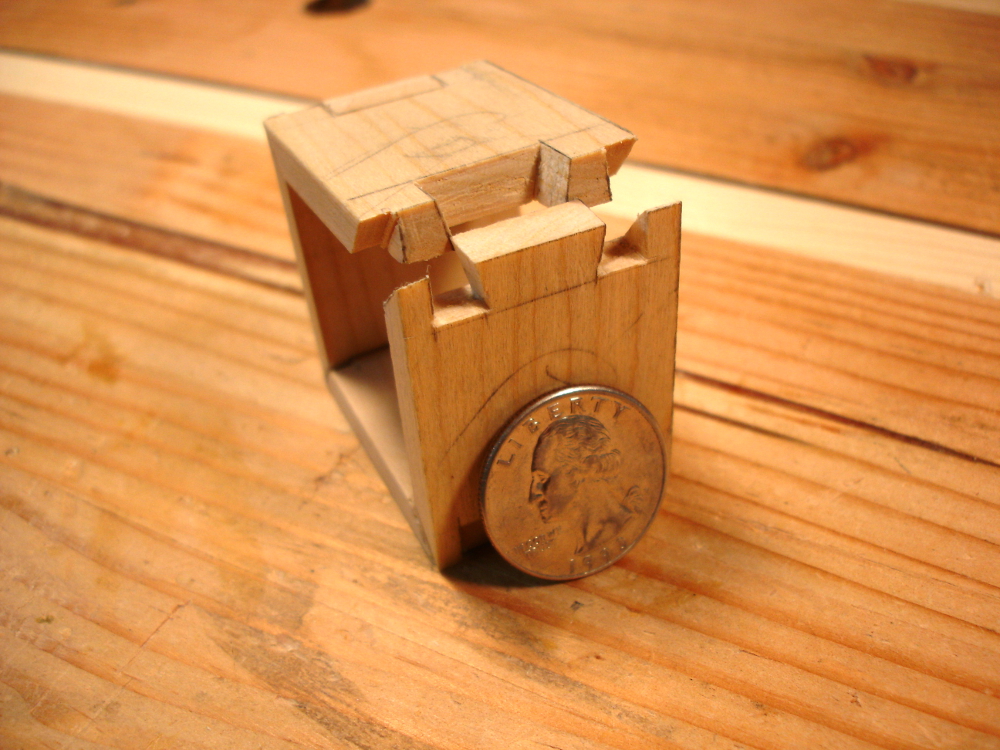 Joinery: It’s simply described as mitered dovetails. The intention is to provide good looking miters, instead of plain, semi-beautiful, butt joints, on visible areas like top edges. Actually making them is a bit more work than the simple description implies. Getting the miter perfect is an acquired art.
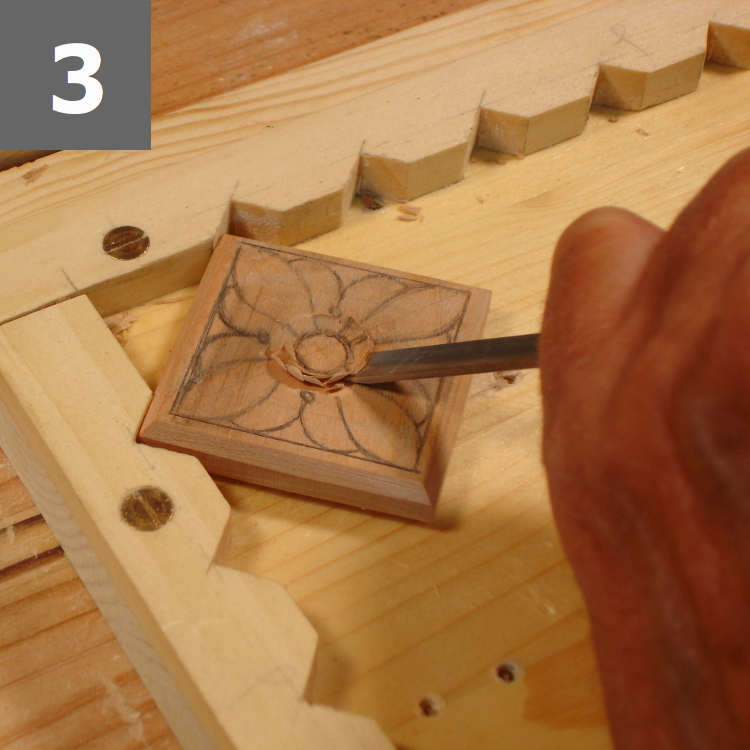
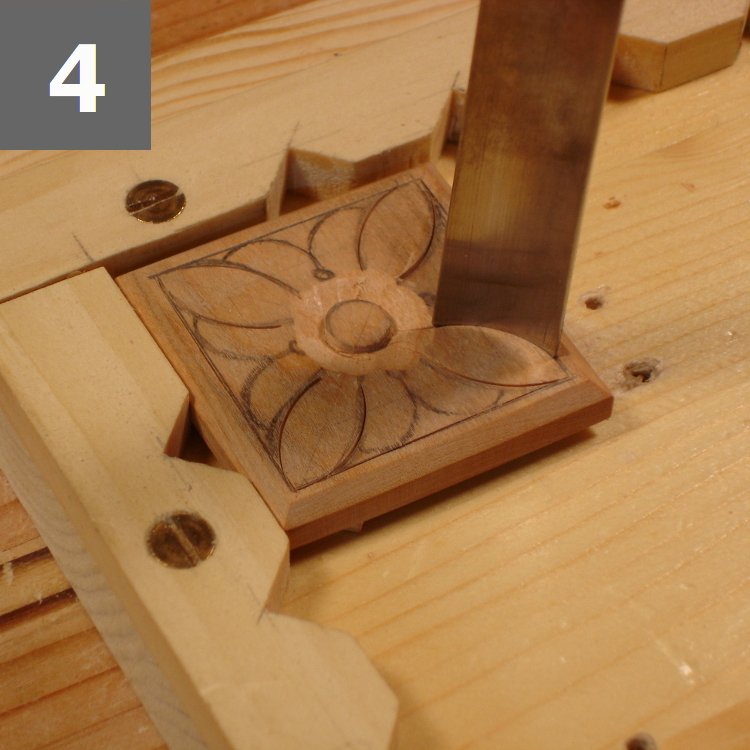
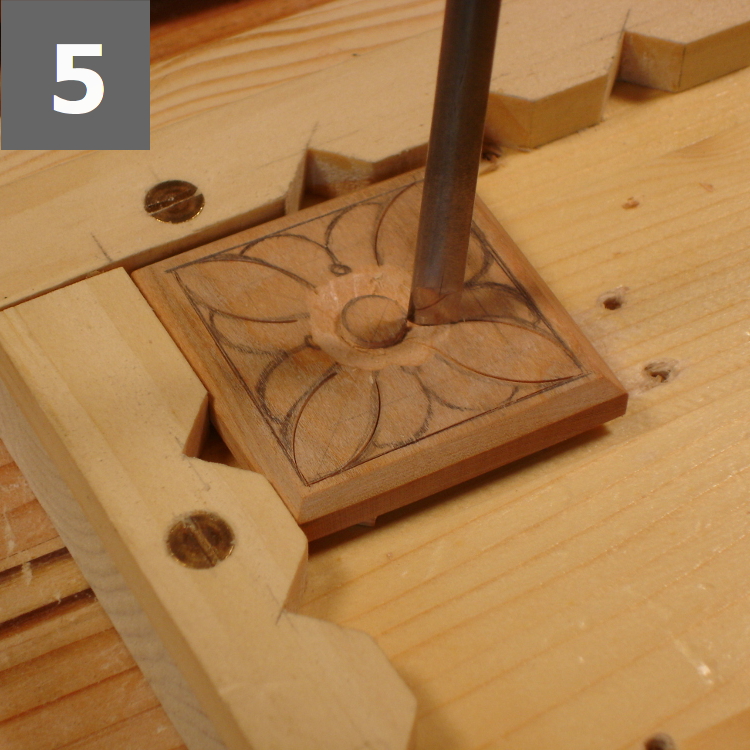
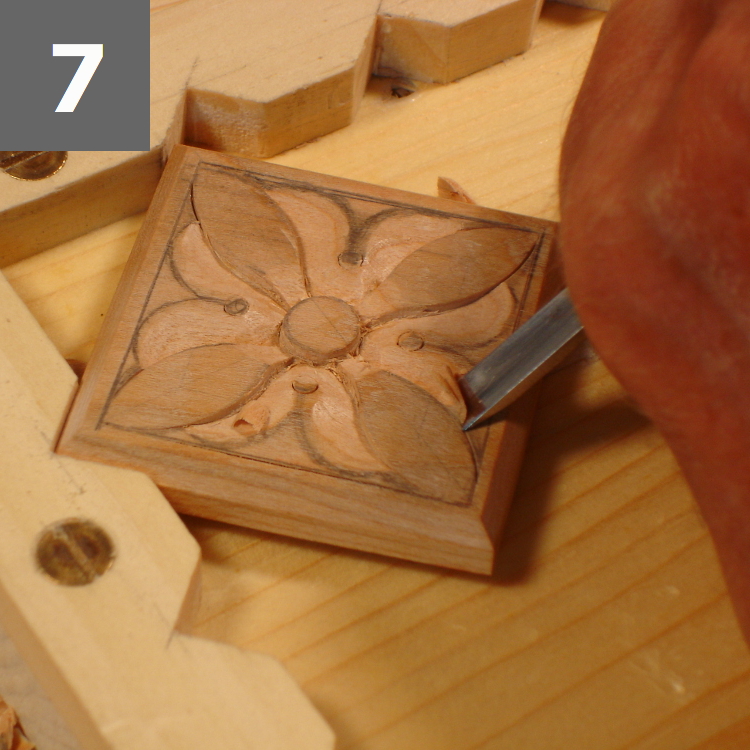
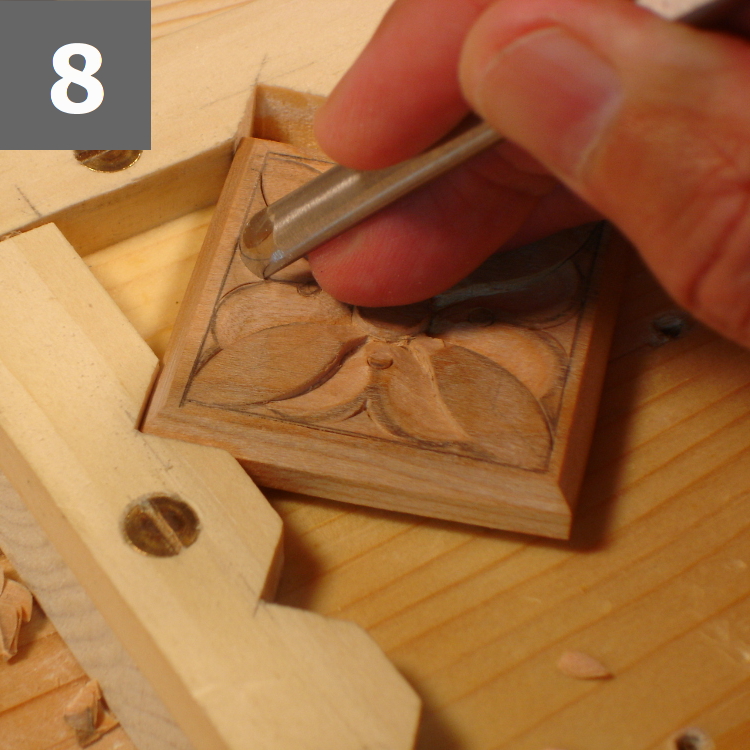
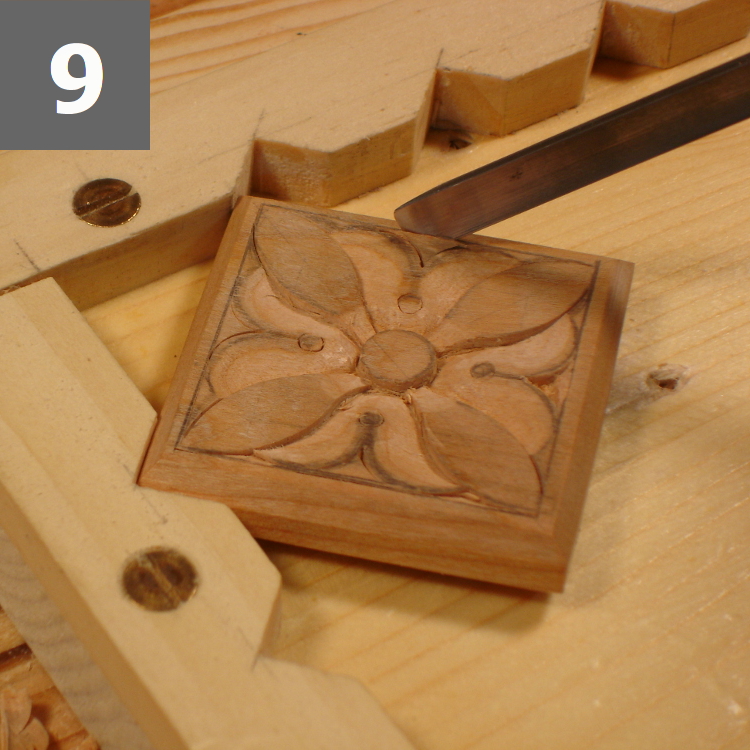
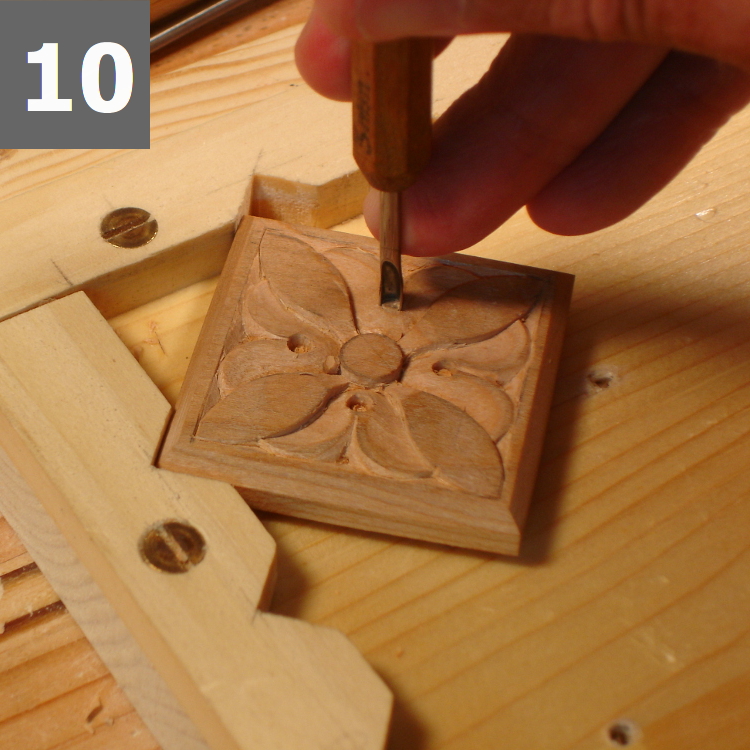
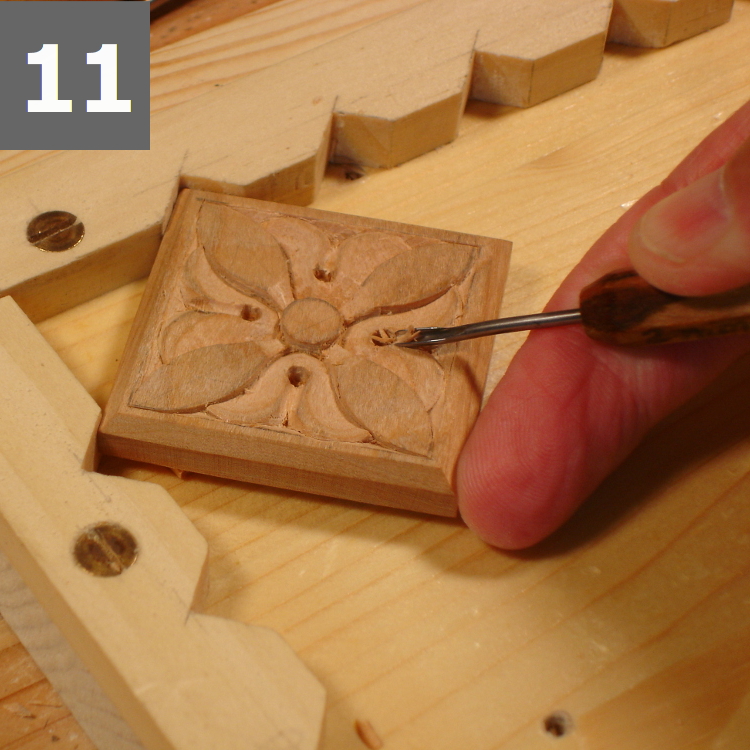
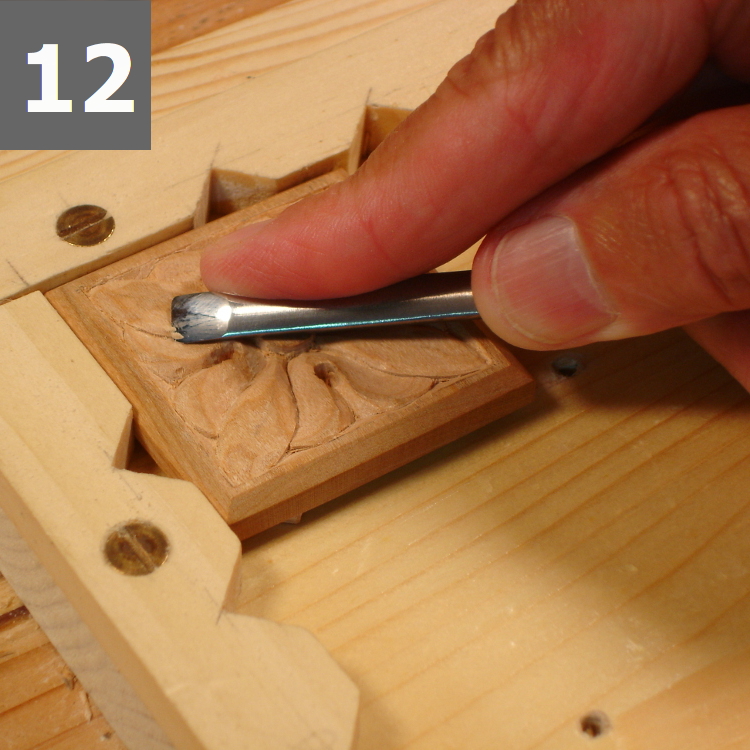
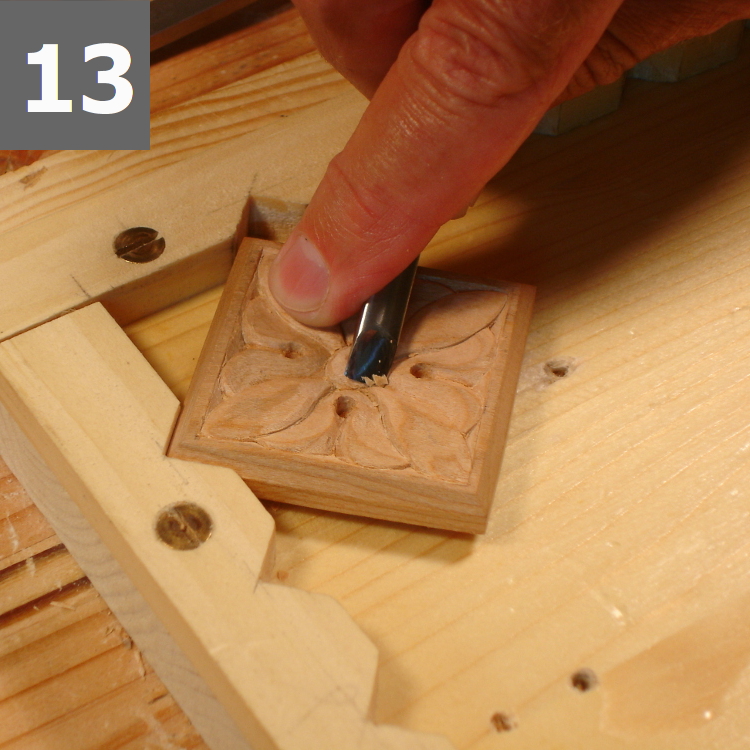
Carving: That’s the real reason for the box. I don’t pretend this to be thorough instruction, but an illustration of some of the steps. This sweet little flower is a classic design that shows up in a lot of architectural carvings. It’s made like this:
- (no photo) Define the straight outlined edges using a 1″ chisel canted about 30 degrees.
- (no photo) Define the edges of the center bud. — #6 6mm gouge
- Remove material all around the center bud. — #3 6mm gouge
- Define the outer part of the four diagonal pedals. — #4 14mm gouge
- Define the inner part of the four diagonal pedals. — #3 6mm gouge
- Carve the leaves. — #3 6mm gouge
- Continue carving the leaves. — #3 6mm gouge & #6 6mm
- Define the edges of the leaves. — #6 6mm gouge
- Remove material between edges of leaves and the frame edge. — #3 6mm, or flat skew chisel
- Pierce the eyes in the leaves. — #11 3mm micro gouge
- Complete the eyes in the leaves. — #11 2mm micro gouge
- Round over the pedals. — #3 6mm gouge
- Round over the center bud. — #3 6mm gouge

Finish is shellac and high grade wax, hand rubbed to a satin surface.
The box measures 1 3/4″ x 1 3/4″ x 1 3/4″ (4.4cm x 4.4 cm x 4.4 cm) outside, and 1 3/16″ x 1 3/16″ x 1 3/16″ (2.8cm x 2.8cm x 2.8cm) inside.
Lastly, I added a slotted and fabric covered “cushion” so the box can be used as a ring box. It’s currently available on Etsy, if anyone is interested.
Really lastly …. the size of the box is mostly irrelevant. This little one requires as many steps as a larger one, and is exactly as much fun to make.
Very nice!
Thanks Ron!
Would like to see some of your work some day.