• Skip to primary navigation
  • Skip to main content
  • Skip to primary sidebar
  • Skip to footer

Bob Easton

Chocolate powered woodworking

  • Home
  • Grinling Gibbons Tour

WARNING: Scam at Home Improvement Stores

September 21, 2008 by Bob Easton 2 Comments

A “heads up” for those men who may be regular Home Depot customers. Over the last month I became a victim of a clever scam while out shopping. Simply going out to get supplies has turned out to be quite traumatic. Don’t be naive enough to think it couldn’t happen to you or your friends.

Here’s how the scam works:

Two seriously good-looking girls come over to your car as you are packing your shopping into the trunk. They both start wiping your windshield with a rag and Windex, with their curves almost falling out of their skimpy T-shirts and short shorts. It is impossible not to look. When you thank them and offer them a tip, they say “No” and instead ask you for a ride to another Home Depot or Lowe’s. You agree and they get in the back seat.

On the way, they start undressing. Then one of them climbs over into the front seat and starts crawling all over you, while the other one steals your wallet.

I had my wallet stolen August 4th, 9th, 10th, twice on the 15th, 17th, 20th, & 24th. Also September 1st, 2nd, twice on the 3rd, three times just yesterday and very likely this coming weekend.
Filed Under: Humor

Mortises and Wood Movement

September 21, 2008 by Bob Easton Leave a Comment

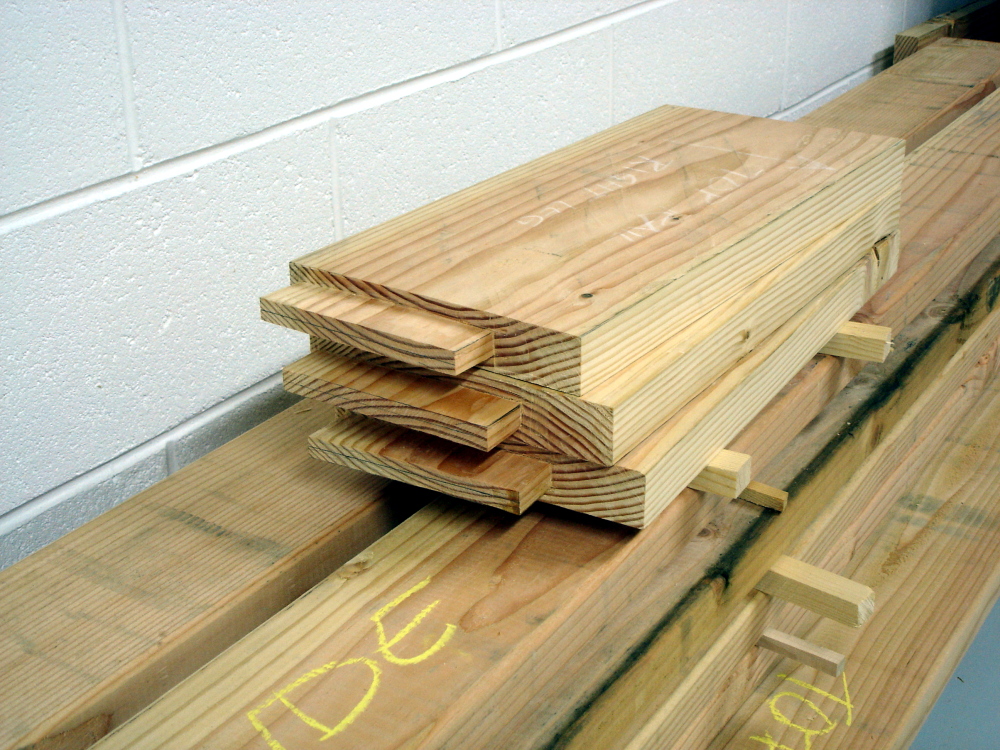
The legs for the workbench are laminated from two pieces of 2 x 4. They are actually gotten out of rather nice 2 x 6s that aren’t nearly as gnarly and twisted as a typical 2 x 4.

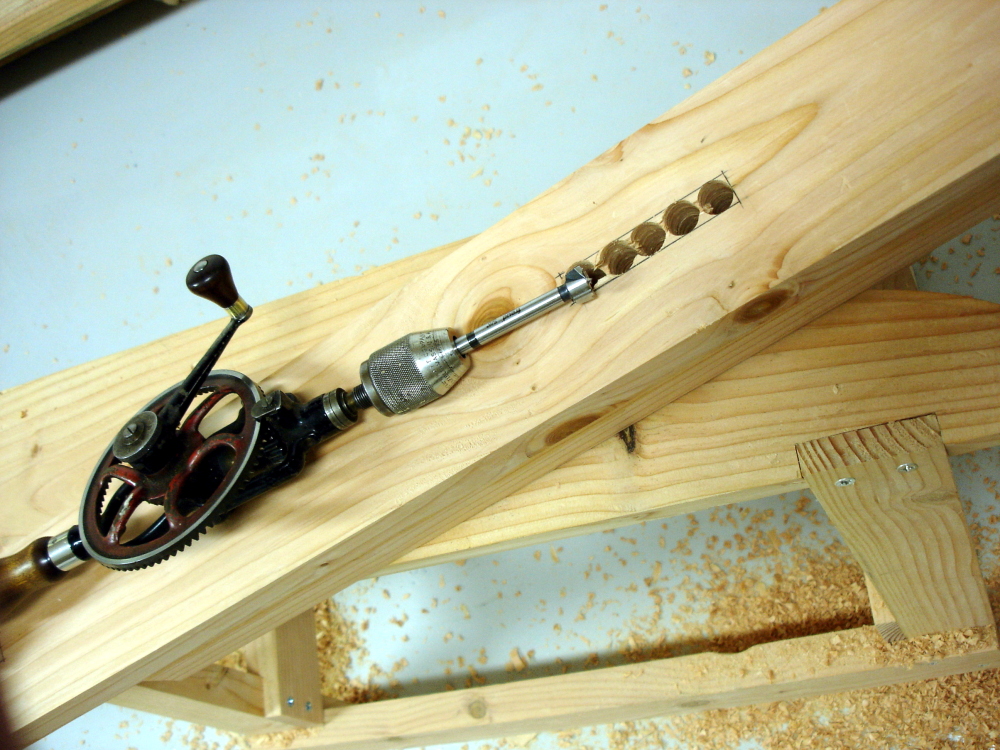
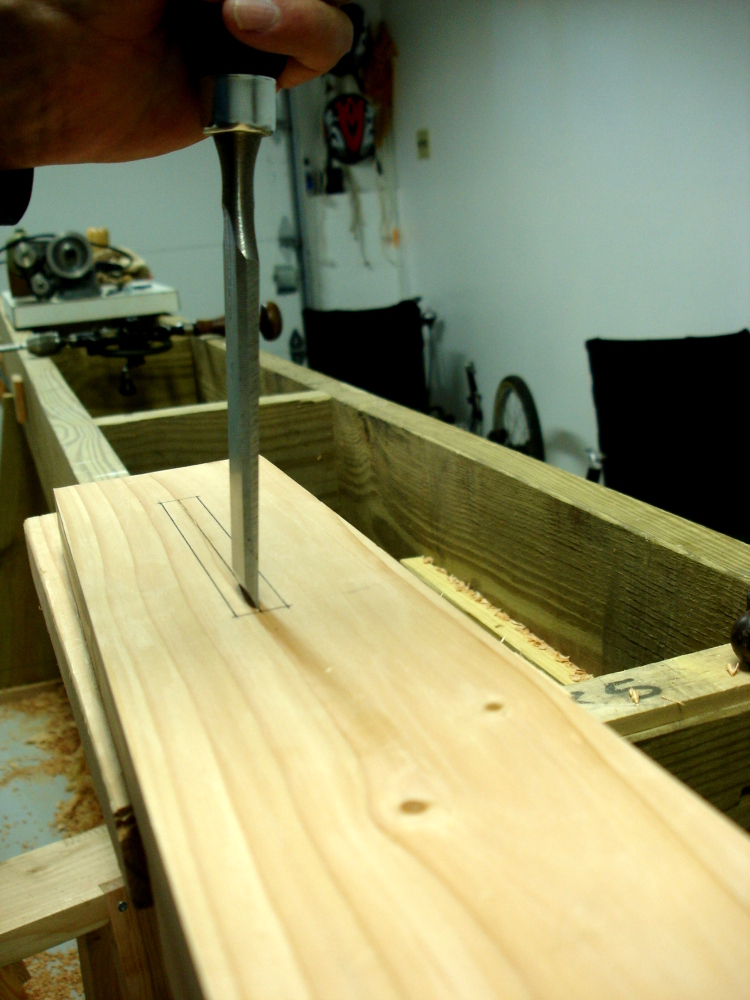
After dimensioning the lumber and laminating the parts, it’s time to cut mortises. mortise for a lower railsetting up accurate drillingThe bottom rails are also 2 x 4 and fit in blind mortises in the thicker part of the legs.  The way this is done in a powered workshop is with a drill press, using a fence to assure correct spacing of the mortise. As you can see, I’m using my made-in-1896 cordless drill and the chance of using an accurate fence is nil. Yeah, I toyed with making a block that could ride on the bit and act as a fence, but it didn’t seem stable enough.  Instead, I incise the center line of the mortise with a chisel. Make that deep enough, and the center point of a forstner bit falls right in place. Nice! Now, there is one thing that a drill press can do that a hand drill cannot. With a drill press, the bit can be moved anywhere in the mortise to remove almost all the waste. Can’t be done by hand, so there’s a bit more chisel work to be done. Six legs, three rails, six blind mortises. These were my first mortise and tenon joints and I’m pleased with the results.

Time to move to the upper rails. These guys are heftier, currently being 9 inches wide. upper railsI got them out of a 2 x 10 that I know sat idle in an air conditioned Home Depot store for about three months. I had it in my shop about a week before I began working it. After dimensioning the wood, I rough cut it into the three pieces, noting that the newly cut ends felt about the same temperature as the outside edge of the wood. That’s a rough indication of relative dryness. (No, I’m not going to buy a $300 moisture meter.) I stickered the three pieces and let them sit for about a week while doing other things. When I came back to them, they were absolutely flat. So, I cut their tenons and set the pieces aside, still dead flat.

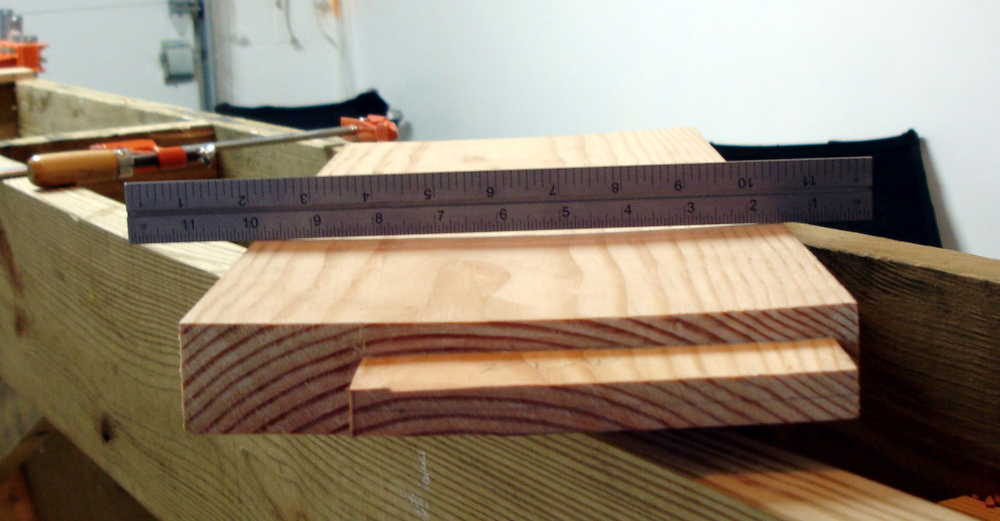
cupped railsA week later, I’m ready to cut mortises for these rails and I look over and see… Two of the three, all from the same board are now cupped. Yes, wood moves. Yet, I was a bit surprised to see these pieces change shape rather suddenly after being flat for a few weeks. It’s also interesting that the tenons aren’t cupped as much as the thicker part of the wood.  No, I’m not going to flatten the pieces again. This is a workbench, not a grand piano, and those rails will do very well as they are. All of the important strength and bearing surfaces are unaffected by whether the piece is dead flat or cupped a bit.

Speaking of pianos, who needs a grand piano to play honky tonk music, except maybe Jerry Lee Lewis? His latest collection “Last Man Standing” is great music for drilling mortises.

Filed Under: Woodworking, workbench

I Picked Up a New Workbench

September 7, 2008 by Bob Easton 2 Comments

That stange looking thing I’ve been using as a workbench is actually the building horse for the Fiddlehead canoe. Once enough frame parts are ready, they’ll be set up on the building horse. Then, what will I use for a workbench?

Chris Schawarz’s “Workbenches…” book is a winner. As a cabinet maker and writer about woodworking, he has made a number of workbenches. The unique thing about his book is a chapter in which he analyzes almost any woodworking task imaginable and classifies all the ways a bench might handle them. This analysis ends up with plans for two benches, one built incredibly heavy and perfect for cabinet makers, the other lighter and originally used by for 19th century joiners. This lighter bench, which Chris calls the “English” bench, looks ideal for boat building work. The most appealing feature is the ability to clamp long boards to the face aprons, enabling the kinds of edge working that is prevalent in boat building.

All I need is to make it longer. One can never have a bench that’s too long. I’m planing for 12 feet. Extending the length requires some longer lumber and an extra pair of legs.

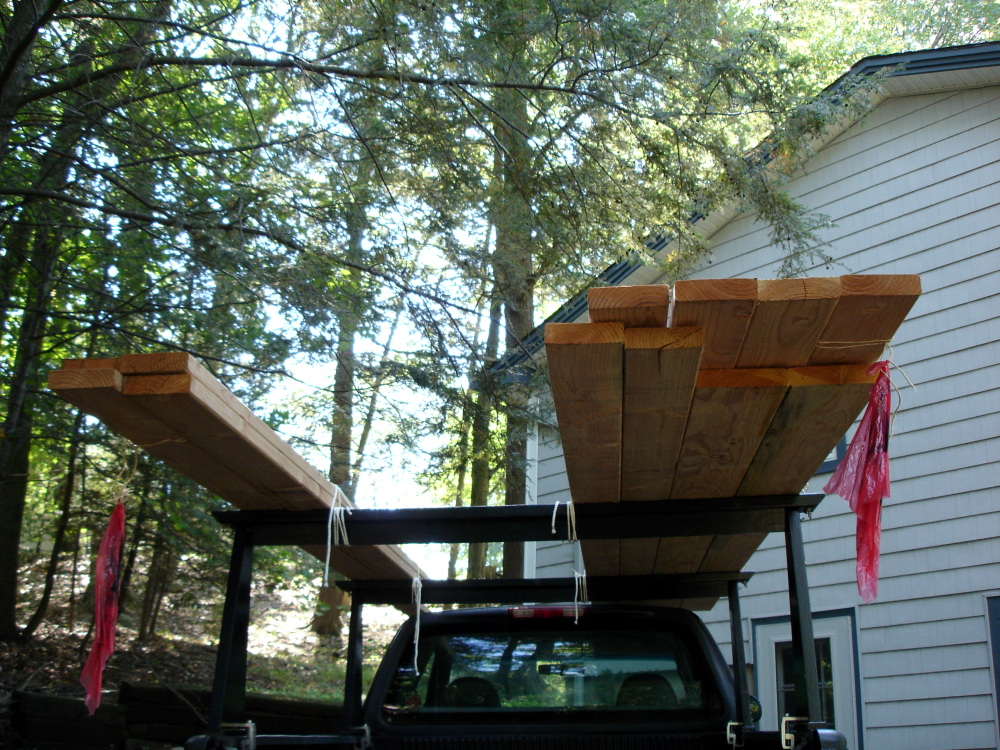
lumber on my truckChris suggests building benches from construction lumber. After all, these are workbenches, not grand pianos, we’re building. He uses southern yellow pine, very hard softwood that’s availalble where Chris lives. The examples in his book show beautiful wood that is clear and knot free. Not here. I have load of “green Douglas fir,” the next best alternative in this part of the country. As an aside, the lumber is sold green (high moisture content) because it is intended for house framing. If a framer uses it immediately, the joins become tighter as the lumber dries. Some of what I bought is still very green and very heavy. It was a good load test for the truck rack and for my knot tying.

Yeah, this puts the Fiddlehead build into limbo for a while.

Filed Under: Woodworking, workbench

  • « Go to Previous Page
  • Page 1
  • Interim pages omitted …
  • Page 104
  • Page 105
  • Page 106
  • Page 107
  • Page 108
  • Interim pages omitted …
  • Page 129
  • Go to Next Page »

Primary Sidebar

Footer

Recent Posts

  • Sign Your Work!
  • New Frame Saw / Scroll Saw
  • Lamppost Sign
  • Goodbye PayPal – Goodbye Bob’s eBooks
  • Anarchist’s Workbench is Done

Categories

  • About
  • Artwork
  • Boatbuilding
  • Boating
  • bowl carving
  • Boxmaking
  • Clocks
  • Drawings
  • eBook
  • etude
  • Eva Too
  • Eva Won
  • Fiddlehead
  • Fiddlehead model
  • Flying
  • frame saw
  • gilding
  • green woodworking
  • Grinling Gibbons
  • Guns
  • Hand tools
  • Humor
  • kerfing plane
  • Lettercarving
  • Mill Creek 13
  • Model building
  • Power tools
  • Rant
  • resawing
  • scroll saw
  • Shopmade
  • sign painting
  • Stonework
  • Swimming
  • Technology
  • The Wall
  • treadle lathe
  • Uncategorized
  • VSD
  • Woodcarving
  • Woodturning
  • Woodworking
  • workbench

Other stuff

  • About
  • Contact
  • Privacy Policy

Copyright ©2024 · Bob Easton · All Rights Reserved