 The center of the universe for people interested in wooden boats is Brooklin Maine. Don’t let anyone else fool you. The people in Brooklin will set you right. Brooklin is a little place on Maine’s central coast with a winter population of about 650 people. The WoodenBoat magazine, and others, is published from Brooklin. Nearby are 7 to 9 (depends on who counts) thriving boat shops, many of them building mostly with wood.
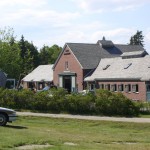 The magazine has been operating the WoodenBoat School for 27 years. The school manages 99 courses over the duration of the summer months. Most courses are one week, with a few running two weeks. I’m attending the ever popular two week “Fundamentals” of Boatbuilding” course, which runs 5 times each summer. Course instruction rotates among several highly respected wooden boat builders, each teaching one or more iterations each year. The instructor for my iteration is Greg Rössell, who builds with traditional techniques and operates a sole proprietorship boat shop in Troy, Maine.
Greg promotes traditional boatbuilding. That means using traditional materials, local wood varieties, and traditional building techniques … as opposed to building epoxy embalmed boats, or tortured plywood boats. I can see the course curriculum following fairly close to the material in Greg’s books, “Building Small Boats” and “The Boatbuilder’s Apprentice.” It doesn’t take long to recognize expertise, and Greg has it. He also has an entertaining style, always a bonus.
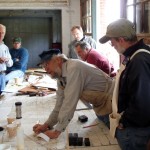 I’ve read Greg’s books and magazine articles for several years and have what I think is a good general understanding of what he teaches. What I lack is practical experience, and more importantly, knowledge of what to do when things don’t go exactly according to plan. That’s where this course excels. We get some time for practical hands on work, but more of the time is Greg’s instruction, and that instruction includes a tremendous amount of information about other ways of doing things and how to recover from things gone wrong.
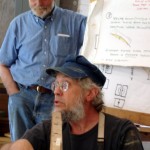
The typical day is part instruction and part hands on work. Most days, the work is the lesser part of the time. Instruction, not step-by-step “do this – do that,” is explanation and demonstration of techniques. We’re swimming in information and taking every opportunity to get all of our curious questions settled. The course follows the logical progression of building a boat: materials, woods, fastenings, glues, understanding lines and drawings, lofting, setting up building molds and other jig parts, setting up stems keels and transoms, planking, joinery, spar making, and on and on.
Sometimes a colleague stops by. That’s Maynard Bray, frequent WoodenBoat author, standing by the “powerpoint display device.”
We are working on two boats and will complete neither. One is a Chaisson semi-dory. The other is a Whitehall. Each offers unique building lessons.
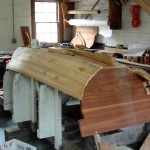 The Chaisson, being basically a dory has a flat bottom and lapstrake planking. It is built upside down over four molds and has light frames bent into it after planking is complete. Planks fasten to each other, mostly with copper rivets. It is called a semi-dory because it has a transom that is broader than most dories and has lines that make the hull more rounded than most dories. It’s a very pretty small boat. The one we have in the shop is partially planked and will be off the molds and turned over next week.
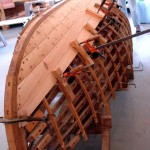 The Whitehall is a round bottomed boat that is carvel planked. It is built upside down over its frames. The frames are bent over ribbands supported by molds. The jig is substantially more complex than the one used for the Chaisson. Planks fasten directly to the frames with screws. Ours is called a “baby” Whitehall because it is shorter than most. Yet, it is not so short as to make it look bad. It has very sweet lines. It wants to have 10 planks per side and currently has 4 on one side and 3 on the other. Lots of work remains and we won’t see it fully planked.
 One of our work sessions this week was spiling and getting out a plank. Spiling is thought to be some form of black magic. At least that’s what it sounds like when reading about it. Actually, it is only two parts black magic and one part semi-Euclidiean geometry. Take 48 measurements per pank. Find a suitable piece of wood. Transfer the 48 measurements. Connect the dots, very smoothly of course, and that’s spiling. Then get the plank out of the wood by removing all parts that are not plank, and affix it to the boat. Simple! It took my partner Paddy and I about 8-9 hours to spile, get out, and hang our first plank. We learned lots, about 17 tricks and 38 pitfalls. Greg’s reaction was, “Women and children will squeal with delight.” We’re not sure he was talking about the plank.
Other hands on tasks this week included making two new transoms, making a new Chaisson bottom, making a new Chaisson stem. All of these were for the next boats, not the current ones. There were also a variety of “fix this” activities.
Maybe it’s the students who should squeal with delight. There is universal agreement that it was a very good week.
