• Skip to primary navigation
  • Skip to main content
  • Skip to primary sidebar
  • Skip to footer

Bob Easton

Chocolate powered woodworking

  • Home
  • Grinling Gibbons Tour

A Better Glue Bottle

February 24, 2014 by Bob Easton Leave a Comment

Glue is something that I try to avoid as much as possible. Carving rarely needs glue, but box making does and so does the most recent project (more on that in another post). For most work, I use Titebond glues. The glues work well, but I really dislike the bottles. How does this work for you? Pick up the bottle, turn over and shake 1, 2, 3 times to get some glue near the tip. Then, pull open the tip … or most likely wrestle with opening the tip. After two good yanks, the tip is still stuck. So go find pliers. Then, find the slot in the nozzle blocked. Scrape it out; danged stuff really sticks on the cap almost as well as the wood. Phew, finally open. Squeeze and use. Clean the tip off this time before closing. One big PITA, and that’s NOT pita bread.

photo of honey bottle filled with glue
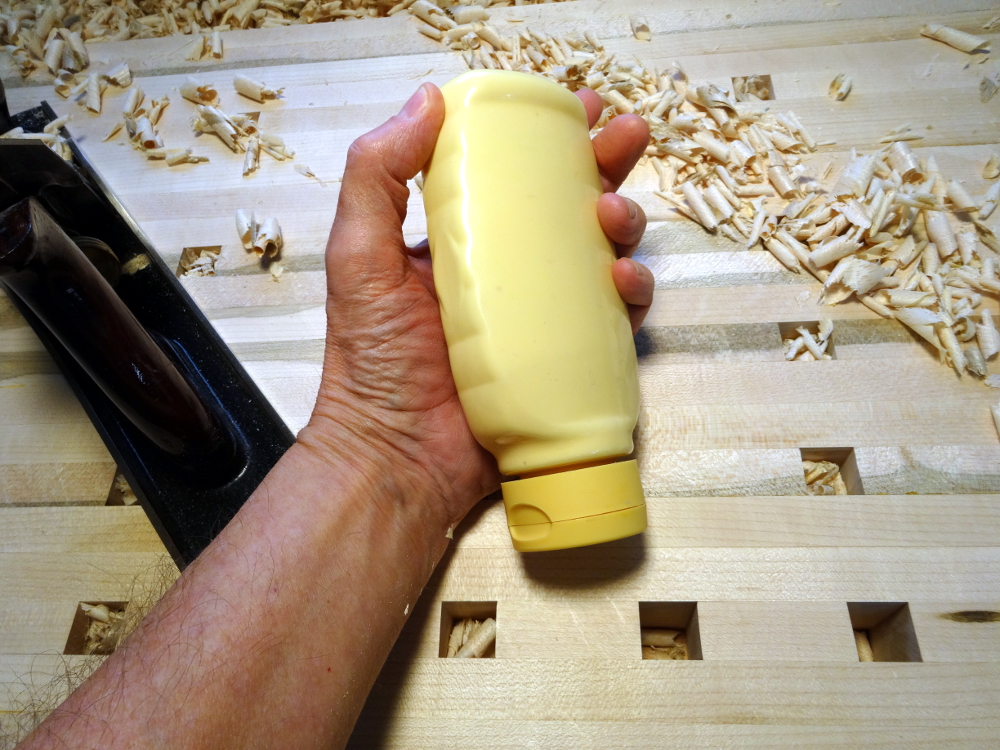
Being the cook, and grocery shopper, I’m seeing more and more products being sold in bottles meant to be stored inverted. SOME of those bottles actually have valves built into the lids. Two notable examples are Wallmart’s Great Value brand honey, and Heinz’s tomato ketchup. Wondering how well that valve handles glue, I cleaned out the last empty honey bottle and refilled it with Titebond glue.

photo of bottle valveWonderful!!! Pick up the bottle, flip the lid, squeeze and spread. Set the bottle back down closing the lid all in one motion.  No, it doesn’t have a long pointy nozzle, but how often do you really need that type of nozzle? Tilt this bottle a bit and there’s plenty of control. It works a bazillion times better than Titebond’s bottle. What’s more, the lid’s plastic surface is super slick and doesn’t hold on to spillover glue the way Titebond’s nozzles do. What little glue gets left on the lid slides right off.

Goodbye Titebond bottles; I’m sticking with the sweet ones now.


Filed Under: Woodworking

Bob Builds Another BOB

February 17, 2014 by Bob Easton Leave a Comment

just one photo for now…

bob-2-parts

Filed Under: Boxmaking, Shopmade, Woodcarving, workbench

Treadle Lathe – Machined Crank Details

January 30, 2014 by Bob Easton 7 Comments

Lathe builders in 1805 didn’t know Roger Davis. They’d just have a blacksmith make them a simple crank and be done with it. I didn’t know Roger either when I built my lathe. He saw the blog entry showing the (pathetic) wooden crank I made, in the absence of a blacksmith, and suggested it wouldn’t last long. It didn’t. He then made me one that will never fail. It is solid!

Roger Davis is a fellow Hoosier with the good sense not to move to New York, a frequent visitor to the Sawmill Creek forums, owner of “a very complete machine shop” and self-proclaimed “lack of good sense,” an aerospace engineer by education (Yay Purdue!), former high school teacher (physics, cemistry, algebra), a builder of scientific instrumentation (start to finish) as his paying job, a builder and user of muzzleloaders as one of his hobbies, and variously proficient in gunsmithing, blacksmithing, woodworking hand tools, A&C furniture, cooperage and who knows what else. Bottom line: a generously good guy.

So, why am I telling you all of this? Josh, from the previous post, wanted more information about the machined crank, as did Matt in the comments on the post about Stephen Shepherd’s kit of parts.

Photos and a drawing tell most of what you need to know to make one. If you have the metal working equipment to cut a block of steel, cut a slot in it, drill accurately, and tap some screw holes, you can make one similar. For what it’s worth, the distance between pivots was simply an estimate (a little more than a tenth the diameter of the flywheel) and has worked very well. Roger didn’t specify the size of the cap screws, but they look to be 1/4 by 20 by 1 inch long. The only other thing not shown on the drawing, that’s very visible in the photos, is a dowel pin that retains the crank pin. The retaining pin is probably not needed on this particular crank since Roger built it to such close tolerances that the crank pin probably took several tons of pressure to seat as a “press fit.”

When installing on the flywheel axle, be sure to go back and forth between the two screws, as they each affect the other’s tightness until they are really tight.

This crank has been very solid. I’ve got hours and hours of use on the lathe and ZERO, Nada, NO slippage from the crank. It simply works! Thanks again, Roger.

photo of flywheel crank - 1 photo of flywheel crank - 2 photo of flywheel crank - 3 photo of flywheel crank - 4 drawing of crank arm


Filed Under: Shopmade, treadle lathe

  • « Go to Previous Page
  • Page 1
  • Interim pages omitted …
  • Page 35
  • Page 36
  • Page 37
  • Page 38
  • Page 39
  • Interim pages omitted …
  • Page 128
  • Go to Next Page »

Primary Sidebar

Footer

Recent Posts

  • New Frame Saw / Scroll Saw
  • Lamppost Sign
  • Goodbye PayPal – Goodbye Bob’s eBooks
  • Anarchist’s Workbench is Done
  • Why we keep offcuts…

Categories

  • About
  • Artwork
  • Boatbuilding
  • Boating
  • bowl carving
  • Boxmaking
  • Clocks
  • Drawings
  • eBook
  • etude
  • Eva Too
  • Eva Won
  • Fiddlehead
  • Fiddlehead model
  • Flying
  • frame saw
  • gilding
  • green woodworking
  • Grinling Gibbons
  • Guns
  • Hand tools
  • Humor
  • kerfing plane
  • Lettercarving
  • Mill Creek 13
  • Model building
  • Power tools
  • Rant
  • resawing
  • scroll saw
  • Shopmade
  • sign painting
  • Stonework
  • Swimming
  • Technology
  • The Wall
  • treadle lathe
  • Uncategorized
  • VSD
  • Woodcarving
  • Woodturning
  • Woodworking
  • workbench

Other stuff

  • About
  • Contact
  • Privacy Policy

Copyright ©2024 · Bob Easton · All Rights Reserved