The lumberyard I use for hardwoods, Maurice Condon in White Plains, NY, has a great selection. Like most good yards, they don’t mind customers combing through stock as long as they put things neatly back in the racks. About this time a year ago, I pulled out a small collection of cherry boards. They were so nice that one of the guys working there said, “Wow, you found that here!? We have stuff that nice?”
Of course, there’s always a “…but…” Specifications for Cherry say that sapwood is not a defect. Yet, cherry that has been stacked in a rack almost since it came from the mill has had so little exposure to light that sapwood is not apparent. Get it out in daylight. Sticker it for a few weeks. Then the sapwood fades into view, and there’s always more of it than one wants. Despite that, it turned out to be a very nice collection of boards. Some have already become boxes.
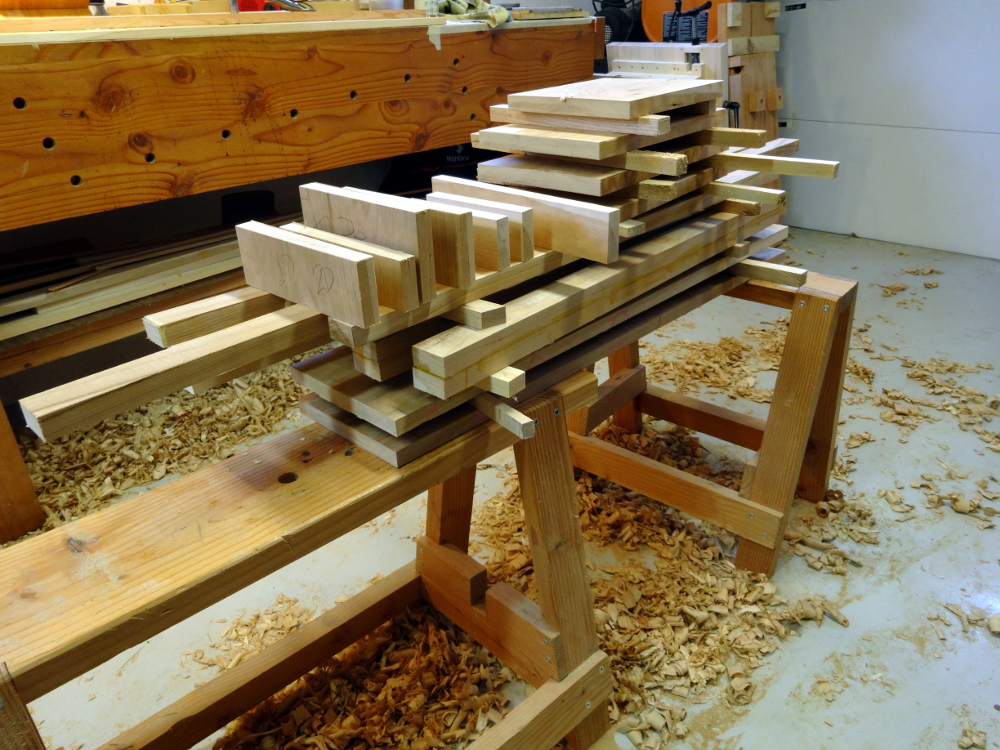
Now, let’s find a clock case in those boards. One side of each board shows mostly heartwood, the other not so much. Turn the boards to show all the sapwood and start finding parts within the heartwood. I need 30-some pieces and found most of them within three boards. All but the long pieces for the sides and door are four-squared. The rest are now rough cut, leaving a bit of length until final prep.


Processing long boards is a real joy when there’s a bench that can handle them with ease. The twelve foot long bench was originally for boat building but handles this sort of work superbly .. when not affected with HSS (Horizontal Surface Syndrome, which attracts all sorts of stuff randomly collected and in the way).
This wood has been here about a year and well acclimated. It is also straight grained enough that little tension is apparent. There’s no cupping among the cut pieces and only a slight bit of twist that already existed on one piece.
Other articles in this series…
- Regulator Clock – Done
- Regulator Clock – Woodworking completed
- Regulator Clock – Scratching the frames
- Regulator Clock – Door Hinged
- Regulator Clock – Case Dry Fitted
- Regulator Clock – Jelly Side Down
- Regulator Clock – Case Frames – 2
- Regulator Clock – Glass – 2
- Regulator Clock – Case Frames – 1
- Regulator Clock – The Works work
- Regulator Clock – Glass
- Regulator Clock – Tongue & Groove planes
- Regulator Clock – Completed Mouldings
- Regulator Clock – Stick Mouldings
- Regulator Clock – Plate Mouldings
- Regulator Clock – Egg and Dart Moulding
- Regulator Clock – Eat Dessert First
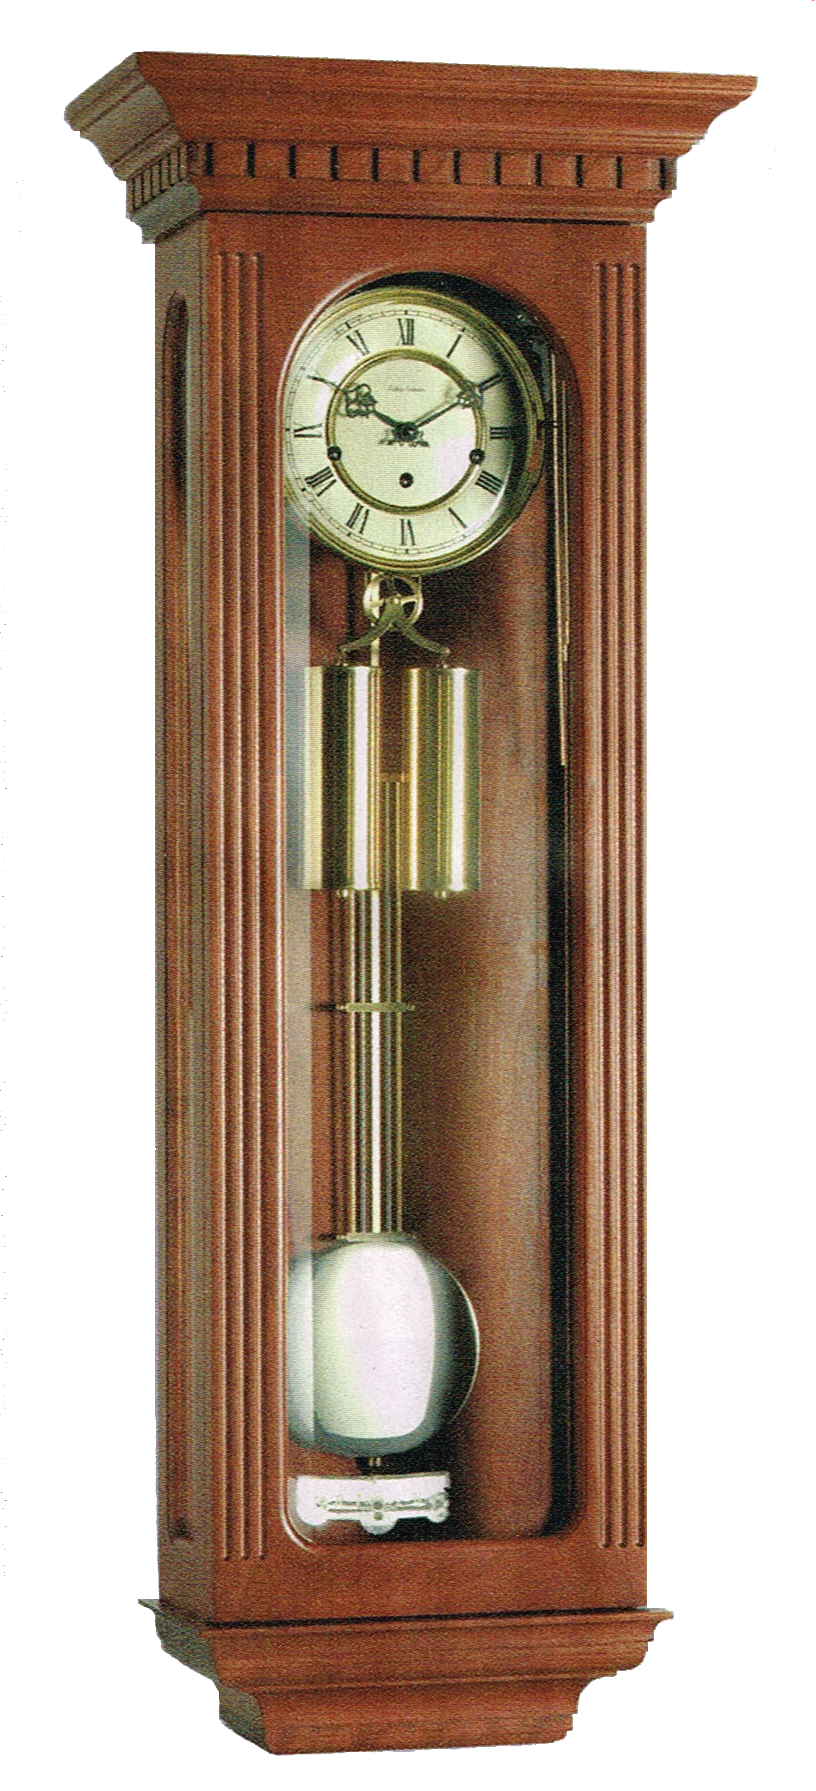
- Regulator Clock – original description
- Regulator Clock – Stock Prep
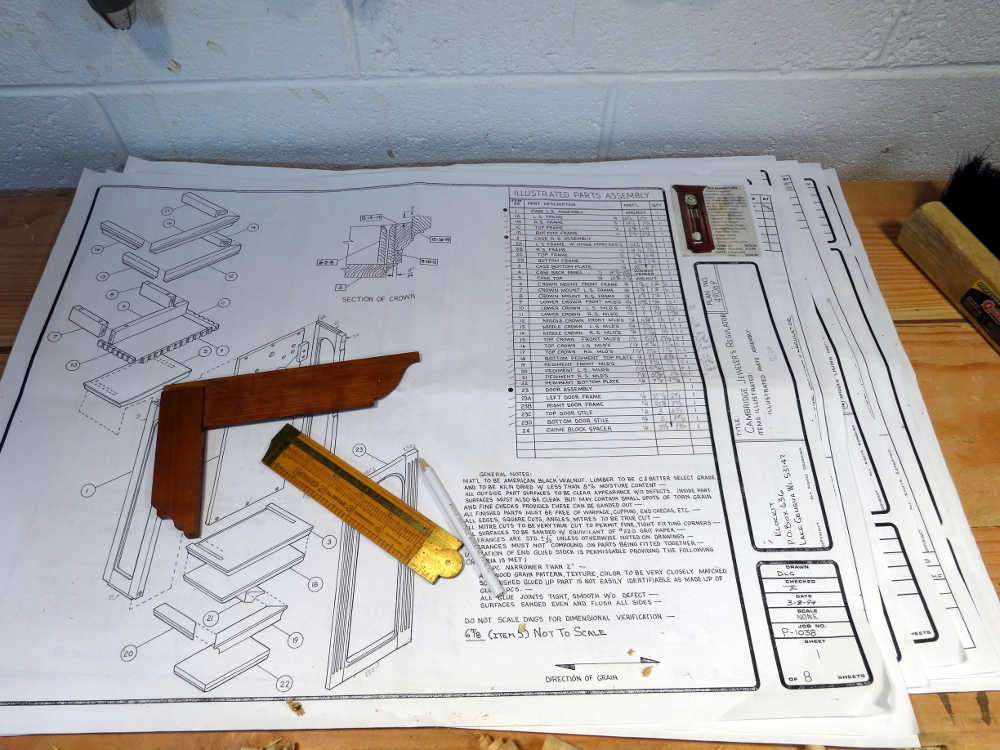
- Regulator Clock – Plans for Moldings
- Taming the Rabbet