• Skip to primary navigation
  • Skip to main content
  • Skip to primary sidebar
  • Skip to footer

Bob Easton

Chocolate powered woodworking

  • Home
  • Grinling Gibbons Tour

Carving on a Dovetailed Box

February 8, 2013 by Bob Easton 10 Comments

photo of carvingIt’s been a long road. My serious woodworking interests started when I came through the door marked “small boats.” Since then, I’ve passed through many doors, each offering new interests and challenges. None included or required dovetail joinery. Until now… That’s one reason why I have been rehabilitating saws lately.

Oh yes, carving still holds my main interest, but carvings need a purpose. Not being one to construct elaborately carved furniture, photo of box - lid  prominent
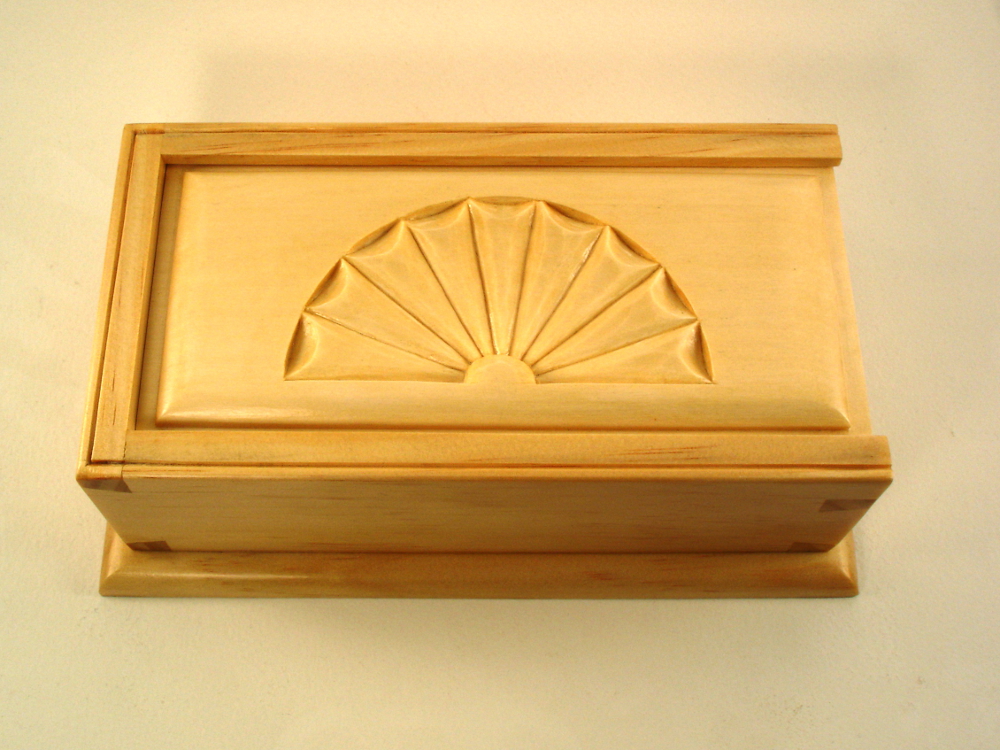
I find smaller forms more appealing. Hence, the boxes. But… dovetails? Really? (You know, small boats have neither straight lines nor square joins … nor dovetails.) OK. OK.

I’m learning from yet another master. Paul Sellers is in the midst of a boxmaking series at his Woodworking Masterclasses online school. While I find his classes excellent, Paul is one who always produces perfect results. So rare are his mistakes that he seldom advises how to correct them. photo of dovetailed corner
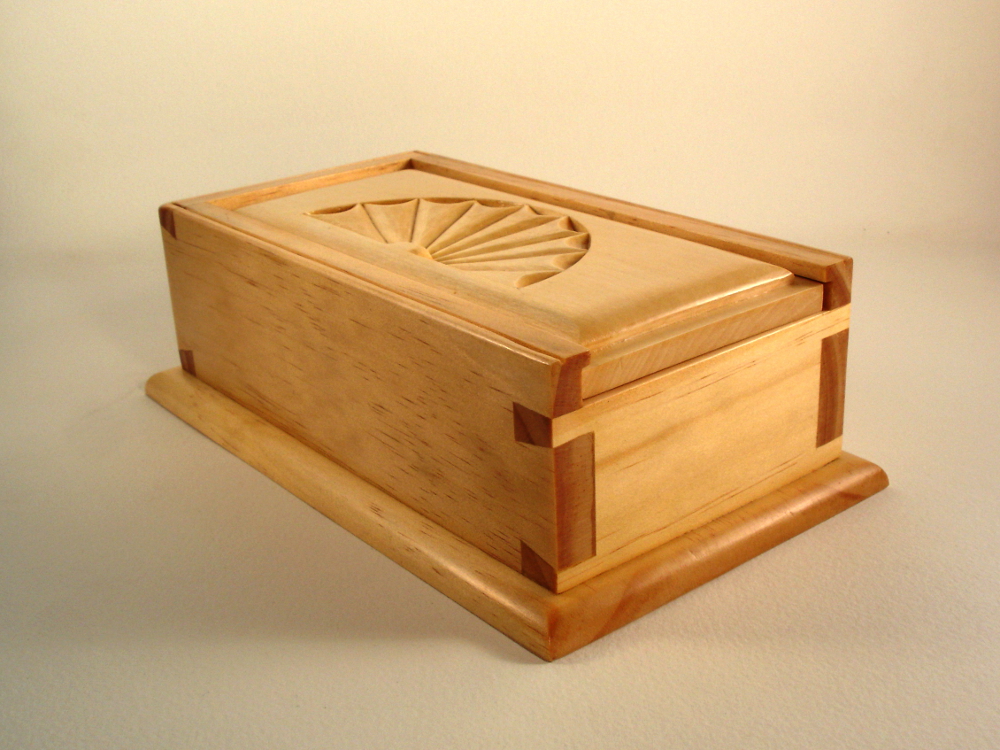
My learning comes more from (alright, mostly … maybe totally) making mistakes and learning how to fix / avoid them, and I’ve learned over the past weeks that there are elebenty-seven different ways to ruin a dovetail joint. (Nope, no pictures!)

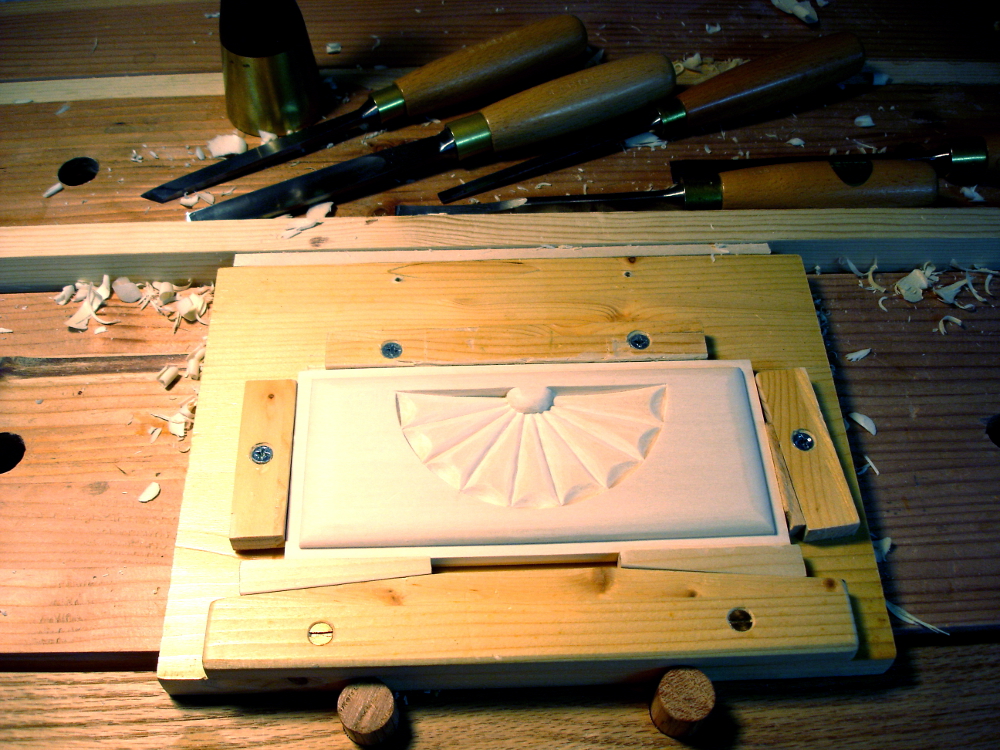
Without further jabbering, here’s the first dovetailed and carved box that’s worth showing:

Body: 4″ by 7 1/2″ by 2 1/4″
Base: 3/8″ larger all around
photo of dovetailed corner
Body: New Zealand pine
Lid: Wisconsin basswood
Finish: Shellac and paste wax

It is similar to the example Sellers has been teaching, but I’ve made it my own with the carved lid. There are a couple of other variances too.  Sellers cuts the groves for the lid with a tenon saw. That results in a grove that goes all the way through the end of the box and then needs tedious fitting of plugs to close the holes.photo of dovetailed carved box I made mine a stopped groove, like a stopped dado. This one I cut with only a chisel and knife, an experience I won’t repeat. More learning. A Record 044 just arrived from Patrick Leach in today’s mail.

Sellers also cuts the rebates on the lid (for the slides) with a tenon saw. I cut mine with an ancient Stanley #78 moving fillister plane that I call Mr. Fussy. It does the job, but takes about 4 times longer to set up than just using a saw. Doh! Yet more learning.photo of cutting the beading

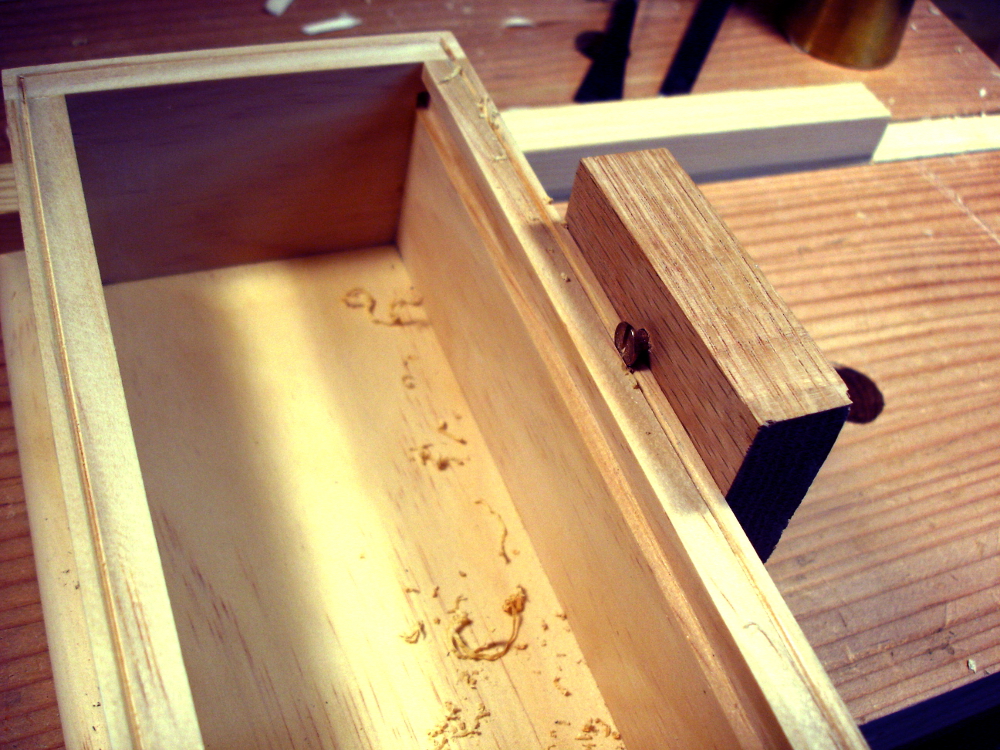
One of the last little bits of learning with this project was creating the beading on the top edge. Some time ago, I did beading on the lathe’s timbers with a scratch stock. An even simpler tool, smaller too, produces results faster. Another bit of Seller’s wisdom is a simple screw in a block of wood. The crisp edge of a single slot screw makes a great cutter. Then, hit the outside corner with a light chamfer. Fast. Easy.

The box collector in our household has already claimed this one.

Filed Under: Boxmaking, Woodcarving

Saw Clamp

January 15, 2013 by Bob Easton 3 Comments

photo of saw clamp in useUntil now, my infrequent saw filing has been assisted by holding the blade between a pair of 1x2s placed carefully in my bench’s leg clamp. It had two problems. One, it took two men, a little boy, and a monkey to hold all the parts “just so” and get it clamped. Two, oh my aching back bending over it.

The activity is not frequent enough to warrant buying a fine metal clamp, but does warrant a bit of DIY time and about $6 worth of oak. I side view of saw clampfound drawings on a blog post by Paul Sellers and got to work. Straightforward … until I noticed the rounded hinge. Hey, a simpler square edge hinge, not housed, would work just as well.  No, that’s the wimpy way out. Carve that hinge, and if it really fails, square off the mess into the simpler version. It worked.

The hinge pin is a piece of brass tubing that I had on hand. That’s a carriage bolt and wing nut that tighten the jaw.

The clamp works beyond expectations, perfectly well for as often as I need it.

Filed Under: Hand tools, Shopmade

Saw Rehab – Stanley 26″ Rip Saw

January 12, 2013 by Bob Easton 2 Comments

This one is not a refurbish project. It’s simpler, a rehab, if you please. As can be seen by the handle, this is not a priceless antique. It is one that I purchased new at some big orange home center, maybe in the 1980s. It clearly dates to the era when handles sank to their ugliest just before Buck Rogers style plastic handles. The saw has a 26 inch plate and is filed rip, 7 TPI. … and the hang hole in the tip was drilled by the manufacturer, not me.

I once picked this saw up during my earlier boat building days, and just as quickly set it aside. It didn’t cut well and had a noticeable kink about midway along the tooth line. If memory serves, the most previous abuse was cutting sheetrock or some other kind of rock.

Removing the kink

Read enough around the Internet and you’ll think you need a blacksmith’s anvil and planishing hammers to take the kink out of a saw blade. TRY THIS FIRST: I removed the handle, just to make it easier to mount the handle end of the plate in a vise. Once about an inch of the plate was tightly clamped, I curled the saw first one way, then the other. Don’t be bashful. FIRMLY grab the toe end, pull it around toward the handle end. Once you reach a “U” shape, keep on going, running the curl up and down the length of the plate. Repeat a few times to both sides. Like magic, the kink was relieved and smoothed away.

photo of saw cutting woodSharpening

No magic. The teeth were not really in bad shape, just dull. Sighting along the line, I saw that all were even enough to not even warrant a flattening filing. I simple hit each tooth with a couple of swipes of the file and then tested. Tops: 20 minutes.

The first job for this “new again” saw (OK. it really needs to have the plate cleaned) was resawing a length of 1×4 poplar. I was very pleased to find the saw working straight and true, and running easily.

Filed Under: Hand tools

  • « Go to Previous Page
  • Page 1
  • Interim pages omitted …
  • Page 41
  • Page 42
  • Page 43
  • Page 44
  • Page 45
  • Interim pages omitted …
  • Page 128
  • Go to Next Page »

Primary Sidebar

Footer

Recent Posts

  • New Frame Saw / Scroll Saw
  • Lamppost Sign
  • Goodbye PayPal – Goodbye Bob’s eBooks
  • Anarchist’s Workbench is Done
  • Why we keep offcuts…

Categories

  • About
  • Artwork
  • Boatbuilding
  • Boating
  • bowl carving
  • Boxmaking
  • Clocks
  • Drawings
  • eBook
  • etude
  • Eva Too
  • Eva Won
  • Fiddlehead
  • Fiddlehead model
  • Flying
  • frame saw
  • gilding
  • green woodworking
  • Grinling Gibbons
  • Guns
  • Hand tools
  • Humor
  • kerfing plane
  • Lettercarving
  • Mill Creek 13
  • Model building
  • Power tools
  • Rant
  • resawing
  • scroll saw
  • Shopmade
  • sign painting
  • Stonework
  • Swimming
  • Technology
  • The Wall
  • treadle lathe
  • Uncategorized
  • VSD
  • Woodcarving
  • Woodturning
  • Woodworking
  • workbench

Other stuff

  • About
  • Contact
  • Privacy Policy

Copyright ©2024 · Bob Easton · All Rights Reserved