• Skip to primary navigation
  • Skip to main content
  • Skip to primary sidebar
  • Skip to footer

Bob Easton

Chocolate powered woodworking

  • Home
  • Grinling Gibbons Tour

Treadle Lathe – Mount the Wheel

September 7, 2012 by Bob Easton 3 Comments

photo of flange, axle and wheel

One of the hard parts of preparing the flywheel was done a long time ago, before cutting it round. The wheel rotates on a 1/2 inch axle. I drilled the center hole and then used that hole as the pivot point for cutting the perimeter on the band saw. Nice! Guaranteed center for the axle.

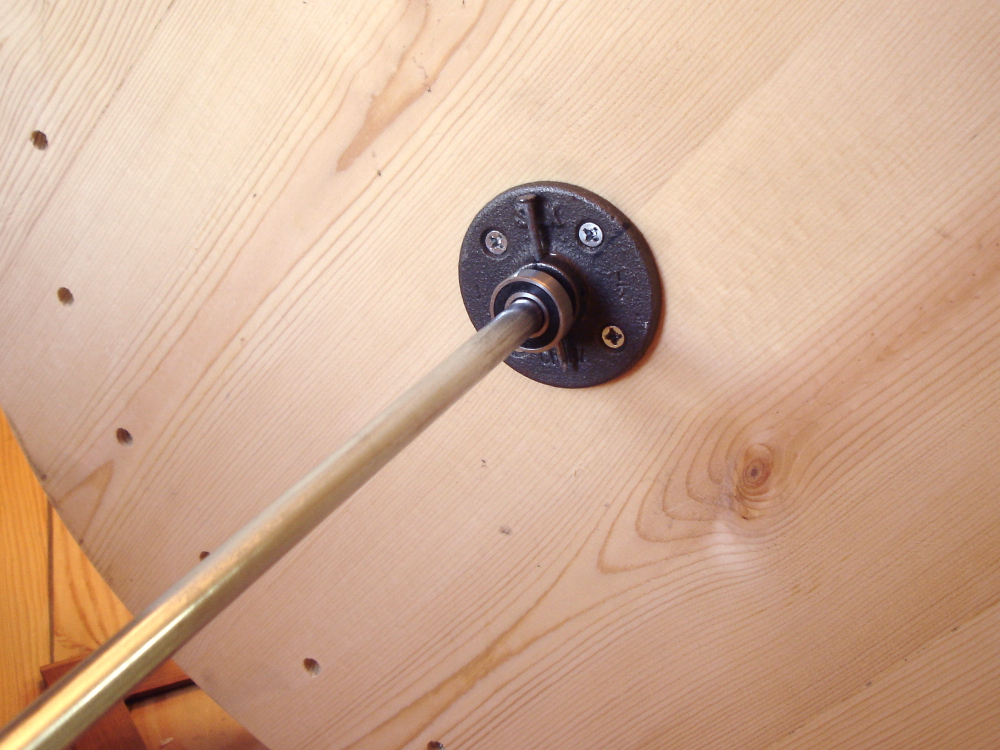
Here, we see the axle mounted. I used the ever popular plumbing flange on both sides of the wheel. The purpose of this flange is to connect the wheel mass to the axle. That is done with a simple 9/64″ hole drilled through the axle and a common “8 penny” nail through a pair of holes already in the flange. Simple. Snug. Done! (Oh well, almost. The axle will be cut to length later.)

Yes, there’s a matching flange on the other side of the wheel. No pin through it; all we need is one. The real purpose of that flange is to provide a bearing surface for the washers that will keep the wheel centered between the uprights. You’ll see those later.

Filed Under: Shopmade, treadle lathe

Treadle Lathe – Resume Building

September 6, 2012 by Bob Easton 11 Comments

drawing of latheBuilding a treadle lathe started a long time ago, when the shop was too cold for epoxy to cure on a boat I was building. A lot of water has passed under our boats since then. Other activities, swimming, language learning, travel, and various forms of woodcarving have also happened. So, why back to the lathe now? Simple, some of the woodcarving I want to do is on various turned objects.

Quick recap: Plans are abundant. Making choices depends on intended use and can lead to analysis paralysis. My intended use does not include dragging the thing around to festivals, to shows, or any form of re-enactment. Out with the period costumes, and actually out with some of the other period authenticity.

photo of dry fitted major parts

The lathe is intended for practical use and I’ll certainly be using modern parts such as ball bearings, chucks and live centers.

My choice of structure most closely resembles Stephen Shepherd’s 1805 “Moses T” lathe, but without the bench behind the ways. Mine is also heavier in certain areas, mainly the uprights and feet.

photo of tail stock being mortised

The last we saw of the build had the bigger parts mostly complete, the uprights, feet, wheel and rough tail stock. All of it has been set aside in the shop and has shown no signs of checking, splitting, warping etc. Not bad for construction grade lumber. The photo of assembled parts is showing only a dry fit. Nothing is fastened to anything else. … and what looks like a piece of lumber much longer than the lathe is really a french cleat attached to the wall behind the lathe.

Recent work includes getting the tail stock to fit between the ways. That was basic tenon cutting. After that, I hacked out a through mortise that will later house a wedge.

Next up: A bevy of smaller parts for the treadle, or getting that wheel mounted between the uprights? hmmmmmm…


Filed Under: Shopmade, treadle lathe

Acanthus – Carving and Not Carving

August 9, 2012 by Bob Easton 6 Comments

photo of acanthus carving on mahoganyMonths ago, I had the good fortune to attend Mary May’s class “Introduction to Relief Carving.” One of the projects was an Acanthus leaf. It lingered, unfinished, while I did other things. I recently got back to it and completed the carving. Not bad for an “Intro” class.

Find more in the Acanthus category at Mary May’s new online school for Traditional Woodcarving.

photo of a book: Acanthus Carving and DesignShortly after that class, we traveled for a few weeks. Not wanting to carry 40 pounds of gouges, nor having a good place to carve, I took a book instead. Bob Yorburg and Hans Sandom’s “Acanthus Carving and Design” is a delight. Design is emphasized with an abundant collection of drawings. These are then followed by a collection of beautifully carved pieces.

A legal pad and a pencil substituted for a roll of gouges as I copied many of the drawings. One can gain a very good feel for how many of the curves start rather flat and accelerate to beautiful curls and sweeps. Highly recommended!

Filed Under: Woodcarving

  • « Go to Previous Page
  • Page 1
  • Interim pages omitted …
  • Page 48
  • Page 49
  • Page 50
  • Page 51
  • Page 52
  • Interim pages omitted …
  • Page 128
  • Go to Next Page »

Primary Sidebar

Footer

Recent Posts

  • New Frame Saw / Scroll Saw
  • Lamppost Sign
  • Goodbye PayPal – Goodbye Bob’s eBooks
  • Anarchist’s Workbench is Done
  • Why we keep offcuts…

Categories

  • About
  • Artwork
  • Boatbuilding
  • Boating
  • bowl carving
  • Boxmaking
  • Clocks
  • Drawings
  • eBook
  • etude
  • Eva Too
  • Eva Won
  • Fiddlehead
  • Fiddlehead model
  • Flying
  • frame saw
  • gilding
  • green woodworking
  • Grinling Gibbons
  • Guns
  • Hand tools
  • Humor
  • kerfing plane
  • Lettercarving
  • Mill Creek 13
  • Model building
  • Power tools
  • Rant
  • resawing
  • scroll saw
  • Shopmade
  • sign painting
  • Stonework
  • Swimming
  • Technology
  • The Wall
  • treadle lathe
  • Uncategorized
  • VSD
  • Woodcarving
  • Woodturning
  • Woodworking
  • workbench

Other stuff

  • About
  • Contact
  • Privacy Policy

Copyright ©2024 · Bob Easton · All Rights Reserved