• Skip to primary navigation
  • Skip to main content
  • Skip to primary sidebar
  • Skip to footer

Bob Easton

Chocolate powered woodworking

  • Home
  • Grinling Gibbons Tour

Covering Boards and Decks

May 26, 2009 by Bob Easton 3 Comments

It’s looking more and more like a boat.
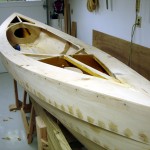
covering boardsThe covering boards, or long decks, cover the spaces between the sheer clamps and the long carlins. They are made from book matched resawn cedar slices finished to 3/16 inch thickness. Their undersides are sealed with a coat of epoxy. They are attached with epoxy and brass escutcheon pins.

After attaching the covering boards, four knees are added as additional framing for the short decks. They are spruce. Epoxied and screwed to the bulkheads and long carlins.
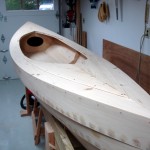
decksThe upper short decks complete the closing of the watertight compartments. They too are made from book matched resawn cedar slices finished to 3/16 inch thickness. Their undersides are sealed with epoxy. They are attached with simple household caulk and screws. No epoxy here because they might need to be removed occasionally.

Being a slow and deliberate builder is paying off. All of the recent work has moved along well with no time spent in the moaning chair. Most pleasing was avoiding inadvertent damage to the very thin very pointy ends of the upper deck boards.

Next come:

  • Coamings
  • False stems
  • Backrest (The seat is the bottom of the boat, no raised seat in this canoe.)
  • Footrest
  • Finishing (outside painted, inside and decks “bright”)

All of that will wait a few weeks while we do something else.
Filed Under: Boatbuilding, Eva Won, Fiddlehead

A New Marking Knife

May 14, 2009 by Bob Easton 1 Comment

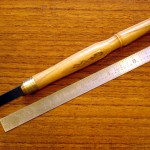
knifeA beautiful new Pattern Pilot marking knife from Bob Zajicek at Czeck Edge Hand Tool is now hard at work in my shop. (Click image for a larger view.)

Making my own tools is something I enjoy, especially of I can make ones that function well and also look great. I’ve had drawings for marking knives waiting in the “to do” queue for quite some time and have been content to simply use pencils for the time being.

That changed last week when Al Navas ran a contest on his “Sandal Woods” blog. Al often has drawings for tools provided by his sponsors. I was very fortunate to win the marking knife as one of his Safety Week drawings. THANKS Al!

The knife is superb. It’s edge is keen and it feels great in the hand. Not only does it work very well, it is drop-dead beautiful. Maybe because I’m partial to blonds, I find the olive wood simply gorgeous. There aren’t any dovetails in the small boats I’m building, nor are there many straight lines. Yet, there are lots of ways to use this knife.

Not only is Bob Zajicek a very fine tool smith, he’s also a fortune teller. Along with the knife he sends not one, not two, but three plastic point guards. They are easily misplaced among the clutter of a busy project and the spares are appreciated.

Now, I can make marks that are 6 times more accurate than I can saw. A delightful tool. Very highly recommended! THANKS Bob!

Filed Under: Hand tools

Deck Framing and Hatches

May 14, 2009 by Bob Easton 2 Comments

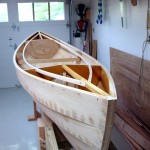
carlinsThe first round of deck framing consists of several carlins made of 5/8″ by 3/4″ spruce. These will support covering boards along the outside edges of the boat. A  little fussy fitting, some careful positioning through the bulkheads, screws set at angles to avoid collisions, a little epoxy and it’s easily done.

Those areas at the ends of the boats become watertight flotation compartments. They are going to get closed up soon. So, while I can still get a brush in there, they’re getting painted with a couple of coats of Cetol.

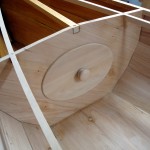
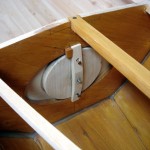
hatch-facehatch backsideOne of the fussier parts of the construction are the oval hatch covers for the watertight compartments. One could handily purchase round, plastic, readily available, easily installed covers, but that would be far too easy. Instead, I followed Harry’s drawings for a semi-diabolical device that ends up looking a lot nicer than a round slab-o-plastic. All is in place except the gasket which the last part of the hatches.

In case you’re wondering how it operates, the small knob is free to turn and is used to pull the bar toward the knob. The bronze screws are not tightened down all the way because they allow the bar to move in and out as needed. Two small wood stops help with positioning. Insert the cover so the bar fits through the opening. Turn the whole cover clockwise until the bar registers against the stops. Then tighten the knob until the gasket seals the opening.

Filed Under: Boatbuilding, Eva Won, Fiddlehead

  • « Go to Previous Page
  • Page 1
  • Interim pages omitted …
  • Page 91
  • Page 92
  • Page 93
  • Page 94
  • Page 95
  • Interim pages omitted …
  • Page 128
  • Go to Next Page »

Primary Sidebar

Footer

Recent Posts

  • New Frame Saw / Scroll Saw
  • Lamppost Sign
  • Goodbye PayPal – Goodbye Bob’s eBooks
  • Anarchist’s Workbench is Done
  • Why we keep offcuts…

Categories

  • About
  • Artwork
  • Boatbuilding
  • Boating
  • bowl carving
  • Boxmaking
  • Clocks
  • Drawings
  • eBook
  • etude
  • Eva Too
  • Eva Won
  • Fiddlehead
  • Fiddlehead model
  • Flying
  • frame saw
  • gilding
  • green woodworking
  • Grinling Gibbons
  • Guns
  • Hand tools
  • Humor
  • kerfing plane
  • Lettercarving
  • Mill Creek 13
  • Model building
  • Power tools
  • Rant
  • resawing
  • scroll saw
  • Shopmade
  • sign painting
  • Stonework
  • Swimming
  • Technology
  • The Wall
  • treadle lathe
  • Uncategorized
  • VSD
  • Woodcarving
  • Woodturning
  • Woodworking
  • workbench

Other stuff

  • About
  • Contact
  • Privacy Policy

Copyright ©2024 · Bob Easton · All Rights Reserved